New build of my Aquaforest Ocean Guard 275 cube tank in my home office to supplement my RedSea XXL625 main display tank.
I'll be making updates to this last as the build progresses.
Tank & Sump Details


I'll be making updates to this last as the build progresses.
Tank & Sump Details
| Model | Aquaforest Ocean Guard 275 |
| Display Dimensions | 24" x 22" x 22" |
| Display Capacity | 48 Gallons |
| Sump Capacity | 25 Gallons |
Equipment
Filtration
| Device | Model | Details |
|---|---|---|
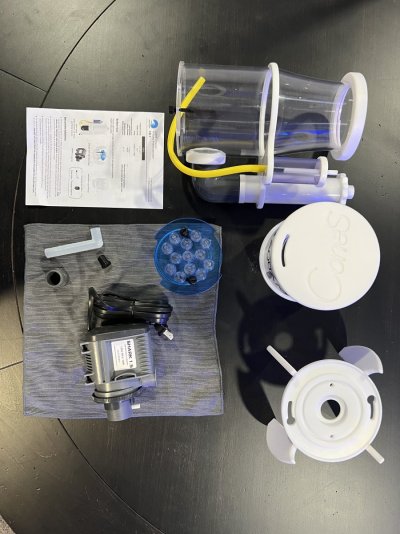
| Return Pump | Reef Octopus VarioS 4 |
|
| Protein Skimmer | AquaMaxx ConeS CO-1 |
|
| Filter Sock | 4" Mesh |
|
| Filter Cup | 4" x 10" RedSea |
|
| Return Pump Baffle | SeaChem Matrix |
|
ATO and Environmental
| Device | Model | Details |
|---|---|---|
| ATO System | Tunze Osmolator 3155 | |
| ATO Reservoir | Innovative Marine/ AuqaGadget Hydrofill Reservoir |
|
| Temperature Controller | Inkbird 2-probe Wi-Fi Controller |
|
| Heaters | 2x - BRS Titanium 200W |
|
| Heater Mount | 2x - Innovative Marine Helio PTC Titanium Element Holder |
Power, Control and Automation
�| Device | Model | Details |
|---|---|---|
| Automation Controller | Neptune A3 Apex Jr. |
|
| Power Bar | Neptune EB832 | |
| pH | Neptune pH Probe | |
| Temperature | Neptune Temperature Probe | |
| ORP | Neptune ORP Probe | |
| Switch Control | Neptune Breakout Box |
|
| Input Module | Neptune PM1 |
|
Flow
| Device | Model | Details |
|---|---|---|
| Power Head | Reef Octopus OP-2 |
|
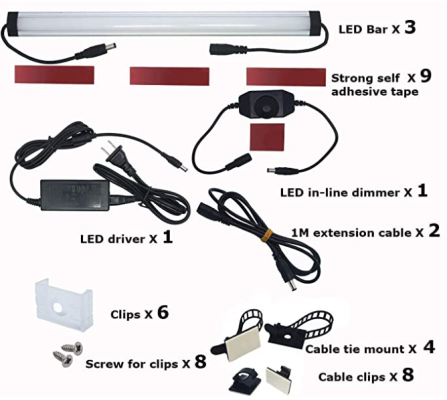
Lighting
Livestock
Fish
Coral
Last edited:

 .
.


.JPEG")
.JPEG")