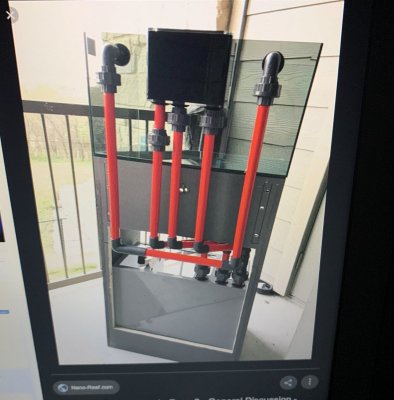
My First Build: 75 Gallon

b4tn

Valuable Member
View Badges
Joined
Jun 17, 2015
Messages
1,673
Reaction score
2,241
Location
Columbia MD
Rating - 0%
0   0   0
I have thought about a coral beauty angel but am a little scared because of coral. I've heard conflicting info about them. But I think they are beautiful!!!

I heard the same when I was researching them. “Knock on wood“ I have had mine for 4+ years with no issues. I just keep my fish well fed and they seem to do ok. I also had heard the train of thought that if you have enough coral you won’t notice the nips here and there so just get more coral :)
 
OP
OP
markysgirl

markysgirl

Active Member
View Badges
Joined
Sep 14, 2018
Messages
135
Reaction score
144
Location
Fort Worth
Rating - 0%
0   0   0
I wanted to provide a little update. I have been finishing up my semester at work but have been able to put two coats of paint on the inside of my stand and need one more that I will put on today. I'll add a photo once I get the final coat on. The led strip I got to light the interior got here yesterday and I am looking forward to installing it.
We were going to drill the tank yesterday but it just got too late ad it is pretty chilly here! We might be able to get it done today...we will see.
I am starting to stress about the plumbing job. It really seems pretty straight forward but I have little questions like;
How does the loc line return attach to the bulkhead?
How does the street 90 attach to the back of the bulkhead?
Will the 90 degree angles I got for the drains work or should I have gotten 45's?
Should I go ahead with the expense of a return manifold now or make a "blank" spot attached with unions to change out later?
Ugh!
I am really hoping that once I start dry fitting all of this stuff it makes more sense so I can stop stressing about it.
Any little tips and words of wisdom any of you have about this would be great. I think I have watched every single YouTube video over hard plumbing that exists.
Things should really start moving a lot faster next week as I am off of work and school and will have days on end to mess with all of this. I am really looking forward to finally getting this project underway so I can have a tank again!
get ready for daily photos and updates!!!
 

b4tn

Valuable Member
View Badges
Joined
Jun 17, 2015
Messages
1,673
Reaction score
2,241
Location
Columbia MD
Rating - 0%
0   0   0
I am guessing if they are like mine the return bulkheads are threaded on the inside. For the interior loc line you dont need to do anything but thread it on. For the exterior elbow you will need some teflon tape or paste. I have used this on all my threaded fittings for my tank and my water change station and where teflon tape failed it always succeeded

 
OP
OP
markysgirl

markysgirl

Active Member
View Badges
Joined
Sep 14, 2018
Messages
135
Reaction score
144
Location
Fort Worth
Rating - 0%
0   0   0
I am guessing if they are like mine the return bulkheads are threaded on the inside. For the interior loc line you dont need to do anything but thread it on. For the exterior elbow you will need some teflon tape or paste. I have used this on all my threaded fittings for my tank and my water change station and where teflon tape failed it always succeeded


The bulkheads are not threaded! Hence my confusion. Should I have bought threaded bulkheads?
 
OP
OP
markysgirl

markysgirl

Active Member
View Badges
Joined
Sep 14, 2018
Messages
135
Reaction score
144
Location
Fort Worth
Rating - 0%
0   0   0
Another step completed!!! The inside is painted! I think the inside of the cabinets should be fun colors. I wanted the inside of this cabinet to be lighter to help with visibility in this workspace. Rather than just go with white I decided on Art Deco Pink. ;Shy
The next steps are white flexseal on the bottom to help with floor protection and a fresh coat of black paint on the outside. I'm hoping to get the stand totally painted and drying over the weekend while I start plumbing!
00100lrPORTRAIT_00100_BURST20191211152341988_COVER.jpg
IMG_20191211_152406.jpg
IMG_20191211_152515.jpg
 
OP
OP
markysgirl

markysgirl

Active Member
View Badges
Joined
Sep 14, 2018
Messages
135
Reaction score
144
Location
Fort Worth
Rating - 0%
0   0   0
The tank got drilled today! It was so easy! Now I feel really silly about how worried about it I've been.
00100lrPORTRAIT_00100_BURST20191212150615563_COVER.jpg
IMG_20191212_154424.jpg

My semester is done and I've got until January 6th to work on this! I really hope I can get water in it, the rock curing and a cycle starting before I go back to school/work.
So exciting! I can't wait to work on the plumbing this weekend.
 

mich2599

Valuable Member
View Badges
Joined
May 19, 2018
Messages
2,087
Reaction score
12,395
Location
ELDO
Rating - 0%
0   0   0
The tank got drilled today! It was so easy! Now I feel really silly about how worried about it I've been.
00100lrPORTRAIT_00100_BURST20191212150615563_COVER.jpg
IMG_20191212_154424.jpg

My semester is done and I've got until January 6th to work on this! I really hope I can get water in it, the rock curing and a cycle starting before I go back to school/work.
So exciting! I can't wait to work on the plumbing this weekend.

I’m working against the clock on my new build as well. Looking good btw! :)
 
OP
OP
markysgirl

markysgirl

Active Member
View Badges
Joined
Sep 14, 2018
Messages
135
Reaction score
144
Location
Fort Worth
Rating - 0%
0   0   0
This weekend I've been working on plumbing the tank. I've attached a photo of where I am as of now. I'm kind of stuck and not sure where to go from here.
Any suggestions?
Or links to good plumbing builds?
00100lrPORTRAIT_00100_BURST20191215115311933_COVER.jpg
IMG_20191215_193823.jpg
 

MrWheelock

Valuable Member
View Badges
Joined
Jun 21, 2017
Messages
1,443
Reaction score
5,510
Location
St. Petersburg FL
Rating - 0%
0   0   0
Sorry for the crude drawing but this is what I would do. Looking at the back, R/H is primary, middle is secondary, and left into return section is emergency
20191216_082751.jpg
 
OP
OP
markysgirl

markysgirl

Active Member
View Badges
Joined
Sep 14, 2018
Messages
135
Reaction score
144
Location
Fort Worth
Rating - 0%
0   0   0
Thank you guys!!! I think I've got it figured out. Mr. Wheelock, I ended up with essentially what you drew. Unfortunately, I need parts (street 90's) that I have to order from BRS before I can finish .
The parts should be here Friday so hopefully I'll be able to finish the plumbing this weekend.
In the meantime, I have to put another coat of paint on the stand and I need to scrub the glass tank. So I guess I'll do those chores while I wait for plumbing pieces to get here.
 

MrWheelock

Valuable Member
View Badges
Joined
Jun 21, 2017
Messages
1,443
Reaction score
5,510
Location
St. Petersburg FL
Rating - 0%
0   0   0
Thank you guys!!! I think I've got it figured out. Mr. Wheelock, I ended up with essentially what you drew. Unfortunately, I need parts (street 90's) that I have to order from BRS before I can finish .
The parts should be here Friday so hopefully I'll be able to finish the plumbing this weekend.
In the meantime, I have to put another coat of paint on the stand and I need to scrub the glass tank. So I guess I'll do those chores while I wait for plumbing pieces to get here.
Using the street 90's in the over flow box or cause you had a tight turn into the sump? Always glad I could help!
 
OP
OP
markysgirl

markysgirl

Active Member
View Badges
Joined
Sep 14, 2018
Messages
135
Reaction score
144
Location
Fort Worth
Rating - 0%
0   0   0
Alright, all plumbing is dry fit together!
I've included a bunch of photos I would love it if as many of you pros would take a look and see what you think.
I have one question so far and was hoping I could get an answer to put my mind at ease. I have measured to the stopping point inside the fittings, the 3/4 fittings are 1 inch deep. So when I measure and cut a piece I measure how much I need and then add 2 inches then cut. It seems like I end up with quite a bit over what I needed.
For example, look at the photo with the tee and the Barb for the return pump.
IMG_20191223_161111.jpg
IMG_20191223_161129.jpg
IMG_20191223_161123.jpg
MVIMG_20191223_161106.jpg
IMG_20191223_150106.jpg
MVIMG_20191223_150039.jpg
IMG_20191223_150058.jpg
I put a 2.5 in piece in between the tee and the Barb but when I dry fit it, I end up with quite a bit more than .5 inches between them. Will it "shrink" once I glue them together permanently? I know the glue lubricates the pieces....
 

MrWheelock

Valuable Member
View Badges
Joined
Jun 21, 2017
Messages
1,443
Reaction score
5,510
Location
St. Petersburg FL
Rating - 0%
0   0   0
So, the glue will help you bottom out the pipe in the fitting. However there are 2 things you need to consider. 1. Your cut angle should be accounted for. (I couldn't cut straight with the cheap cutter I have) 2. The pieces will want to push away from each other as the chemical reaction between the glue and the pvc happen so you have to hold them together tightly in the desired position for a few seconds.
 

Being sticky and staying connected: Have you used any reef-safe glue?

  • I have used reef safe glue.

    Votes: 126 88.1%
  • I haven’t used reef safe glue, but plan to in the future.

    Votes: 8 5.6%
  • I have no interest in using reef safe glue.

    Votes: 6 4.2%
  • Other.

    Votes: 3 2.1%
Back
Top