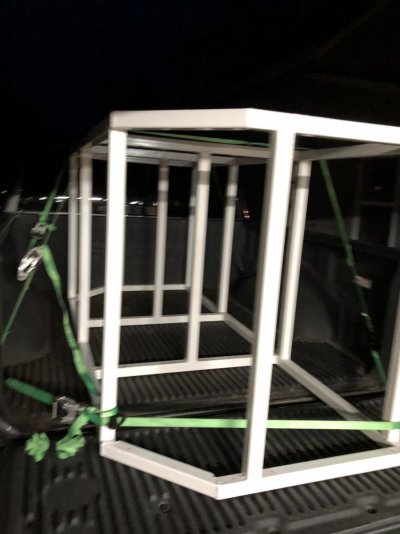
My new big tank build!

eric.tech

Active Member
View Badges
Joined
Jan 4, 2019
Messages
155
Reaction score
167
Location
Metro Detroit area
Rating - 0%
0   0   0
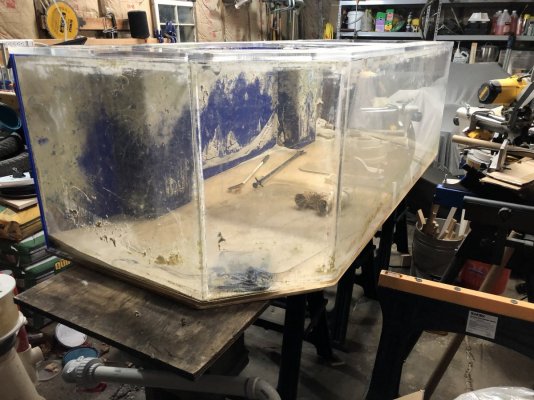
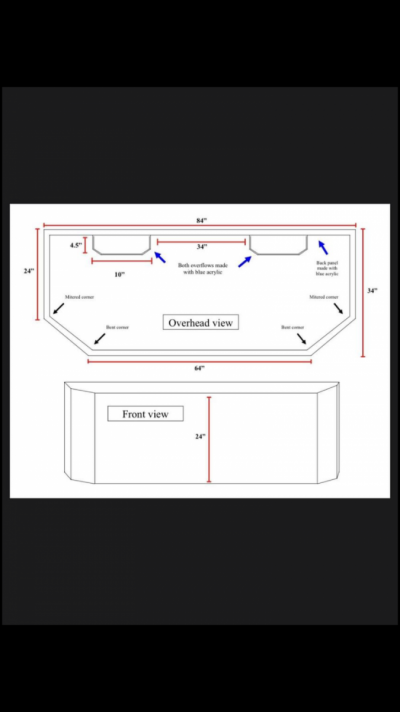
Well I finally was able to get my hands on a 200+ gallon tank! I picked up a used 285 gallon acrylic tank locally that’s in great shape, came with a steel stand and some other goodies. My plan is to use a 125 gallon I recently picked up as my sump in the basement. Once it’s up and running, the contents of my 75 gallon reef will be transferred over! Oh and support the floor in my 100 year old house I’ll keep this thread updated as I go.
975B1B19-58C6-488B-B3D7-83D3B97B1957.jpeg 7845EB56-C56C-4609-98C1-46A18E18E7FE.png 8880B3FC-B619-49FB-8B05-62A2C6575296.jpeg
 

1ocean

2500 Club Member
View Badges
Joined
Dec 18, 2020
Messages
3,342
Reaction score
15,078
Location
Arizona
Rating - 0%
0   0   0
Looks like you got a lot of polishing on your hands with that tank.
But in the end it will be worth it...
 
OP
OP
eric.tech

eric.tech

Active Member
View Badges
Joined
Jan 4, 2019
Messages
155
Reaction score
167
Location
Metro Detroit area
Rating - 0%
0   0   0
Little update on the progress so far. I was able to round up a few friends to help me squeeze this in the house. The tank was easy, but for the stand, we had to remove a door. It’s in the house and now the big project has begun: pouring reinforced concrete footings to support the floor under the tank! Before someone says I shouldn’t have to support the floor unless it’s an old farm house, well I have that 100 year old farm house I also need to break up some old concrete where the coal pit was, and level it out so my 125gal sump can be down in the basement. Buy an old house they said..... it will be fun they said....
4830F4EB-B90F-4548-A5FD-96771D7EC849.jpeg
0373C3AB-7538-4A53-BEEE-CF37D16D514E.jpeg
EBD10230-BAD1-48C0-AAD2-F8CFB4A290DC.jpeg
 
OP
OP
eric.tech

eric.tech

Active Member
View Badges
Joined
Jan 4, 2019
Messages
155
Reaction score
167
Location
Metro Detroit area
Rating - 0%
0   0   0
Update from the old farm house, I’ve got the floor supported and the concrete poured and cured. There 5 support posts total due to the wonderful positioning of the HVAC system. 8.5 80lb bags of concrete, 4 40lb bags of self leveling concrete, and a very sore back, the floor for the sump is done! Next in that area is clean up. have to get the dirt from the crawl area near that away from the concrete edges, put up a barrier to block it, and start my sump construction. The things we do for our reefs...


78F56B6B-5B98-4CB0-9FAA-C917EE86C0FA.jpeg
6787C2F4-0BE3-4622-848D-F98C4EE4DC01.jpeg


1C8A8429-99F0-4698-966E-1254F2A1E11F.png
2D65BA2F-13E2-47A6-A92C-B3ABE9E78AC9.jpeg
 
OP
OP
eric.tech

eric.tech

Active Member
View Badges
Joined
Jan 4, 2019
Messages
155
Reaction score
167
Location
Metro Detroit area
Rating - 0%
0   0   0
Little update on the tank. Slow going as I have many other projects I’m working on around the house, but it’s getting there.


03E73202-75A2-4181-9FC7-BE0421C2D57F.jpeg


All plumbed up, just have to use soft plumbing for the 57w UV light.

D1680777-64FC-4AEC-A880-607ED55E89AB.jpeg


the 125g sump is about ready to go

B294F6F3-CC25-4078-AA2D-0BBF26A6B980.jpeg


Last I need to patch up some cracked concrete in the basement, clean up all the dust around the area and it’ll be ready for water!
 

1ocean

2500 Club Member
View Badges
Joined
Dec 18, 2020
Messages
3,342
Reaction score
15,078
Location
Arizona
Rating - 0%
0   0   0
Little update on the tank. Slow going as I have many other projects I’m working on around the house, but it’s getting there.


03E73202-75A2-4181-9FC7-BE0421C2D57F.jpeg


All plumbed up, just have to use soft plumbing for the 57w UV light.

D1680777-64FC-4AEC-A880-607ED55E89AB.jpeg


the 125g sump is about ready to go

B294F6F3-CC25-4078-AA2D-0BBF26A6B980.jpeg


Last I need to patch up some cracked concrete in the basement, clean up all the dust around the area and it’ll be ready for water!
looks like you did a great job cleaning up the old tank and polishing it
 

1ocean

2500 Club Member
View Badges
Joined
Dec 18, 2020
Messages
3,342
Reaction score
15,078
Location
Arizona
Rating - 0%
0   0   0
Oh yes, about a week’s worth of buffing the acrylic out. Got my $35 worth out of that ryobi palm buffer! Soooo much Novus #3 lol.
I never used the stuff..yet to redo a tank but I got my hands on a partially used bottle of Novus 1. I used it on the outside of my 140 and now cleaning the outside of the tank is so easy. The water drips wipe right off with a micro-fiber cloth.
So now every once in a while I re-apply it to the outside.
The outside of the tank is now super smooth and the cloth seems to glide over the tank..
 

biecacka

Valuable Member
View Badges
Joined
Jan 1, 2012
Messages
2,305
Reaction score
2,116
Location
columbus ohio
Rating - 0%
0   0   0
Eric, did you use any special techniques while using the hand buffer? I just received my Novus kit and am picking up a hand buffer tomorrow to take a few scratches out of my tank.

corey
 
OP
OP
eric.tech

eric.tech

Active Member
View Badges
Joined
Jan 4, 2019
Messages
155
Reaction score
167
Location
Metro Detroit area
Rating - 0%
0   0   0
Eric, did you use any special techniques while using the hand buffer? I just received my Novus kit and am picking up a hand buffer tomorrow to take a few scratches out of my tank.

corey

Cory, I just made smooth and even passes when moving the buffer around. When the buffer is in operation, try to keep it flat on the acrylic, not tilting it. If there are rounded edges or corners, be very careful with the buffer or do it by hand. After a few passes with the buffer, I would then wipe the panel down with a micro fiber towel. I did not buff it until the compound was dry as it makes wiping it off quite the chore.

Make sure to pick up a random orbit buffer as mine (cheap ryobi random orbit palm sander) worked like a charm. A traditional high speed buffer can burn and leave swirl marks. I would also make sure to grab a couple extra bonnets/buffing pads if you have a large surface to do.

One other thing, make sure to grab at least Novus 2 and 3. This stuff is not as abrasive as the deep cut automotive compounds so if you have some deeper scratches, it will take time and a lot of Novus. I had a pretty deep scratch that I used sand paper on and it came out great, but now there’s a slight distortion in that area as I did not sand the entire panel. If I did it again, I would have used my random orbit sander and worked my way through the entire panel or at least a larger area. With the Novus, just be patient and keep the buffer moving. Hope this helps!
 

Creating a strong bulwark: Did you consider floor support for your reef tank?

  • I put a major focus on floor support.

    Votes: 53 40.5%
  • I put minimal focus on floor support.

    Votes: 27 20.6%
  • I put no focus on floor support.

    Votes: 47 35.9%
  • Other.

    Votes: 4 3.1%
Back
Top