Need feedback on DIY 40B Sump

TimeTwister

Community Member
View Badges
Joined
Jan 14, 2016
Messages
89
Reaction score
53
Rating - 0%
0   0   0
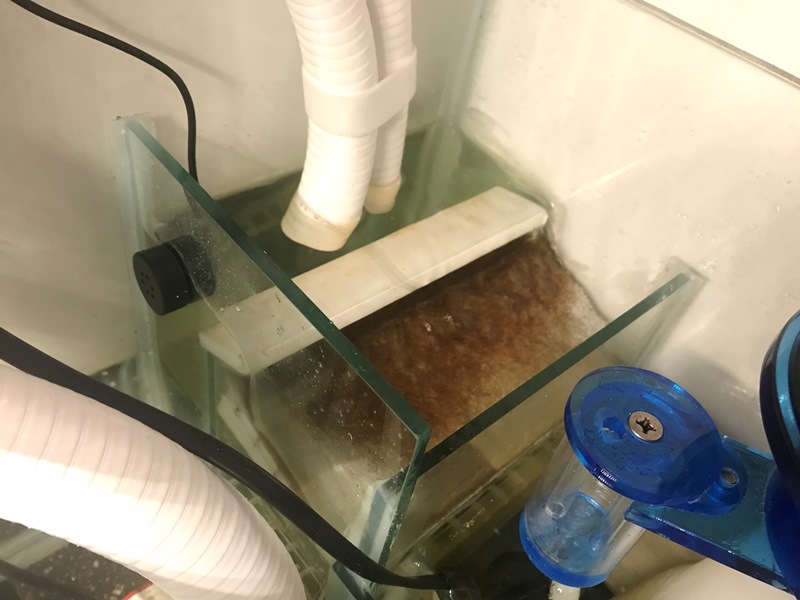
I am in process of setting up my new 150 gallon tank and decided to DIY a sump vs buying one. I had a spare 55 and 40 breeder laying around and chose to go with the 40B. Here are my goals going into the design:

  • Designed to use filter pads/sheets, not socks for easier maintenance. Bonus if it could be converted to a roller mat system later.
  • As much room as possible for refugium area.
  • Leave some extra room in return and skimmer areas for future equipment upgrades if needed.
After I got the layout I wanted I noticed I had to make some concessions, do you think these are ok or will I regret it?

  • No room for bubble traps.
  • No/minimal room for in sump reactors, those will all need to be mounted outside the sump, but still in the stand itself.
Here are some renders of the layout along with a real picture where i used cardboard to test the baffle layout.

https://imgur.com/a/zFR3r4Z

What do you all think?
 

Ron Reefman

Lets Go Snorkeling!
View Badges
Joined
Aug 12, 2012
Messages
9,629
Reaction score
12,364
Location
SW Florida
Rating - 0%
0   0   0
It looks pretty good to me. And excellent images to show us what you have planed. I wish everybody were as thorough as you!

Two points to consider:

I'd be a bit concerned that water flowing over the divider between the fuge and the return pump is going over a big drop and you may have some bubble issues there. But all you need to do is add a second divider on the return pump side that is just an inch off the bottom so the water will have to go under it and should lose all the bubbles behind that new divider.

I personally quit using filter floss in favor of filter socks. I find it easier to change a sock than to clean out floss. And dirty socks go through the washing machine (once I have about 10 to 15 accumulated). But your floss should work OK. You'll probably need an egg create 'floor' under the floss to keep it held up horizontal.
 

redfishbluefish

Stay Positive, Stay Productive
View Badges
Joined
Mar 22, 2012
Messages
12,306
Reaction score
25,427
Location
Sayreville, NJ
Rating - 0%
0   0   0
I like the detail in the drawings....nicely done. I agree with @Ron Reefman about socks with one little piece of detail...go with mesh socks (not felt). The reason is mesh is very easily cleaned by simply running under the faucet for 30 seconds, rubbing fabric to fabric. No washing machine needed.

As far as eliminating the bubble trap, that all depends on the skimmer, and if it puts out bubbles. Not sure if anyone can actually answer, but if I were a betting man, I'd say you can eliminate it. I think the older style skimmers were more likely to put bubbles back into the sump. I've found the newer skimmers, for the most part, don't. My first sump (DIY 50 G), had two, triple walled bubble traps....because, as a newbie, that's what I was told to do. My second sump, I was now down to one triple wall.... And my third sump, one double wall bubble trap that was removable (held in place with nylon bolts), which was later removed. So I'm now bubble trap free.

Here's a picture during the sump build, with the removable bubble trap baffle (blue baffle).

Sump Build.jpg


And here is that same sump (in use) with that baffle removed.

Sump with Biopellets.JPG
 

Ron Reefman

Lets Go Snorkeling!
View Badges
Joined
Aug 12, 2012
Messages
9,629
Reaction score
12,364
Location
SW Florida
Rating - 0%
0   0   0
Here is my 100% DIY sump/fuge just after it was put into use. Water in at the right through a filter sock. It flows to the left through a fuge (no chaeto when this photo was taken) and over a 2 wall divider. The skimmer and return pump are in the same section and I have no issues with bubbles at all. As redfishbluefish said, newer skimmers are much better now than they used to be.

20180723_084247.jpg
 
OP
OP
T

TimeTwister

Community Member
View Badges
Joined
Jan 14, 2016
Messages
89
Reaction score
53
Rating - 0%
0   0   0
It looks like filter socks are still the preferred way with the majority of you. I was just watching the BRS WWC video series and saw how WWC basically just pulls out the dirty filter floss, tosses it and puts in a fresh sheet. With as cheap as filter floss can be when bought in bulk it seemed like the better option. Ultimately I'd rather a roller mat but the upgrade from a 75 to 150 gallon has resulted in the need to buy/upgrade a lot more things than I was planning so certain quality of life upgrades needed to be put on the wait list. Also sounds like the bubble traps may not be needed, other than potentially to help with the taller drop from the fuge, so that is good.

The move to filter floss was really the main reason for the sump redesign. If I were to go with socks I could stick with my old 55 gallon sump and just add a couple sock holders to it. It previous just drained right into the skimmer chamber and I'd hang a filter sock temporarily if i was trying to polish the water. If I did that I wouldn't need to buy any new glass for the baffles or spend the time building the new sump and could just move forward with the overall setup. Only thing I need to double check is to make sure I have enough clearance in this new stand to still be able to work in the taller 55.

So what's your thoughts, spend the time/money to rebuild a sump from the 40B, or use the existing 55 and move forward?

Here is a pic of the old sump in my old stand (plus the last time it was this clean lol).
tgSDU6T.jpg
 

Even Further

Active Member
View Badges
Joined
Nov 23, 2016
Messages
280
Reaction score
309
Location
Houston, TX
Rating - 0%
0   0   0
Your design looks good. I have a similar DIY set up.

I'm running a 7.5" x 4" filter pad section that is slanted. The slant promotes water to flow across the pad and not buildup on one side only. The sump was designed around a large fuge, which isn't running yet. The main down side I have is the short length bubble trap from the skimmer to return. The bubble trap is only 8.33" width, so this limits the flow rate. This works great for my small 38 gal DT. But this sump would not support say a larger 100+ gallon tank if the flow rate was significantly more. If the flow rate is too fast thru the bubble trap, bubbles could be forced down into the return section. So you don't want to make your bubble trap too small.

Also my skimmer section is super small, so it can only support a small compact skimmer.

The filter pad section works great, and its a 2 tier tray so I can also run carbon easily too.

3DcP2Hc.jpg


84vglCE.jpg
 
OP
OP
T

TimeTwister

Community Member
View Badges
Joined
Jan 14, 2016
Messages
89
Reaction score
53
Rating - 0%
0   0   0
Well I just answered my own question with a quick fit check. I brought up the 55 from the basement and put it in the stand, and the maintenance nightmare was quickly apparent. My old stand, even though it held my 75g was over-sized, built slightly taller and was made with 2x4s where as this stand was built to just fit the 150g and I used 2x6 on the top to avoid a center brace which has resulted in less room in the stand (looks better though and is more accessible). Plus the added length leaves me with less room to build an electrical section on one end and the reactors and ATO container would likely have to go in front of the 55 meaning I would have to reach over them to reach the sump to do any maintenance.

I tell you what, doing mock-ups on paper are nice, but nothing beats a real visual to see how things would actually fit/work.

GyOt2JG.jpg
 
OP
OP
T

TimeTwister

Community Member
View Badges
Joined
Jan 14, 2016
Messages
89
Reaction score
53
Rating - 0%
0   0   0
So now that I know I need to stick with the 40 breeder I went back to look at other ready made sumps for inspiration. The Triton style sumps seemed interesting, nearly forgoing mechanical filtration and instead focusing on a big fuge area. Now I don't plan to actually use the Triton method, but I did like the sump design. This design greatly reduces the amount and complexity of the baffles (just two glass pieces needed). Basically I drain straight into a 16 gallon fuge, then overflow into a skimmer area and finally overflow into the return area. I figure I could add a hang on sock holder for occasional polishing/detritus clean up and I left a little extra room in the return area to add a filter pad shelf as a final mech filter/bubble reducer if needed.

So between this design and the original 40b design I did which do you think is better? If it matters the 150 will be bare bottom SPS dominate with plenty of strong flow.

QkbLlJv.jpg
 

Even Further

Active Member
View Badges
Joined
Nov 23, 2016
Messages
280
Reaction score
309
Location
Houston, TX
Rating - 0%
0   0   0
Personally I would want some sort of mechanical filtration to get the first crack at the incoming drain water. In your layout, the fuge would require too much frequent routine maintenance to clear out detritus. IMO I would want something that is quick to service, vs cleaning a fuge. I would prefer a bubble trap before the return section too.
 

griseus

New Member
View Badges
Joined
Feb 20, 2019
Messages
19
Reaction score
8
Rating - 0%
0   0   0
I have the same filtration setup as "Even further" It's easy to change floss and has been working great.
 

HawaiianReef

Well-Known Member
View Badges
Joined
Aug 3, 2017
Messages
698
Reaction score
674
Rating - 0%
0   0   0
Here is a pic of the old sump in my old stand (plus the last time it was this clean lol).
tgSDU6T.jpg
[/QUOTE]
Just hold on a bit ;Stop

What is the color name of the paint on your walls.
That's the color I'm looking for for my livingroom;) lol
 
OP
OP
T

TimeTwister

Community Member
View Badges
Joined
Jan 14, 2016
Messages
89
Reaction score
53
Rating - 0%
0   0   0
Here is a pic of the old sump in my old stand (plus the last time it was this clean lol).
Just hold on a bit ;Stop

What is the color name of the paint on your walls.
That's the color I'm looking for for my livingroom;) lol

Well my current room paint is Behr Ultra, Flat/Matte in Grassy Savannah, but the pic you quoted is my old house and a different green. I'll see if I happen to find any pics of the old house paint labels (since that is what i always did when i needed to buy more of the same color). Here is the current room if you want to see that green.

kIa1rFw.jpg
 

MaiReef

Valuable Member
View Badges
Joined
Oct 27, 2016
Messages
1,198
Reaction score
1,140
Location
Albany, NY
Rating - 0%
0   0   0
upload_2017-3-2_8-22-33-png.488995


This sump works great with eggcrate on the short baffle before the return pump to stop a flow of macros into the pump. Skimmer in the first section and a two part refugium if you want to put in different Macros or LR or bags of a medium. Plus the first bubble chamber allows for floss and or sponge. A skimmer stand is the only other add on I did with mine. I run the ATO in the return pump section.
 

HawaiianReef

Well-Known Member
View Badges
Joined
Aug 3, 2017
Messages
698
Reaction score
674
Rating - 0%
0   0   0
Thanks for the color. They both look pretty close.
I'll check the grassy Savannah out this week.
The green I chose has a little too much yellow I think.

Sorry for hijacking.
 

TOP 10 Trending Threads

WHAT AMOUNT OF LIVE ROCK AND SAND SHOULD BE PRIORITIZED FOR OPTIMAL BIODIVERSITY/FILTRATION?

  • 100% live rock + bagged sand

    Votes: 34 26.4%
  • 100% dry rock + 100% live sand

    Votes: 45 34.9%
  • 50/50 live/dry rock, 50/50 live/bagged sand

    Votes: 29 22.5%
  • 75% live rock, 25% live sand

    Votes: 11 8.5%
  • 25% live rock, 75% live sand

    Votes: 10 7.8%
Back
Top