I have to agree with Sean, I have a gate valve on each over flow and I have the flow turn down in the tank currently, I ended up adjusting both valves and it a balancing act, if on is allowed to run at full siphon it just makes life easier when it comes to tuning the tank so it is quiet
Navigation
Install the app
How to install the app on iOS
Follow along with the video below to see how to install our site as a web app on your home screen.
Note: This feature may not be available in some browsers.
More options
You are using an out of date browser. It may not display this or other websites correctly.
You should upgrade or use an alternative browser.
You should upgrade or use an alternative browser.
Our Dream Tank
- Large Build
- Thread starter Ditto
- Start date
- Tagged users None
After a long wait, it has arrived the next to last part needed for the tank the sump. We have one last set of parts coming on Wednesday and all we will have left will be the engineer to sign off on Monday and we will be ready to install the tank whooohoo.
From the time of ordering to delivery of the sump was 3/10 the order was placed and 7/18 the sump arrived. Others who are going to order should take this into account and it well worth the wait.
First impressions the packed the sump very well, fully crated in plywood with foam all the way around it. Just opening the crate and first looks at the sump can tell you the pride the take when building sumps.
At first when I saw the Crate I was like oh no that way to big in height to fix under the stand.
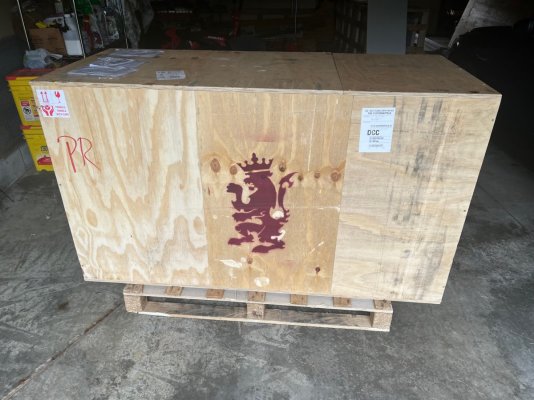
Then unscrewing the top I signed relief as I saw all the rolls of Fleece, the dampening matt for the sump.
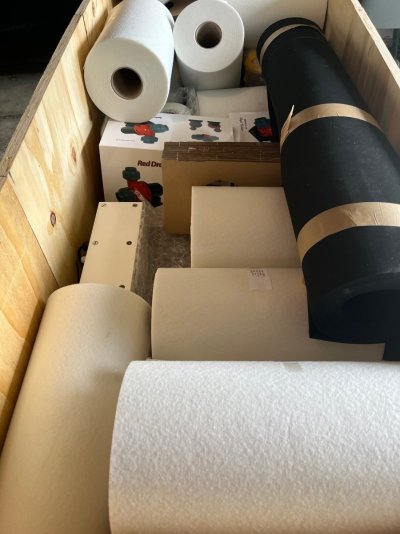
After Removing the Fleece rolls (10 of them) the 11th one was installed already on the sump it started to reveal the top of the sump.
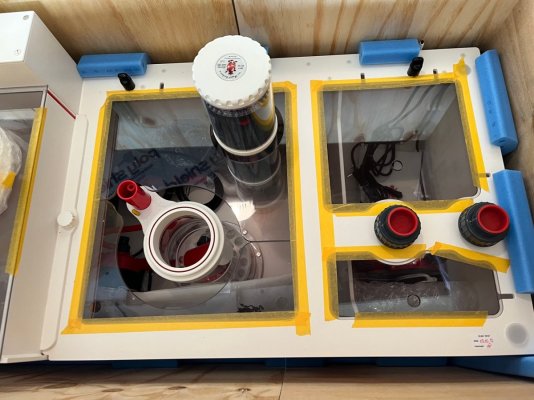
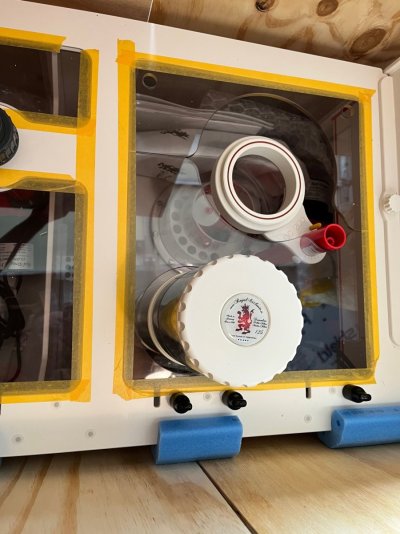
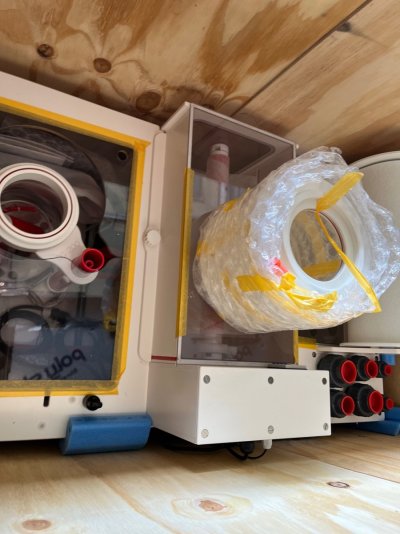
Quite impressed at the build quality and will do a Youtube video walk around once it is fully uncrated and visible.
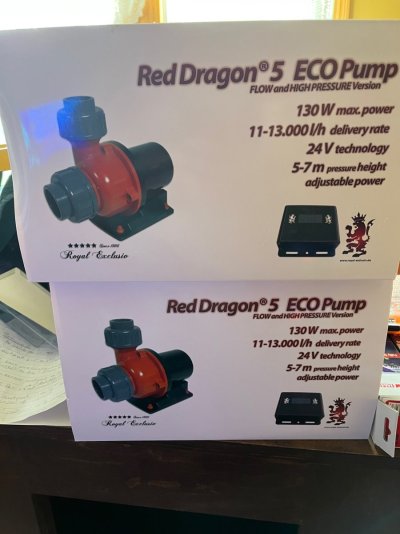
I went with 2 Eco Return pumps inside the sump. Should have no issues driving what ever GPH I need back to the tank along provide some redundancy in the event one fails. Both should never be above 50% power with one being very low as it will have UV returning to the tank.
From the time of ordering to delivery of the sump was 3/10 the order was placed and 7/18 the sump arrived. Others who are going to order should take this into account and it well worth the wait.
First impressions the packed the sump very well, fully crated in plywood with foam all the way around it. Just opening the crate and first looks at the sump can tell you the pride the take when building sumps.
At first when I saw the Crate I was like oh no that way to big in height to fix under the stand.

Then unscrewing the top I signed relief as I saw all the rolls of Fleece, the dampening matt for the sump.

After Removing the Fleece rolls (10 of them) the 11th one was installed already on the sump it started to reveal the top of the sump.


Quite impressed at the build quality and will do a Youtube video walk around once it is fully uncrated and visible.
I went with 2 Eco Return pumps inside the sump. Should have no issues driving what ever GPH I need back to the tank along provide some redundancy in the event one fails. Both should never be above 50% power with one being very low as it will have UV returning to the tank.

- Joined
- Apr 25, 2009
- Messages
- 504
- Reaction score
- 245
I'm setting up the same 96" planet tank as you. Any concerns about the black tank trim getting in the way of the tideline overflow box? I was looking at the modular marine version but was concerned about the trim interfering with the exterior box placement.
@Ironwill723 - That is a great question. I will have to let you know in a few days hehe. I assume the way they constructed the tank they account for this but I will for sure report back. I did buy some extra bulkhead gaskets as I have read some times they leak and read add an extra gasket to prevent it.
I will take pictures of it assembled to show how close.
I will take pictures of it assembled to show how close.
- Joined
- Apr 25, 2009
- Messages
- 504
- Reaction score
- 245
Thanks...please do post pictures.@Ironwill723 - That is a great question. I will have to let you know in a few days hehe. I assume they way they constructed the tank they account for this but I will for sure report back. I did buy some extra bulkhead gaskets as I have read some times they leak and read add an extra gasket to prevent it.
I will take pictures of it assembled to show how close.
- Joined
- Apr 25, 2009
- Messages
- 504
- Reaction score
- 245
Here is a quick Overview of the Planet Aquarium Tank:
@Ironwill723
Quick Overview Video of the Tideline 20" box. No issues putting it on the tank and leak testing. They said a tideline 16 would not overlap the bracing but a tideline 20 would but it looks like when I ordered the tank they added an additional piece of acrylic. So it lined up with the bracing without any issues.
Last edited:
- Joined
- Apr 25, 2009
- Messages
- 504
- Reaction score
- 245
Here is a quick Overview of the Planet Aquarium Tank:
@Ironwill723
Quick Overview Video of the Tideline 20" box. No issues putting it on the tank and leak testing. They said a tideline 16 would not overlap the bracing but a tideline 20 would but it looks like when I ordered the tank they added an additional piece of acrylic. So it lined up with the bracing without any issues.
Excellent videos @Ditto ...so they glued an extra piece of acrylic to add thickness to the outer box if I'm understanding correctly? That seems to make sense as it would bump the box out away from the tank trim.
Also, just an FYI...I believe the extra gaskets you added should go between the outer tank glass and the exterior box. I do not think they are doing much inside the outer box against the nut. Here is a picture I found to illustrate.
Everything looks great! Thanks for taking the time to video.
@Ironwill723 - Thank you for the illustration I will do that instead. I asked my LFS to reach out to them to confirm because every picture I have seen does not show the extra piece of acrylic on it. But it does fit without any issues what so over.
Good Morning Everyone,
We went with TopLids for the Tank and could not be happier of the results. From Start to Finish it took about 6 weeks and the craftmanship is excellent. Since we plan not to run a canopy on this tank we wanted lids that were going to last and keep the fish in the tank. We also wanted a screen stop, easy removability but most of all had to look professional and @Top_Lids did deliver that. Would for sure buy from them again.

Quick Overview Video:
We went with TopLids for the Tank and could not be happier of the results. From Start to Finish it took about 6 weeks and the craftmanship is excellent. Since we plan not to run a canopy on this tank we wanted lids that were going to last and keep the fish in the tank. We also wanted a screen stop, easy removability but most of all had to look professional and @Top_Lids did deliver that. Would for sure buy from them again.
Quick Overview Video:
- Joined
- Apr 25, 2009
- Messages
- 504
- Reaction score
- 245
Good Morning Everyone,
We went with TopLids for the Tank and could not be happier of the results. From Start to Finish it took about 6 weeks and the craftmanship is excellent. Since we plan not to run a canopy on this tank we wanted lids that were going to last and keep the fish in the tank. We also wanted a screen stop, easy removability but most of all had to look professional and @Top_Lids did deliver that. Would for sure buy from them again.

Quick Overview Video:
Those lids are slick!
T- Minus 48 Hours for the Swap out.
Old tank getting one last cleaning and a 25% water change. Setting up the temporary holding tank for the existing fish in the tank, Fx4 been running on the tank for over month (Making sure well seeded) and will be brought over to the temporary holding tank providing the filtration needed for the fish while we get the new tank up and running.
Getting everything Laid out and triple checking that we have everything:
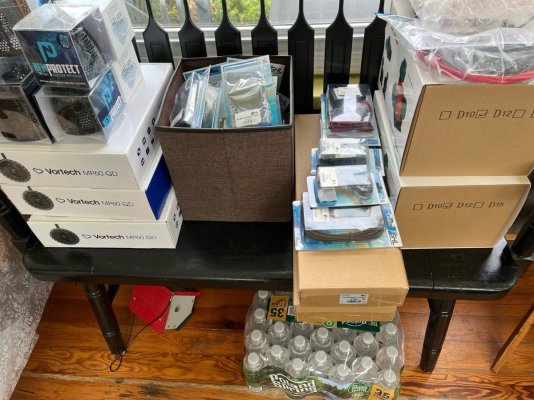
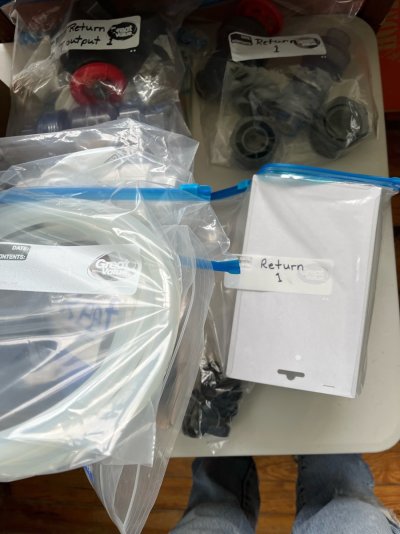
Bagging and labeling everything for an easier identification where it will be used:
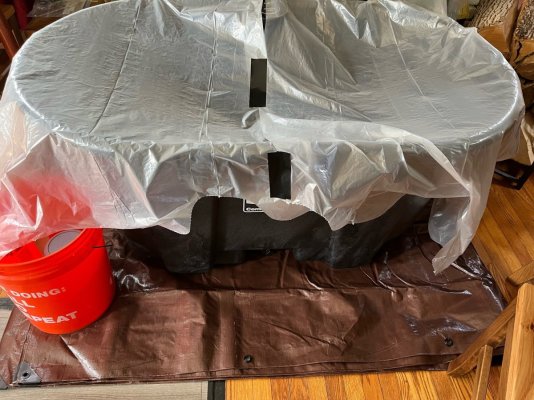
Temporary Holding Tank 125 Gallons (Will have 30 Gallons of New Water and 70 Gallons of tank water the day of the swap out)
FX4 been running side by side with the existing Sump and will provide the Filtration for the holding tank as we conduct the swap out.
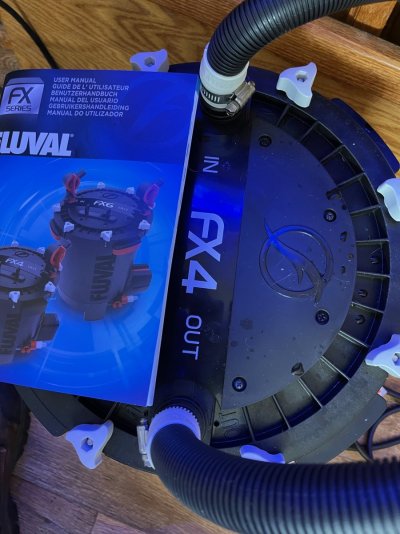
Old tank getting one last cleaning and a 25% water change. Setting up the temporary holding tank for the existing fish in the tank, Fx4 been running on the tank for over month (Making sure well seeded) and will be brought over to the temporary holding tank providing the filtration needed for the fish while we get the new tank up and running.
Getting everything Laid out and triple checking that we have everything:

Bagging and labeling everything for an easier identification where it will be used:

Temporary Holding Tank

FX4 been running side by side with the existing Sump and will provide the Filtration for the holding tank as we conduct the swap out.

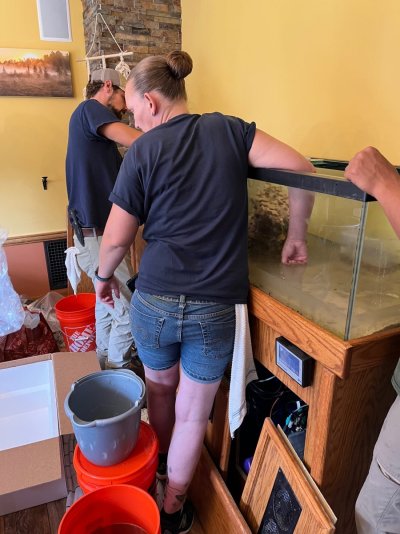
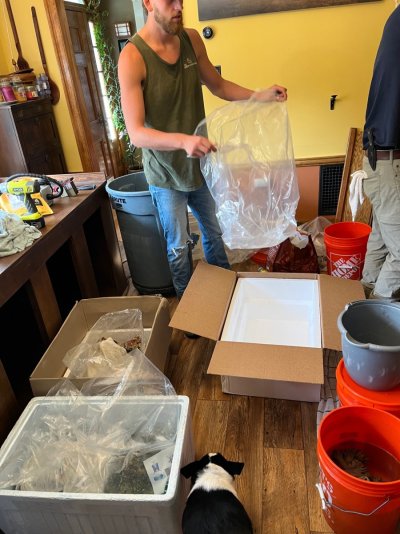
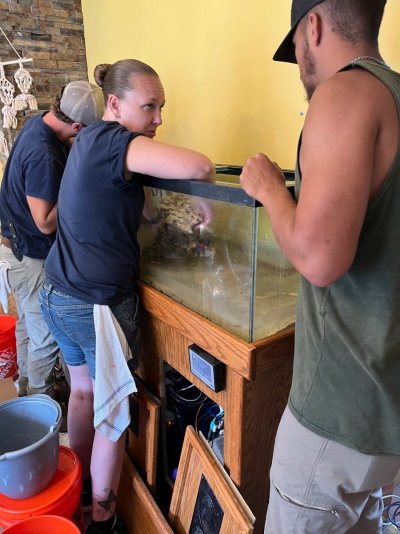
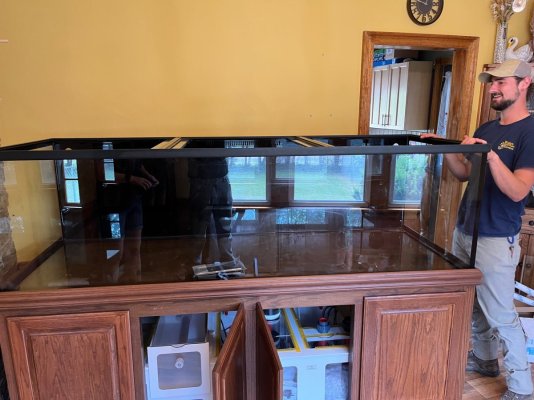
Today is the day for the swap out. The LFS is on the way!! It going to be interesting watching this swap out and can not wait to place the fish in a larger tank!! Whooohooo.
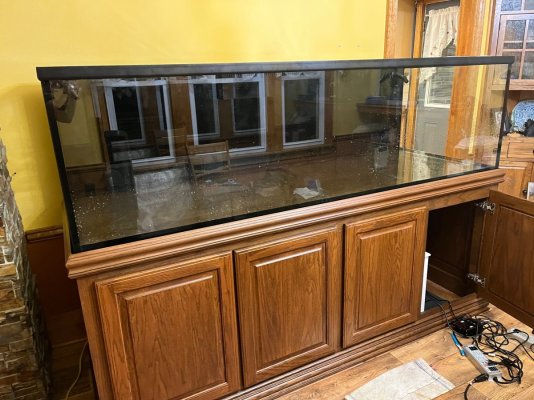
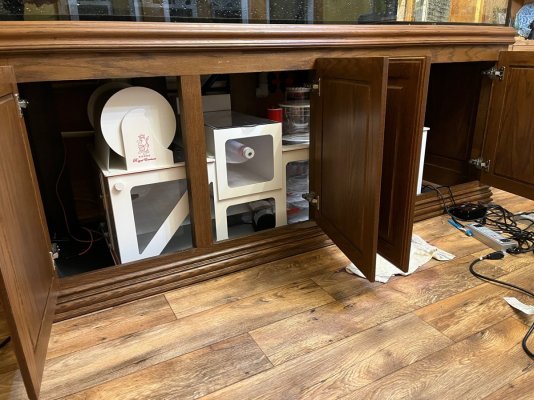
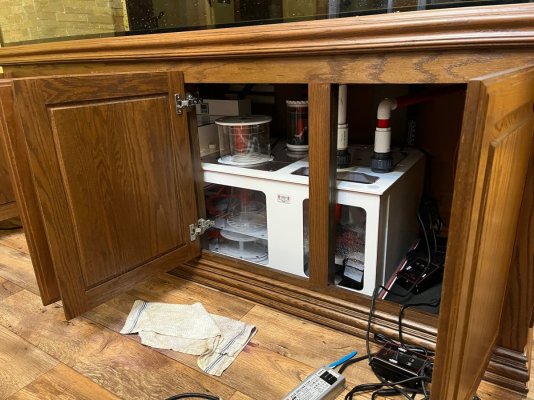
What a long day, started at 4:00am and now 11:31pm and the tank is fully plumb in. And leaked test and now filling with Saltwater.
First have to say Hats off to the Local LFS Eddie Aquarium for the assistance they provided. I could not have done it without them.
The dog seemed to always wanting to be next to all the aciton.

While the tank is filling over the next couple of days:
1- Place Skimmer on Stand
2- Install PowerBars, and Controller Stands
3- Install Icon960 Lighting in Ceiling
4- Install GHL P4 Controller, Sensors (KH and Ion Director)
5- Turn on UV
6- Install Avast Ozone Generator
First have to say Hats off to the Local LFS Eddie Aquarium for the assistance they provided. I could not have done it without them.
The dog seemed to always wanting to be next to all the aciton.


While the tank is filling over the next couple of days:
1- Place Skimmer on Stand
2- Install PowerBars, and Controller Stands
3- Install Icon960 Lighting in Ceiling
4- Install GHL P4 Controller, Sensors (KH and Ion Director)
5- Turn on UV
6- Install Avast Ozone Generator
Good Morning,
Been a little slow, as we are filling the tank and I been working. Yes, should have just taken the week off but alas could not.
We should have the tank fully filled today (More like tonight).
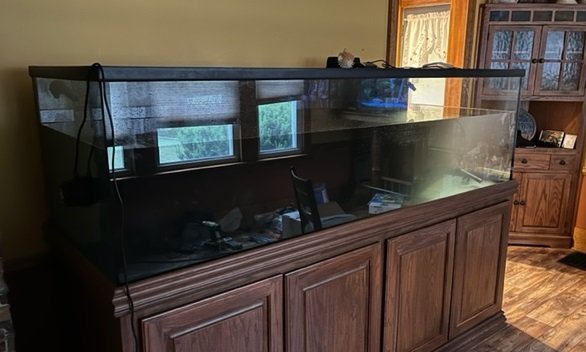
We placed a MP40 in just to keep the water moving inside the display tank as we are filling it. And a heater was thrown in to heat the tank water. I am very very impressed with ESV Salt it been mixing ultra clear in the mixing tank, and even thou it is 4 parts to do having a mixing station being little bit bigger then the 50 Gallons ESV starter box allows me to just fill to 45 gallons, add the 4 components test for salinity and add a little bit of more water to 50 gallons.
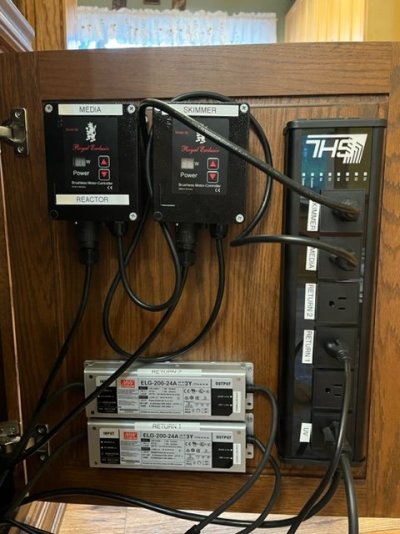
We are also laying out how the doors are going to hold certain aspects of control for the tank. Which is great when we because she made it very clear no wires all over the place
Been a little slow, as we are filling the tank and I been working. Yes, should have just taken the week off but alas could not.
We should have the tank fully filled today (More like tonight).

We placed a MP40 in just to keep the water moving inside the display tank as we are filling it. And a heater was thrown in to heat the tank water. I am very very impressed with ESV Salt it been mixing ultra clear in the mixing tank, and even thou it is 4 parts to do having a mixing station being little bit bigger then the 50 Gallons ESV starter box allows me to just fill to 45 gallons, add the 4 components test for salinity and add a little bit of more water to 50 gallons.
We are also laying out how the doors are going to hold certain aspects of control for the tank. Which is great when we because she made it very clear no wires all over the place

Good Morning,
We had a few leaks that slowed us down more then we anticipated but with all the leaks sealed the tank was fully filled and been running now 48 hours without any drips whooohooo.
We have mounted the lights, and a small wall that will hide them will be done next but wanted to show what the lights look like before the wall is placed up. Even without the wall up the light spillage into the room is small as the 30 degree reflectors installed seem to keep the light over the tank.
We went with the Amazonas 960 iCon (https://orphek.com/amazonas-960-reef-aquarium-led-lighting/), each light weight s10.6 lbs. The cord for the light allows for it to be mounted high as it over 15 Feet long allowing us to channel them down along the chimney to the power supplies.
The light itself has 4 Channels, 2 Blue, 2 White (Channel 1 - 18000K XP UV 380nm – 700nm, Channel 2 Blue – 450 – 460nm, Channel 3 Blue Plus XP – Blue /Violet/UV – 400 – 500nm and Channel 4 8000K White )
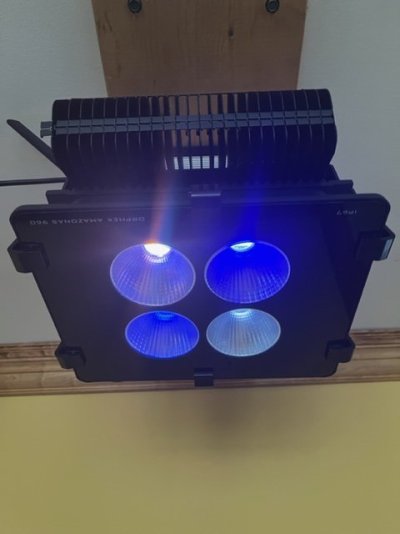
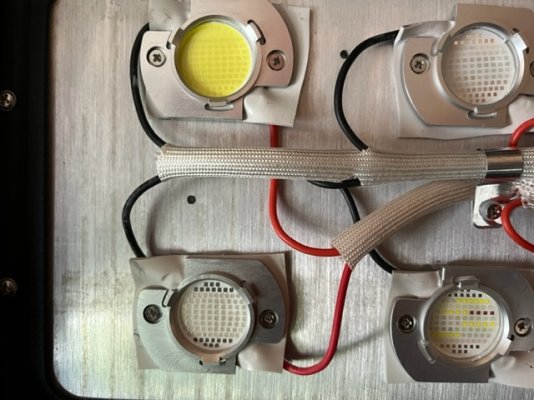
The lights came with 60 Degree Lens and I had to replace them with 30 Degree Lens which was very easy to do. You loose the clips the front glass pops off and the reflectors just twist off:
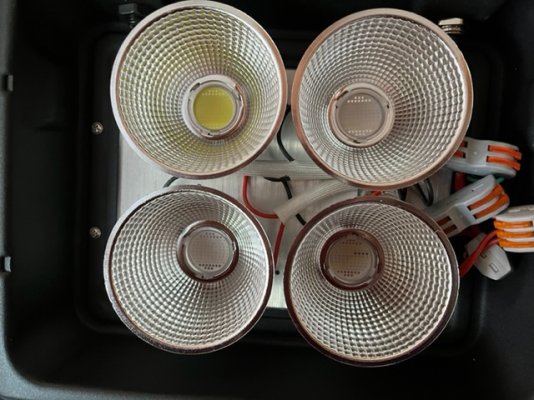
These lights do not have fans as the LED assembly is attached directly to the heat sink.
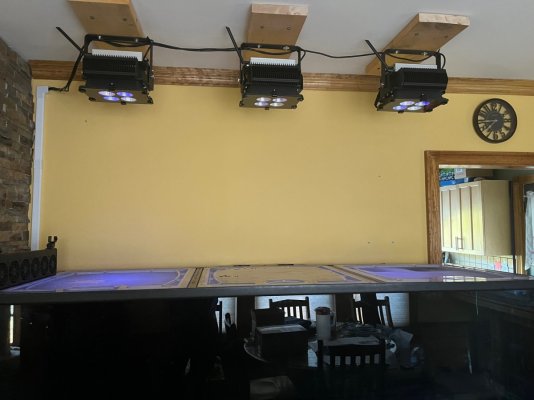
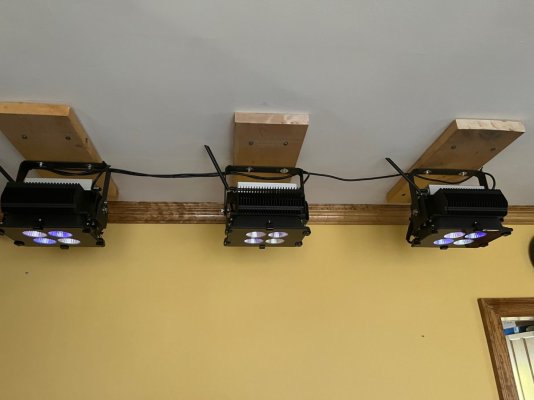
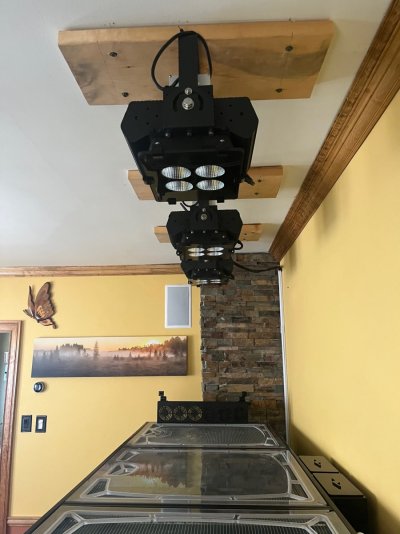
We went with Three per Orphek recommendation, these are 7.2 Feet off the Bottom of the tank in the air. Here they are over the tank before the wall, and painting is completed
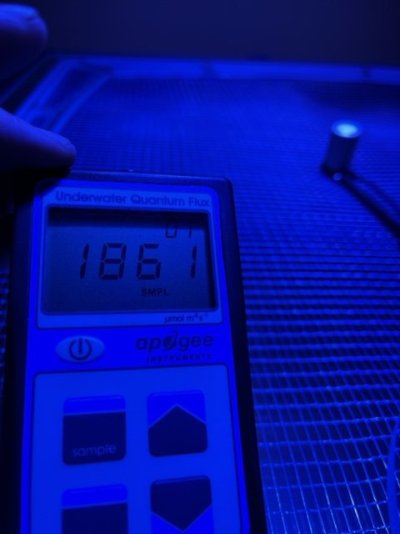
What about the PAR, We turned the lights up to 100% and brought out the Apogee 510 and said let see what the numbers look like and all we can say these will not be at 100% hehe.
At the top of the Tank the PAR Reading was: 1861
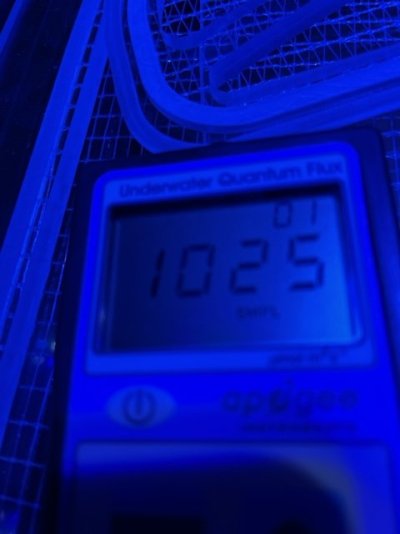
The PAR reading right below the water line was: 1025
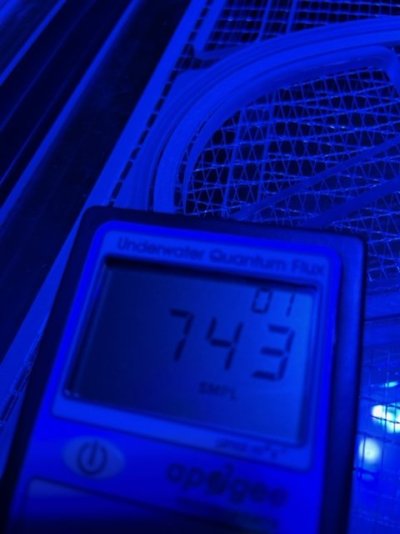
The PAR level in the middle of the tank was: 743
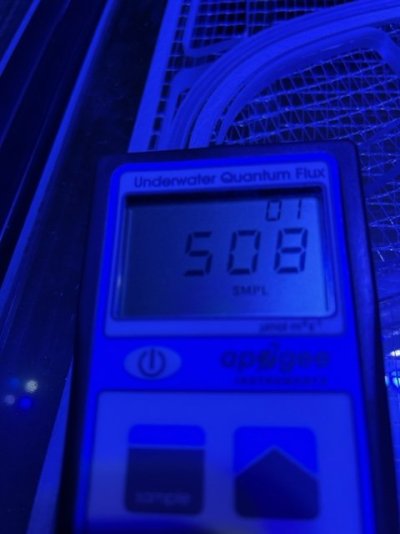
Par Level at the Bottom of the Tank was: 508
We are placing egg crate at the bottom of the tank so we take take point readings equally before we remove the egg crates and place the live base rock into the tank.
Overall impressed with the lights and output. Having only 4 channels I thought would be a disadvantage but after playing with the lights for about an hour I was able to get the look we wanted.
We had a few leaks that slowed us down more then we anticipated but with all the leaks sealed the tank was fully filled and been running now 48 hours without any drips whooohooo.
We have mounted the lights, and a small wall that will hide them will be done next but wanted to show what the lights look like before the wall is placed up. Even without the wall up the light spillage into the room is small as the 30 degree reflectors installed seem to keep the light over the tank.
We went with the Amazonas 960 iCon (https://orphek.com/amazonas-960-reef-aquarium-led-lighting/), each light weight s10.6 lbs. The cord for the light allows for it to be mounted high as it over 15 Feet long allowing us to channel them down along the chimney to the power supplies.
The light itself has 4 Channels, 2 Blue, 2 White (Channel 1 - 18000K XP UV 380nm – 700nm, Channel 2 Blue – 450 – 460nm, Channel 3 Blue Plus XP – Blue /Violet/UV – 400 – 500nm and Channel 4 8000K White )

The lights came with 60 Degree Lens and I had to replace them with 30 Degree Lens which was very easy to do. You loose the clips the front glass pops off and the reflectors just twist off:

These lights do not have fans as the LED assembly is attached directly to the heat sink.

We went with Three per Orphek recommendation, these are 7.2 Feet off the Bottom of the tank in the air. Here they are over the tank before the wall, and painting is completed


What about the PAR, We turned the lights up to 100% and brought out the Apogee 510 and said let see what the numbers look like and all we can say these will not be at 100% hehe.
At the top of the Tank the PAR Reading was: 1861

The PAR reading right below the water line was: 1025

The PAR level in the middle of the tank was: 743

Par Level at the Bottom of the Tank was: 508

We are placing egg crate at the bottom of the tank so we take take point readings equally before we remove the egg crates and place the live base rock into the tank.
Overall impressed with the lights and output. Having only 4 channels I thought would be a disadvantage but after playing with the lights for about an hour I was able to get the look we wanted.
Last edited:
Good Evening,
We spent tonight finalizing the light schedule for the tank. We are doing a 7am start time with an end time of 7:30pm. We adjusted the lights so the average on the bottom of the tank was 220 Par. We did this by waiting till it was dark, turned up all three lights to 100% and then took the initial readings and then turned them down until we reached an average of 220 Par on the bottom of the tank. We did this with 12 reading and an egg crate bottom so that the measurements were accurate and spaced equally. This worked out very well . Average Par right below the water is 415.
The Schedule for the lights are:
07:00 1% - (Channel 1, 2 3, 4)
07:30 25% - (Channel 1,2,3,4)
09:30 45% - (Channel 1,2,3,4)
12:30 55% - (Channel 1,2,3,4)
15:30 45% - (Channel 1,2,3,4)
17:30 35% - (Channel 1,2,3,4)
18:00 0% - (Channel 1, and Channel 4) (Whites are Off)
19:30 0% - (Channel 2, and Channel 3) (Blues are Off)
Below is the Orphek Graph:

We spent tonight finalizing the light schedule for the tank. We are doing a 7am start time with an end time of 7:30pm. We adjusted the lights so the average on the bottom of the tank was 220 Par. We did this by waiting till it was dark, turned up all three lights to 100% and then took the initial readings and then turned them down until we reached an average of 220 Par on the bottom of the tank. We did this with 12 reading and an egg crate bottom so that the measurements were accurate and spaced equally. This worked out very well
The Schedule for the lights are:
07:00 1% - (Channel 1, 2 3, 4)
07:30 25% - (Channel 1,2,3,4)
09:30 45% - (Channel 1,2,3,4)
12:30 55% - (Channel 1,2,3,4)
15:30 45% - (Channel 1,2,3,4)
17:30 35% - (Channel 1,2,3,4)
18:00 0% - (Channel 1, and Channel 4) (Whites are Off)
19:30 0% - (Channel 2, and Channel 3) (Blues are Off)
Below is the Orphek Graph:
Last edited:
Similar threads
- Replies
- 5
- Views
- 190
- Replies
- 2
- Views
- 51


