I've been a long time lurker on this forum but have never sat down and put the time into sharing my slice of the ocean. I've been in and out of the hobby over the past 12-15 years, but never had the time to really keep up with my tanks due to crazy work hours,so ultimately would tear it down and sell them. After a rough go it during the pandemic, I landed a great IT job working from home finally in 2020. Fast forward to 2022 and I thought to myself "you never leave the house anymore so why not setup a new aquarium". Knowing myself and my history in the hobby, I didn't want to spend big money on a brand new tank just to tear it down in 1-2 years. This is where the Facebook special 125 gallon setup came into the picture. It was a little rough around the edges but for $200, I wasn't complaining.

After finding my bins of dry rock in the basement, my wife and I got to work on an aquascape. Nothing too crazy but it got the job done. Fast forward to the end of 2023 and I decided that since I'd been able to keep the fish and coral and clam alive for this long, maybe it was time for the tangs to move into a bigger house.

I started researching, and it came down to a Cade or an Innovative Marine tank. Google had obviously been listening because the next morning I saw an ad for Innovative Marine's Winter sale. I did a little more research on their tanks and decided to bite the bullet on Dec 31. The tank was supposed to ship at the end of march, but to my surprise it was ready to go in the beginning of February. I opened the crate and immediately thought "well, this is bigger than I thought it would be... How the hell am I going to get this into the house, let alone on the stand"

My wife has been so awesome through all of this, as I had the dining room and living room chock full of things to prep for the move. The EXT was going to go in the same place as the 125, so it needed to be torn down and the livestock needed somewhere to live temporarily. Livestock tanks came in handy here, as did some new trash cans for recycling the "old" water.

We didn't take any picture of us moving the tank, but rest assured it took 5 bodies to wrestle it into the house. I bought a hydraulic lift cart to help lift and move the tank into place on the stand, that plus glass suction cups saved the day. I built a small makeshift pallet out of 2*4s and the plywood from the shipping crate to help move the tank from the garage to the house. We had 3 steps to go up and a 90 degree turn to get through the front door. The lift cart and pallet came in handy here as we didn't have to worry about the tank hitting the concrete. Once in the house it was straight into the living room and just a matter of pumping it up and manhandling it onto the stand. After that, pizza was ordered because we were all exhausted.
In went 160lbs of special grade caribsea sand and the the old tank water. I had 100 gallons of fresh seawater in the basement ready to go, and the Kamoer auto water changer came in handy here, it took forever and a day, but it was just a matter of letting it run while I worked.

A stop out at menards for some PVC sheeting and then some 3D printing of brackets turned out pretty well(other than running out of black PLA on the last bracket)

After some wire management and volunteering my wife to help label the wires the sump area started coming together.

I had my wife help me move all the rocks back into the tank and then we hung the lights. I thought about doing a custom 80/20 rail for hanging them, but ultimately decided just to grab the RMS rail because after totalling up everything for the 80/20 it was pretty close to the premade, (plus it would be easier to assemble)

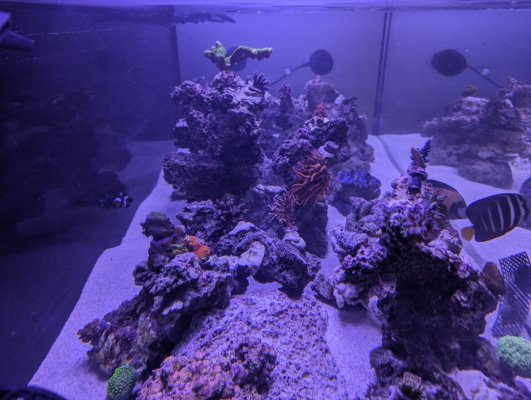
Here's the finished product for those who made it this far.
The tank is an IM EXT200 complete system (with their stand and sump)
Lighting - 3x Neptune Sky, I've had them for a couple years now and they haven't let me down het.
Flow - 4x MP40s
Skimmer - Simplicity 240
Heater- Helios 600 watt package from BRS
Kamoer Auto water changer runs my weekly changes, as well as the auto top off
36 watt Jebao UV sterilizer
Kamoer KH Carer for alk dosing
Milwaukee ORP/PH controller paired with an Enaly Ozone generator
Asus Chromebox converted to windows 11 paired with a Seneye for backup PH/Ammonia monitoring post tank move.
Livestock-
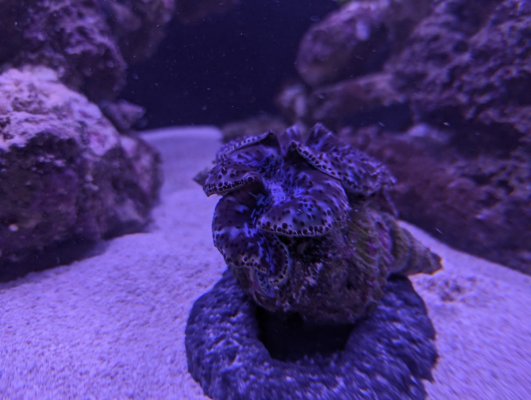
6" Maxima Clam
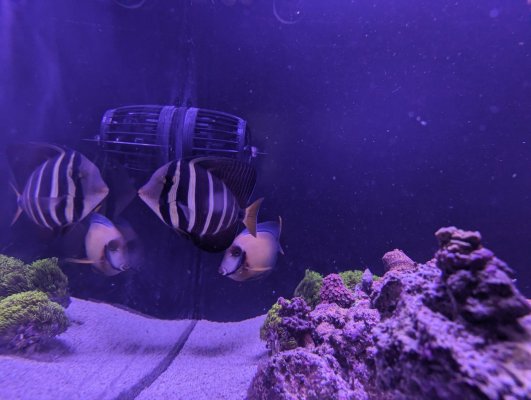
1x Chocolate Tang
1x Sailfin tang
2x black onyx Clownfish
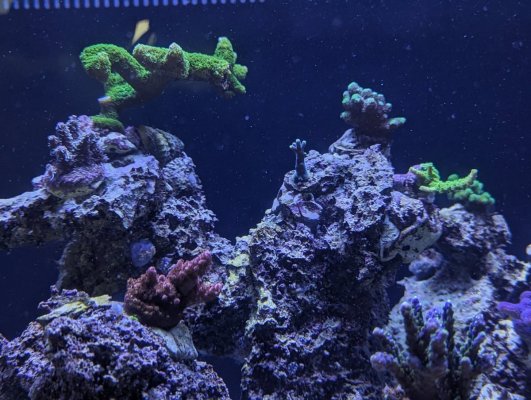
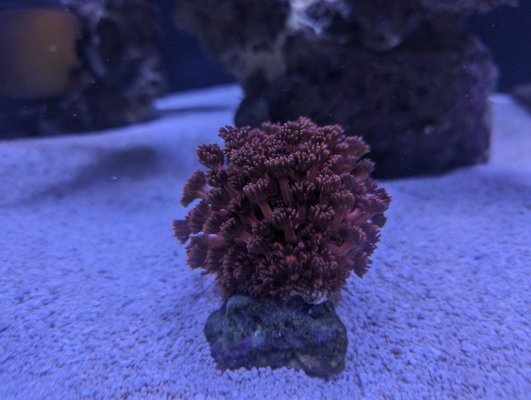
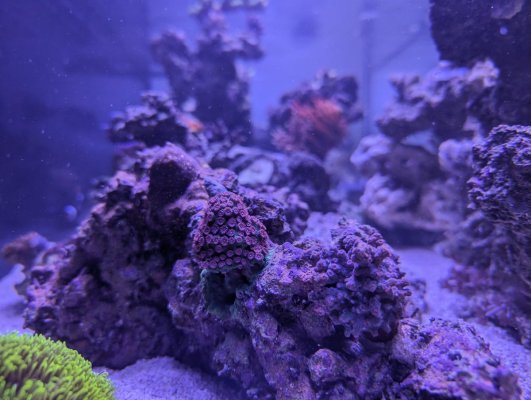
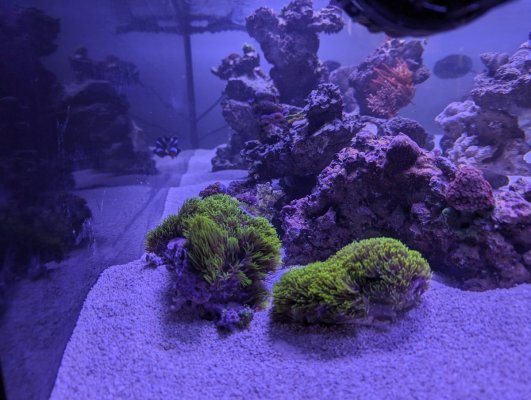
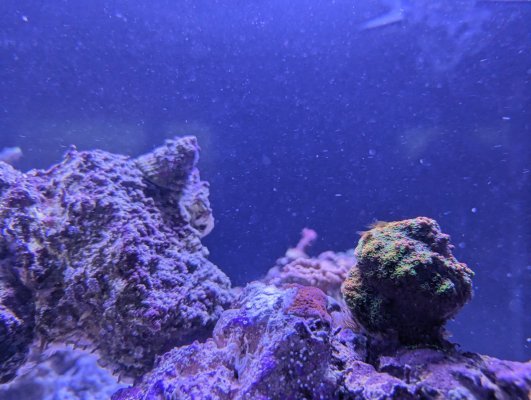
A plethora of acro and monitopora frags that are/we're starting to take off (I'm sure they will take a bit to get going again after the move)
Some Stylos, Leptoseris, Cyphasytea, goni, and a Christata colonies as well.
I feel like I just wrote a book! I'll add pics of the livestock here in a bit. Feel free to ask away any questions in case I missed anything or formatting is weird!
After finding my bins of dry rock in the basement, my wife and I got to work on an aquascape. Nothing too crazy but it got the job done. Fast forward to the end of 2023 and I decided that since I'd been able to keep the fish and coral and clam alive for this long, maybe it was time for the tangs to move into a bigger house.
I started researching, and it came down to a Cade or an Innovative Marine tank. Google had obviously been listening because the next morning I saw an ad for Innovative Marine's Winter sale. I did a little more research on their tanks and decided to bite the bullet on Dec 31. The tank was supposed to ship at the end of march, but to my surprise it was ready to go in the beginning of February. I opened the crate and immediately thought "well, this is bigger than I thought it would be... How the hell am I going to get this into the house, let alone on the stand"
My wife has been so awesome through all of this, as I had the dining room and living room chock full of things to prep for the move. The EXT was going to go in the same place as the 125, so it needed to be torn down and the livestock needed somewhere to live temporarily. Livestock tanks came in handy here, as did some new trash cans for recycling the "old" water.
We didn't take any picture of us moving the tank, but rest assured it took 5 bodies to wrestle it into the house. I bought a hydraulic lift cart to help lift and move the tank into place on the stand, that plus glass suction cups saved the day. I built a small makeshift pallet out of 2*4s and the plywood from the shipping crate to help move the tank from the garage to the house. We had 3 steps to go up and a 90 degree turn to get through the front door. The lift cart and pallet came in handy here as we didn't have to worry about the tank hitting the concrete. Once in the house it was straight into the living room and just a matter of pumping it up and manhandling it onto the stand. After that, pizza was ordered because we were all exhausted.
In went 160lbs of special grade caribsea sand and the the old tank water. I had 100 gallons of fresh seawater in the basement ready to go, and the Kamoer auto water changer came in handy here, it took forever and a day, but it was just a matter of letting it run while I worked.
A stop out at menards for some PVC sheeting and then some 3D printing of brackets turned out pretty well(other than running out of black PLA on the last bracket)
After some wire management and volunteering my wife to help label the wires the sump area started coming together.
I had my wife help me move all the rocks back into the tank and then we hung the lights. I thought about doing a custom 80/20 rail for hanging them, but ultimately decided just to grab the RMS rail because after totalling up everything for the 80/20 it was pretty close to the premade, (plus it would be easier to assemble)
Here's the finished product for those who made it this far.
The tank is an IM EXT200 complete system (with their stand and sump)
Lighting - 3x Neptune Sky, I've had them for a couple years now and they haven't let me down het.
Flow - 4x MP40s
Skimmer - Simplicity 240
Heater- Helios 600 watt package from BRS
Kamoer Auto water changer runs my weekly changes, as well as the auto top off
36 watt Jebao UV sterilizer
Kamoer KH Carer for alk dosing
Milwaukee ORP/PH controller paired with an Enaly Ozone generator
Asus Chromebox converted to windows 11 paired with a Seneye for backup PH/Ammonia monitoring post tank move.
Livestock-
6" Maxima Clam
1x Chocolate Tang
1x Sailfin tang
2x black onyx Clownfish
A plethora of acro and monitopora frags that are/we're starting to take off (I'm sure they will take a bit to get going again after the move)
Some Stylos, Leptoseris, Cyphasytea, goni, and a Christata colonies as well.
I feel like I just wrote a book! I'll add pics of the livestock here in a bit. Feel free to ask away any questions in case I missed anything or formatting is weird!
Last edited: