Reef Savvy Retirement Build

Clarkjw2002

Active Member
View Badges
Joined
Jul 13, 2021
Messages
142
Reaction score
138
Location
Bedford, PA
Rating - 0%
0   0   0
I'm not a very active person online; have no Facebook page, have never been to twitter, and pay no attention to all the other pseudo-reality stuff out there. Figure I'd document this build as it is a culmination of 20+ yrs of reefing with a 10 yr pause in the middle due to deployments and movements around the world. This is where the 21ft long 20,000 gallon dream crashes with physical and fiscal reality for the development of a realistic retirement system.


The system:

The tank will be a 316 gal Reef Savvy tank, 78" long, 36" deep and 26" tall. I've always wanted an emperor angel so that set my lower size limit goal. Originally I was planning a 450 gal 8 ft long tank but estimated long term maintenance costs and other logistical challenges like lighting forced me to go smaller.

I still have the 125 gal tank I started back up with in 2014 when I knew I was most likely done moving around. This tank will be used as a deep sand bed refugium plumbed into the return chamber of the sump.

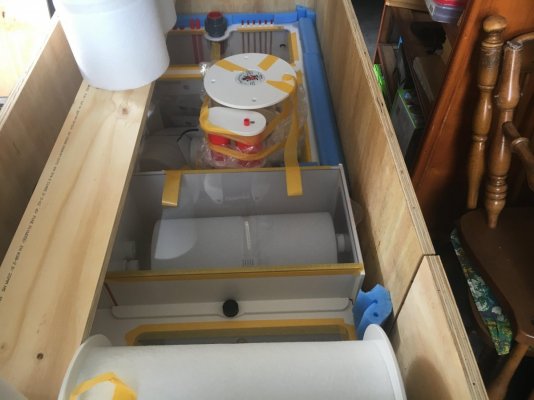
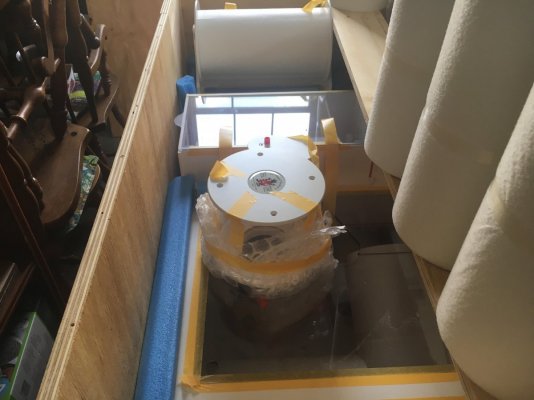
Sump is a Dreambox 3.0 eco fleece and will be plumbed to the main tank Bean Animal style. Total system volume will be around 500 gallons.

So, in summary, I will have a 500 gal bare bottom deep sand bed system. The reason I am doing this is because I have had my best successes w/ both systems but not really the in-between ones. And I like both for different reasons so I figured combining them might be the best of both worlds while having the ability to isolate them will give flexibility if this turns out to not be the case.

The Tank:

The order for the tank was placed in Dec of 2020 but there have been tons of logistical challenges for Felix at Reef Savvy so it is not built yet. Originally the external overflow was going to be in the back panel but this creates logistical challenges for blacking out the overflow portion of the back wall. To help alleviate this issue--as well as the soaring costs of supplies--I've moved the overflow to the right side panel where a smaller thickness of smoked glass can be used. Haven't heard back yet from Felix so this may not be confirmed. This comes w/ a little re-planning of the fish room and tank placement but I'll get to that later.

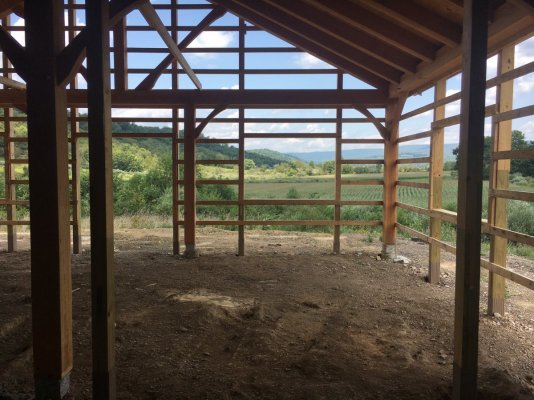
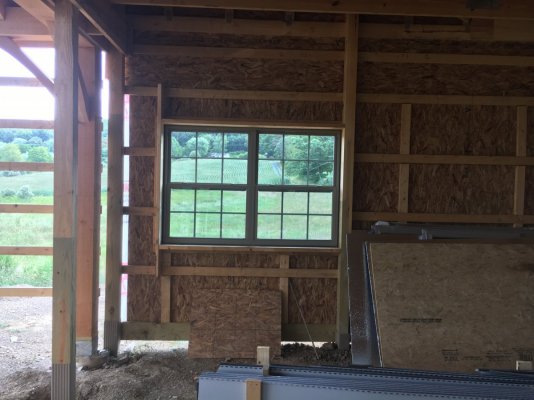
I should mention we are building the retirement house as well and are just as far behind. The goal is to have the tank when the initial internal framing is up so I can place in the wall before all the finish work. The "stand" will be built into the framing along with the stand for the 125 (the current one is shorter than I'd like). Planning on about 36" of clearance under both.

Will stop there for now as this post is already getting ridiculously long.

Goal for in-service date is the summer of 2023.
 

Utubereefer

10K Club member
View Badges
Joined
May 14, 2018
Messages
11,637
Reaction score
20,039
Rating - 0%
0   0   0
Can’t wait for some pictures of this build! Thank you for your service… Enjoy retirement!
Han Solo Good Luck GIF by Star Wars
 

Snoopy 67

Valuable Member
View Badges
Joined
Jan 11, 2019
Messages
1,934
Reaction score
1,335
Location
Long Island
Rating - 0%
0   0   0
So it sounds like a fish only system. High lighting not required, real high flow not required. You will need a good skimmer. Use some live rock starting, can't beat natural critters & bacteria.
With almost a 5' high tank rim & a 36" depth on an in wall system build a door on the wall for front access.
PITA to work only from the rear, I know. IF there is a room behind the tank put your filtration there on a bench. It makes working on it so much easier & reduces head pressure for a smaller pump.
Good luck & when possible we need pictures.
 
OP
OP
C

Clarkjw2002

Active Member
View Badges
Joined
Jul 13, 2021
Messages
142
Reaction score
138
Location
Bedford, PA
Rating - 0%
0   0   0
This will actually be an SPS tank. Just taking a chance w/ the emperor. From what I've seen they are much more likely to nip and eat LPS than SPS. Had thought about an LPS dominant system but figured that was too much of a temptation for an emperor. Plan to start as a small juvenile and feed well. It will be the last addition.

My overarching goal for this system is ease of maintenance, automating processes as much as I can. Originally, the sump was going to be behind the tank on a bench but changing the overflow position forced me to move it under the tank for space, Originally, the tank was going to have three visible sides in the living area but I moved the whole thing into the fish room so the front panel will now be flush with the living room wall.

Minus the sump placement, this actually simplifies several variables and will make working in the tank much easier. I'll have bench space at 3ft on each side that will be built for me to stand on to help with access. The back I will use a step stool or possibly build a removable scaffold to stand on.

Equipment collected so far:

Wasn't going to really start collecting what I need until this past Black Friday until the COVID craziness disease hit.

Lighting:
--6 Coral Care gen 2s (plan to use 3) plus 2 controllers
--3 Kessil A500x (plan to use 2) plus a Kessil spectral X controller
--2 Reefbrite XHO 50/50 72" with dual controller (probably use on the refugium)

Flow:
--5 MP60s (plan to use 4)
--2 1" sea swirls (and 1 for the refugium). One sea swirl is for the return and one for a UV closed loop.
--2 Red Dragon 100w pumps (one as back up)
--1 Abyzz A100 for the UV.

Filtration:
--Dreambox sump with fleece roller and Deluxe 200 skimmer
--DaStaCo A2 Ca reactor system
--Pentair 50W high output UV
--150 lbs Fiji dry rock and 25 lbs or so of flat cut base rock I just finished cooking. Still soaking to make sure it's not leaching phosphates.
--Another 50 lbs or so of dry Fiji and Pukani rock from old systems.
--3 Genesis Reef Systems renew/storms for auto water changes and top offs
--4 finnex 800w heaters with controllers
--Spectrapure maxcap UHE 200gal per day system

I basically have everything I need except the tank at this point. I've collected extras as I may not be able to afford replacements at the drop of a hat down the line. That being said, some of the replacement lighting may be used on the refugium or a separate frag tank. However, I have a ton of stuff for smaller tanks.

I have also been stockpiling supplies. Have maybe 2yrs worth of salt on top of what I need for set up and the rest of the time my current system is up, 12 or 13 extra fleece rolls, and 2 yrs worth of Triton CaRX media.

The controller is a GHL Profilux controller. Picked up on a 20% off one day sale early in 2023. The same with the GHL breeze 5 fans for cooling. The majority of the systems will be on de-centralized controls (lights, heaters) with the aquarium controller as a back up fail safe.
 
Last edited:

SPSReeferMI

Active Member
View Badges
Joined
May 25, 2019
Messages
174
Reaction score
132
Rating - 0%
0   0   0
An Abyzz 100 for a UV???
I was wondering the same. I’m curious about the following:
1.) How much flow are you expecting to run on the A100 (100%)?
2.) Will you run all of the flow through your UV? How many inputs / outputs?
3.) How are you plumbing your closed loop? I got a suggestion from Felix to run the closed loop through my ghost overflow. Obviously an a100 along with your return flow could overwhelm any overflow.

Thanks!
 
OP
OP
C

Clarkjw2002

Active Member
View Badges
Joined
Jul 13, 2021
Messages
142
Reaction score
138
Location
Bedford, PA
Rating - 0%
0   0   0
The UV flow from the A100 will be 1300-1400 gph. And the return from the sump I plan to run around 1200--1500 gph to the tank and 400 gph to the refugium for a total of about 1800-1900 gph going through the red dragon return. The UV is for algae control, not fish parasite control--I have QT and prophylactics for that.

I haven't quite figured out the closed loop yet but was planning on having one 1.5" hole cut in the back that would flow to the UV and the A100 would push the water through the sea swirl over the top. I added an extension on the output of the sea swirl so that it remains below the water surface when the main pump is off. Plan is for it to continue running during return pump down time--like for feeding or maintenance.

Not exactly sure how I'll plumb the UV. Since the A100 has a 1.5" intake and 1" output I was thinking of running the return pipe from the bulkhead through the UV with the pump pulling the water out and sending straight back up into the sea swirl/tank. This seems most efficient since the UV connections are 2". The two issues I am grappling with are: 1, does it matter if the water enters the UV from the top and flows down as opposed to in the bottom and up through the UV? And, 2, does it matter if the UV is before the pump or is it better to have the pump push water through the UV instead of pulling it?

Since it is a closed loop I'm thinking the push vs pull doesn't matter as long as the bulkhead is large enough to accommodate the needed flow without pump cavitation. Same w/ the flow through the UV as it would be the same either way. However, upward flow through the UV may be required to prevent air bubble build up or something but I need to look at the manual.

I could mount the UV horizontal but was thinking vertical would be easier.

For the overflow I was thinking 3 1.5" bulkheads, which should be more than enough to handle the flow. Hadn't thought about running the UV from the overflow though.

My other concern with the closed loop is debris getting into the pump and causing issues down the line. Main tank is bare bottom so this might be me being paranoid but I'm not sold yet on the robustness of these DC controllable pumps--just dazzled by the efficiency (i.e lower potential operating costs).
 
OP
OP
C

Clarkjw2002

Active Member
View Badges
Joined
Jul 13, 2021
Messages
142
Reaction score
138
Location
Bedford, PA
Rating - 0%
0   0   0
I should say I got a good deal on the A100 still new in box. Original plan was to use the other red dragon pump for the UV. I'm expecting it to last the rest of my life.
 

Snoopy 67

Valuable Member
View Badges
Joined
Jan 11, 2019
Messages
1,934
Reaction score
1,335
Location
Long Island
Rating - 0%
0   0   0
You probably know NOT to reduce the intake size on a pump but increasing the output size is OK, some say even better. The flow through the UV should be stated in the instructions & on the box.
 
OP
OP
C

Clarkjw2002

Active Member
View Badges
Joined
Jul 13, 2021
Messages
142
Reaction score
138
Location
Bedford, PA
Rating - 0%
0   0   0
Yep. I know the targeted flow I want for the desired effect. The question is the direction of that flow. Also, with a 1.5" bulkhead I'd be stepping up to 2" for the UV then back down to 1.5" for the pump intake. So no net restriction on the intake side.
 
OP
OP
C

Clarkjw2002

Active Member
View Badges
Joined
Jul 13, 2021
Messages
142
Reaction score
138
Location
Bedford, PA
Rating - 0%
0   0   0
Since there isn't much to look at now with this build I will add a few pics of the VERY beginning--and we are not far along.

This is the eventual placement of the tank. It will be between the two posts in the foreground. This will be the wall between the living room and fish room.
 

Attachments

  • IMG_0922.JPG
    IMG_0922.JPG
    253.8 KB · Views: 179
OP
OP
C

Clarkjw2002

Active Member
View Badges
Joined
Jul 13, 2021
Messages
142
Reaction score
138
Location
Bedford, PA
Rating - 0%
0   0   0
And this is the eventual fish room. The 125 gal refugium will be in front of that 6ft window for partial natural lighting (morning sun).
 

Attachments

  • IMG_0921.JPG
    IMG_0921.JPG
    183.2 KB · Views: 145
OP
OP
C

Clarkjw2002

Active Member
View Badges
Joined
Jul 13, 2021
Messages
142
Reaction score
138
Location
Bedford, PA
Rating - 0%
0   0   0
Here is a recent pic where the floor was prepped and ready for the concrete pour. The pipe along the left wall is for automatic water change waste water and maybe RODI waste water. The pipe in the floor will be the floor drain for the fish room. These drains are plumbed to a dry drain that empties to an underground soakage pit. I'm doing this so no salt water goes into our septic system. The pipes you see on the right are standard plumbing for sinks and drains (and a powder room on the other side of that fish room wall).

Those two little grey pipes next to the smaller post on the right are actually for thermal probes for the concrete slab and have nothing to do with the fish room. These are for making sure the radiant floor heat does not allow the slab to cool too much if I am burning firewood for heat all day.

The tank will be between those two interior posts. Space between the posts is 92" so I am really glad I stepped down from an 8 ft to a 6.5 ft tank!
 

Attachments

  • drains.jpg
    drains.jpg
    232.5 KB · Views: 179
OP
OP
C

Clarkjw2002

Active Member
View Badges
Joined
Jul 13, 2021
Messages
142
Reaction score
138
Location
Bedford, PA
Rating - 0%
0   0   0
Lastly, a few pics of the sump. It is still crated up so not great pics. I just opened to inspect before closing back up. It is here and not at the farm so the Army will move when we make the move. Keeping it in the crate so it will be near impossible for the movers to damage. But I still may take to the farm myself.

The sump is roughly 24" by 60". The intakes are one 1.5" and three 1.25" intakes. The return is 1.25" to fit the RD3 100 watt return. I have four extra connectors for BRS media filters and six dosing tubes to accommodate the CaRX and other dosing needs I may have.

The only thing I will need to do is drill the return section for the refugium overflows. Since the sidewalls are PVC this will be a relatively simple affair once I decide how I want the system plumbed together.
 

Attachments

  • unnamed-1.jpg
    unnamed-1.jpg
    127 KB · Views: 179
  • unnamed-2.jpg
    unnamed-2.jpg
    129.4 KB · Views: 165

Daniel@R2R

Living the Reef Life
View Badges
Joined
Nov 18, 2012
Messages
37,488
Reaction score
63,900
Location
Fontana, California
Rating - 100%
1   0   0
Excited to follow along!
 

Stackrat

Community Member
View Badges
Joined
Aug 18, 2016
Messages
43
Reaction score
54
Location
London
Rating - 0%
0   0   0
Looks like it's going to be a great build with some pretty awesome equipment. Love the view outside too. That's my dream.
 

hawkeyejp82

Active Member
View Badges
Joined
Dec 18, 2021
Messages
175
Reaction score
304
Location
Fredericksburg
Rating - 0%
0   0   0
Congrats on the retirement! I'm about 4 years away myself after many deployments and moves etc. I came from mostly keeping freshwater aquariums and slowly fish breeding has recouped alot of my investment in Freshwater tanks. I too am working on my dream tank here is the build: https://www.reef2reef.com/threads/my-new-200g-peninsula-build.883682/
 
OP
OP
C

Clarkjw2002

Active Member
View Badges
Joined
Jul 13, 2021
Messages
142
Reaction score
138
Location
Bedford, PA
Rating - 0%
0   0   0
Thanks. Haven't dropped paperwork yet but will this summer/fall.

The only thing that could change my plans at this point is the promotion board. Will know by Memorial Day for sure. If that happened the date would change to 3yrs from my pin on date. Right now my date is when the tractor is paid off.

Will check out your build thread. Judging by location I'm guessing you work in the DC area as well.
 

Being sticky and staying connected: Have you used any reef-safe glue?

  • I have used reef safe glue.

    Votes: 105 86.8%
  • I haven’t used reef safe glue, but plan to in the future.

    Votes: 8 6.6%
  • I have no interest in using reef safe glue.

    Votes: 5 4.1%
  • Other.

    Votes: 3 2.5%
Back
Top