techy_reefer's Waterbox AIO 50.3 first time reef tank

techy_reefer

Community Member
View Badges
Joined
Mar 20, 2022
Messages
26
Reaction score
20
Location
Fairfield County, CT
Rating - 0%
0   0   0
First time reefer here and this is my build. I've gone through a bunch of content here on the forums, Reddit, BRStv Youtube, etc. I intend for this to be a "low maintenance" tank while looking very cool at the same time. Let's see if we can pull this off.

Going to focus on keeping the fish livestock easy, community friendly, functional, and complementary where possible. Corals will probably be easy to care for softies. Not only do I want to succeed but hopefully this becomes an example, maybe inspiration, for others who want a reef tank but might be intimidated.

Equipment
Tank:
Waterbox AIO 50.3
Lighting: 2 x AI Prime 16HD Reef (purchased with the tank from Waterbox)
Return Pump: Sicce Syncra Silent 2.0
Heater: AquaEl ULTRA Thin Aquarium Heater 200 Watt (bought 2 of these)
Heater Controller: Inkbird ITC-306A WiFi Temperature Controller

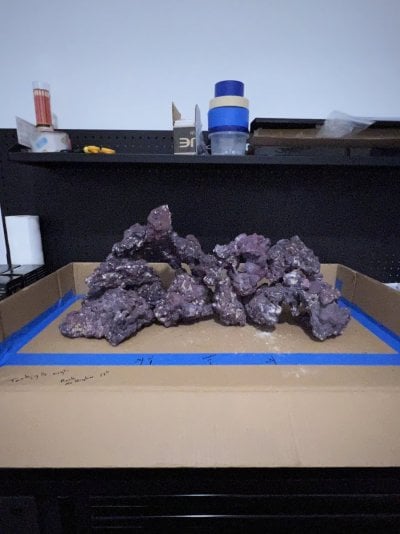
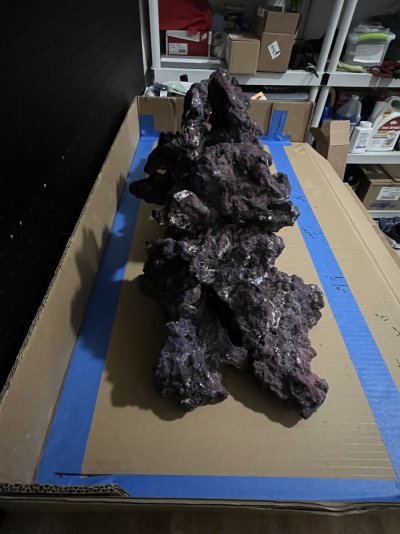
Rock: CaribSea Life Rock - 1 x 20lb "original" box; 1 x 20lb shapes box
Sand: 2 x 20lb. bags of CaribSea Arag-Alive Special Grade Sand (40lbs. total sand)

Water Maker: BRS 4 Stage Value Plus 75GPD RO/DI System
Salt: Red Sea Blue Bucket
Salinity Checker: BRS LED Refractometer for Reading Salinity with Calibration Fluid
Water Testing Kit: API Saltwater Master Test Kit 550

Cycling: I'm planning to do a fishless cycle. DrTim's has a write up and schedule for going about this on their site so I intend to follow that. Looks like it's calling for a 2 week process.
Ammonia source: DrTim’s Aquatics Ammonium Chloride Solution for Fishless Cycling
Starter Bacteria: Instant Ocean Nitrifying Bacteria Bio-Spira


Other notes:
- Rock: The tank is 49 gallons of volume but keep in mind some of it is sump area in the rear so using about 40lb of rock in the display seems appropriate. I'll put some bio balls or something similar in one of the sump chambers to add some extra surface area there.
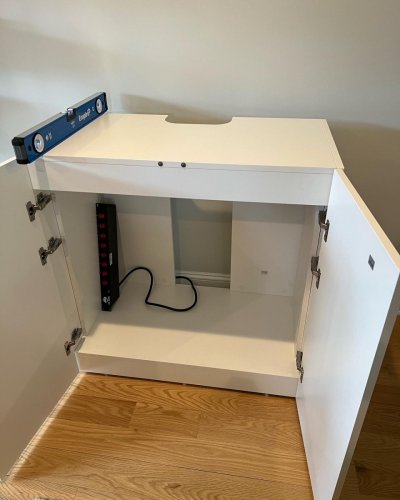
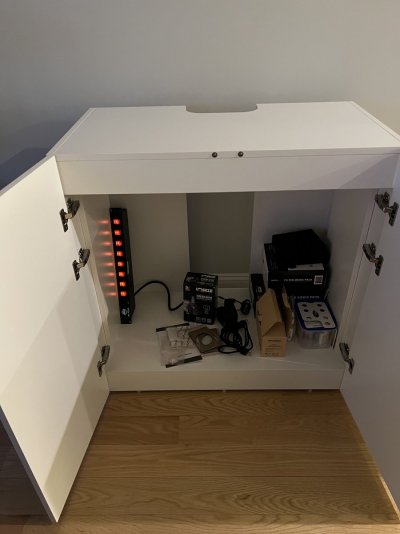
- Right now everything is ordered and coming in. I'll take pics as I'm putting things together to document the process.
- This will be the largest tank I've ever done. I have experience with smaller freshwater tanks. But this is my first of this size, this quality, and saltwater. Am I intimidated? I'd be lying if I said I wasn't! But what gives me confidence is this community on R2R as well as all over social media. I've seen others do it so I know I can do it.
 
Last edited:
OP
OP
T

techy_reefer

Community Member
View Badges
Joined
Mar 20, 2022
Messages
26
Reaction score
20
Location
Fairfield County, CT
Rating - 0%
0   0   0
Thanks! Right now I’m just in the waiting game for the tank and equipment to arrive. Planning out how I’m going to put everything together. As a wise man named Tom once said, the waiting is the hardest part.
 
OP
OP
T

techy_reefer

Community Member
View Badges
Joined
Mar 20, 2022
Messages
26
Reaction score
20
Location
Fairfield County, CT
Rating - 0%
0   0   0
Tank has arrived. There was a little damage to the bottom (tank) package in one of the corners, a little compression, but seemed not too bad from the outside. Fedex marked the bill "subject to inspection" as we were unsure if there was any impact to the inside.

Unboxed the cabinet and assembled, all was good. Unboxed the tank, could see all but the bottom of the tank (which would include that possibly impacted corner) but all seemed okay so far. Placed the tank on the stand. Then noticed that suspect corner, which was the bottom right rear of the tank, had a nick in it. Photos attached. Also noticed that the leveling mat glued to the underside of the tank is not so level. Looking at the tank from the side, I seems like the mat was compressed and you could see daylight under the mat. Not sure if this works itself out when you fill the tank.

Biggest concern is that nick in the back. There's black film over it so it's hard to tell to what extent the damage really is. Seems like a small nick/scratch from the outside.

I filled up that rear right chamber with water and no leaking for past 12hrs. Curious how the damage looks to you guys who might have experienced this before. Any concerns with the mat?

I've contacted Waterbox so waiting to hear from them. I did purchase the extra insurance from Mulberry during the tank purchase so curious if that helps out.
 

Attachments

  • IMG_1384.jpg
    IMG_1384.jpg
    76 KB · Views: 155
  • IMG_1388.jpg
    IMG_1388.jpg
    83 KB · Views: 148
  • IMG_1391.jpg
    IMG_1391.jpg
    123.8 KB · Views: 158
  • IMG_1406.jpg
    IMG_1406.jpg
    157.6 KB · Views: 150
  • IMG_1408.jpg
    IMG_1408.jpg
    148.8 KB · Views: 173
OP
OP
T

techy_reefer

Community Member
View Badges
Joined
Mar 20, 2022
Messages
26
Reaction score
20
Location
Fairfield County, CT
Rating - 0%
0   0   0
OP
OP
T

techy_reefer

Community Member
View Badges
Joined
Mar 20, 2022
Messages
26
Reaction score
20
Location
Fairfield County, CT
Rating - 0%
0   0   0
To bad about the issue, but I'm excited to see this build. Good luck.

Thanks!

@Waterbox Aquariums has made it right by sending out a replacement tank without hassle. Waiting for the FedEx delivery to arrive Tuesday.

Right now I've just been doing some additional research, getting some extra supplies, and planning out the rockscape and thinking up a system to make seawater on a going forward basis.
 

Dreamscapesaquatics

Active Member
View Badges
Joined
Jan 8, 2020
Messages
113
Reaction score
106
Location
Opelika
Rating - 0%
0   0   0
Great use of downtime. I'd suggest drawing it out. Plan what coral you want too. If you know what and where coral will be placed it makes it easier in the long run. And helps stave off impulse coral buying.
 
OP
OP
T

techy_reefer

Community Member
View Badges
Joined
Mar 20, 2022
Messages
26
Reaction score
20
Location
Fairfield County, CT
Rating - 0%
0   0   0
Great use of downtime. I'd suggest drawing it out. Plan what coral you want too. If you know what and where coral will be placed it makes it easier in the long run. And helps stave off impulse coral buying.

Good tip on coral placement. Right now I'm looking at other tanks on Instagram and trying to get a sense of what corals are used and where they are placed and then developing a mental image of how do I replicate portions of a tank I saw on Instagram into my own. Drawing it out would certainly help!

I'm planning to stick to easy/low maintenance corals, so I'm identifying which ones those are, then finding tanks that utilize such corals and taking note of where placement looks best. And that's guiding the overall look of the rockscape I'm trying to build to act as a foundation.
 
OP
OP
T

techy_reefer

Community Member
View Badges
Joined
Mar 20, 2022
Messages
26
Reaction score
20
Location
Fairfield County, CT
Rating - 0%
0   0   0
Look up pictures of more mature versions of the coral you like so you see how they grow and what kind of pace they take up. That way you can alot space for growth.

Would love to ask you... do you recommend gluing the rockscape or leaving it loose for possible relocation of pieces at some future point? I really asking about gluing the whole scape together. I might glue a piece or two together especially if there is instability but I see some recommending to pretty much glue the whole thing together to essentially lock it all in. While I don't plan to and would not like to do any major relocation of rocks, since it's my first tank I have to acknowledge the possibility that I might need or want to resolve unknown issues that might arise. Maybe I'm answering my own question and I'm leaning to not necessarily doing too much gluing but interested in your feedback. Was going to use a super glue gel like a Loctite or something similar either way.
 

Dreamscapesaquatics

Active Member
View Badges
Joined
Jan 8, 2020
Messages
113
Reaction score
106
Location
Opelika
Rating - 0%
0   0   0
Do what feels right to you. When I scape I try to alot for cleaning. I always have enough room to run my hand all the way around the scape. If 2 rocks go together in a really stable way, no wobbling etc., I don't bother gluing. I do glue anything feeling really lose, or anything I'm adding like a ledge made of smaller rock. I can take most of my rock out in about quarters. I would give coral a week or so to see if they like the location you picked, the glue them as well. Some people go a month, some glue the day they arrive. You just have to see what fits you. Slower is always better in my opinion.
 
OP
OP
T

techy_reefer

Community Member
View Badges
Joined
Mar 20, 2022
Messages
26
Reaction score
20
Location
Fairfield County, CT
Rating - 0%
0   0   0
Quick Updates:

- Got the initial damaged tank out of the way

- Took the opportunity to re-level the stand to make some improvements. Kinda feels like you're always chasing perfection when it comes to leveling but also need to know when to walk away when you're "good enough." Least I think I'm good enough. Pics below of levels taken from each stand side edge.

- With the @Waterbox Aquariums leveling feet, not sure where that nut is supposed to be. Right up against stand? Any negative impacts if I leave where it is? Pics below.

- Rockscape: Taking the time to dry fit it. Including a picture of where I last left off with it. Do I need to put anything between the rock and glass? Been doing searching and seems people are 50/50 and maybe leaning towards nothing and rock directly on glass.

- Power strip - could use some feedback on placement/mounting of the power bar. I'm thinking vertically on the left side of the interior side wall. Kinda where you see it in the below pics but just somewhere in the middle of that wall. Going to use velcro strips (rated for 10lbs) to make it easily detachable for adding/removing plugs and equipment when needed. Any harm with plugging a wifi plug into the power strip and then a piece of equipment into the wifi plug?

- Other than that I think I have everything that I need for now. Just waiting for the replacement tank to arrive Tuesday, do another unboxing and inspection.

- Have not decided what type of container I want to use for making water. I'm in a townhouse so don't have room in basement for multiple containers or some big fixed operations. Thinking of either a 20 or 32 gallon Brute can. Might do 32. I'll probably make 2 batches of 25 gallons. 1st batch will need to probably be stagnant in the tank for a day while the 2nd batch is made.
 

Attachments

  • IMG_1458.jpeg
    IMG_1458.jpeg
    161.1 KB · Views: 130
  • IMG_1459.jpeg
    IMG_1459.jpeg
    164.6 KB · Views: 128
  • 663FD976-3428-447E-A686-4F8017C782DA.jpg
    663FD976-3428-447E-A686-4F8017C782DA.jpg
    135.7 KB · Views: 112
  • 2312C8B6-273F-448E-BEEB-FC8E295E8F2C.jpg
    2312C8B6-273F-448E-BEEB-FC8E295E8F2C.jpg
    176.7 KB · Views: 95
  • C0E9F4F4-A176-47BF-962E-A40271CA8F5B.jpg
    C0E9F4F4-A176-47BF-962E-A40271CA8F5B.jpg
    218.7 KB · Views: 88
  • F59CA81E-F8DB-4C00-9C3F-144DD95B8C61.jpg
    F59CA81E-F8DB-4C00-9C3F-144DD95B8C61.jpg
    98.1 KB · Views: 91
  • 4AB5E7A6-3E11-4A37-8FF7-2C2AA2909757.jpg
    4AB5E7A6-3E11-4A37-8FF7-2C2AA2909757.jpg
    90.5 KB · Views: 103
  • F0BF9CE5-FF99-4B6D-B72E-AB54BBFA197F.jpg
    F0BF9CE5-FF99-4B6D-B72E-AB54BBFA197F.jpg
    132.5 KB · Views: 115
  • IMG_1493.jpeg
    IMG_1493.jpeg
    101.2 KB · Views: 140

Reefing threads: Do you wear gear from reef brands?

  • I wear reef gear everywhere.

    Votes: 17 17.3%
  • I wear reef gear primarily at fish events and my LFS.

    Votes: 5 5.1%
  • I wear reef gear primarily for water changes and tank maintenance.

    Votes: 0 0.0%
  • I wear reef gear primarily to relax where I live.

    Votes: 17 17.3%
  • I don’t wear gear from reef brands.

    Votes: 51 52.0%
  • Other.

    Votes: 8 8.2%
Back
Top