Hello everyone. I should have done this a while ago as no matter how many threads or videos you read and watch, nothing prepares you for the real thing. Here is my story. A little over a year ago I decided that I wanted to get back into the hobby, so I started researching, reading and watching, rinsing and repeating...well you get the idea. In March of this year I started getting quotes for a 72x24x24 rimless tank. I ended up going with Crystal Dynamics, thanks to a fellow forum member, mainly because they were localish, I almost pulled the trigger on a Reef Savvy. I ended up using CD for my stand as well. I will spare you the details but the tank and stand finally came in the 2nd weekend in December, yes the order was placed at the end of March. So here she is...drum roll please....

A few reasons for this tank. For starters, I didn't want the tank against the wall. I wanted to use it as a room divider. Plus, I love being able to see it from both sides. I initially wasn't sure what type of coral I was going to keep, but I knew I wanted a little mix. Another aspect is that I do not like power cords coming out of the tank. So that might limit what I can keep. With that said, I chose to have a closed loop to help with water flow and circulation. An unfortunate thing that plagues peninsula style tanks is that particulates tend to accumulate at the far end of the tank, thus the CL. Some notes on the stand. 1. Its a stainless steal stand. 2. The wood is 100% cherry stained to match my media stand. 3. Its all one piece, you can't take it apart, meaning you can't slide the wood "skin" off. 4. It's closed, no opening in the back.

As a side note, I chose not to go wider than 24" as that seems to be many light fixtures max range and I had to take that into account, would I have loved an extra few inches...who wouldn't
I chose to use the shadow overflow because from what I have seen and read the bean animal is the way to go now, plus I didn't want any overflow box in the tank. I seem to have a problem with foreign objects in the tanks...don't know why.
For lighting, I decided to go with LEDs and selected Maxpect Ethereals to start with. Again, not knowing what corals I wanted, but definitely sold on LEDs, I chose these as starters and got 3 of them. I haven't put them on yet, however, so much for power cords not being around the tank. I will have to do something about that in the future, either a canopy or some type of hanging apparatus.
Sump, skimmer, pumps...etc.
I had the most difficult time selecting a sump. In the end I went with a Bashsea SS48 with accompanying water reservoir. The skimmer is a Reef Octopus Elite 200int. I have to say, the skimmer is impressive. Pump is a Reef Octopus Varios 8. For the closed loop, I missed the black friday sales...grrr....so I opted for a Jebao DCP-5000. I almost got 2 so that I can have better control but I stayed with one for now. Tunze for ATO. Finnex Titanium 800 watt heater and temp controller. I will add a back up soon or add 2 500watts. I should have asked the community prior to ordering.


After much deliberation, questions and thoughts, I decided to go all in with the Triton Method. I hope I don't regret it. I know no one method is best, but what appealed to me about this was the organic approach or natural filtration with the fuge. Ok and the fact that no filter socks are recommended. I can't stress that for myself. I hate filter socks...yes I had a small 55g 15 years ago and I hated them then, no reason to believe I will like 'em now. Petty yes, but I never liked them. The no water change idea...ok I'll take it, of course this is after I already purchased equipment for a mixing station! Plus come on, BRStv gave the fuge a reef reality rating right? I was impressed with the nutrient control using the fuge and so yes I ordered a Kessil H380 too. I'm such a sucker!
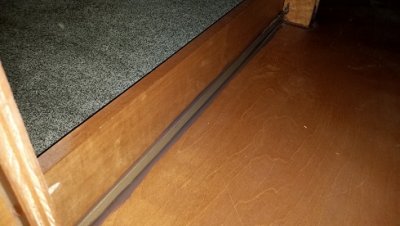
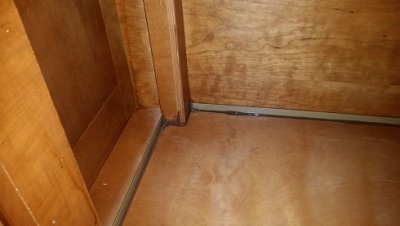
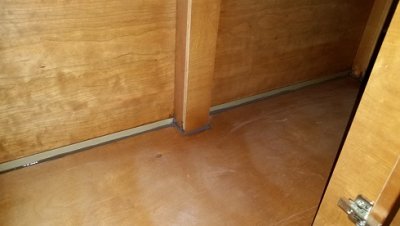
On to the build, still here? Of course you are! Prior to just throwing everything in I wanted to try to prevent major catastrophe so I took the time to prep the stand by sealing it with silicone and then priming and painting the bottom.


Stand lighting was done with LED strip lights...yes waterproof ones. And I have used stainless steal screws throughout the build.


All power controllers where installed with access from the side door.


Another factor that was taken into consideration was noise. That's the main reason I chose the Shadow overflow and decided on a closed stand. Just trying to control noise. However, nothing is for free. It is never a good idea to have a totally closed stand because we need air movement to control heat and get fresh oxygen. I installed a couple of fans. I am slightly concerned. Not sure how long these will last, not sure if they are in a safe enough space, I will be monitoring that very carefully. And I can add a temp controller on them to adjust speed.


Soooo...I did mention I decided to use the Triton Method? If you have a weak stomach or can't stand idiots, this next picture might not be for you...you have been warned! Triton requires a minimum of 10% water volume for the fuge and well I didn't have that...until now! Btw, did I mention I can't stand filter socks...just checking. For those of you that are considering starting a tank...ask questions and seek guidance BEFORE you buy stuff. Otherwise, you end up wasting and destroying beautiful equipment. I still can't believe I did this. I couldn't return the sump. Had I decided on the triton method months earlier, I would have ordered a custom sump. But we move on.

Today on...hmm, I don't have a youtube channel...but time to plumb the RC180!
Ok, this is a lot more work than I ever anticipated. If you are going to do this yourself please read the following!!! DRY FIT, DRY FIT, DRY FIT...this is so you don't make a mistake and accidentally plumb a pipe in the way...not just for measurement purposes!
I have only plumbed the closed loop and am still in the process of plumbing the return. But because I didn't dry fit it all, I made multiple mistakes and now have to order new parts to finish. I had to place valves so that I can maintenance the pump and or when I am ready to add a second one. The closed loop is 1.5 inch drain to 2 1 inch returns.


The middle is full siphon, obviously, the gate valve is there the emergency and secondary are flanking it. I contemplated adding a bulkhead but in the end I opted not to. But the pipe is too low and the return cross pipe was suppse to go underneath and I didn't leave enough room. I had to make a modification, but as I said earlier, waiting on parts.

Part of the overflow. I need to have the back paint touched up a bit. I was told that the paint is hard and cracked/chipped most likely during the installation process as the tank flexed a little. Anyone buying that story?

A couple more before I sign off.


Please all constructive feedback is welcome. God knows I already made too many mistakes and could use the help. If there is anything I am missing or didn't consider please let me know.
A few reasons for this tank. For starters, I didn't want the tank against the wall. I wanted to use it as a room divider. Plus, I love being able to see it from both sides. I initially wasn't sure what type of coral I was going to keep, but I knew I wanted a little mix. Another aspect is that I do not like power cords coming out of the tank. So that might limit what I can keep. With that said, I chose to have a closed loop to help with water flow and circulation. An unfortunate thing that plagues peninsula style tanks is that particulates tend to accumulate at the far end of the tank, thus the CL. Some notes on the stand. 1. Its a stainless steal stand. 2. The wood is 100% cherry stained to match my media stand. 3. Its all one piece, you can't take it apart, meaning you can't slide the wood "skin" off. 4. It's closed, no opening in the back.
As a side note, I chose not to go wider than 24" as that seems to be many light fixtures max range and I had to take that into account, would I have loved an extra few inches...who wouldn't
I chose to use the shadow overflow because from what I have seen and read the bean animal is the way to go now, plus I didn't want any overflow box in the tank. I seem to have a problem with foreign objects in the tanks...don't know why.
For lighting, I decided to go with LEDs and selected Maxpect Ethereals to start with. Again, not knowing what corals I wanted, but definitely sold on LEDs, I chose these as starters and got 3 of them. I haven't put them on yet, however, so much for power cords not being around the tank. I will have to do something about that in the future, either a canopy or some type of hanging apparatus.
Sump, skimmer, pumps...etc.
I had the most difficult time selecting a sump. In the end I went with a Bashsea SS48 with accompanying water reservoir. The skimmer is a Reef Octopus Elite 200int. I have to say, the skimmer is impressive. Pump is a Reef Octopus Varios 8. For the closed loop, I missed the black friday sales...grrr....so I opted for a Jebao DCP-5000. I almost got 2 so that I can have better control but I stayed with one for now. Tunze for ATO. Finnex Titanium 800 watt heater and temp controller. I will add a back up soon or add 2 500watts. I should have asked the community prior to ordering.
After much deliberation, questions and thoughts, I decided to go all in with the Triton Method. I hope I don't regret it. I know no one method is best, but what appealed to me about this was the organic approach or natural filtration with the fuge. Ok and the fact that no filter socks are recommended. I can't stress that for myself. I hate filter socks...yes I had a small 55g 15 years ago and I hated them then, no reason to believe I will like 'em now. Petty yes, but I never liked them. The no water change idea...ok I'll take it, of course this is after I already purchased equipment for a mixing station! Plus come on, BRStv gave the fuge a reef reality rating right? I was impressed with the nutrient control using the fuge and so yes I ordered a Kessil H380 too. I'm such a sucker!
On to the build, still here? Of course you are! Prior to just throwing everything in I wanted to try to prevent major catastrophe so I took the time to prep the stand by sealing it with silicone and then priming and painting the bottom.


Stand lighting was done with LED strip lights...yes waterproof ones. And I have used stainless steal screws throughout the build.
All power controllers where installed with access from the side door.
Another factor that was taken into consideration was noise. That's the main reason I chose the Shadow overflow and decided on a closed stand. Just trying to control noise. However, nothing is for free. It is never a good idea to have a totally closed stand because we need air movement to control heat and get fresh oxygen. I installed a couple of fans. I am slightly concerned. Not sure how long these will last, not sure if they are in a safe enough space, I will be monitoring that very carefully. And I can add a temp controller on them to adjust speed.
Soooo...I did mention I decided to use the Triton Method? If you have a weak stomach or can't stand idiots, this next picture might not be for you...you have been warned! Triton requires a minimum of 10% water volume for the fuge and well I didn't have that...until now! Btw, did I mention I can't stand filter socks...just checking. For those of you that are considering starting a tank...ask questions and seek guidance BEFORE you buy stuff. Otherwise, you end up wasting and destroying beautiful equipment. I still can't believe I did this. I couldn't return the sump. Had I decided on the triton method months earlier, I would have ordered a custom sump. But we move on.
Today on...hmm, I don't have a youtube channel...but time to plumb the RC180!
Ok, this is a lot more work than I ever anticipated. If you are going to do this yourself please read the following!!! DRY FIT, DRY FIT, DRY FIT...this is so you don't make a mistake and accidentally plumb a pipe in the way...not just for measurement purposes!
I have only plumbed the closed loop and am still in the process of plumbing the return. But because I didn't dry fit it all, I made multiple mistakes and now have to order new parts to finish. I had to place valves so that I can maintenance the pump and or when I am ready to add a second one. The closed loop is 1.5 inch drain to 2 1 inch returns.
The middle is full siphon, obviously, the gate valve is there the emergency and secondary are flanking it. I contemplated adding a bulkhead but in the end I opted not to. But the pipe is too low and the return cross pipe was suppse to go underneath and I didn't leave enough room. I had to make a modification, but as I said earlier, waiting on parts.
Part of the overflow. I need to have the back paint touched up a bit. I was told that the paint is hard and cracked/chipped most likely during the installation process as the tank flexed a little. Anyone buying that story?
A couple more before I sign off.
Please all constructive feedback is welcome. God knows I already made too many mistakes and could use the help. If there is anything I am missing or didn't consider please let me know.


