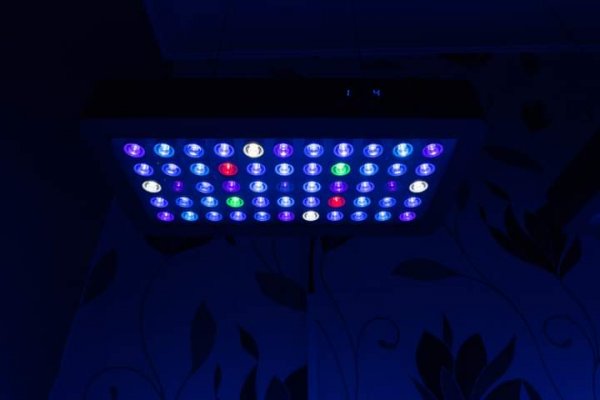
Viparspectra 165watt, Anyone using these?

AbjectMaelstroM

Valuable Member
View Badges
Joined
Jul 21, 2019
Messages
1,527
Reaction score
1,810
Location
RVA
Rating - 100%
1   0   0
Fantastic information mate. Thanks very much for that. Looks like a lot of work changing all of those LEDs out of 3 units!!! Fair play.

I'm guessing it's not a difficult job lifting the diodes off the thermal paste? I've seen a few people struggling with it.

Did you replace the paste and if so was it the grease/paste you can buy from eBay?

It took some time, but I kinda did it one at a time as I played with the layouts before settling on this. I bought an extra fixture so that I can have one on the bench changing out diodes and not take any off the tank; then just swap them out once its done. Rinse repeat.

As for difficulty, it depends. Two of 4 of my fixtures came with diodes attached with thermal adhesive to the board, so once you de-solder the two legs (+/-) it was still a pain to pull them off. I used locking pliers as well as a jewelers chisel to pop them off...both methods are still a pain and you may pull off some of the board protective layer (doesn't effect function once everything is done). The other two, once the legs were de-soldered, diode was held in place with just thermal compound and came off with minimal effort. So I guess it's the luck of the draw.

To mount them back, yes, add a thin layer of thermal compound between the board and the diode. I use MX-4 just because that's what I have on hand. Then just pop them on and solder the legs. Done. Takes me about an hour to do 1 fixture now.
 

tim132

Active Member
View Badges
Joined
Jul 22, 2020
Messages
120
Reaction score
79
Location
Morecambe, Lancs
Rating - 0%
0   0   0
It took some time, but I kinda did it one at a time as I played with the layouts before settling on this. I bought an extra fixture so that I can have one on the bench changing out diodes and not take any off the tank; then just swap them out once its done. Rinse repeat.

As for difficulty, it depends. Two of 4 of my fixtures came with diodes attached with thermal adhesive to the board, so once you de-solder the two legs (+/-) it was still a pain to pull them off. I used locking pliers as well as a jewelers chisel to pop them off...both methods are still a pain and you may pull off some of the board protective layer (doesn't effect function once everything is done). The other two, once the legs were de-soldered, diode was held in place with just thermal compound and came off with minimal effort. So I guess it's the luck of the draw.

To mount them back, yes, add a thin layer of thermal compound between the board and the diode. I use MX-4 just because that's what I have on hand. Then just pop them on and solder the legs. Done. Takes me about an hour to do 1 fixture now.
Thanks once again for your help. I'll keep my fingers crossed I have two non adhesive boards then!!

Was looking through your build thread yesterday, impressive stuff!!
 

AbjectMaelstroM

Valuable Member
View Badges
Joined
Jul 21, 2019
Messages
1,527
Reaction score
1,810
Location
RVA
Rating - 100%
1   0   0
Thanks once again for your help. I'll keep my fingers crossed I have two non adhesive boards then!!

Was looking through your build thread yesterday, impressive stuff!!
Thank you, a lot a of trial and error haha.


Good luck with the lottery! It's a bit of a crap shoot. I bought mine from the same vendor on 3 different occasions and got different boards lol. 1st was adhesive, next two were just thermal compound, my last one was adhesive.

Even if you get adhesive, honestly it's not too bad and adds like 30 seconds per diode. Just take your time and find the right tool. Only downside is if they're are soldered/glued to the board 9 times out of 10 you destroy the led... Which if you're replacing them, isn't too bad. You can get a xacto knife chisel blade under them and pop them off but it takes a good bit more effort which to me wasn't worth it.
 

reef_ninja

Active Member
View Badges
Joined
Sep 14, 2014
Messages
303
Reaction score
230
Location
Carson City, NV
Rating - 0%
0   0   0
Alright, so I got quite the update here for you guys. Borrowed a PAR meter from a local reefer, and mapped out the PAR readings for the 300w unit. Attached is the pic of the readings at various intensities.

Details:
-The meter is an Apogee, the same model that BRS rents out.
-Each large square represents a top-down view of the tank, with the front and back on the tank marked
-The light is mounted in the center of the tank
-Each section I mapped has 3 numbers: the first number is 1" below the water surface, the 2nd is approx in the middle, and the third is on the sand bed (which is only about an inch or so)
-Flow was left on
-The 90 degree lenses are removed
-Light is mounted 8" above the water line
-Tank is a 40 breeder (36" x 18" x 16")
-If there is a "0", its because rock was in the way or I just didnt care.

When I started taking the readings, the lenses were left on. I realized quickly that this is a problem for a smaller tank like this. Those lenses not only turned those LEDs into little lasers, but they also created dramatic variations in PAR readings in areas that were only a couple inches apart (some differences were easily 100 PAR across a couple inches laterally). So I removed the lenses, and now Im much happier with the spread.

Hope this helps. I have the meter for a bit longer, so if you want more info, Im happy to help.

PAR Readings.png
 

JMAwoodworks

Community Member
View Badges
Joined
Feb 14, 2020
Messages
46
Reaction score
67
Rating - 0%
0   0   0
Thank great job. I have been thinking about removing my lenses too. did you do any reading with the whites not so high so you get a bluer look? I think I will go with the 65 or 70 blue and 15 or 10 white . I run the blue for 12 hr & white 4 hr
 

reef_ninja

Active Member
View Badges
Joined
Sep 14, 2014
Messages
303
Reaction score
230
Location
Carson City, NV
Rating - 0%
0   0   0
Thank great job. I have been thinking about removing my lenses too. did you do any reading with the whites not so high so you get a bluer look? I think I will go with the 65 or 70 blue and 15 or 10 white . I run the blue for 12 hr & white 4 hr
With the whites, those are the lowest settings I tested it on. I know the color spectrum affects penetration depth, but I doubt there’s a significant difference on a shallower tank. For example, I would think running 60blue/10white would be about the same as 70blue/0white. That’s just my guess after playing with the meter for a few hours.
 

JMAwoodworks

Community Member
View Badges
Joined
Feb 14, 2020
Messages
46
Reaction score
67
Rating - 0%
0   0   0
I took off the lenses and I like the look much better but there's a lot of light spillage in the room. Im going to keep the lenses off antway. I can tell the corals seem to like it .
 

AbjectMaelstroM

Valuable Member
View Badges
Joined
Jul 21, 2019
Messages
1,527
Reaction score
1,810
Location
RVA
Rating - 100%
1   0   0
I took off the lenses and I like the look much better but there's a lot of light spillage in the room. Im going to keep the lenses off antway. I can tell the corals seem to like it .

I took my lenses off about a month ago, no going back. Great coverage and pretty good blending.

I 3D printed some "side skirts" to help with spillage into the room.
 

reef_ninja

Active Member
View Badges
Joined
Sep 14, 2014
Messages
303
Reaction score
230
Location
Carson City, NV
Rating - 0%
0   0   0
I took my lenses off about a month ago, no going back. Great coverage and pretty good blending.

I 3D printed some "side skirts" to help with spillage into the room.
Yeah I’m realizing the spill kinda sucks, now I have to build a canopy. Welcome to reefing, it’s always something lol
 

AbjectMaelstroM

Valuable Member
View Badges
Joined
Jul 21, 2019
Messages
1,527
Reaction score
1,810
Location
RVA
Rating - 100%
1   0   0
It doesn't bother me, but my wife has made the room with the tank into her "office" while she works from home. So I had to do the skirts so that she's not being blinded 8 hrs a day... More of a quality of life improvement for her.

I'll otobabibe building a floating canopy in a not-too-distant future.
 

tim132

Active Member
View Badges
Joined
Jul 22, 2020
Messages
120
Reaction score
79
Location
Morecambe, Lancs
Rating - 0%
0   0   0
Thank you, a lot a of trial and error haha.


Good luck with the lottery! It's a bit of a crap shoot. I bought mine from the same vendor on 3 different occasions and got different boards lol. 1st was adhesive, next two were just thermal compound, my last one was adhesive.

Even if you get adhesive, honestly it's not too bad and adds like 30 seconds per diode. Just take your time and find the right tool. Only downside is if they're are soldered/glued to the board 9 times out of 10 you destroy the led... Which if you're replacing them, isn't too bad. You can get a xacto knife chisel blade under them and pop them off but it takes a good bit more effort which to me wasn't worth it.
Finally got the Viparspectras white channel swapped over to more blues and violets.... 46 leds later (23 per unit) !!!

Thanks for your help again and giving me the confidence to try it myself. For the record both of my boards, the LEDs were stuck down with thermal adhesive!!

I've uploaded a video if any one is wondering how easily it can be done.


FB_IMG_1609613318095.jpg
 
Last edited:

tim132

Active Member
View Badges
Joined
Jul 22, 2020
Messages
120
Reaction score
79
Location
Morecambe, Lancs
Rating - 0%
0   0   0
Alright, so I got quite the update here for you guys. Borrowed a PAR meter from a local reefer, and mapped out the PAR readings for the 300w unit. Attached is the pic of the readings at various intensities.

Details:
-The meter is an Apogee, the same model that BRS rents out.
-Each large square represents a top-down view of the tank, with the front and back on the tank marked
-The light is mounted in the center of the tank
-Each section I mapped has 3 numbers: the first number is 1" below the water surface, the 2nd is approx in the middle, and the third is on the sand bed (which is only about an inch or so)
-Flow was left on
-The 90 degree lenses are removed
-Light is mounted 8" above the water line
-Tank is a 40 breeder (36" x 18" x 16")
-If there is a "0", its because rock was in the way or I just didnt care.

When I started taking the readings, the lenses were left on. I realized quickly that this is a problem for a smaller tank like this. Those lenses not only turned those LEDs into little lasers, but they also created dramatic variations in PAR readings in areas that were only a couple inches apart (some differences were easily 100 PAR across a couple inches laterally). So I removed the lenses, and now Im much happier with the spread.

Hope this helps. I have the meter for a bit longer, so if you want more info, Im happy to help.

PAR Readings.png
This is invaluable information. Thanks very much for that. I'll be downloading that image for safe keeping
 

120g guy

New Member
View Badges
Joined
Jan 6, 2021
Messages
2
Reaction score
0
Location
Canada
Rating - 0%
0   0   0
I have 3 over my 125 mixed reef. I'm happy with them, cant beat the price, I have nice color and a lot of growth. I run mine at 55% blue 40% white. they are about a foot off the water. blue are on an hour before the white and stay on an hour after the whites turn off.
Are you still using these lights?
 

Wolf94

Community Member
View Badges
Joined
Aug 31, 2019
Messages
35
Reaction score
26
Rating - 0%
0   0   0
Hello im trop France.
My tank is 150cm 50cm 50cm
I have 3x viparspectra 165w.
I read all the topic, but i see You put very little whites than France.
My settings are 85 blue and 35. All softies and entacmea.

Too much whites ?
What about your settings ?

Cordially
 

Pau Hana Reefer

got reef?
View Badges
Joined
Dec 18, 2018
Messages
1,340
Reaction score
10,075
Location
Pennsylvania
Rating - 0%
0   0   0
Hey all,

I've been following this thread for some time and haven't chimed in for a while. This thread gave me a lot of guidance and made me realize a couple years ago that I had my Viparspectras turned up way too high. After adjusting my lights based on everything shared in this thread, my corals continued showing signs of under and over lighting, so I've been me wondering about my tank's actual PAR. When the Apogee SQ-520 went on sale last summer, I jumped on it.

I played around quite a bit back in August and September and have been meaning to share the results. Below are the results of four different tests/measurements. Please note that I used the same picture of my tank for all of the results below and they do not indicate the actual lighting intensity/coloration mentioned in each test.

About my set-up:
- 90 gallon (48" W x 18" D x 24" H)
- (2) Viparspectra 165w
- Bottom of lights to water surface is 6.5" (this is too low, I do not recommend this. I have plans to raise the lights)
- Apogee SQ-520 connected to my PC, using ApogeeConnect app

Test 1 - Impact of Screen Netting
I have DIY screen nets on top of my tank to keep my wrasses in the tank. The netting is 1/4" clear netting, similar to this one. I wanted to understand if and how this netting impacted PAR.

The top number in each circle represents PAR with the netting on and the bottom numbers are without netting. The netting appears to lower the lighting by about 10 PAR for any areas directly under the light. The difference in the bottom left circle (146/152) is different, I believe due to shadowing caused by the rocks above it. The top middle circle (130/135) did not see a similar decrease in PAR with the netting in, I believe due to the fact that it is not directly under the lights.
WithWithoutNetting-Sept2020.png


Test 2 - PAR with Blues at 38 and Whites at 4 (with netting)
This shows PAR measurements in various parts of my tank with my blues at 38 and whites at 4. The shade of the circle indicates whether the measurement is for the back of the tank (dark blue), middle of the tank (blue), or front of the tank (light blue).

Notice how my setup causes the PAR to significantly drop off in the area between my lights? I will be raising my lights in the coming months to see if I can minimize some of this drop off. Because this is not a rimless tank, I have a plastic brace in the middle that also causes additional shadowing.
Baseline.png


Test 3 - Raising Just Blues (with netting)
How does turning up just the blues or just the whites impact PAR? I first measured how PAR is impacted when just turning up the blues. I started at the baseline used in Test 2 (Blues 38, Whites 4) and turned up the blues in increments of 4.

In my setup, the area directly under the lights at mid tank (both height and depth) goes up by approximately 10 PAR when you turn the blues setting up 4. I also tested this without netting and saw similar results.
TurningUpBlues.png


Test 4 - Raising Just Whites (with netting)
And I did the same for the whites, starting with the baseline of Blues 38 and Whites 4.

And in my setup, it appears PAR directly under the lights at mid tank (both height and depth) goes up by approximately 12 PAR when you turn the whites setting up by 4. I'm unsure why it increased by 16 PAR when whites were turned up from 12 to 16. I measured this multiple times to confirm it wasn't an error. I also tested this without netting and saw similar results.
TurningUpWhites.png


Hope this info helps.
 
Last edited:

Being sticky and staying connected: Have you used any reef-safe glue?

  • I have used reef safe glue.

    Votes: 102 86.4%
  • I haven’t used reef safe glue, but plan to in the future.

    Votes: 8 6.8%
  • I have no interest in using reef safe glue.

    Votes: 5 4.2%
  • Other.

    Votes: 3 2.5%
Back
Top