Waterbox 130.4 build

Madonia

Active Member
View Badges
Joined
Jan 9, 2020
Messages
393
Reaction score
271
Rating - 0%
0   0   0
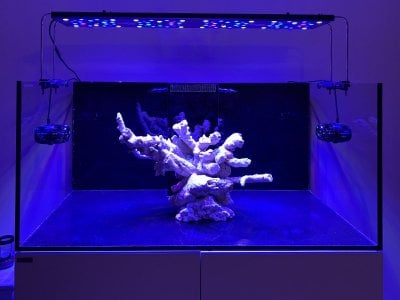
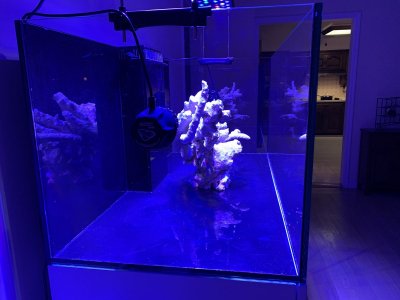
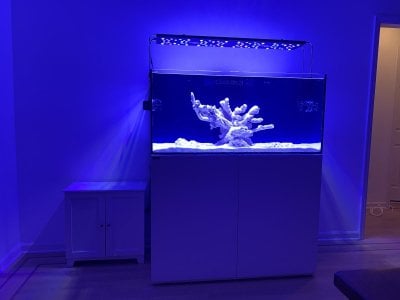
Hey guys! I decided to do a build thread on my on the new tank - the waterbox 130.4

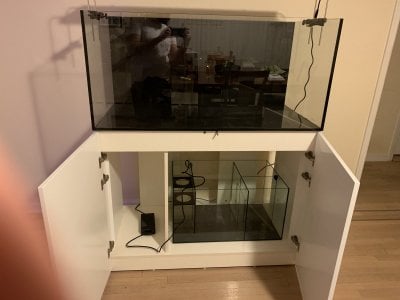
This is a late build thread as a lot of the build is already done. So I’ll post most of the pics that I took during the build. The stand came already built so that was a bonus.

the tank is used and it’s approximately 6 months old. The seller was moving so needed to get rid of the tank. the tank is in perfect condition and came with some extras. I’ll only use the Red Sea 300 skimmer that it came with. Everything else I’ve purchased.

equipment:
-Red Sea RSK 300 skimmer
-2x ecotech MP 40s
-reefbreeders photon V2+ 48 inch
-octo various 6 return pump
-Aquamaxx media reactor (that may be converted to an algae reactor- to be decided)
-cobalt 300w heater, eheim 100w heater
-ink bird temperature controller
-tunze automatic top off
-jebao doser
-bulk reef supply RODI unit

aquascape:
-60-80lbs Carib sea special grade live sand
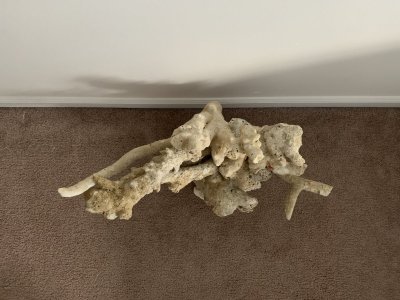
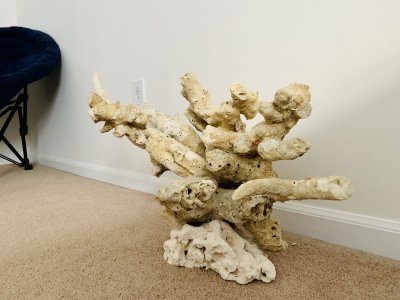
-35lbs Tonga branch rock (real rock that came dry)
-approximately 20lbs of reef saver rock in display
-an additional 20lbs Live rock for the sump
9C4963A8-EEA1-465D-AD97-E1851183AACE.jpeg
 
Last edited:
OP
OP
Madonia

Madonia

Active Member
View Badges
Joined
Jan 9, 2020
Messages
393
Reaction score
271
Rating - 0%
0   0   0
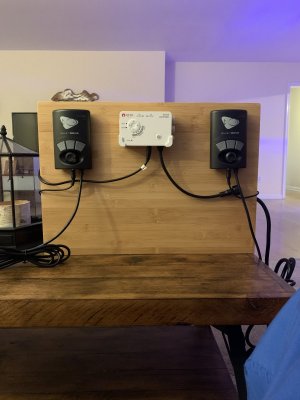
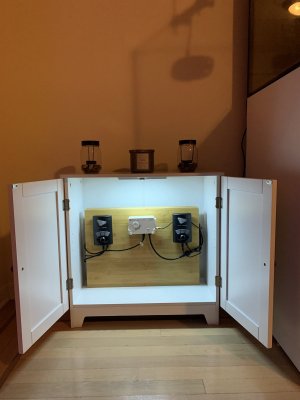
most of my controllers will be housed on a controller board in a separate cabinet next to the tank. I learned my lesson with my first tank. The less clutter the better....I used a bamboo serving tray as a controller board. I decided not to drill holes in it as I don’t have many controllers and there isn’t much clutter as is. I have the wires coming thru the side hand holders.

I got the cabinet on Wayfair for $60

I used a Motion sensor LED light to light up the cabinet when I open the doors. It’s awesome. I found it on amazon for around 20 bucks.

E7733588-BE0F-4A5F-A2E2-1EA3F4EF6A28.jpeg 1AE4EEB3-375C-404D-895B-F9FDE54796CE.jpeg
 

Mastiffsrule

Where ever you go, there you are, so be nice 2 you
View Badges
Joined
Feb 10, 2019
Messages
8,440
Reaction score
33,571
Location
Charlotte
Rating - 0%
0   0   0
Hi.

Love the set up, some really inventive ideas. Those cubes have endless possibilities. If you have not already done so Brs did a segment on modifying a biocube.

Attach a link to your build thread into your profile, details section so you can get a build thread badge. This way everyone can follow your build.
 
OP
OP
Madonia

Madonia

Active Member
View Badges
Joined
Jan 9, 2020
Messages
393
Reaction score
271
Rating - 0%
0   0   0
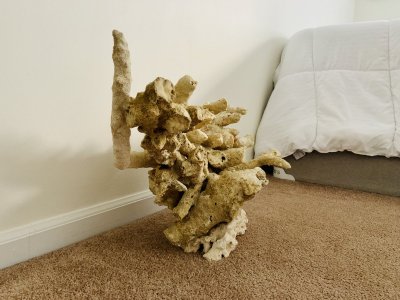
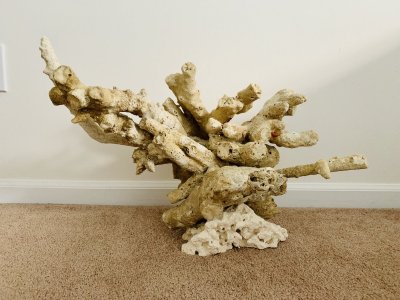
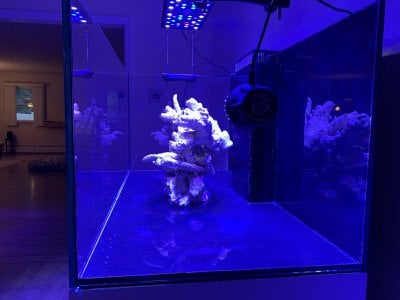
I haven’t yet plumbed the tank or filled it with water as I am awaiting the wall to get painted. Today I got to work on the aqua scape. I found some real branched Tonga rock (dry) from a fellow reefer. He never used this Tonga. I spent about 4 hours on the scape today. I used BSI glue and a spray that accelerated the glue drying. It worked very very well. I decided not to use cement or epoxy based on BRS recommendations as well as a fellow reefer who makes great scapes. Glue was a pleasure to work with and along with the spray- it dried very quickly (almost instantly). I did wait about 6 hours to transport my centerpiece to the tank.

I havent yet decided what I want to do with the sides of the tank. I was thinking of an island off to the right?? Vs. something else..

my goal for the tank is SPS dominated with some LPS on the sand bed vs. lower in the scape.

489BF1B0-3F89-475B-9731-B9C6C77F8F63.jpeg 6FA1F572-43EB-4698-BE0F-892731812114.jpeg 9ECFF1EF-66CE-4A0C-8824-3605C717200E.jpeg FB25BA9B-EAE9-4302-B182-4DC5D947B185.jpeg 58746089-5BF0-40C1-AB69-A0D899D3D000.jpeg 3798C126-0BBC-4D7C-A9CE-CD909C7BFB2C.jpeg 6AECDC5B-34D9-44ED-9959-9B4D8AB01D20.jpeg
 
OP
OP
Madonia

Madonia

Active Member
View Badges
Joined
Jan 9, 2020
Messages
393
Reaction score
271
Rating - 0%
0   0   0
Hi.

Love the set up, some really inventive ideas. Those cubes have endless possibilities. If you have not already done so Brs did a segment on modifying a biocube.

Attach a link to your build thread into your profile, details section so you can get a build thread badge. This way everyone can follow your build.
Will do! Biocube is actually my old tank. The build will be the waterbox 130.4.
 

Mastiffsrule

Where ever you go, there you are, so be nice 2 you
View Badges
Joined
Feb 10, 2019
Messages
8,440
Reaction score
33,571
Location
Charlotte
Rating - 0%
0   0   0
Will do! Biocube is actually my old tank. The build will be the waterbox 130.4.

Sorry. Old, I get a bit sleepy after 8 :D :).

Even better. I have heard great things about Waterbox.
 
OP
OP
Madonia

Madonia

Active Member
View Badges
Joined
Jan 9, 2020
Messages
393
Reaction score
271
Rating - 0%
0   0   0
Progress with the build:

I was able to fill the tank yesterday. I used BRS 4 stage RODI unit with the water saver upgrade. It worked very well. After about 10 minutes after initial startup, I had a TDS reading of 0. I felt that the water flow was adequate for my needs.

I set up the RODI line directly to the display and filled it up until the water reaches the sump. I let the sump fill 2/3 of the way and then fired up the octo various 6 pump. No leaks!

haven’t yet dialed in the return pump flow. It’s only at setting 1/5. I will tinker tonight to try and increase it.

I then added the salt. I am using tropic Marin Pro reef. Brought my salinity you to 1.025. I added Dr. Tim’s one and only, followed by liquid ammonia (Microbacter). I also added some of my biocubes media floss to get the cycle rolling. I’ll test ammonia today.

i have Carib sea special grade live sand. I used 60lbs total and that gave me about a 1 inch sand bed.

3EE6CFB7-C33A-4236-8314-143AF2B62E9B.jpeg
 
OP
OP
Madonia

Madonia

Active Member
View Badges
Joined
Jan 9, 2020
Messages
393
Reaction score
271
Rating - 0%
0   0   0
The overflow valve under the cabinet gave me some trouble. There was a gurgling sound every 20 seconds. This was when the valve was in the fully open position (turned all the way left).

What I did to fix this was turn the valve all the way to the right (Closing the overflow). This filled up the overflow completely. I noticed that water was now coming down to the sump through the emergency drain.

Then I slowly opened up the valve- using less than 1/8 turn at a time, until the overflow started to allow water to come through it. I did this until the overflow pipe was completely filled with water, but not open enough to the point that the overflow was completely open.

the gurgling sound stems from the overflow being too open, allowing a spillage of water down into it.

by adjusting it the way I did, the overflow is completely filled and only allows a certain amount down into the sump. This seemed to work as I no longer hear gurgling.
 

Caring for your picky eaters: What do you feed your finicky fish?

  • Live foods

    Votes: 19 30.2%
  • Frozen meaty foods

    Votes: 52 82.5%
  • Soft pellets

    Votes: 10 15.9%
  • Masstick (or comparable)

    Votes: 7 11.1%
  • Other

    Votes: 3 4.8%
Back
Top