Zoo Med 50 Gallon Low Boy Frag Tank

sbash

Valuable Member
View Badges
Joined
Mar 17, 2014
Messages
1,659
Reaction score
1,122
Location
Ottawa, Canada
Rating - 0%
0   0   0
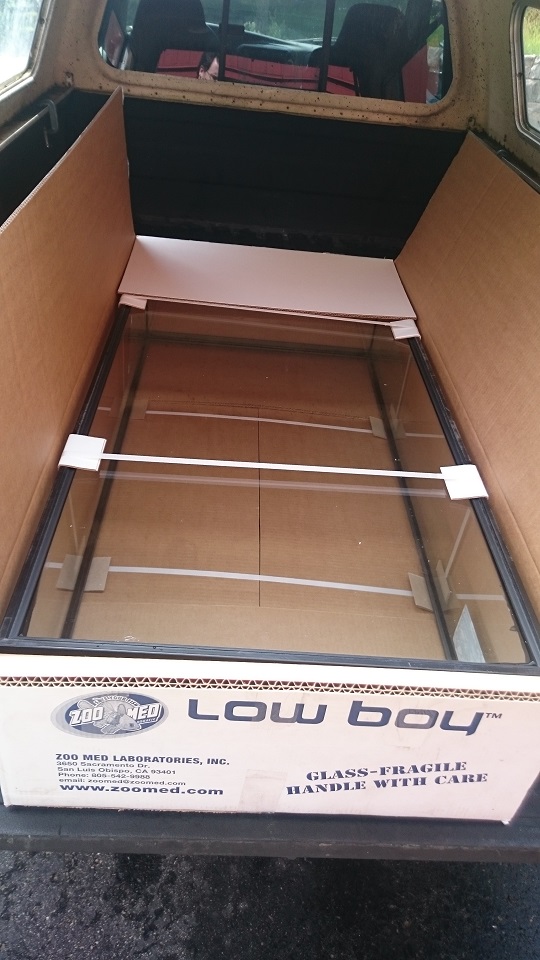
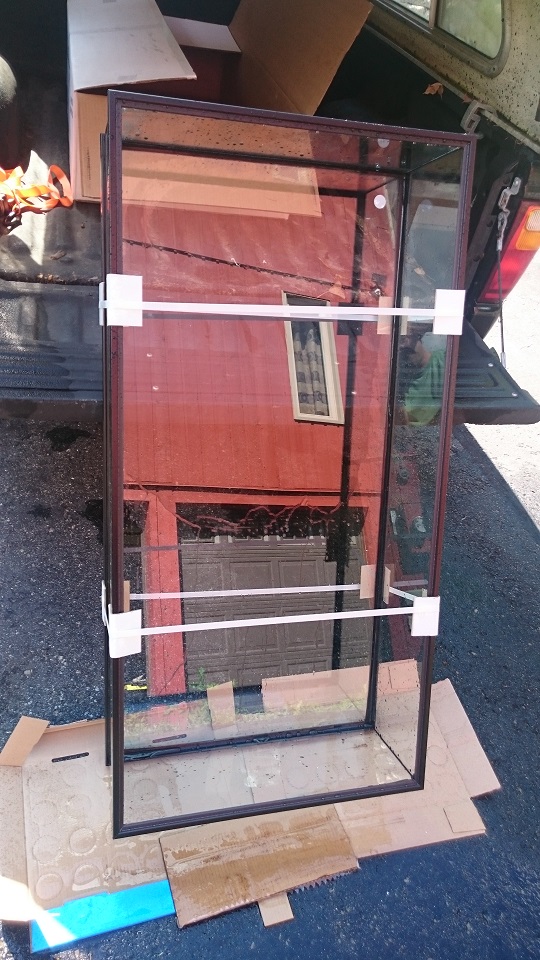
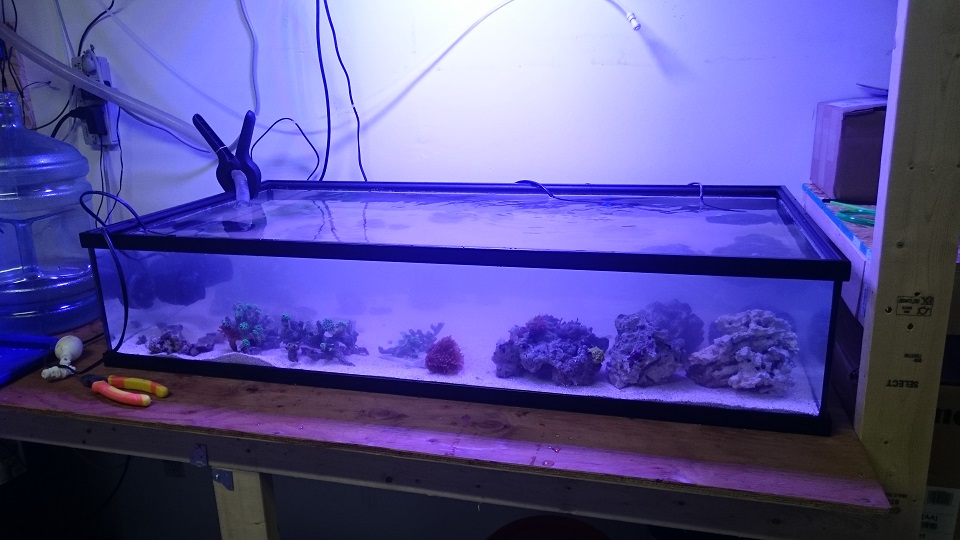
I came across this 'Low Boy' tank while looking at a video of a 220 gallon system, which was (imagine this) using it as a frag tank... After struggling with finding the right frag tank for my frags from my 220 gallon, I thought this might be a good fit. Several videos later, I am almost convinced.

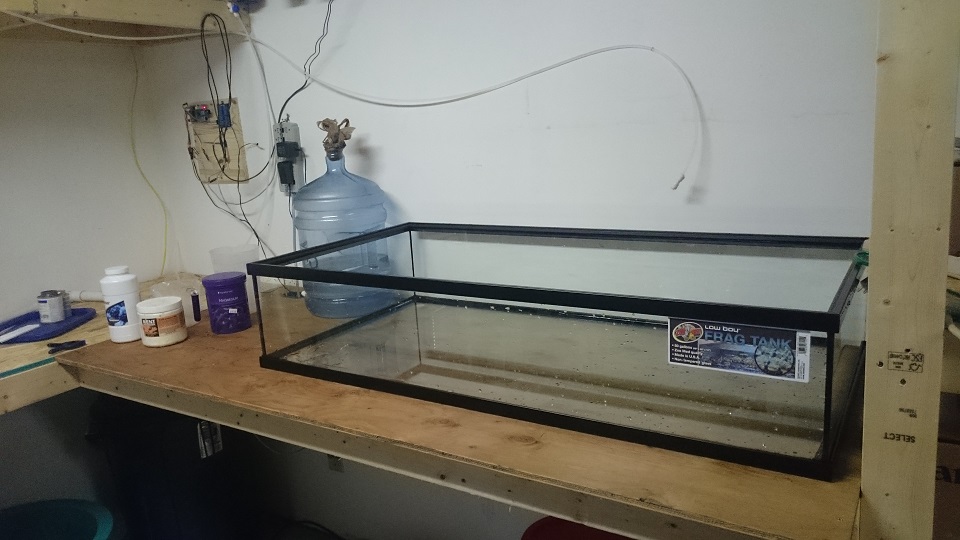
I am worried it is a tad too 'low'... Amongst other containers of various sizes, I have experimented with a 7" deep plastic tub, which was definitely too low... From the videos I have seen, it looks like it would suitable, so I am just looking for some actual feedback from some owners!
 
OP
OP
sbash

sbash

Valuable Member
View Badges
Joined
Mar 17, 2014
Messages
1,659
Reaction score
1,122
Location
Ottawa, Canada
Rating - 0%
0   0   0
Well, given the lack of response, I decided to pull the trigger and see for myself :)

First off, based on the dimensions I wanted, I did not shop around a whole lot. However, I priced out buying the glass and assembling this myself. It would have been about the same cost, give or take $10... This is a bit larger than I need, but I have three times in the last year already, and I have a bunch of fragging to do (a couple acros and birdsnests). Also, given the rate corals grow, I am sure I will be able to fill it up within the next year. Besides, I can treat is like a shallow aquarium for a (long) while until I need to add a sump and have rows upon rows of frags.

A quick note on the costing, all in all, this tank came in under $200 CAD. Which means, it will pay for itself in as few as 10 sales and at most 20. In Canada, there is only one official Zoo Med re-seller, so this tank may be even cheaper in countries with more re-sellers.
 
OP
OP
sbash

sbash

Valuable Member
View Badges
Joined
Mar 17, 2014
Messages
1,659
Reaction score
1,122
Location
Ottawa, Canada
Rating - 0%
0   0   0
Now, onto the tank itself... The dimensions are 48" x 24" x 10". The glass is thicker than I expected, but it is not heavy. A little tricky to manoeuvre around on my own, but I figured it out:

Unboxing:
001.jpg

I was surprised at the lack of packing material, and it was upside down (which made it awkward to get out of the box while it was in the truck, lol).

Post Rinse:
002.jpg

Since my driveway is sloped, and I have a hot water tap in garage, I just rinsed it in place (as you can see). I have to stress the importance of rinsing new tanks. There was clearly a layer of cleaner, or soap on the inside. I blasted it with hot water for 5-10 minutes until the water ran perfectly clear.

Quality Control:
003.jpg

Thanks Delgado!!!

Placement:
004.jpg

Here is its placement. I have to add the middle support to the floor. My ATO line is hanging there in anticipation. I have to fashion the float valve somehow. Next up, I am going to add some aragonite and start filling it up. Then I will be migrating contents of the current frag tub (which is sitting on the floor right now).

This whole section of the stand is new (hence the different wood), specifically for this tank (and to create more storage under the shelf). The tub was originally on the far left shelf; which will now be used for a quarantine tank (I know, not the best practice, but the room is only so big)...
 
Last edited:

newbreefer316

Valuable Member
View Badges
Joined
May 11, 2016
Messages
1,024
Reaction score
250
Rating - 0%
0   0   0
Here's mine, they're a work in progress but I got them drilled and painted the other day. Hope to get them plumbed and wet this weekend! I ran into some issues with the seals on one of the tanks being pretty crappy and zoomed customer support was pretty much worthless. In the future I'll probably spend the extra money for a deep blue or something like that with better build quality and support.
f50875cd75d0ac4d27452fbe106ed855.jpg
 
OP
OP
sbash

sbash

Valuable Member
View Badges
Joined
Mar 17, 2014
Messages
1,659
Reaction score
1,122
Location
Ottawa, Canada
Rating - 0%
0   0   0
Here's mine, they're a work in progress but I got them drilled and painted the other day. Hope to get them plumbed and wet this weekend! I ran into some issues with the seals on one of the tanks being pretty crappy and zoomed customer support was pretty much worthless. In the future I'll probably spend the extra money for a deep blue or something like that with better build quality and support.

That is a nice little set-up you have there!

Mine has been wet for about 24 hours now, and so far no issues. It is good to know about your experience though. But yes, I agree, if I end up needing more space, I will get a custom built; that is a few years down the line for me though; in which case, I will need a full system. This is just more or less a proof of concept for me a this point. So far, it is much easier to work with, and nicer looking than plastic tubs, lol...
 

newbreefer316

Valuable Member
View Badges
Joined
May 11, 2016
Messages
1,024
Reaction score
250
Rating - 0%
0   0   0
That is a nice little set-up you have there!

Mine has been wet for about 24 hours now, and so far no issues. It is good to know about your experience though. But yes, I agree, if I end up needing more space, I will get a custom built; that is a few years down the line for me though; in which case, I will need a full system. This is just more or less a proof of concept for me a this point. So far, it is much easier to work with, and nicer looking than plastic tubs, lol...
Yeah, I'm in the same boat. Going to give a couple things a try and see how they go before jumping off the deep end with it.
 

bubbaque

Follow me on Instagram @ Bubbaquecorals
View Badges
Joined
Apr 6, 2016
Messages
6,343
Reaction score
21,589
Location
Central Florida
Rating - 0%
0   0   0
Before you fill them with water check the silicone around the top in the inside. I have my low boy pretty full and I was getting water leaking because they didn't caulk all the way to the corners. The caulk was stopped about 1" away from the corner so I had to drain it some and add silicone.
 
OP
OP
sbash

sbash

Valuable Member
View Badges
Joined
Mar 17, 2014
Messages
1,659
Reaction score
1,122
Location
Ottawa, Canada
Rating - 0%
0   0   0
Before you fill them with water check the silicone around the top in the inside. I have my low boy pretty full and I was getting water leaking because they didn't caulk all the way to the corners. The caulk was stopped about 1" away from the corner so I had to drain it some and add silicone.

Good call and thanks for the heads up! Mine looks fine, Delgado seems to have done a good job. The silicone is up to the trim, and then all the way around the bottom of the inner trim. However, I just installed the ATO, so the level precise "full" level will really be a testament to how well it is caulked. I should know in a couple hours; worse case at this point, I could just drop the ATO "full" level down 1/8"...

I use these tanks haven't had any issues. They work great and perfect size. I can hold 432 frags in one tank.

Nice! That is good to know... Do you use standard frag plugs with egg crate?
 

BoomCorals

2500 Club Member
View Badges
Joined
Mar 22, 2017
Messages
4,653
Reaction score
7,379
Location
Milwaukee, WI
Rating - 0%
0   0   0
Good call and thanks for the heads up! Mine looks fine, Delgado seems to have done a good job. The silicone is up to the trim, and then all the way around the bottom of the inner trim. However, I just installed the ATO, so the level precise "full" level will really be a testament to how well it is caulked. I should know in a couple hours; worse case at this point, I could just drop the ATO "full" level down 1/8"...


Nice! That is good to know... Do you use standard frag plugs with egg crate?
No I had custom racks built with 3" legs. 108 frag plug holes per rack. Each tank holds 4 racks perfectly.
 

masssnapz

Active Member
View Badges
Joined
Jul 11, 2016
Messages
315
Reaction score
168
Location
Pepperell
Rating - 0%
0   0   0
I have this tank as well. Currently sitting dry. I used it as a super shallow display, had an awesome top down view !
 

Tahoe61

10K Club member
View Badges
Joined
Mar 2, 2012
Messages
13,239
Reaction score
15,695
Location
AZ
Rating - 0%
0   0   0
Would make a great Tridacna tank, nice acquisition.
 
OP
OP
sbash

sbash

Valuable Member
View Badges
Joined
Mar 17, 2014
Messages
1,659
Reaction score
1,122
Location
Ottawa, Canada
Rating - 0%
0   0   0
Here is "Hour Zero", right after being filled:

005.jpg


The water is quite cloudy (obviously), but it did clear up by the next morning just fine. One issue I did have is with my powerheads (vs the sand). With this low height, the powerheads were simply too powerfull and they pushed the sand into piles (lol).

Here is the ATO settling out the level :)

006.jpg


This is tied into my gravity-fed ATO system. This bracket is my latest design, as the past few have failed me (they are 3D printed). It is based around the one on my main sump, but is streamlined and customized to this trim.
 

newbreefer316

Valuable Member
View Badges
Joined
May 11, 2016
Messages
1,024
Reaction score
250
Rating - 0%
0   0   0
Looks good, I didn't even think about the shallow height plus sand :( I've got a gyre to use on each of mine and I was going to have one bare bottom and the other with sand... I may have to rethink that now :(
 
OP
OP
sbash

sbash

Valuable Member
View Badges
Joined
Mar 17, 2014
Messages
1,659
Reaction score
1,122
Location
Ottawa, Canada
Rating - 0%
0   0   0
Looks good, I didn't even think about the shallow height plus sand :( I've got a gyre to use on each of mine and I was going to have one bare bottom and the other with sand... I may have to rethink that now :(

Oh yeah, gyre is not going to work with sand in this tank... Although the tank is 10" high, the water level is really at about 9" (just at the bottom of the trim). I am not sure what the rating of my initial powerheads are (the label is warn off), I would guess around 1000gph (there were two). They worked fine in 11" of water with a sandbed, so it must just be a funny threshold thing... That said, with an overflow and a nice strong powerhead (bare bottom), it would be really easy to keep detritus from settling...

However, the flow is nice with a couple of ~500gph powerheads and the sand is undisturbed. I will likely end up with four 500gph (ish) in total (the SunSun powerheads are dirt cheap). I am going to let this tank settle for a month or so, then start testing some SPS frags; so I will need the flow situation sorted out by then...
 

Creating a strong bulwark: Did you consider floor support for your reef tank?

  • I put a major focus on floor support.

    Votes: 43 42.2%
  • I put minimal focus on floor support.

    Votes: 22 21.6%
  • I put no focus on floor support.

    Votes: 34 33.3%
  • Other.

    Votes: 3 2.9%
Back
Top