Figured I'd start this now, even though it may be a while before the tank is set up.
I work for a commercial contractor in the New Orleans area. We started building our new office about a year ago. During the planning stages, I asked the owner if it was ok if I set up a small aquarium in my office. I have a 30 gallon sitting around my house unused, so I was going to maybe do a Fairy Cichlid tank.
Being the guy that he is, his answer was "no, you're not putting a 30 gallon tank in your office. We're going to put a 100+ gallon tank in the wall." Pretty cool, huh?
The tank will be viewable on two sides: one from my office, the other from the conference room.
Here's the conference room view:

This is the view from my office:

We had a time of finding a tank that would suit our needs. The boss bought a used reef setup off of Facebook Marketplace without consulting me first. He got a real good deal on it, but after looking at it, we realized that it didn't really suit our needs.
So I ordered a tank from American Aquariums. We received it last Wednesday. The dimensions are 72x18x22. I haven't taken it completely out the box yet, but here's a shot of the top:

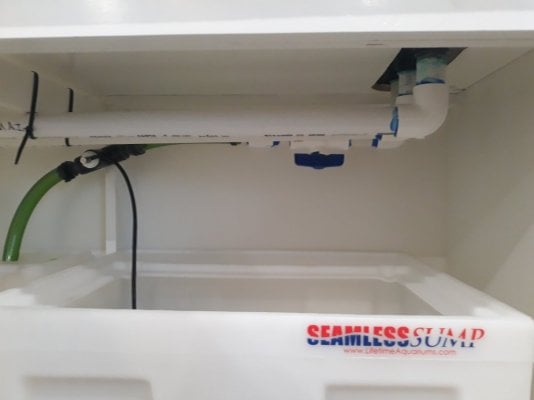
The tank has an overflow on each side. This is a problem, I soon realized, because of the sump we ordered from Seamless Sumps. The sump we got only has one filter sock. We will need two filter socks since there will be two overflows. I ordered a magnetic holder online. We'll see if it works out, I guess. My first thought was to just have one overflow lead to the sump, and have the other just deal with the returns. But that would leave an overflow full of stagnant water, which is something I don't want.
I should take this moment to mention that I have zero experience with saltwater tanks in general. I come from the high tech freshwater planted tank world. So, I've been doing a lot of studying. I've picked up a lot of info from here and other areas, but I really have no idea what I'm doing.
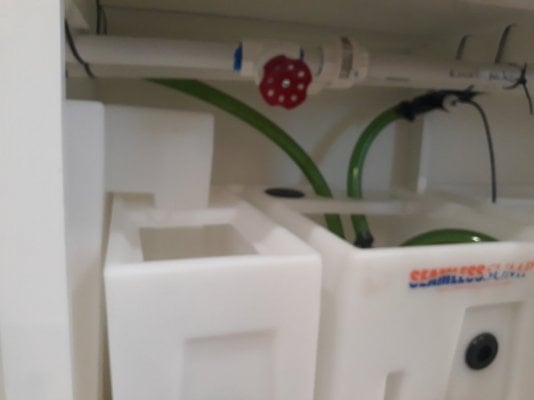
Anyway, this is the sump. We chose the Seamless brand because of space limitations in the cabinet. They are custom made (without any input from me; I really wish the boss would stop doing this to me). Because there is no way that I'd be able to get a full sized tank under the tank with those vertical braces, I needed something modular that I could put in and take out piece by piece. Seamless fit the bill.


So, on to the equipment I have to work with. Like I said, the boss picked up a used reef tank, which came with all the equipment. I need to study up on what we have to see if it will work in our situation.
Heater controller

Wave Maker

Lights ramp timer

Return pumps. We have three of these, which seems like overkill. Do yall have an opinion on these?

We have two of these powerheads

And two of these powerheads

I believe this is a UV sterilizer with pump

Around 120 pounds of dry rock I bought new

We also have two Current USA lights, which I believe are Marine Orbits that I didn't get a picture of.
Well as soon as we have some free time, we need to drill holes for the overflows and returns, set the tank on the stand, and start plumbing. I'll try to update this as we progress. My hope is to have the tank on the stand by the middle of next week. But with our hectic work schedules, it's hard to say.
Any suggestions, criticisms, well-wishes, and general bufoonery are certainly welcome in this thread.
I just realized how blurry some of my pictures are from my phone's potato camera.
I work for a commercial contractor in the New Orleans area. We started building our new office about a year ago. During the planning stages, I asked the owner if it was ok if I set up a small aquarium in my office. I have a 30 gallon sitting around my house unused, so I was going to maybe do a Fairy Cichlid tank.
Being the guy that he is, his answer was "no, you're not putting a 30 gallon tank in your office. We're going to put a 100+ gallon tank in the wall." Pretty cool, huh?
The tank will be viewable on two sides: one from my office, the other from the conference room.
Here's the conference room view:
This is the view from my office:
We had a time of finding a tank that would suit our needs. The boss bought a used reef setup off of Facebook Marketplace without consulting me first. He got a real good deal on it, but after looking at it, we realized that it didn't really suit our needs.
So I ordered a tank from American Aquariums. We received it last Wednesday. The dimensions are 72x18x22. I haven't taken it completely out the box yet, but here's a shot of the top:
The tank has an overflow on each side. This is a problem, I soon realized, because of the sump we ordered from Seamless Sumps. The sump we got only has one filter sock. We will need two filter socks since there will be two overflows. I ordered a magnetic holder online. We'll see if it works out, I guess. My first thought was to just have one overflow lead to the sump, and have the other just deal with the returns. But that would leave an overflow full of stagnant water, which is something I don't want.
I should take this moment to mention that I have zero experience with saltwater tanks in general. I come from the high tech freshwater planted tank world. So, I've been doing a lot of studying. I've picked up a lot of info from here and other areas, but I really have no idea what I'm doing.
Anyway, this is the sump. We chose the Seamless brand because of space limitations in the cabinet. They are custom made (without any input from me; I really wish the boss would stop doing this to me). Because there is no way that I'd be able to get a full sized tank under the tank with those vertical braces, I needed something modular that I could put in and take out piece by piece. Seamless fit the bill.
So, on to the equipment I have to work with. Like I said, the boss picked up a used reef tank, which came with all the equipment. I need to study up on what we have to see if it will work in our situation.
Heater controller
Wave Maker
Lights ramp timer
Return pumps. We have three of these, which seems like overkill. Do yall have an opinion on these?
We have two of these powerheads
And two of these powerheads
I believe this is a UV sterilizer with pump
Around 120 pounds of dry rock I bought new
We also have two Current USA lights, which I believe are Marine Orbits that I didn't get a picture of.
Well as soon as we have some free time, we need to drill holes for the overflows and returns, set the tank on the stand, and start plumbing. I'll try to update this as we progress. My hope is to have the tank on the stand by the middle of next week. But with our hectic work schedules, it's hard to say.
Any suggestions, criticisms, well-wishes, and general bufoonery are certainly welcome in this thread.
I just realized how blurry some of my pictures are from my phone's potato camera.


")