150 gal Double Decker tank build

4nreefer

New Member
View Badges
Joined
Nov 22, 2019
Messages
22
Reaction score
29
Rating - 0%
0   0   0
This thread will show details of my 150gal double decker tank build...

The initial plan was actually for a 75 gallon tank but with an interesting turn of event the 75gal was upgraded to a 150. I helped a friend breakdown his 150gal tank because he wanted to leave the hobby. he originally had planed to sell his tank and equipment but ended up giving them to me and my other friend who helped break down the tank. I only needed the tank since I already had most of the equipment so I gave my other friend the rest of the equipment.

The plan is to have the 150 gallon Main Display tank on a steel stand with a 40breeder Anemone/Clownfish tank in the bottom of the stand, hence the theme: "Double Decker."

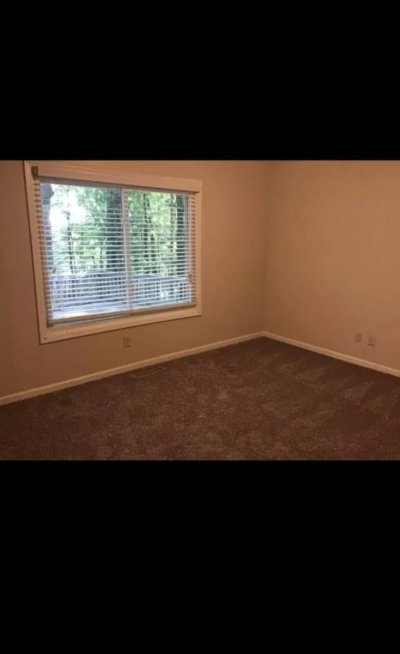
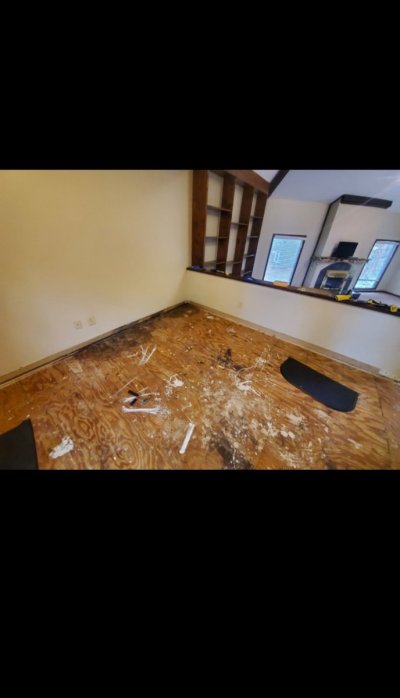
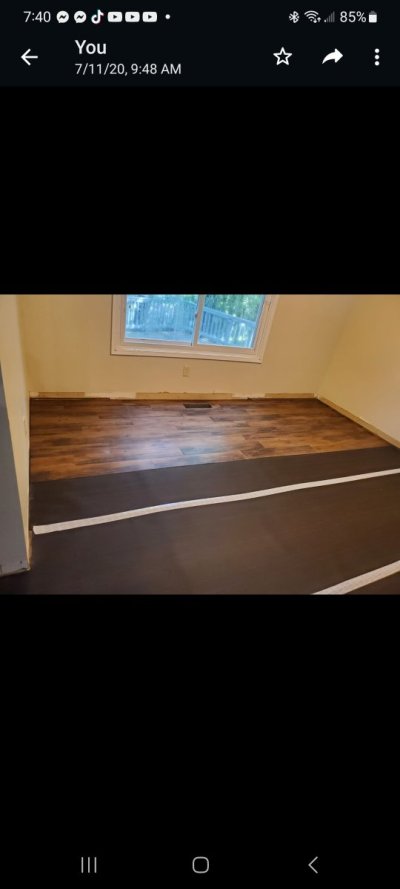
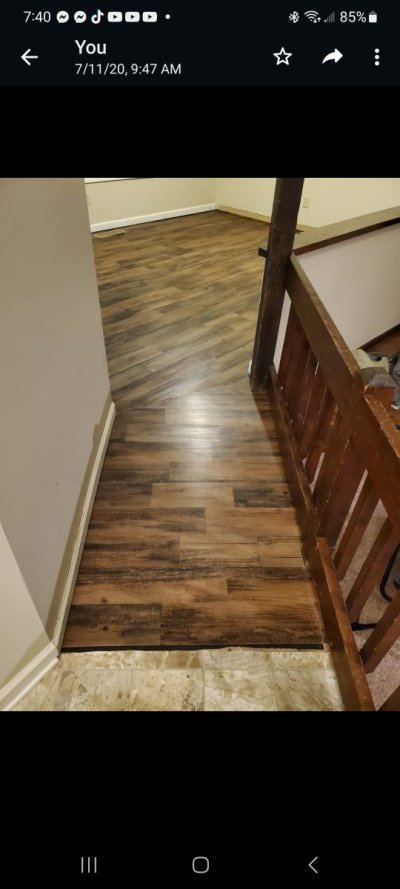
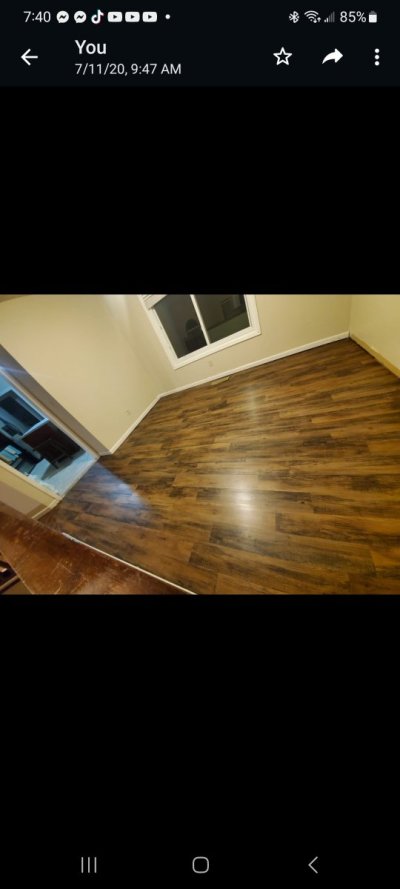
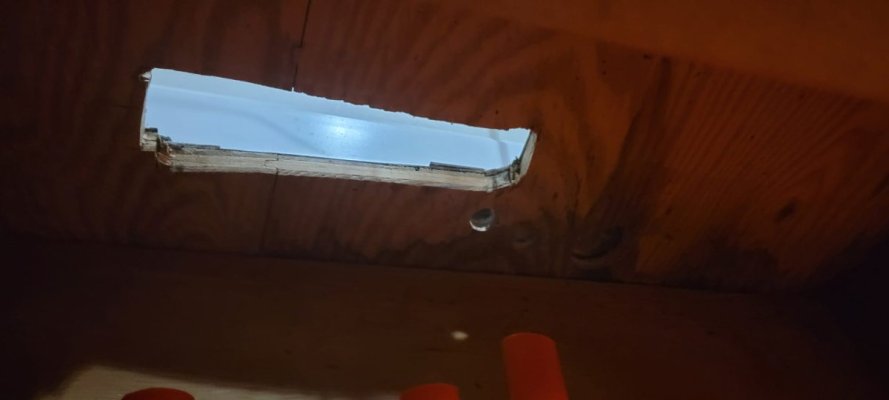
The position that was chosen for the tank was the dining area which sat on top of a spare room in the garage/basement. The Idea is to transform that room into a filtration room. The first step I took was to reinforce the floor beams with three extra beams to give the floor more strength and stability to hold the tank.

Screenshot_20230305_190245_WhatsApp.jpg Screenshot_20230305_190257_WhatsApp.jpg Screenshot_20230305_190310_WhatsApp.jpg Screenshot_20230305_190257_WhatsApp.png Screenshot_20230305_190314_WhatsApp.jpg
 
Last edited:
OP
OP
4nreefer

4nreefer

New Member
View Badges
Joined
Nov 22, 2019
Messages
22
Reaction score
29
Rating - 0%
0   0   0
After the beams was completed, the next step was to change the carpet on the floor to millennium floor. the reason I chose this flooring was to help to easily clean up spills both from the tank and from the kids on the dinning table...lol

To do this, I removed the carpet, thoroughly cleaned up the floor, and placed a layer of sheet roof. The reason for using sheet roof was to help create some sort of cushion between the millennium floor boards and the floor, another reason was to eliminate any uneven surfaces on the floor. Then, vacuumed the sheet roof to remove any debris.

Next I laid down the flooring one plank at a time, making sure to cut to fit irregular spaces. It is important to make sure the planks doesn't line up evenly to create a more natural look as shown in the picture below. While installing the flooring, I was sure to cutout certain holes like the A/C vents which in my case was on the floor.
 

Attachments

  • Screenshot_20230305_193941_WhatsApp.jpg
    Screenshot_20230305_193941_WhatsApp.jpg
    56 KB · Views: 23
  • Screenshot_20230305_193957_WhatsApp.jpg
    Screenshot_20230305_193957_WhatsApp.jpg
    66.1 KB · Views: 25
  • Screenshot_20230305_194004_WhatsApp.jpg
    Screenshot_20230305_194004_WhatsApp.jpg
    46.1 KB · Views: 22
  • Screenshot_20230305_194008_WhatsApp.jpg
    Screenshot_20230305_194008_WhatsApp.jpg
    43.5 KB · Views: 26
  • Screenshot_20230305_194014_WhatsApp.jpg
    Screenshot_20230305_194014_WhatsApp.jpg
    75.9 KB · Views: 24
  • Screenshot_20230305_194018_WhatsApp.jpg
    Screenshot_20230305_194018_WhatsApp.jpg
    51.3 KB · Views: 27
  • Screenshot_20230305_194027_WhatsApp.jpg
    Screenshot_20230305_194027_WhatsApp.jpg
    55.9 KB · Views: 29
OP
OP
4nreefer

4nreefer

New Member
View Badges
Joined
Nov 22, 2019
Messages
22
Reaction score
29
Rating - 0%
0   0   0
Next I started working on the filtration room in the basement. I helped a friend move his 220 gallon tank and he gave me his 75gal sump that he didn't need anymore. This increased the sump volume tremendously from a 25gal to 75 gal. The idea of the filtration room was to have the refugium, sump, equipment, hospital tank and WTC station. I also wanted to access the tanks (sump and fuge) while standing rather than having them on the floor. With this in mind, we got to work. My very first 75gal tank came with a stand but I had rebuilt a different stand for that tank. So I used the stand for the sump and built a slightly taller stand for the refugium to sit on so that gravity can take control. I got a 40breeder tank and drilled two holes to hold the 1 1/4 bulkheads. I then routed the fuge to the sump and started cycling the tank. One important thing I learnt during this process is that with gravity, the lines should always be below the drain holes. if it's above the hole, then the water might not flow through.

I also started the plumbing process.

For plumbing, I got some orange pipes from an online vendor. the sizes included 3/4", 1", and 1 1/4". I also got some ball valves.

For the Nem/Clownfish tank, I got an Eshopps prodigy L overflow box. I chose this overflow box due to its sleekness but mainly because it has three drain holes, two main drains and one emergency drain. The 150 gal also had two drain holes.

The plan is to connect the both tanks together to the drain in the sump. to do this, I constructed the drain system in such a way that the right drain hole on the MD links to the right drain hole on the nem tank and down to the sump and same on the left side as shown below.

I also built a manifold. the manifold has four outlets all connected to a quick disconnect. the manifold would supply the refugium, chiller, media reactor (as needed), and UV sterilizer as shown in the video below.

20211003_203659.jpg 20211031_121515.jpg 20211031_183908.jpg IMG-20211029-WA0003.jpeg
 

Attachments

  • 20210925_123536.mp4
    58.4 MB
Last edited:
OP
OP
4nreefer

4nreefer

New Member
View Badges
Joined
Nov 22, 2019
Messages
22
Reaction score
29
Rating - 0%
0   0   0
The next step in the filtration room was to build the Auto Water Change Station.

To do this I got the RODI system I used on my previous system. I got two 30gal drums, one for freshwater and the other for mixing salt. The plan is to allow water flow into one tank from the RODI system and then transferred to the other tank where the water would be mixed with salt. A Neptune DOS would be used to perform an automatic water change. A Neptune Cor-15 would serve as the pump to transfer water between tanks and also for circulation in the saltwater tank. There would also be two rubber faucets to allow me to get water from either tank at anytime and some ball valves to control the direction of the water.

We also used this time to treat the rocks. First I soaked them in bleach overnight, then sun dried them. After they dried off, I soaked them again overnight in Prime and then sun dried them again. once they were dried, I soaked them in a tub with a wave maker and started the cycle process for the rocks.

Screenshot_20230306_014024_WhatsApp.jpg 20211118_103835.jpg
 
Last edited:
OP
OP
4nreefer

4nreefer

New Member
View Badges
Joined
Nov 22, 2019
Messages
22
Reaction score
29
Rating - 0%
0   0   0
Now that the filtration room is complete is time for the Double Decker main display, time for the fun part.

the first step was to put the put the 150gal tank and the steel stand in position. After that, I got a 40breeder tank for the nem/clownfish and decided to build a peninsular tank. As stated earlier, I got a Eshopps Prodigy L overflow box for the nem tank. Using the guide that came with the overflow box, we made a peninsular tank with the 40breeder, drilling two holes on the side for the drain and two holes for the intake as shown in the video below.

 
OP
OP
4nreefer

4nreefer

New Member
View Badges
Joined
Nov 22, 2019
Messages
22
Reaction score
29
Rating - 0%
0   0   0
Next was to place the tanks in position and create a passage.

The anemone tank was placed directly under the Main display to create the double decker look.

I had to cut a hole on the floor to create a passage to the sump in the basement. Using a jig saw, we opened up a hole wide enough to hold all the pipes that would go through it.
 

Attachments

  • IMG-20220615-WA0002.jpg
    IMG-20220615-WA0002.jpg
    39 KB · Views: 23
OP
OP
4nreefer

4nreefer

New Member
View Badges
Joined
Nov 22, 2019
Messages
22
Reaction score
29
Rating - 0%
0   0   0
Now that all the holes are drilled, We put the tank in place and started plumbing.it was time for the fun part, PLUMBING!!! :)

As stated earlier we used orange pipes from an online vendor. The main display has two drain holes and two intake holes. The drain holes used a 1" pipe while the intake holes used 3/4" pipes.

The Nem tank had three drain holes and two intake holes. The drain holes also used 1" pipes while the return holes used 3/4 pipes.

Using a Tee connector, I connected the two intakes for the MD together and linked them to the Neptune COR-20 return pump located in the sump. I also did the same for the Nem tank, which had a Neptune COR-15 return pump.

In the basement, using a 1-1/4 " pipe, we made two trident plumbing designed to connect all drains to the sump.

The left drain of the MD and the Nem tanks connected to one of the trident, and the right drains of both tanks connected to the other trident. The third hole on the Nem tank was used as an emergency drain and was connected straight to the drain but high enough that if water does come through it be loud enough to alert me that something is wrong. 20211212_215047.jpg 20211212_204640.jpg
 

Attachments

  • 20211223_222851.mp4
    74.6 MB
  • 20211224_022728.mp4
    99.5 MB
Last edited:
OP
OP
4nreefer

4nreefer

New Member
View Badges
Joined
Nov 22, 2019
Messages
22
Reaction score
29
Rating - 0%
0   0   0
Now that the plumbing was done, we moved on to the next step. Leak test.

To perform the leak test, I connected the an RODI tube to the RODI station down in the basement and filled the MD and then the Nem tank. after both tanks were filled, I manually filled the drain tanks and of course there was a little bit of leak. Luckily it was just from the seal on the bulkheads. Tightening the bulkheads fixed the leak issues.
 

Attachments

  • 20211227_101408.mp4
    85.4 MB
OP
OP
4nreefer

4nreefer

New Member
View Badges
Joined
Nov 22, 2019
Messages
22
Reaction score
29
Rating - 0%
0   0   0
After the leak test was done it was time for salt and sand.
We mixed the salt in both tanks raising the salinity to 1.024.
Then added live sand in

Note: It is very important to scan through the sand for any unwanted material.
When I added the sand, I and ran my hands through it and discovered a rusted washer in the sand as shown below.
 

Attachments

  • 20211229_000653.mp4
    21.2 MB
OP
OP
4nreefer

4nreefer

New Member
View Badges
Joined
Nov 22, 2019
Messages
22
Reaction score
29
Rating - 0%
0   0   0
After adding the sand, the next step is to cycle the tank.

Luckily for us, at this point it's been about a month since refugium and sump in the basement have been running successfully, growing tons of pods and also incredibly good growth on the macro algae.

This helped to hasten the cycle time for the main display. In theory, merging the tanks with the tanks with the fuge and sump was more like doing a large water change...

Once the tanks were cycled, we added our cooked live rocks and started to transfer all the live stocks.

the transfer was a success. all the livestock was happy with their new home.

For lighting, the Double Decker tank was placed in a way that it received direct sunlight. Sunrise and sunsets were the best time to watch the tank. all the corals would get all excited during this times.

The MD tank also had eight ATI T5 bulbs and two Orphek LED strips. The Nem tank ran off a Vipar Spectra.

Thank you for taking the time to read through this build. I hope it was helpful. Below is the tank, for your viewing pleasure.

IMG-20220103-WA0002.jpg IMG-20220103-WA0001.jpg IMG-20220103-WA0003.jpg IMG-20220103-WA0007.jpg IMG-20220103-WA0006.jpg IMG-20220103-WA0005.jpg IMG-20220103-WA0010.jpg IMG-20220103-WA0013.jpg IMG-20220103-WA0014.jpg IMG-20220103-WA0015.jpg IMG-20220103-WA0012.jpg IMG-20220103-WA0016.jpg IMG-20220103-WA0017.jpg IMG-20220103-WA0018.jpg IMG-20220103-WA0019.jpg IMG-20220103-WA0009.jpg IMG-20220103-WA0020.jpg IMG-20220103-WA0021.jpg IMG-20220103-WA0023.jpg IMG-20220103-WA0022.jpg IMG-20220103-WA0025.jpg IMG-20220103-WA0024.jpg 20220125_153752.jpg
 

Attachments

  • 20220101_143653.mp4
    47.6 MB
Last edited:

Gumbies R Us

Another Fish in the Sea
View Badges
Joined
Nov 10, 2022
Messages
9,940
Reaction score
19,127
Location
North Georgia
Rating - 0%
0   0   0
After adding the sand, the next step is to cycle the tank.

Luckily for us, at this point it's been about a month since refugium and sump in the basement have been running successfully, growing tons of pods and also incredibly good growth on the macro algae.

This helped to hasten the cycle time for the main display. In theory, merging the tanks with the tanks with the fuge and sump was more like doing a large water change...

Once the tanks were cycled, we added our cooked live rocks and started to transfer all the live stocks.

the transfer was a success. all the livestock was happy with their new home.

For lighting, the Double Decker tank was placed in a way that it received direct sunlight. Sunrise and sunsets were the best time to watch the tank. all the corals would get all excited during this times.

The MD tank also had eight ATI T5 bulbs and two Orphek LED strips. The Nem tank ran off a Vipar Spectra.

Thank you for taking the time to read through this build. I hope it was helpful. Below is the tank, for your viewing pleasure.

IMG-20220103-WA0002.jpg IMG-20220103-WA0001.jpg IMG-20220103-WA0003.jpg IMG-20220103-WA0007.jpg IMG-20220103-WA0006.jpg IMG-20220103-WA0005.jpg IMG-20220103-WA0010.jpg IMG-20220103-WA0013.jpg IMG-20220103-WA0014.jpg IMG-20220103-WA0015.jpg IMG-20220103-WA0012.jpg IMG-20220103-WA0016.jpg IMG-20220103-WA0017.jpg IMG-20220103-WA0018.jpg IMG-20220103-WA0019.jpg IMG-20220103-WA0009.jpg IMG-20220103-WA0020.jpg IMG-20220103-WA0021.jpg IMG-20220103-WA0023.jpg IMG-20220103-WA0022.jpg IMG-20220103-WA0025.jpg IMG-20220103-WA0024.jpg 20220125_153752.jpg
Nice looking tank!!! Your progress has been really neat to see!!
 

High pressure shells: Do you look for signs of stress in the invertebrates in your reef tank?

  • I regularly look for signs of invertebrate stress in my reef tank.

    Votes: 42 31.3%
  • I occasionally look for signs of invertebrate stress in my reef tank.

    Votes: 31 23.1%
  • I rarely look for signs of invertebrate stress in my reef tank.

    Votes: 27 20.1%
  • I never look for signs of invertebrate stress in my reef tank.

    Votes: 34 25.4%
  • Other.

    Votes: 0 0.0%
Back
Top