29 Gallon Reef build...

Subarody

Community Member
View Badges
Joined
May 2, 2020
Messages
56
Reaction score
73
Rating - 0%
0   0   0
Hey reefing community!

I thought I would share my experience starting my new reef aquarium after being out of the hobby for about 11 years. My previous tank was a 36G bowfront mixed reef and I had great success with it. I have been looking forward to getting back into the hobby ever since I dismantled the first tank and the time has finally come! This is certainly not my dream build (check back in about 5 or 6 years for that!!) but it's a great opportunity for me to get back into the hobby with new technology and gain some experience before I settle on a larger tank.

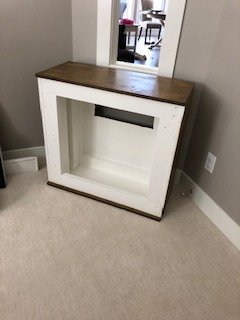
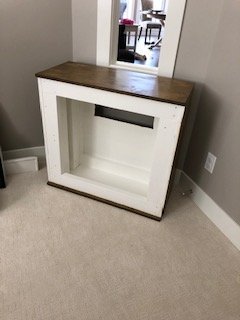
I decided to build my stand, stain and varnish it to give it a personal look and feel. I'll detail the process in this thread highlighting some of my mistakes and what I did to fix them (or not fix them) and try to keep thing updated with pictures.

Overview of the system so far:
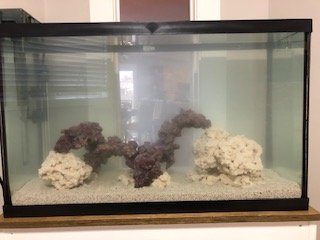
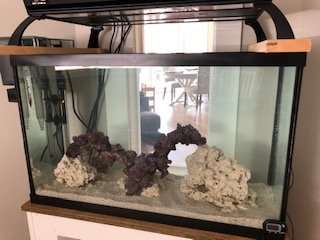
  • 29 Gallon marineland glass tank
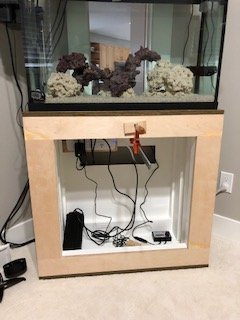
  • DIY stand
  • Aquaclear 70 hob filter
  • innovative marine wavelink desktop wavemaker (love it!)
  • jager 100W heater
  • coralife 150W MH 14K with 2 65W power compact bulbs and 2 moonlights (yes, this light is from my previous tank about 14 years from when I started it and I can no longer get the 65 w bulbs so a replacement is likely in the near future)
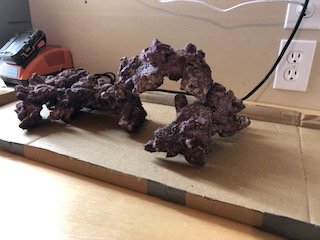
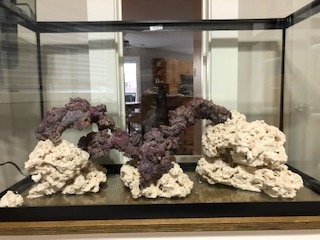
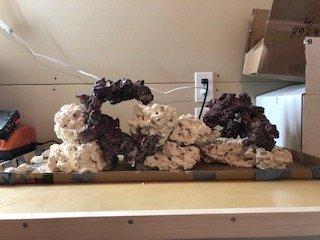
  • Caribsea liferock nanoarches – 10lbs
  • Marco Rock – Premium dry Key Largo – 10lbs flat one side, 8lbs regular
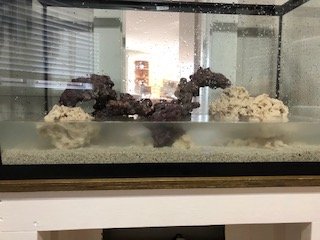
  • Caribsea Aragonite 0.5mm-2.0mm dry sand
That is what I started with May 1, 2020.

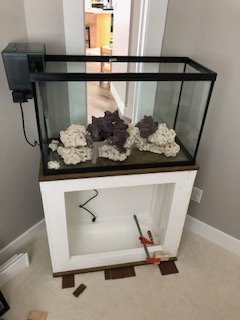
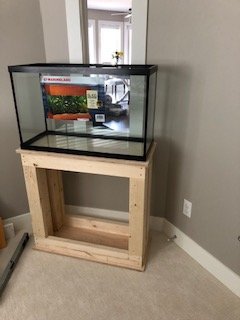
I'll get the details of my stand build shortly but here are a few pictures to get started.
60762358953__1A671818-989B-4368-8AA0-3BDA98D2F4EB.JPG IMG_1666.jpg IMG_1742.jpg IMG_1757.jpg IMG_1786.jpg
 

SPR1968

No, it wasn’t expensive dear....
View Badges
Joined
Feb 21, 2017
Messages
20,037
Reaction score
124,675
Location
Nottinghamshire England
Rating - 0%
0   0   0
Great start and keep the pictures coming

Welcome to R2R as well!
 
OP
OP
S

Subarody

Community Member
View Badges
Joined
May 2, 2020
Messages
56
Reaction score
73
Rating - 0%
0   0   0
Coming back into the hobby I had always said I would do a tank with a sump, minimum 75 gallons...then I realized the cost of setting up such a tank and decided that wasn't going to happen for several years so I would have to figure out something else...enter the 29 gallon sumpless tank I am currently working on.

It all really started when my wife made an off handed comment of getting a fish for our two girls (age 1 and 4) to help with being stuck at home during Covid-19. She very well knew that I had made a decision to give up a 36 gallon saltwater aquarium to make her a part of my life before we married and that was more than11 years ago...she has also been married to me for 11 years and knows that once an idea is in my head it's hard to get out and I follow through with what I say! All this to say the little freshwater betta bowl became a 29 gallon saltwater aquarium...you know...what 4 year old doesn't want a clownfish:).
 
OP
OP
S

Subarody

Community Member
View Badges
Joined
May 2, 2020
Messages
56
Reaction score
73
Rating - 0%
0   0   0
Now to the build:

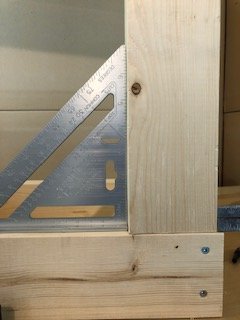
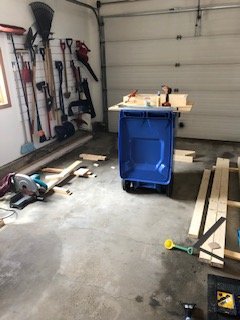
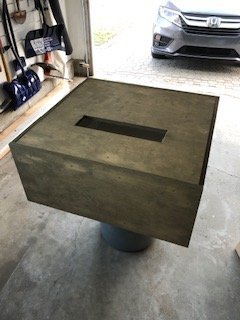
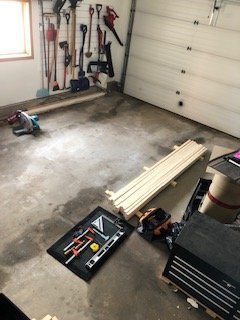
I decide to build my own stand for this tank and I've certainly learned a few things along the way. I decided on a 2x4 frame and ended up sheeting it with 3/4" birch plywood. I had intended to use 1/2" or even 1/4" plywood for the sheeting but I decided the 3/4" gave me a peace of mind for the added strength and rigidity as my frame was not perfectly built as you'll see in the pictures.

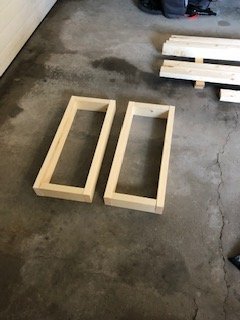
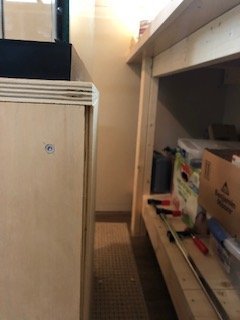
I made a top and bottom 2x4 frame and then supported it with 2 cripples on each corner plus a 3rd 2x4 on the inside of each corner to screw into. My initial 2x4 frame was not perfectly square, it had a rotational issue that must have been from the quality of the wood used and it did not sit perfectly flat once I had screwed and glued the bottom frame together. As I had very little experience with woodworking I soon found out that a slight imperfection at start becomes a much larger imperfection at the end!!! Take your time a do it right from the start.

more to come later...

60780266849__8A1415D5-18CF-48CE-8A27-5BE842DB81A6.JPG 60780518510__5F5CA817-E511-4FC5-B7F2-19934FFAC879.JPG 60780519617__1AE98CD9-9CC9-48D0-863A-97867E2B9C64.JPG IMG_1686.jpg IMG_1687.jpg IMG_1695.jpg IMG_1709.jpg
 
OP
OP
S

Subarody

Community Member
View Badges
Joined
May 2, 2020
Messages
56
Reaction score
73
Rating - 0%
0   0   0
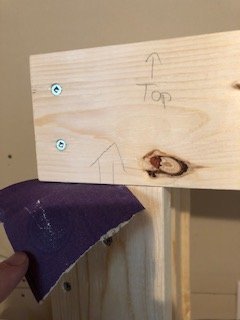
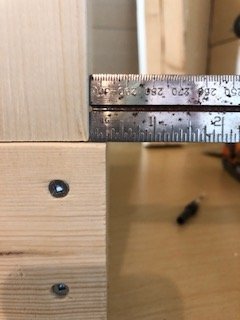
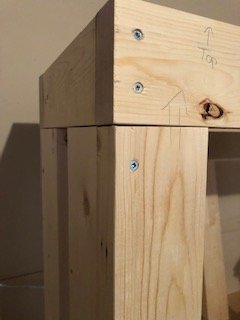
As you can see in the previous posts my stand is far from perfectly square. Looking back at how I built the stand I noticed one of the frames (top/bottom) had a wobble to it that I believe came from a slightly warped 2x4. I tried to correct this by screwing and gluing the frame together with weight on it to keep it flat but as soon as I removed the weight the warp came back.

I continued on with building the stand and that led to a final product that was not square.

In the end there were small (sandpaper width) gaps between the top frame and the vertical 24 supports as seen in the picture. The sandpaper did not go all the way through so there was definitely support from those 2x4's frame. I decided to continue with the stand but made the decision to cover the outside with 3/4" plywood rather than 1/4" or 1/2" as planned originally. This provided some additional structural support. Given the small tank and talking with some others about the build I felt comfortable leaving it with the gaps.

If anyone has any suggestions to correct these issues for my future build let me know!! This was my first time building something like this.
 

RL6723

Active Member
View Badges
Joined
Mar 14, 2019
Messages
138
Reaction score
166
Rating - 0%
0   0   0
Hey reefing community!

I thought I would share my experience starting my new reef aquarium after being out of the hobby for about 11 years. My previous tank was a 36G bowfront mixed reef and I had great success with it. I have been looking forward to getting back into the hobby ever since I dismantled the first tank and the time has finally come! This is certainly not my dream build (check back in about 5 or 6 years for that!!) but it's a great opportunity for me to get back into the hobby with new technology and gain some experience before I settle on a larger tank.

I decided to build my stand, stain and varnish it to give it a personal look and feel. I'll detail the process in this thread highlighting some of my mistakes and what I did to fix them (or not fix them) and try to keep thing updated with pictures.

Overview of the system so far:
  • 29 Gallon marineland glass tank
  • DIY stand
  • Aquaclear 70 hob filter
  • innovative marine wavelink desktop wavemaker (love it!)
  • jager 100W heater
  • coralife 150W MH 14K with 2 65W power compact bulbs and 2 moonlights (yes, this light is from my previous tank about 14 years from when I started it and I can no longer get the 65 w bulbs so a replacement is likely in the near future)
  • Caribsea liferock nanoarches – 10lbs
  • Marco Rock – Premium dry Key Largo – 10lbs flat one side, 8lbs regular
  • Caribsea Aragonite 0.5mm-2.0mm dry sand
That is what I started with May 1, 2020.

I'll get the details of my stand build shortly but here are a few pictures to get started.
60762358953__1A671818-989B-4368-8AA0-3BDA98D2F4EB.JPG IMG_1666.jpg IMG_1742.jpg IMG_1757.jpg IMG_1786.jpg
I really like your stand!! Great Job!!
 
OP
OP
S

Subarody

Community Member
View Badges
Joined
May 2, 2020
Messages
56
Reaction score
73
Rating - 0%
0   0   0
I painted the interior with an oil based primer followed by an interior/exterior paint and used an oil based Varathane stain and polyurethane top coat (4 coats of top coat) for the outside of the stand. I used a wood filler to cover the screw holes and as you can see they are noticeable after the stain. Two options to fix this - sand way more to get all the excess wood filler off around the screw hole or better yet screw from the inside and avoid the screw holes on the outside.

Polyurethane is a bit of bear to get a nice finish coat but I was satisfied with the results...at least at certain angles!

IMG_1705.jpg IMG_1736.jpg IMG_1757.jpg
 
OP
OP
S

Subarody

Community Member
View Badges
Joined
May 2, 2020
Messages
56
Reaction score
73
Rating - 0%
0   0   0
Sorry I've abandoned my build thread lately. I can assure you the tank has continued and I currently have 2 clowns in my QT tank at the moment. I'll pick up where I left off and continue the build...

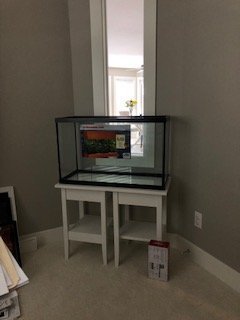
SO, stand is built, painted/stained and in place. I used synthetic shims along the front edge of the stand to ensure it was level front to back. and side to side. All is good! I played around with the rock scape prior to placing it in the tank and then again once in the tank. I changed it several times over the course of a few days to make sure I was happy with the final results.

April 30, 2020 and it was finally time to add water!! I put in the rock first, 2 bags of caribsea aragonite and slowly poured the water over the rockwork. I should mention I rinsed each bag of aragonite in a 5 gallon bucket to help prevent and cloudy tank and it worked great! The tank was clear 16hrs after filling.

IMG_1792.jpg IMG_1760.jpg IMG_1816.jpg IMG_1817.jpg IMG_1821.jpg
 
OP
OP
S

Subarody

Community Member
View Badges
Joined
May 2, 2020
Messages
56
Reaction score
73
Rating - 0%
0   0   0
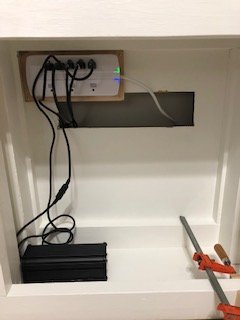
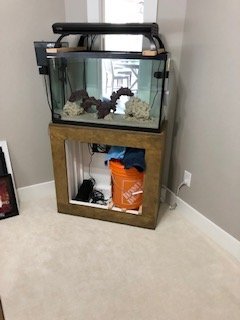
I wanted to get the tank running sooner than later so I did not add any doors to the stand but thought I could finish it in the future. I decided to build a face frame for the front and stain it to match which looks nice and as a bonus gave me an extra 3/4" depth under the stand for storage of a future top off water system. For the time being it's a home depot 5 g pail for my RODI water that I manually pour in as the noise from the water cascading into the tank from the filter increases to the point of annoyance. Once I have fish in there I'll be a little more vigilant with my top offs. I also added a power par under the stand and some timers (not shown) for my old school power compact/MH light fixture I ran in my previous tank 12 years ago.

IMG_1825.jpg IMG_1842.jpg IMG_2044.jpg
 
Back
Top