38-Gallon Reef

Apollo7235

Well-Known Member
View Badges
Joined
Dec 31, 2020
Messages
751
Reaction score
820
Location
Orlando, FL
Rating - 0%
0   0   0
Huulllooooo out there!

Here I am, finally, with progress photos and some build info for my reef-tank-to-be!

Backstory: I have always wanted a reef tank and hubby FINALLY bought me a tank to get started this last Christmas. We have a 4 month-old beautiful little girl, so I have been working on my tank when I have spare time (between our baby, Great Dane, St. Bernard, and my full time remote job, I don't seem to have much of that anymore, haha!).

Anyway, here's the low-down:

38-gallon display tank
20-gallon sump tank (DIY -- scary, I know!)

Hubby built me a beautiful stand with a gorgeous quartz top:

63554368485__D9927300-746B-499D-865D-E3E29B7C388B.jpg
63554369763__1B5661C8-8AE4-4E6A-8415-AB7ABBFF8C02.jpg


I chose the AQUATICLIFE Reverse Osmosis Water Filtration Unit. It is rated 75 GPD and it comes with an auto shut-off solenoid, float valve, and all of the necessary tubing and installation components. It was pretty easy to set up once I figured out what the heck the instructions were talking about, hahaha. I installed this system on our screened in back porch and used one of the adapters to connect it directly to one of our garden hoses. Handy dandy, runs great, fills the buckets to about the 4-gallon line within 2-4 hours depending on how high I set the water pressure, and the float valve is reliable. It makes a healthy groaning noise when the bucket is filled (or, at least, it does for me), so I haven't had any 'oops, I left it sitting full and forgot about it' tests on the integrity of the auto shut-off solenoid (yet ;)). Link below the photo:

IMG_9051.JPG


I ordered 35 pounds of the Marco Rocks Reef Saver Dry Rock, as well as a pound of the Reef Saver Shelf Rock. I opted for the 25 Pound Aquascaping Bundle from Marine Depot, but I don't really see the value. The tiny 2oz. tube of epoxy ended up getting me next to nowhere and the 4oz. tube is only an extra $2 if you order it separately, so my advice: buy it separately ;) After rinsing with RODI water and letting it sit out to dry, this is what I was left with:

63553987493__C6DCDFBA-5617-4824-9ECD-2B3B3C4E61BE.jpg


I also ordered a 40 pound bag of the CaribSea Dry Aragonite Special Grade Reef Sand and, boy, oh boy. Does that stuff ever come clean? I finally gave up after rinsing, and rinsing, and rinsing, and rinsing, and rinsing............... No photo because, I'm not even going to sit here and lie, I was frustrated. Haha!

This is what the tank looked like after being mostly filled with salt water (I chose to use Tropic Marin Pro-Reef Salt Mix, which we paid an arm and a leg for at the local fish store since it's out of stock literally everywhere online :rolleyes:). Excuse the jumble of rocks; I could not decide how I wanted everything (Yes, I know. Woman that I am ;)), so I decided to aquascape underwater which actually worked out really well. I decided to also run the mechanical filter that came with the tank to clear out all the wonderful cloudiness from the sand. Hopefully it didn't just settle to the bottom and was actually filtered out. I ran some cheapy powerheads I found on Amazon to help avoid just that.

IMG_9065.JPG


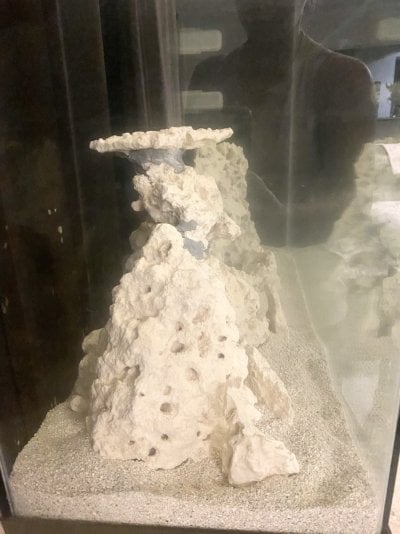
Here is the final result after much aquascaping and moving and adjusting and 'wellllllllll, I don't like it. I'm starting over''s, hahaha. I used the Two Little Fishies Aquastik Epoxy in Stone Grey to create my rock formations, and I have to say, I'm very impressed. It was very easy to use, though stinky, sets quickly, and definitely gets the job done. I found it very easy to work with under water and it definitely proved its integrity holding up that rock shelf until my second order of the stuff came to reinforce it.

I forgot to mention, I blacked out the back of the tank as well as the right side. Considering it is not pre-drilled, I wanted to be sure to hide the plumbing, cords, etc. Also, the right side faces a wall, so no need to have that side clear either. I would much rather the fishes and corals be the object of the eye rather than that far wall, hence the black. I used some self-adhesive vinyl to do this; no, it does not look 100% perfect if you get close and inspect it. Yes, there are little bubbles that are near impossible to get out, but once the rock, sand, and water are in the tank, you can't see it. Plus, when there are critters in there, the last thing you'll notice are the tiny air bubbles in the black background. I actually like the imperfect look as I feel it adds a bit more dimension to the tank.

Anyway, here it is all done (Apologies for the glare. Now you've all seen my daughter's massive playpen that now dominates our living room, haha):

IMG_9239.JPG
IMG_9240.JPG

That's all I have time to write about tonight, so I will continue on in my next post probably about my sump build and all the wonderful issues I'm having with that! Hahaha, until next time!

Thank you very much for reading! Please, I love feedback, so don't be afraid to share it!
 
Last edited:
OP
OP
Apollo7235

Apollo7235

Well-Known Member
View Badges
Joined
Dec 31, 2020
Messages
751
Reaction score
820
Location
Orlando, FL
Rating - 0%
0   0   0
What kind of fish do you have in mind?
I am actually working toward a career in genetics and the genetically selected fishes really interest me. ORA has some BEAUTIFUL clowns as well as some very interesting others, so I think I will be starting there! I would like my first addition to be a host anemone of some sort, although I haven't decided which yet!

Thank you so much for reading!
 
OP
OP
Apollo7235

Apollo7235

Well-Known Member
View Badges
Joined
Dec 31, 2020
Messages
751
Reaction score
820
Location
Orlando, FL
Rating - 0%
0   0   0
As earlier promised, here is the latest on my 20-gallon sump build.

I found an interesting read on DIY sump design and I ultimately decided to go with the recommendations I found there.

Link here:


I especially appreciate the advice about the egg crate-plastic mesh-egg crate at the top of the last baffle (I'll get to how that worked out for me shortly).

The most difficult part of this little project was basically everything to do with the baffles, so pretty much the whole project, hahaha. I had a really hard time finding glass/acrylic in the dimensions I needed (cutting them myself just wasn't an option considering my already limited spare time and personal aversion to cutting glass). I did, however, eventually track down a local plastic supplier who did an AMAZING job laser-cutting some extremely dark smoked acrylic baffles for me (BONUS: they came with the edges somewhat polished already). Super quick and easy ordering and very efficient shipping. I HIGHLY recommend my new friends at SIBE-R Plastic Supply:


Guys, I just want to take a moment to reflect and say that I sincerely learned a lot about myself, specifically the length of the fuse on my temper and the threshold of my patience, whilst razor-blading silicone fragments off of everything within a 2' radius of its intended target. Good luck to any of you who choose to travel down this wonderfully scenic route o_O Oh, and be prepared for the smell...... I love vinegar, but holy bananas...........

Here is the finished product:
(Specifics below the photo)
63624360252__AEEE7C59-D7C1-4A1E-A082-7A1A072B7371.jpg


I won't even lie to you guys and say that I'm not super insecure about this little project, because I totally am, but hey, you don't learn if you don't try, right?

Please don't mind the water droplets, I had just brought it in from testing the integrity of my silicone seals chamber by chamber.

I built my sump in reverse of the AdvancedAquariumConcepts diagram because I would like my system to cycle clockwise (If you read my original post, you know that I blacked out the right side of my tank which faces a wall, so my overflow box and overflow plumbing will be hidden over in that area).

I placed my AquaMaxx FC-80 In-Sump Skimmer in the first chamber because I would like to have a small refugium in this sump and my logic tells me that filtering water that comes directly from a refugium may remove the copepods and other beneficial tiny organisms from the water.....? Please correct me if I am wrong in this assumption! Either way, what's done is done and my skimmer is in the first compartment. The AquaMaxx FC-80 Skimmer is rated for 140 gallons with a light bio-load and 70 gallons with a heavy bio-load, so I feel that I am more than sufficiently covered with a total of probably around 50-52-gallons running in my system. I am a believer in getting the 'next step up' with most things, which is what I did here. Hopefully that won't cause me any issues! Also, this skimmer has some really great reviews, so I feel pretty comfortable with my decision. If anyone has used or is currently using this skimmer, I would love to hear some feedback on your experience with it!

The first baffle is 10" high, the second baffle is also 10" but is sitting about an inch to an inch and a half off of the bottom of the tank for the bubble trap section, and the third baffle is 8" high. I chose to raise the height of this baffle and the fourth baffle to 8" to give some extra refugium space considering it is already pretty small at only around 2-gallons. Not-so-pro tip: make sure you can easily fit your hand between the baffles of your bubble trap ALL THE WAY to the bottom of the tank..............Your arm is thicker than your hand ;)

I decided to give the Ultimate Refugium Starter Pack by AlgaeBarn a shot. I chose the sea lettuce as my macroalgae on recommendation from one of the AlgaeBarn experts and I'm pretty excited! I think it will be nice to have the option of feeding my fishies some nice fresh salad should I be so inclined. Considering how small my refugium is going to be, the expert also recommended that I go with the small pack which comes with an ounce of TurboStart 900, 5 of the MarinePure 2"" Cubes, 1 jar of the 5280Pods, an 8 ounce bottle of OceanMagik, and an ounce of Clean Sea Lettuce MacroAlgae. It's pretty cool how they ship these packs in two separate shipments a week apart from each other when it is a brand new tank so you have an opportunity to get your tank started cycling before the copepods and macroalgae need to be added. Unfortunately for me, I received my first shipment few days ago, BUT my tank isn't up and running so I had to ask my new friends at AlgaeBarn to delay the second shipment. Did I mention how wonderful their customer service is? (More on my current issues preventing my tank from running in a later post).


For the fourth and final baffle, I chose to act on the AdvancedAquariumConcepts recommendation of installing the egg crate-plastic mesh-egg crate fish/macroalgae/anything that shouldn't go through the return pump safe-guard. I think the idea is pretty fantastic, personally, but I did manage to ruin my little set-up with all of the adjustments I've been having to make while attempting to get things up and running. I had originally siliconed the egg crates to the baffle and just slipped the plastic mesh between them, but since the silicone won't cure under water, I will have to figure out something different to re-install the pieces once I get this sucker up and functioning correctly.

In my final compartment, I have my handy dandy Eheim Jager TruTemp Aquarium Heater, which I one-step-upped to the 150 Watt, and my Aqueon Quietflow Submersible Aquarium Pump, Model 3000. Unfortunately, this return pump did not work out for me, so I ordered a Sicce Synchra Silent 1.5 Multifunction Aquarium Pump, which will actually be here today (more on what happened with my Aqueon pump in my future 'Why My Tank isn't Running Yet' post). As far as my heater is concerned, I did have to place it diagonally to keep the minimum water level line under water. Whether or not this is going to work out still remains to be seen, so I will follow up with that once I get things up and running (fingers crossed that that will be today!).

**Edit: Since the crash of my macro (RIP), I have moved my heater into the now vacant refugium compartment until I determine a permanent home for it.**

Anyway, I think that about covers my sump build at this present moment, SO, I would love to hear some feedback and pretty please, for the sake of my newbie confidence, be gentle, but honest ;Nailbiting

Thank you so very much for reading! Have a fantabulous day!
 
Last edited:
OP
OP
Apollo7235

Apollo7235

Well-Known Member
View Badges
Joined
Dec 31, 2020
Messages
751
Reaction score
820
Location
Orlando, FL
Rating - 0%
0   0   0
Good day to you all and happy weekend!

We can consider this my 'Why My Tank is JUST NOW Up and Running' post. Hahahaha

Long story short, I was having some serious issues with my return pump overpowering my overflow box, which was seriously baffling considering my Marine Depot OF-800 Overflow Box is rated to handle 800GPH and my Aqueon Quietflow 3000 Return Pump is rated to pump 530GPH at 0' and +/- 325GPH at 4'-6" (DT rim height). After much debate, deliberation and testing, the issue ended up being what my new friend Marine Depot Scott suggested: Aqueon severely under-rating the capacity of their equipment.

So, anyway, we installed my new Sicce Synchra 1.5 pump and, what do you know? All is running perfectly. I have the Sicce running wide open to optimize tank flow and even so, all is right in the world of this newbie tank.

I am super excited to finally be past these issues and I couldn't have done it without the wealth of knowledge and fantastic advice shared by all of you in this amazing R2R community! If anyone is ever struggling with this same or a similar issue, there is an abundance of very helpful advice on my post about my overflow issue. Link to my 'Somebody Please Help Meeeeee' post below:


Next steps:

- Work on fine tuning my water chemistry. I busted out my handy dandy refractometer this morning and, as I already knew it would be, the salinity of my system is very low. When I was adding water to the tank, I decided that, since salt doesn't evaporate, I would rather need to add more to the tank than need to pump water out, hence the 1.018 salinity level.

- Install some wavemakers to establish a healthy amount of water flow. I ordered a pair of Jebao OW-10 Wavemakers on recommendation from @theMeat (thank you!), so I get to play with those when they come in tomorrow.

- Add the TurboStart to get this thing cycling!

Here is my 20-gallon sump in action, overflowing protein skimmer and all! Don't mind the rough holes, we will find something to clean them up, I'm sure. Plus, once hubby gets the doors on the stand, you won't even see them ;)

Please let me know what you guys think! I love feedback! Thank you so much for reading!
IMG_9275.JPG
IMG_9278.jpg
 
Last edited:
OP
OP
Apollo7235

Apollo7235

Well-Known Member
View Badges
Joined
Dec 31, 2020
Messages
751
Reaction score
820
Location
Orlando, FL
Rating - 0%
0   0   0
Lots of activity in the last two days:

It took 6.5 cups of salt mix, but I got the salinity up to 1.025. I'm not sure about other salts, but this Tropic Marin Pro Reef sure is easy to use. I just added it to the bubble trap of my sump since that's where I felt the flow was pretty high and mixed it around a bit with a wooden spoon. Voila, easy peasy. No precipitate and it only took about 2 minutes to dissolve after each addition. Gotta love that!

I noticed that my tank temperature has been hanging around the 77ish (Fahrenheit) range, so I cranked up my Eheim heater to try and get things up around the 80ish mark. I read that having little bit of temperature fluctuation actually can benefit a system in the long run, God forbid a power outage causes a big swing, so I think anything between 79 and 81 will keep me happy, as long as that's not too broad for my inhabitants. I am currently using a JBJ Digi-Temp2 Thermometer and Probe and I am pretty happy with the product thus far. I like being provided with the option to either stick the thermometer in place using double-sided tape or using suction cups and I also appreciate the suction cup they provide for the probe. I chose to place my probe down in the bottom 1/3 of my tank, smack in the middle. I have the suction cup placed on the cord about 2 or 3 inches above the probe itself, so the probe just basically floats in that general vicinity. I love that, with my black background, the probe and cord are almost invisible.

IMG_9316.jpg


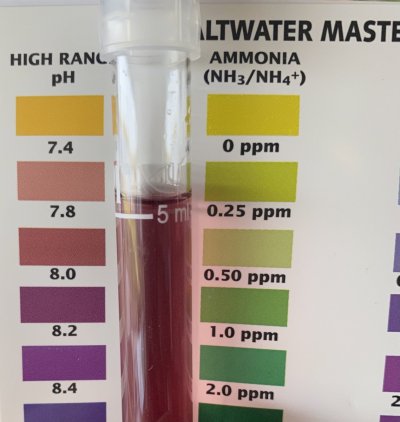
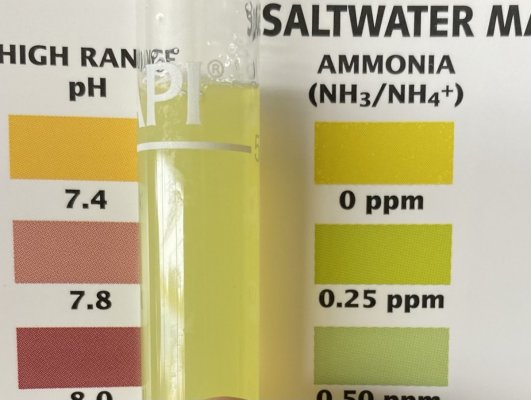
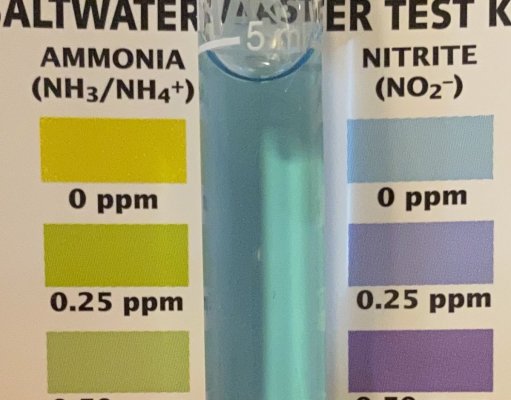
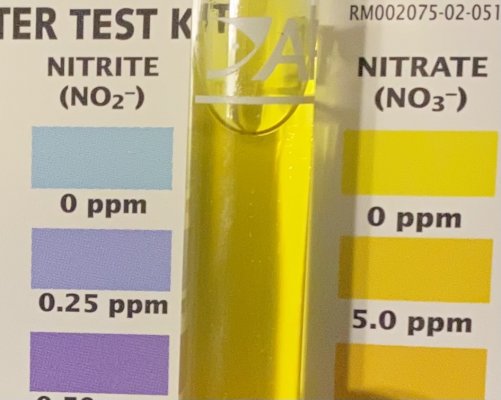
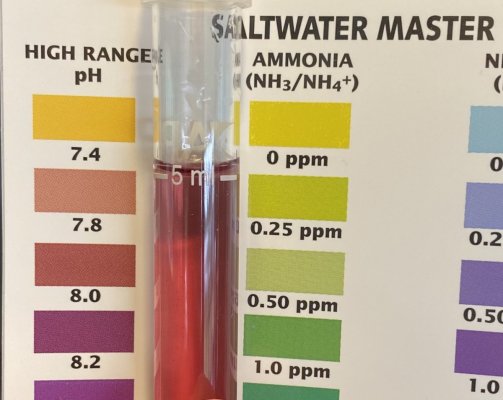
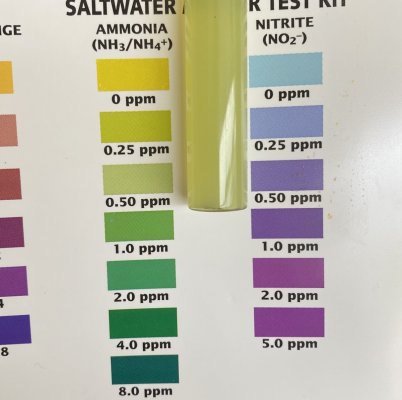
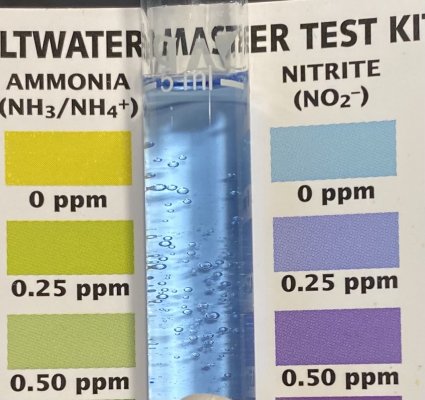
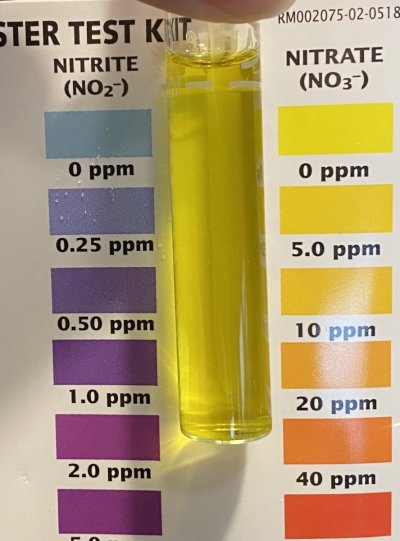
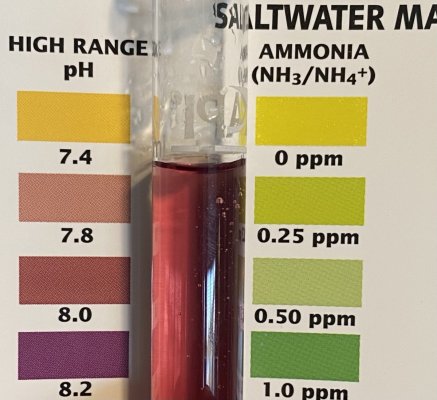
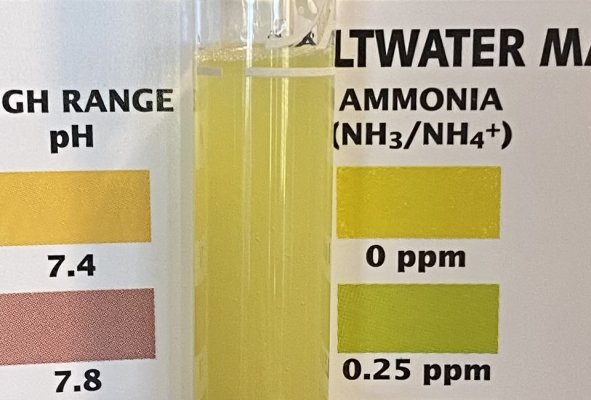
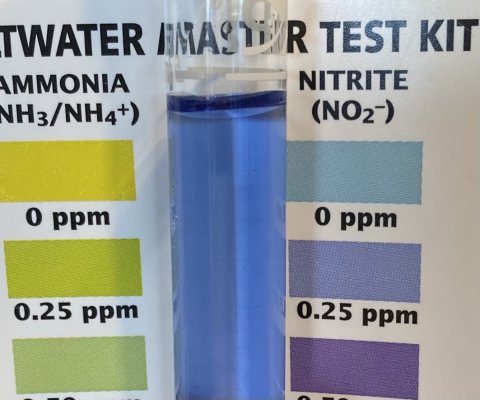
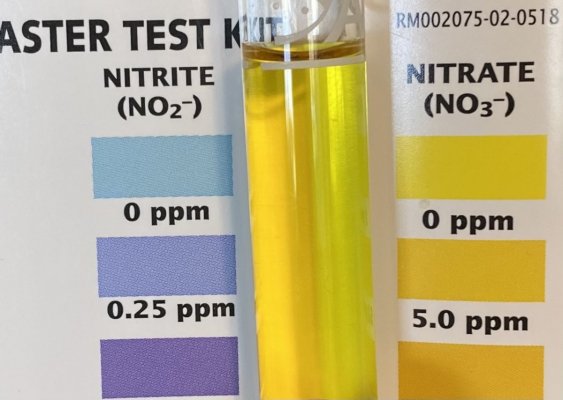
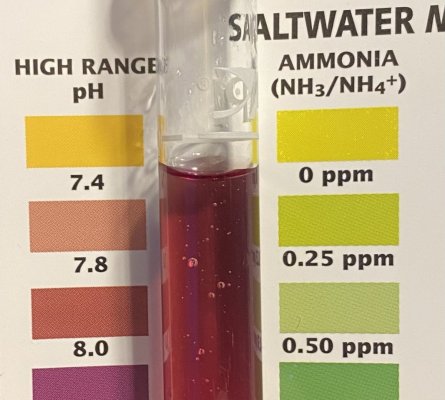
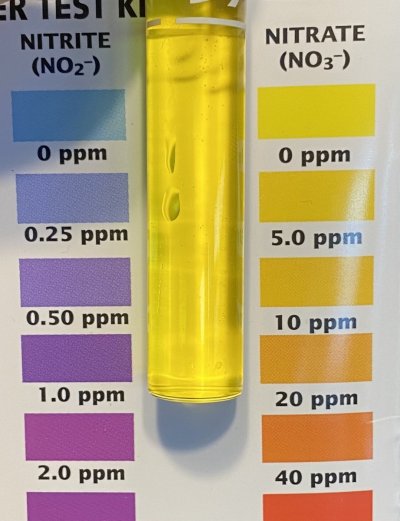
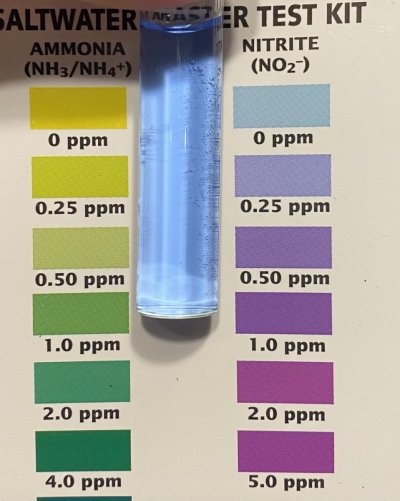
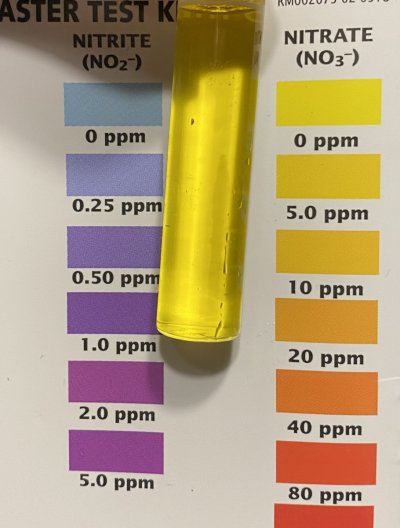
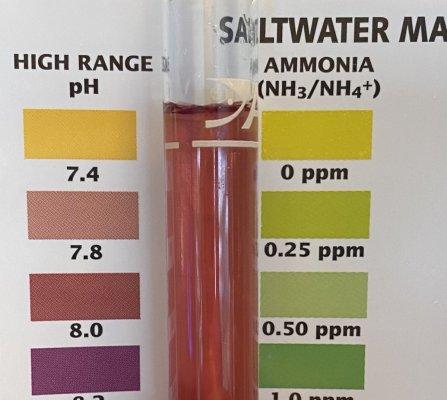
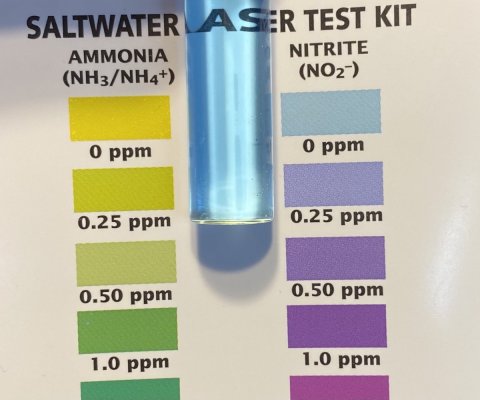
I've read a few posts about ammonia levels spiking after adding the MarcoRocks Reef Saver Rocks, even when they're brand spanking new, so I busted out my handy dandy API Saltwater Master Test Kit and tested for pH, ammonia, nitrite and nitrate. I really enjoyed using this test kit. It was super easy to use; the directions are very clear and they give you the why's, how's and what-to-do's. I also appreciate how the drop amounts are labeled on the bottles as well as in the instructions. Definitely adds to the ease of use.

pH
IMG_9281.JPG


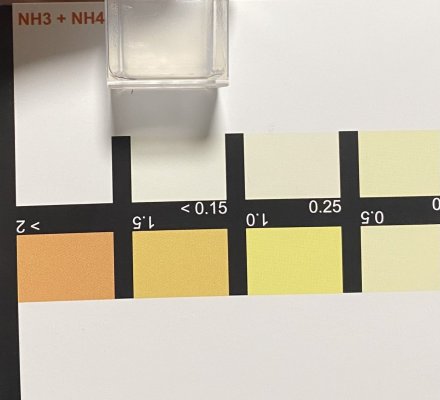
Ammonia
IMG_9282.JPG


Nitrite
IMG_9285.JPG


Nitrate
IMG_9288.JPG


My eye is untrained, but it looks to me that all is well with the all but the ammonia, which I think matches the 0.50 ppm the most closely. Maybe I'm wrong?

Either way, I added an ounce of TurboStart 900 and some fish food, so hopefully all will correct itself as the tank cycles. Unfortunately, the refugium pack recommended to me only had one 1 ounce bottle of TurboStart in it although my system actually requires 2 or 3 based on the bottle instructions (1oz per 20 gallons), so I have two more bottles coming with my second refugium pack shipment.

I also got my ChaetoMax Refugium Light installed on my little refugium in preparation for my second shipment from Algaebarn. I have an outlet timer for this light so I can run it throughout the night and cut back the power use a little bit throughout the day. Super excited to get my sea lettuce started growing and my copepod population established! I am trying to figure out how often I'll actually need to add the OceanMagik after the initial 2 weeks, so if anyone reading this maintains a copepod population, I would love some advice!

IMG_9308.jpg


Summers here in Florida are pretty intense and, although we keep our home air conditioned, we do have two gigantic floor-to-ceiling windows in our living room where my tank is, so I also installed a dual fan cooling system just in case I need to deal with any temperature swings. For reference, my tank is on the same wall as those giant windows, kind of tucked away into a corner. We have drapes on the windows and we generally keep them open (we live on a lake and have a beautiful view), but even so, the direct sunlight never seems to reach that corner. I am going to monitor the temperature throughout the day and if there seems to be a time of day where the temperature consistently spikes above my 'acceptable' range, I will set the fan to turn on during that time period VIA the same outlet timer I am using for my ChaetoMax light.

IMG_9309.jpg


Last installation for today: two Jebao OW-10 Wavemakers. I installed one in each of the bottom rear corners and I am actually really impressed with the flow. I have them both turned all the way up and they are connected VIA the master/slave setting. They are set on the Else mode, which is the random flow setting, and Night mode, which lowers the flow when the light sensors on the remotes detect darkness. I actually really enjoy watching the water move around; it will be neat to see what it looks like with some nice flowy anemones in there! By the way, the remotes are advertised as being 'wireless'..........they most certainly are not. If I didn't like the compact size, surprising strength, and the interesting flow patterns of these little powerheads so much, I would have sent them back because of this. The only wireless feature of these remotes is the master/slave connection, which is helpful considering it allows everything to be controlled VIA one controller, BUT each controller acts as the connection between the outlet and each power head, so they are definitely inconveniently wired. That being said, at least I'll never have an issue with them getting lost, especially when we have a toddler running around, haha! There is a little loop tab on the top of each of them, so I will probably just use those to hang them discreetly behind my tank stand.

IMG_9300.jpg
IMG_9301.jpg
IMG_9310.jpg


Anyway, that's all for now!

I love feedback, so please, feel free to share any advice or comments!

Thank you so much for reading!
 
Last edited:
OP
OP
Apollo7235

Apollo7235

Well-Known Member
View Badges
Joined
Dec 31, 2020
Messages
751
Reaction score
820
Location
Orlando, FL
Rating - 0%
0   0   0
Hello all!

So, as it turns out, I actually chose to go with the Red Ogo Macro rather than the sea lettuce (surprise!), and it came in with the two addition bottles of TurboStart, OceanMagik, and 1580 Pods from AlgaeBarn. Very exciting!

Everything has been added to my system, so here are a few pictures!


IMG_9387.jpg
IMG_9388.JPG
IMG_9389.JPG
IMG_9391.JPG
 
OP
OP
Apollo7235

Apollo7235

Well-Known Member
View Badges
Joined
Dec 31, 2020
Messages
751
Reaction score
820
Location
Orlando, FL
Rating - 0%
0   0   0
I have a few things to say about my API Master Test Kit, which is why I am posting this in a separate post than my last progress update.

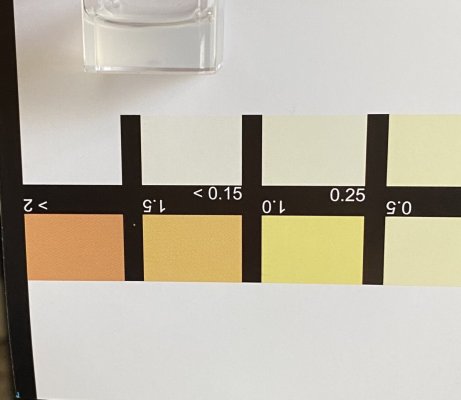
First of all, I kept getting a positive ammonia test even before I had added anything but salt water to the tank. Kind of annoying, but I just attributed that to my MarcoRocks having a little bit of something still on them. The ammonia test has been consistently positive and consistently hard to read considering it's super cloudy, so I did a bit of R2R research and found that Salifert typically is the better option when it comes to ammonia tests. I also read on another site that the API test vials are notoriously incorrect when it comes to the 5mL lines. Would you believe all 4 of my vials had their lines in different places? Seriously.

That being said, I actually measured 5mL of water into each vial and not a single vial had it correct. Unbelievable. Well, lesson learned: this will be the last of these kits that I purchase.

Considering how severely shaken my confidence in this kit had become, I ran an ammonia test using distilled water to be sure that absolute zero was, in fact, attainable, and it actually is. I also ran two more ammonia tests: one filled to the incorrect 5mL line and the other with correctly measured 5mL. Results of all of these tests below:


5mL Distilled Water measured into vial:
IMG_9400.JPG


Absolute 0 result with distilled water:
IMG_9401.JPG


Tank water test result--vial filled to the API line:
IMG_9405.jpg


Tank water test result--vial filled with measured 5mL;
IMG_9404.JPG


I am honestly pretty frustrated with this test considering the difference in the two tank water tests was so slight despite one of them being more dilute than the other, but it is what it is at this point. I ordered a Salifert ammonia test kit and I'm just writing this one off as a loss. Very disappointing.
 
Last edited:
OP
OP
Apollo7235

Apollo7235

Well-Known Member
View Badges
Joined
Dec 31, 2020
Messages
751
Reaction score
820
Location
Orlando, FL
Rating - 0%
0   0   0
Wow thanx for sharing. Have been using api for years, never heard of this. Good catch
Thanks, glad to help!

I ran an ammonia test using my new Salifert test kit yesterday evening. Will post a follow-up on the results later today. I’ve been photo-logging my test results daily since I added the additional TurboStart, pods, and macro on Friday. Hoping to have a nice cycle-log for newbies like me to reference back to at some point
 
OP
OP
Apollo7235

Apollo7235

Well-Known Member
View Badges
Joined
Dec 31, 2020
Messages
751
Reaction score
820
Location
Orlando, FL
Rating - 0%
0   0   0
Hello again!

Lots of progress on my build to date, but I am going to begin by sharing my water parameters that I collected throughout my tank's cycling process. Silly 'Is My Tank Cycled?' question thread here:


Anyway, here are my test results by date. For reference: I added 1 ounce of TurboStart 900 and the recommended 'little bit of fish food' to my tank on 03/14. I added two more ounces of TurboStart 900 along with Red Ogo Macro, and 5280 Pods to my sump refugium on 03/18. I have been dosing OceanMagik every evening since.

03/13 (The day before I added the first dose of TurboStart):

IMG_9281.JPG IMG_9282.JPG IMG_9285.JPG IMG_9288.JPG

03/18 (Just before I added the two additional bottles of TurboStart):

IMG_9381 2.jpg IMG_9383 2.jpg IMG_9384 2.jpg IMG_9385 2.jpg

03/19:

IMG_9407.JPG IMG_9404 2.JPG IMG_9409.JPG IMG_9411.JPG

03/20 (Switched to Salifert Ammonia test. See prior post about API defects):

IMG_9438.JPG IMG_9439.JPG IMG_9440.JPG IMG_9441.JPG

03/23:
IMG_9471.jpg IMG_9474.jpg IMG_9476.jpg IMG_9477.jpg


Salinity has remained at ~1.025 and temperature between 78F & 80F.

I now consider my tank to be cycled, despite the lack of parameter swings, and will be setting up my QT tank so I can bring home some coral!
 

theMeat

2500 Club Member
View Badges
Joined
Oct 1, 2017
Messages
3,060
Reaction score
2,521
Rating - 0%
0   0   0
Personally would ghost feed the tank and wait till you start to see nitrates start to climb, do a water change if they climb above 10-15 ppm, and then consider adding stuff
 
OP
OP
Apollo7235

Apollo7235

Well-Known Member
View Badges
Joined
Dec 31, 2020
Messages
751
Reaction score
820
Location
Orlando, FL
Rating - 0%
0   0   0
I was hone
Personally would ghost feed the tank and wait till you start to see nitrates start to climb, do a water change if they climb above 10-15 ppm, and then consider adding stuff

I was honestly considering adding ammonia to see how long it takes to drop back to zero, but I’m afraid of killing my copepods and macro algae.

I’m struggling! On one end, I agree with @brandon429 that the tank is cycled, but on the other end, I’m afraid to add anything because I don’t want to doom it to death!

Haha, maybe it’s just the mom in me.
 

brandon429

why did you put a reef in that
View Badges
Joined
Dec 9, 2014
Messages
29,684
Reaction score
23,710
Location
tejas
Rating - 0%
0   0   0
Do a large water change, reinstate total system clarity via new water, the tank is done Fritz is plated onto surfaces in 24 hours we are at ~13 days. It’s not that you’re partially done, you’re done ten days ago having paid for the most concentrated bac avail. You can tell from any post I’ve been in, api readings do not impact the outcome of the cycle we don’t want to run them up in the presence of the new animals for this nice new blended cycle setup, you both did not cut any corners on that build! Outstanding.


you fed it well, on levels under the test kits which still cycled on time for sure, hope that helps.
 
Last edited:
theMeat

2500 Club Member
View Badges
Joined
Oct 1, 2017
Messages
3,060
Reaction score
2,521
Rating - 0%
0   0   0
I was hone


I was honestly considering adding ammonia to see how long it takes to drop back to zero, but I’m afraid of killing my copepods and macro algae.

I’m struggling! On one end, I agree with @brandon429 that the tank is cycled, but on the other end, I’m afraid to add anything because I don’t want to doom it to death!

Haha, maybe it’s just the mom in me.
Yeah, Brandon makes a strong argument and he may be right. Just don’t see the harm in feeding tank and seeing that nitrates start to climb as they should. Aside from waiting of course
 

brandon429

why did you put a reef in that
View Badges
Joined
Dec 9, 2014
Messages
29,684
Reaction score
23,710
Location
tejas
Rating - 0%
0   0   0
I like for new tank owners to start with some starter corals and clean up crew

then that early success drives interest as more is added. The key hidden secret is this: fish disease protocol controls when you add fish, not anything about the biofilter.

time to consider fallow and quarantine, but you get to stock your reef with corals and fun stuff first :) fish go in last.
 

Caring for your picky eaters: What do you feed your finicky fish?

  • Live foods

    Votes: 18 29.5%
  • Frozen meaty foods

    Votes: 51 83.6%
  • Soft pellets

    Votes: 10 16.4%
  • Masstick (or comparable)

    Votes: 7 11.5%
  • Other

    Votes: 3 4.9%
Back
Top