So not to sound horrible here but you really shouldn't add Weldon to a seam that's already bonded. The area has already undergone the chemical bonding process and adding more will cause the area to melt, crazy, and there by compromise the existing seam. To do it correctly you would cut the existence seam out completely machine finish the edges and bond the two new edges so the material being used has never been touched with the bonding solvent before. Ive done a lot of acrylic work and would not use this tank as you currently described.
Navigation
Install the app
How to install the app on iOS
Follow along with the video below to see how to install our site as a web app on your home screen.
Note: This feature may not be available in some browsers.
More options
You are using an out of date browser. It may not display this or other websites correctly.
You should upgrade or use an alternative browser.
You should upgrade or use an alternative browser.
720 gallon acryllic
- Monster Build
- Thread starter Seneca
- Start date
- Tagged users None
- Joined
- Oct 1, 2019
- Messages
- 137
- Reaction score
- 213
So not to sound horrible here but you really shouldn't add Weldon to a seam that's already bonded. The area has already undergone the chemical bonding process and adding more will cause the area to melt, crazy, and there by compromise the existing seam. To do it correctly you would cut the existence seam out completely machine finish the edges and bond the two new edges so the material being used has never been touched with the bonding solvent before. Ive done a lot of acrylic work and would not use this tank as you currently described.
Are you familar with weldon 40? Tip and pouring weldon 40 is a standard practice for filling in corners on a acrylic tank. It is not at all the same thing as weldon 3, 4, or 16. Weldon 40 is near 100% solids and will not "melt" or compromise the existing seam at all. It is essentially equivelant to adding dowels, but better.
vetteguy53081
Well known Member and monster tank lover
View Badges
Partner Member 2024
Excellence Award
Reef Tank 365
RGB
Article Contributor
Tampa Bay Reef Keepers
West Palm Beach Reefer
Hospitality Award
Ocala Reef Club Member
305 Reef Club
Wisco Reefers
Midwest Reefer
Fish Medic
MAC of SW Florida
Rock Pool Reef Keepers
R2R Secret Santa 2023
My Tank Thread
My Aquarium Showcase
Agreed. 40 does not get as hot as other weldonsSo not to sound horrible here but you really shouldn't add Weldon to a seam that's already bonded. The area has already undergone the chemical bonding process and adding more will cause the area to melt, crazy, and there by compromise the existing seam. To do it correctly you would cut the existence seam out completely machine finish the edges and bond the two new edges so the material being used has never been touched with the bonding solvent before. Ive done a lot of acrylic work and would not use this tank as you currently described.
Yepp Weldon 40 is the two part you mix before using etc. My currently setup was built with 42 (same as 40 but you use the gun for it) due to all the fun curves, it's on my build thread in my profile if your curious . If you added it to the point of causing crazying it's a sign the material has exceeded it's stress point. The way it bonds does melt otherwise it wouldn't crazy etc, the damage to the material may not go all the way through which would be lucky for you but only time will tell if there is microscopic damage all the way through. If you added the mix to the inside and sanded the outside to remove the crazying (just for example) the material had to be effected all the way through. 720gallons is a lot of water to gamble with I honestly just wouldn't risk it. if your comfortable with it by all means go ahead, I just noticed that noone really said anything and there is the potential that the seams are compromised.
Tip and pouring weldon 40 is a standard practice for filling in corners on a acrylic tank.
I assume this was a used tank that you felt was compromised in some way? Confess I have never heard of the practice you say is standard. Curious.
- Joined
- Oct 1, 2019
- Messages
- 137
- Reaction score
- 213
I assume this was a used tank that you felt was compromised in some way?
No specific reason. It was full of water when I first picked it up and not leaking. I think it is very good practice to reinforce old used tanks.
Confess I have never heard of the practice you say is standard.
For your pleasure https://www.monsterfishkeepers.com/forums/threads/weld-on-40-and-42.544585/
I suppose it might not be as common as it used to be. It will form an excellent seam, essentially regardless of the condition of the existing seam. Similar, but superior too (imho), doweling.
Thanks for the link, I've also never heard of this practice. But I also generally just build with acrylic not really repair it.
My point was soley that crazying is an indication of overstressing the material no matter what did it. It generally gets worse or stays the same with time so if what you did caused crazying on the seams they could now be compromised.
Usually if it holds water and they don't get worse in 24mos (according to the fab shop I volunteered at for experience) your fine but to me it's not worth the risk. Even if I caught a minor leak a year or so in I wouldn't want to have to tear down a tank that's just getting good to fix it.
- Joined
- Oct 1, 2019
- Messages
- 137
- Reaction score
- 213
To do it correctly you would cut the existence seam out completely machine finish the edges and bond the two new edges so the material being used has never been touched with the bonding solvent before.
The tip and pour method does not really interact with the existing seam. It creates two new seams like a wedge dowel. See the above linked discussion at monsterfishkeepers.
If you added the mix to the inside and sanded the outside to remove the crazying
I did not. I sanded the surface crazing immediately adjacent to the pour inside. Older acrylic is prone to surface crazing.
The way it bonds does melt
This is somewhat true. It does just enough to form a very strong bond. It does not penetrate 1.5 inches through acrylic.
720gallons is a lot of water to gamble with I honestly just wouldn't risk it
The gamble would have been trusting the original seams, but probably not that much of one. I prefer to be safe and the tank is safe now.
- Joined
- Oct 1, 2019
- Messages
- 137
- Reaction score
- 213
what you did caused crazying on the seams they could now be compromised
You made your point several posts ago. This is becoming tiresome.
- Joined
- Oct 1, 2019
- Messages
- 137
- Reaction score
- 213
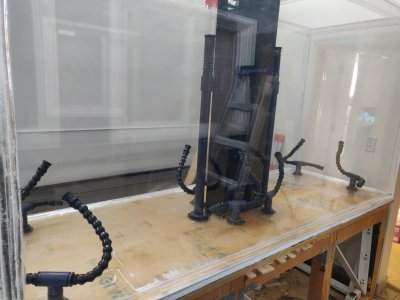
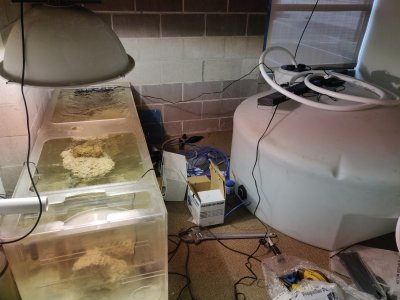
Foam is under the tank and I drilled holes for my closed loop. Made a hole through the wall for the return from the fish room. I hope to get the closed loop plumbed this week (schedule 80 bulkheads should arrive tomorrow and have everything else). Also reinforced the tank stand with lots of steel.
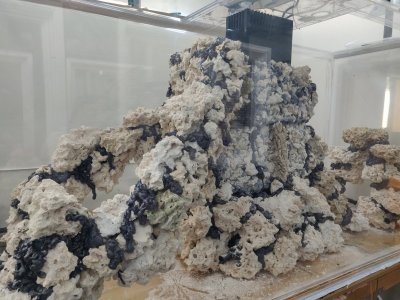
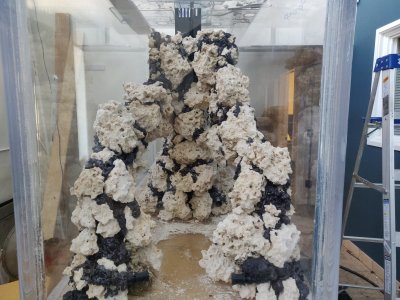
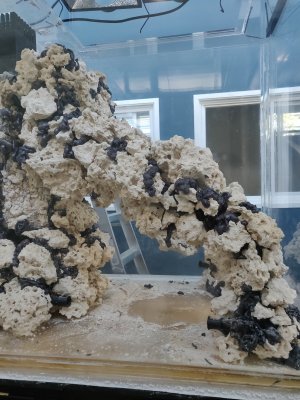
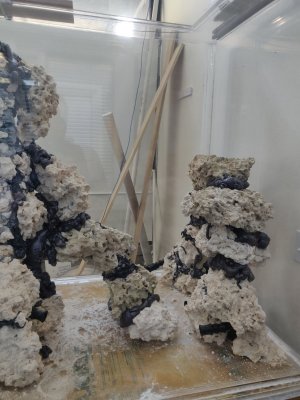
My dry rock is drying again after acid and lanthanum cloride followed by power wash. The acid really helped a lot of the sand to come lose. Hopefully I can aquascape next week.
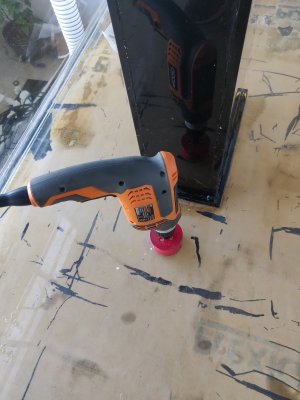
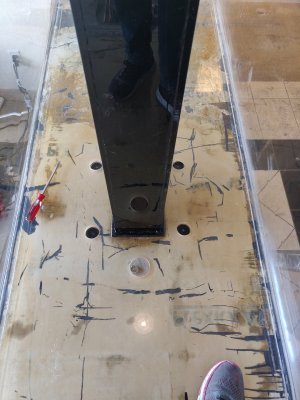
My dry rock is drying again after acid and lanthanum cloride followed by power wash. The acid really helped a lot of the sand to come lose. Hopefully I can aquascape next week.


- Joined
- Oct 1, 2019
- Messages
- 137
- Reaction score
- 213
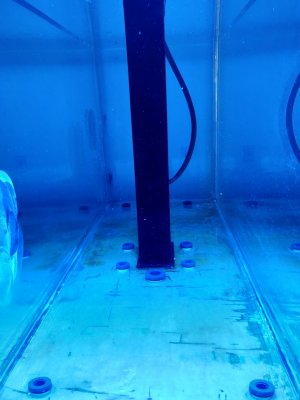
Leak test number 1. So far so good. Once I verify for a few days all the bulkheads are leak free I'll drain it and use scs1200 silicone around them as a backup (scs1200 is supposed to have decent adhesion to acrylic and that appears true in my own test).
Next leak test will involve all the plumbing and the closed loop in operation in a week or so.
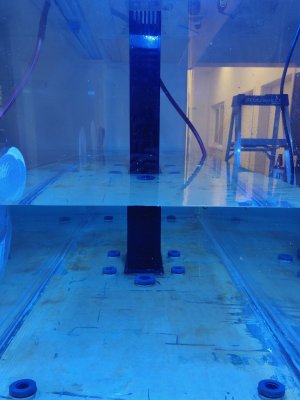
Next leak test will involve all the plumbing and the closed loop in operation in a week or so.

vetteguy53081
Well known Member and monster tank lover
View Badges
Partner Member 2024
Excellence Award
Reef Tank 365
RGB
Article Contributor
Tampa Bay Reef Keepers
West Palm Beach Reefer
Hospitality Award
Ocala Reef Club Member
305 Reef Club
Wisco Reefers
Midwest Reefer
Fish Medic
MAC of SW Florida
Rock Pool Reef Keepers
R2R Secret Santa 2023
My Tank Thread
My Aquarium Showcase
Youre right on track. this is what I like seeing
- Joined
- Oct 1, 2019
- Messages
- 137
- Reaction score
- 213
- Joined
- Oct 1, 2019
- Messages
- 137
- Reaction score
- 213
Similar threads
- Replies
- 4
- Views
- 114
- Replies
- 38
- Views
- 853


