His Coral Highness

Active Member
View Badges
Joined
Dec 9, 2022
Messages
263
Reaction score
309
Location
Charleston, SC
Rating - 0%
0   0   0
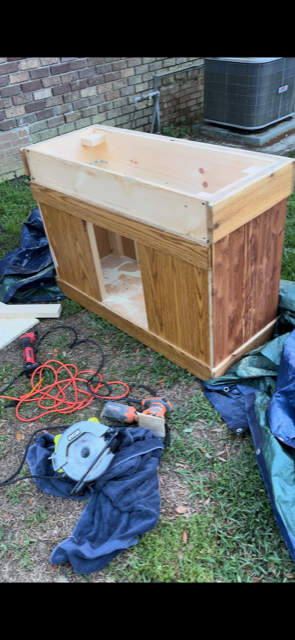
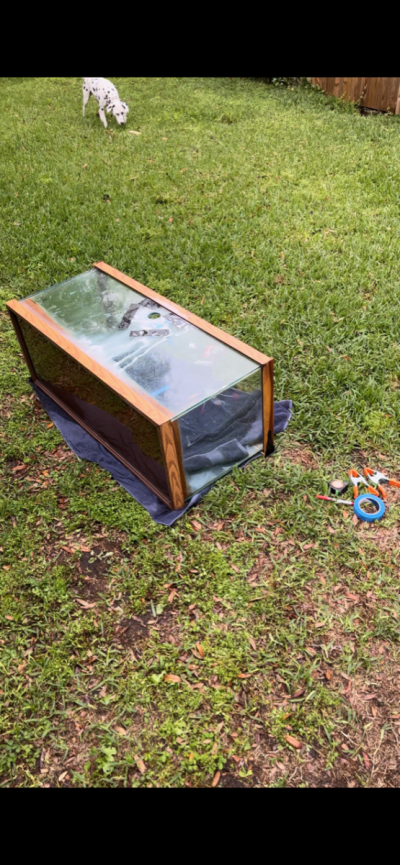
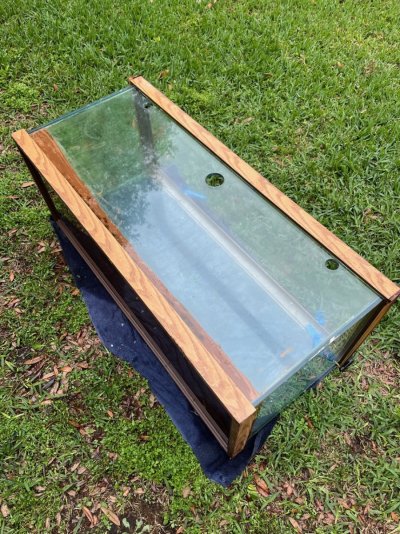
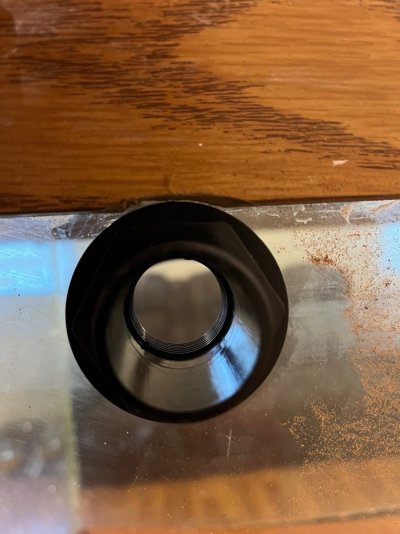
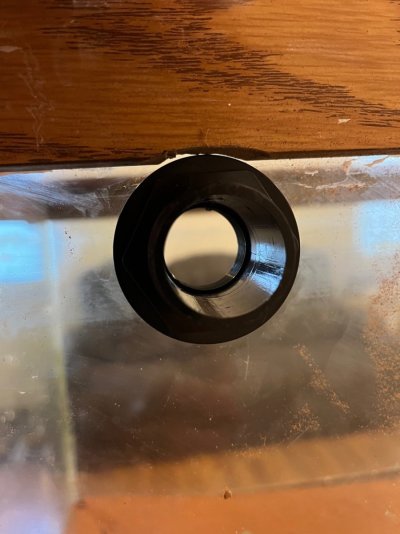
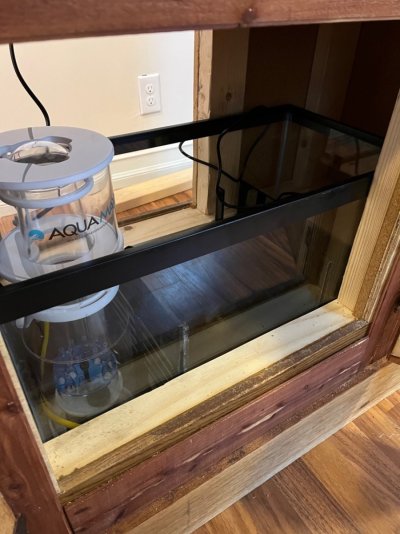
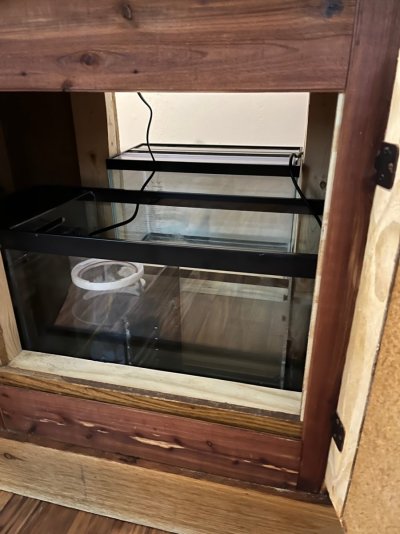
Started off about 2 years ago with an old 75 gallon tank I picked up at a garage sale with an old busted-up MDF stand. I redid the facade of the stand to cedar and added in 2x4 supports where I thought the stand would sag. Honestly I took it on as more of a woodworking project than an actual aquarium project, and it sat just filled with water/rocks and no livestock for the longest time. Finally after enough guests asking why I had an empty tank I took the plunge (no pun intended), but never thought I'd get into corals. After having some success with a 16 gallon reef tank in my office I am finally planning on upgrading this to a full-fledged reef tank. I want to eventually switch from a canister filter to a sump (planning on drilling), moving to an in-sump skimmer, and replacing my lava rocks with aragonite reef rocks. The lighting right now is actually a freshwater LED strip light hidden under a Home Depot shop light, so needless to say that is changing as well...

I do still like the red desert sand I originally went with though, and am thinking that hopefully I can still stick with this. The sand is "Jurassic Sand" and the guy collects it from the desert in Utah, if that means anything, and I think with the background gives the tank kind of a cool otherworldly look. I occasionally get a little diatom blood if I overfeed, but otherwise haven't had any major problems with it.

In the time being I am just browsing for ideas on a new scape to go with, as I think the current one is too "blocky," even though I do like having "mountains" in the scape. I think with reef rock it will be easier to build vertically without creating giant rock mounds. Also I like having a negative desert space in the middle, but it is so underused by the fish that I am planning on building more into the center of the tank. Originally my thought process was to create a valley in between two mountains before I had any interest at all in creating a reef tank. I can upload more pics/vids in a bit.

But like I said, this is just the before picture, and eventually I plan on upgrading to a full predator reef tank and would like to create a predator reef tank from my FOLWR setup.

75 tank.jpg
 
OP
OP
His Coral Highness

His Coral Highness

Active Member
View Badges
Joined
Dec 9, 2022
Messages
263
Reaction score
309
Location
Charleston, SC
Rating - 0%
0   0   0
UPDATES! Finally moved out of my apartment and I get to upgrade my old FOWLR setup to a real reef system. First step was cutting out a hole in the stand I put together to fit a 29 gallon tank to act as my sump. The stand was originally all MDF and was in pretty poor shape when I bought it secondhand, so I decided to lift it with some 2x8s (or maybe they were 2x10s, it was a few years ago), some 2x4s and new plywood on the inside, and I used cedar than I stained and varnished for the trim. The paneling on the outside is actually red cedar that is meant to be a closet liner, but I think it came out beautifully around the body of the stand with a little varnish on it. The backside of the stand is what you see here, and that I did not refinish, so you can kind of see the before/after in one shot. At this point the stand is upside-down so I could cut out the insert for the sump tank.

Also you can see my little helper.
 

Attachments

  • IMG_4006.PNG
    IMG_4006.PNG
    1,001.1 KB · Views: 26
  • IMG_4002.MOV
    58.1 MB
OP
OP
His Coral Highness

His Coral Highness

Active Member
View Badges
Joined
Dec 9, 2022
Messages
263
Reaction score
309
Location
Charleston, SC
Rating - 0%
0   0   0
Here was the part I was most anxious about. I finally got around to drilling the holes (after finding the Gorilla tape that mysteriously kept vanishing). I had a friend on the garden hose and I used painter's tape on the inside of the glass and it came out just fine. After I finished drilling though I realized I may have put the return holes too close to the trim to get the retaining nut on :oops::confounded-face:
 

Attachments

  • IMG_4076.PNG
    IMG_4076.PNG
    1.3 MB · Views: 25
  • IMG_4077.PNG
    IMG_4077.PNG
    1.3 MB · Views: 26
  • IMG_4040.jpg
    IMG_4040.jpg
    376 KB · Views: 32
OP
OP
His Coral Highness

His Coral Highness

Active Member
View Badges
Joined
Dec 9, 2022
Messages
263
Reaction score
309
Location
Charleston, SC
Rating - 0%
0   0   0
Eh well I was right, but luckily with a little dremel and a straight razor I was able to trim just enough of the plastic to get the bulkheads to sit flush. It was actually pretty easy as I didn't have far to go, and the plastic is very soft. Plus it is on the back of tank and no one will ever see it (gotta tell myself that a lot of DIY projects...)
 

Attachments

  • IMG_4056.jpg
    IMG_4056.jpg
    144.7 KB · Views: 27
  • IMG_4057.jpg
    IMG_4057.jpg
    132.6 KB · Views: 27
OP
OP
His Coral Highness

His Coral Highness

Active Member
View Badges
Joined
Dec 9, 2022
Messages
263
Reaction score
309
Location
Charleston, SC
Rating - 0%
0   0   0
Here is the sump setup, btw. I used an Aqueon 29 gallon and the baffle kit from Jax Racks, plus a 5.5 gallon Aqueon tank that I put on a little platform to act as the ATO reserve. The hole I cut into the stand worked out well, and I have plenty of room to work in the sump. Not enough horizontal space to totally hide the ATO reserve in the sump, but it really only juts out about 4-5", and with the tank pushed closer to the wall and with all the plumbing/electrical work behind the tank, I don't think it will be much of an eyesore. Plus it makes it easy to refill with a hose from my RODI water container. Don't mind the silicone job on the baffles, I broke both of my hands and had to do it with my feet.
 

Attachments

  • IMG_4018.jpg
    IMG_4018.jpg
    168.4 KB · Views: 25
  • IMG_4019.jpg
    IMG_4019.jpg
    164.2 KB · Views: 23
  • IMG_4020.jpg
    IMG_4020.jpg
    148.5 KB · Views: 24
  • IMG_4022.jpg
    IMG_4022.jpg
    117.6 KB · Views: 26
  • IMG_4023.jpg
    IMG_4023.jpg
    175.1 KB · Views: 28
OP
OP
His Coral Highness

His Coral Highness

Active Member
View Badges
Joined
Dec 9, 2022
Messages
263
Reaction score
309
Location
Charleston, SC
Rating - 0%
0   0   0
I know they’re not popular but I added this background to my tank when it was only a FOWLR and I really liked it. The background combined with the red sand gives it a little extraterrestrial look IMG_4090.jpeg
 
OP
OP
His Coral Highness

His Coral Highness

Active Member
View Badges
Joined
Dec 9, 2022
Messages
263
Reaction score
309
Location
Charleston, SC
Rating - 0%
0   0   0
Didn’t have any power heads at this point so I was using a canister just to get some flow while I plumbed it. I decided to use the colored FormuFit PVC and I’m glad I did. Red for overflow, green for returns. IMG_4299.jpeg IMG_4300.jpeg IMG_4308.jpeg
 
OP
OP
His Coral Highness

His Coral Highness

Active Member
View Badges
Joined
Dec 9, 2022
Messages
263
Reaction score
309
Location
Charleston, SC
Rating - 0%
0   0   0
Lids are crazy expensive in my opinion, and I didn’t like the look of the pure screen too or if the pure acrylic tops, so I ordered a piece of Lexan online for about $60 and used a jigsaw to cut out two windows, then used mesh and clear plastic hinges I found on Amazon to make two separate windows with a center brace down the middle to help with preventing sagging. IMG_4442.jpeg
 

Being sticky and staying connected: Have you used any reef-safe glue?

  • I have used reef safe glue.

    Votes: 75 86.2%
  • I haven’t used reef safe glue, but plan to in the future.

    Votes: 6 6.9%
  • I have no interest in using reef safe glue.

    Votes: 3 3.4%
  • Other.

    Votes: 3 3.4%
Back
Top