
Hanna Instruments
Active Member
View Badges
Platinum Sponsor
Best of the Best Winner 2025
Article Contributor
8 Best Practices for Using Your Hanna Marine Checker
Testing the levels with your Checker – like alkalinity, calcium, nitrite and more – may seem to be a cut-and-dry process, but there are a lot of small things that can happen during testing which negatively impact your results.
Follow these best practices when using a Checker to ensure your get the most accurate results while saving yourself time and frustration. Learn More About Hanna Marine Checkers
1. Use a Clean Cuvette with Checkers
Why: Products in the Hanna Checker line are colorimeters, which means they use a light source – such as an LED or tungsten lamp – with a filter and a light sensing detector to determine absorbance and ion concentration. Since the Checkers are an optical-based measurement it's important that the light is not impeded by fingerprints, scratches, dirt, or air bubbles on your cuvettes.
Fix: Use a microfiber cloth to wipe the outside of the cuvette. To remove air bubbles, gently tap the cuvette before placing it inside the Checker.
2. Use Separate Pipettes
Why: Using the same syringe or pipette tip for both salt and freshwater can contaminate your freshwater sample, which leads to inaccuracies since some salt may be left inside the pipette.
Fix: Label each syringe and pipette tip as either freshwater or saltwater so they don't get mixed up.
3. Place Cuvettes in the Same Position Every Time
Why: When using a Checker, it's important that the length of the optical path is always the same to ensure consistent and accurate readings every time.
Fix: Place a small mark on the cap or top of the glass to help index the position of the cuvette in the device.
Hanna Tip: Check out the video below by Bulk Reef Supply comparing our phospahte and phosphorus Checkers with a more expensive professional meter. At the nine minute mark he gives great advice on how make sure your cuvette is always in the same spot, and other handy cuvette tips.
4. Don't Let Reagents Sit in the Cuvette
Why: Letting a sample mixed with reagents sit in the cuvette for too long can stain the glass. This will affect the absorbance as the light passes through the glass, resulting in a bad reading.
Fix: Always empty and rinse cuvettes after testing. Which brings us to our next point...
5. Clean Cuvettes in Distilled or DI Water
Why: Cuvettes need to be free of possible contaminants before a new test is performed. Rinsing them with aquarium water can leave behind residual material after testing. The cuvettes should also be completely air-dried after rinsing to prevent any unwanted dilution of the sample when performing your next test.
Fix: Always empty and rinse cuvettes with distilled or DI (deionized) water after testing. When placing the cuvettes back in the case, leave the caps off.
6. Check Reagent Expiration Dates
Why: Using an expired reagent can give inaccurate or false readings.
Fix: Make a habit to examine reagent bottles or sachets before use. For best results, make sure you’re storing reagents in a cool, dry place and avoid dramatic temperature changes. Dramatic temperatures and humidity can damage the reagents.
7. Completely Close the Checker Hood
Why: Any alternative light source entering the checker can cause inaccurate or false readings. The checker is designed to use a fixed light source – such as an LED or tungsten lamp – with a filter and a light sensing detector to determine absorbance and ion concentration.
Fix: Make sure the checker is hood pushed down completely so that additional outside light cannot penetrate the cuvette.
8. Cut Reagent Packets Along the Dotted Line
Why: Cutting the packet along the bottom right corner towards to the top left will create a funnel to allow easier pouring of the reagent into the cuvette. No reagent spilling means better testing results!
Fix: Before cutting the packet, gently tap it to make sure the reagent is not stuck in the corner you are cutting. Then use scissors to cut along the dotted line.
Hanna's Marine Checkers
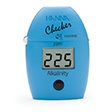
Marine Alkalinity Checker (ppm) HC - HI755
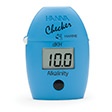
Marine Alkalinity (dKH) Checker® HC - HI772
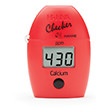
Marine Calcium Checker HC - HI758
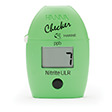
Marine Nitrite Ultra Low Range Checker HC - HI764
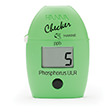
Marine Phosphorus Ultra Low Range Checker HC - HI736
Want more content like this delivered right to your inbox? Subscribe to our blog!
Questions?
If you have any questions about testing in aquariums you can leave a comment below, or contact us by phone at 800-426-6287 or email at [email protected].
You can also get in touch with us through social media!
Facebook | Twitter | Instagram | LinkedIn
Testing the levels with your Checker – like alkalinity, calcium, nitrite and more – may seem to be a cut-and-dry process, but there are a lot of small things that can happen during testing which negatively impact your results.
Follow these best practices when using a Checker to ensure your get the most accurate results while saving yourself time and frustration. Learn More About Hanna Marine Checkers
1. Use a Clean Cuvette with Checkers
Why: Products in the Hanna Checker line are colorimeters, which means they use a light source – such as an LED or tungsten lamp – with a filter and a light sensing detector to determine absorbance and ion concentration. Since the Checkers are an optical-based measurement it's important that the light is not impeded by fingerprints, scratches, dirt, or air bubbles on your cuvettes.
Fix: Use a microfiber cloth to wipe the outside of the cuvette. To remove air bubbles, gently tap the cuvette before placing it inside the Checker.
2. Use Separate Pipettes
Why: Using the same syringe or pipette tip for both salt and freshwater can contaminate your freshwater sample, which leads to inaccuracies since some salt may be left inside the pipette.
Fix: Label each syringe and pipette tip as either freshwater or saltwater so they don't get mixed up.
3. Place Cuvettes in the Same Position Every Time
Why: When using a Checker, it's important that the length of the optical path is always the same to ensure consistent and accurate readings every time.
Fix: Place a small mark on the cap or top of the glass to help index the position of the cuvette in the device.
Hanna Tip: Check out the video below by Bulk Reef Supply comparing our phospahte and phosphorus Checkers with a more expensive professional meter. At the nine minute mark he gives great advice on how make sure your cuvette is always in the same spot, and other handy cuvette tips.
4. Don't Let Reagents Sit in the Cuvette
Why: Letting a sample mixed with reagents sit in the cuvette for too long can stain the glass. This will affect the absorbance as the light passes through the glass, resulting in a bad reading.
Fix: Always empty and rinse cuvettes after testing. Which brings us to our next point...
5. Clean Cuvettes in Distilled or DI Water
Why: Cuvettes need to be free of possible contaminants before a new test is performed. Rinsing them with aquarium water can leave behind residual material after testing. The cuvettes should also be completely air-dried after rinsing to prevent any unwanted dilution of the sample when performing your next test.
Fix: Always empty and rinse cuvettes with distilled or DI (deionized) water after testing. When placing the cuvettes back in the case, leave the caps off.
6. Check Reagent Expiration Dates
Why: Using an expired reagent can give inaccurate or false readings.
Fix: Make a habit to examine reagent bottles or sachets before use. For best results, make sure you’re storing reagents in a cool, dry place and avoid dramatic temperature changes. Dramatic temperatures and humidity can damage the reagents.
7. Completely Close the Checker Hood
Why: Any alternative light source entering the checker can cause inaccurate or false readings. The checker is designed to use a fixed light source – such as an LED or tungsten lamp – with a filter and a light sensing detector to determine absorbance and ion concentration.
Fix: Make sure the checker is hood pushed down completely so that additional outside light cannot penetrate the cuvette.
8. Cut Reagent Packets Along the Dotted Line
Why: Cutting the packet along the bottom right corner towards to the top left will create a funnel to allow easier pouring of the reagent into the cuvette. No reagent spilling means better testing results!
Fix: Before cutting the packet, gently tap it to make sure the reagent is not stuck in the corner you are cutting. Then use scissors to cut along the dotted line.
Hanna's Marine Checkers
Marine Alkalinity Checker (ppm) HC - HI755
Marine Alkalinity (dKH) Checker® HC - HI772
Marine Calcium Checker HC - HI758
Marine Nitrite Ultra Low Range Checker HC - HI764
Marine Phosphorus Ultra Low Range Checker HC - HI736
Want more content like this delivered right to your inbox? Subscribe to our blog!
Questions?
If you have any questions about testing in aquariums you can leave a comment below, or contact us by phone at 800-426-6287 or email at [email protected].
You can also get in touch with us through social media!
Facebook | Twitter | Instagram | LinkedIn


