Caravan's 310g in-wall with Fish Room

Caravanshaka

Well-Known Member
View Badges
Joined
Oct 23, 2017
Messages
956
Reaction score
1,653
Location
Austin, TX
Rating - 0%
0   0   0
I put the deposit down yesterday on the tank, and the room officially becomes mine on Monday, so it's time to start the build thread!

The room will officially be multi-use, as it was intended to be a mother-in-law suite. 1/2 will be the fish room, and 1/2 will be setup for an exercise room. It also has an attached full bathroom and separate entrance from the exterior of the house. The wall behind the frag tank is the sink and toilet in the bathroom, so I will have easy access to a drain and water supply.

Here are the plans for equipment:

Tank - Planet Aquariums 96x30x25 310g w/ Modular Marine external overflow
Frag Tank - Modular Marine 48x36x10 acrylic
Sump - 75g standard glass tank for rock/fuge and a 60x24x16 Modular Marine Sump with built-in Roller Filter to hold equipment
Stand - Custom Designed 15 series 8020. largest beams are 3"x3" and design incorporates additional tables and a full walkboard around the display. Full epoxy coat planned for the top
Display Lights - 4x XR30g4 Pro, 2x 48" Aquaticlife Hybrids, 2x 48" Orphek OR actinic bars
Frag lights - 48" Aquaticlife Hybrid with 4x XR15g4 Pros
Fuge light - 24" Orphek Fuge light
Display Flow - 2x Gyre 350's, 4x MP40QDs
Frag Flow - 2x Gyre 350's
Skimmer - currently a RO Elite INT 220, plan to upgrade to a 300 as it becomes stocked
CaRX - custom built 6x18 currently, may upgrade to a 6x24 main body and has a 4x18 second chamber. Kamoer peristaltic pump and Carbon Doser regulator
Kalk - Avast k2 stirrer with Kamoer peristaltic pump

I think that will get this started. Including some design pics below:
Stand.png
Stand_with_walls.png
Plumbing.png
Top-Down.png
Tank_Setup.png
Tank_bare_wall.png
Tank_Wall_Closed.png
Tank_Wall_Open.png
 
OP
OP
Caravanshaka

Caravanshaka

Well-Known Member
View Badges
Joined
Oct 23, 2017
Messages
956
Reaction score
1,653
Location
Austin, TX
Rating - 0%
0   0   0
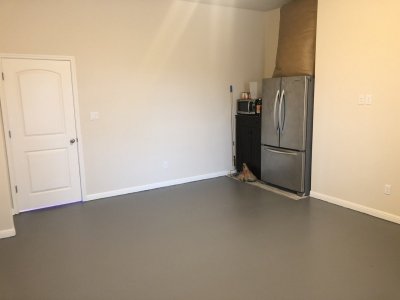
Got to work last night. Moved all the stuff into one section of the room so I could begin working on this section. Carpet removed and began filling all the little nail holes as well as sealing from baseboard to floor with caulk. Ran out of caulk and called it a night. Will be hitting the store for more caulk after work and will get back to it tonight.

Wife is out of town until thursday afternoon....going to be fun when she gets home and asks what the heck happened, lol.

14C03056-4FF1-4732-A12B-004FADD00DA1.jpeg

6130946B-64CD-41EF-842D-69E30CF29043.jpeg
 
OP
OP
Caravanshaka

Caravanshaka

Well-Known Member
View Badges
Joined
Oct 23, 2017
Messages
956
Reaction score
1,653
Location
Austin, TX
Rating - 0%
0   0   0
Not much more happening tonight...second coat of epoxy, then it needs a few days to fully cure. Gotta clean out the rest of the room soon and do the same thing to the other half. My wife is closing down her side-business of newborn photography, so she’s got A TON of stuff left to sell off and it may take some time.
 
OP
OP
Caravanshaka

Caravanshaka

Well-Known Member
View Badges
Joined
Oct 23, 2017
Messages
956
Reaction score
1,653
Location
Austin, TX
Rating - 0%
0   0   0
If I had a fish room I would do everything I could to get the sump out from under the tank. It is so much easier to work on stuff when you can easily reach all parts of the sump.

I played with the layout for hours to try and achieve this, but I have too much water volume in that area to get it done. I would need to find space for a 60x24 and a 48x18 footprint. The agreement on the room was to keep it multi-purpose, so I can't take up much more space and still stay married ;Blackeye

I am attempting to pull a good bit of the equipment out of the sump though. My goal is to only have the heaters and the skimmer in the sump. I should be able to run the calcium reactor and kalk reactor from the corner of the shelf. I'm also considering running the 2 COR20 returns as external pumps as well.
 
OP
OP
Caravanshaka

Caravanshaka

Well-Known Member
View Badges
Joined
Oct 23, 2017
Messages
956
Reaction score
1,653
Location
Austin, TX
Rating - 0%
0   0   0
Moving a fridge that is full is no joke. Protected the floor as best as I could while moving it, but got a couple scuffs. No big deal as I can touch it up later, and the majority of the floor will have foam tiles or tanks on it anyway, lol.

You can see below that I have a water line and dedicated circuit there as well! Drain access is just on the other side of the wall!

EB3E8E4A-DC50-41A1-BC11-7D969A7DAD26.jpeg
 
OP
OP
Caravanshaka

Caravanshaka

Well-Known Member
View Badges
Joined
Oct 23, 2017
Messages
956
Reaction score
1,653
Location
Austin, TX
Rating - 0%
0   0   0
I drew out the lines of the hole as well as taped where the corners of the tank are going to be.

I’m now working on cleaning everything out of the other half of the room so I can caulk baseboards and epoxy it as well. Hoping to get that done this week before the stand arrives!

EA601DF0-A42B-4BD4-B347-CD6D37C58E0F.jpeg
 
OP
OP
Caravanshaka

Caravanshaka

Well-Known Member
View Badges
Joined
Oct 23, 2017
Messages
956
Reaction score
1,653
Location
Austin, TX
Rating - 0%
0   0   0
- Walls sealed (except where I plan to cut).
- Foam floor tiles laid through most of the floor. I wanted something comfortable to walk on, but easy to remove in case of water spills. I will do more precise cutting around the stand when it is in place.
- Lastly, can’t be too careful with electricity, so I’ve installed the GFCI outlet in the dedicated circuit to start with. Once the wall is open and I determine what I need to do with that plug below the main tank, I will figure out if 1 more GFCI is enough to protect the rest of the outlets or if I will need more.

06FB1FF5-3B04-4707-80FB-6EDD28F9AAA8.jpeg

3539B033-05B4-4CB5-B98E-CC631D0EC368.jpeg

2E610327-C626-40D1-9C52-C97B52EA4099.jpeg
 
OP
OP
Caravanshaka

Caravanshaka

Well-Known Member
View Badges
Joined
Oct 23, 2017
Messages
956
Reaction score
1,653
Location
Austin, TX
Rating - 0%
0   0   0
And there is a hole in the wall! No electrical to worry about, but there is a spot with 3 2x4’s sandwiched up as well as a very thin gusset-type brace which means it is load bearing. Getting the header sized and installed correctly is a necessity. Planning a 12” thick header:

D47F6FF6-BB2A-4CE2-AB0F-97A9AF9C5D3E.jpeg
 

Being sticky and staying connected: Have you used any reef-safe glue?

  • I have used reef safe glue.

    Votes: 78 86.7%
  • I haven’t used reef safe glue, but plan to in the future.

    Votes: 6 6.7%
  • I have no interest in using reef safe glue.

    Votes: 3 3.3%
  • Other.

    Votes: 3 3.3%
Back
Top