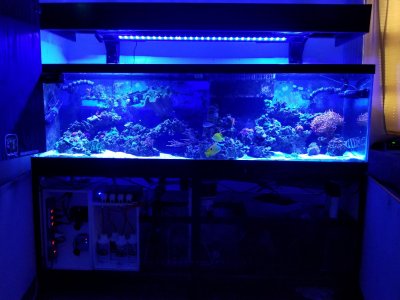
DIY Power console/controller cabinet

RichtheReefer21

Scrap Yard Reefer
View Badges
Joined
Jun 11, 2018
Messages
8,766
Reaction score
49,645
Location
Western Massachusetts
Rating - 0%
0   0   0
Good day to all... back at it with another simple guide to help anyone out there who loves to penny pinch in our never-ending cost of keeping a reef. Up today, we are going to be building a bare bones basic box and getting the sump area looking fresh and tidy.


Back story: (booorrrrrinnnng ;) )
Last year I took in my neice, a ripe 4 years old, for temporary custody through Child Services while her mother dealt with some personal issues. I was 1 step away from completing my custom 125g drilled diy sump build. The power station. DCF did a walk through of my home prior, and immediately cited the reef. They gave me 3 days to add doors with keyed locks and contain all the electronics and chemicals.

2 days later a rushed, half-booty cabinet was built and mounted to the wall. Here is what it ended up looking like:
20190424_043137.jpg


20190511_105323.jpg


Will start the new build details in the next post.
It did what it needed to do, Alianna (foster neice) returned to mom back in November or so. And i finally decided to finish the build and tear down the dcf cabinet of doom.
 
OP
OP
RichtheReefer21

RichtheReefer21

Scrap Yard Reefer
View Badges
Joined
Jun 11, 2018
Messages
8,766
Reaction score
49,645
Location
Western Massachusetts
Rating - 0%
0   0   0
For the material, I chose the same as my sump stand walls. PVC Board from home depot, waterproof, already white, its messy to saw, but perfect in all other aspects.. not only does it simply wipe clean with a wet towel, but It will outlive the human race. Best reef material substrate for the price point imo.

Heres the doodle. I always sketch out my build first. Pulled some XP from my blueprint training.
20200624_145346.jpg


I originally planned 2 simple computer tower cooling fans, but decided with enough well-placed holes, that wasnt necessary to keep things cool back in the rear chamber which houses all the power supplies.

First up was the cuts. I wanted to show this step because my father taught me a great trick for cutting straight edges when a tablesaw isnt around. I measured the width from the outter edge of the skillsaw guide to the actual blade. 5" on the dot. After measuring and marking, i added the 5" to my original measurement, and then clamped a flatedge (can use anything, i used an aluminum bubble level) to the pvc board along your new line. Make sure the blade is on the far side away from the flatedge you use, or your size will be off by a ton. Simply slide the saw along the flatedge u made and your cut will be straight everytime. I must add, that i NEVER mark aline or make a cut without using a Square. This is vital for a seemless box.
20200625_125217.jpg


I chose to use 1" concrete screws for my hardware in the box assembly. (1/2 width on the pvc board) Predrilling your holes is a must if u ask me. Countersunk heads and strong grips are a bonus for a clean look, and also allows a flat even surface along whatever side you are using as the base, so theres no "tippyness" to it.

The goal was straight forward for me. I wanted a clean front mounted panel for the controllers and toggle power strip up front and visible. But the panel needed to be easily and swiftly removed if for whatever reason i had to get to the power supplies and power strip in the rear.

I thought of about 6 different methods to kount the front panel, and eventually decided on four 2" x 7/32" brass pan-head, threadless button lugs set into predrilled 1/4" holes to accomodate. This way, the lugs slide in and out with ease.. if i must access the rear, i can pull 4 plugs out and the panel slides right out. I also used a 30° cut on the bottom edge of the front panel to create a tilt, leaning top-side-back, to give me easier vantage when adjusting the flow and eliminating the need to get on my knees to mess with it once installed. It sits 6" off the floor, quite low.

Top:
20200625_140719.jpg


Bottom
20200625_140733.jpg


20200625_140740.jpg


You get the idea... finished with the skeleton:
20200625_141047.jpg


As you can see, I cut the top and bottom squares 2" shorter front to back. This is my air flow and cooling plan. As well as easy access to add or delete a particular mod/wire.

Once i got it home, it was time to tear down the cabinet of doom. BUT BEFORE I DID, i labeled every single chord, on both ends, and the power supplies. A simple sharpie and masking tape will do. This saved an immense amount of headaches later in the build.

Tear down time:
20200626_141002.jpg


A quick dry fit was done before i ripped the cabinet apart..
20200625_151033.jpg


All good with the fit, room to spare as planned. I always give myself 1" of tolerance on the negative side to my measurements. To ensure a hasslefree install that can never end up too big by accident.

The rear is always first...Before i started rerouting wires, ample air flow and access holes were drilled via a 1-3/4" holesaw.
20200626_143355.jpg
20200626_143843.jpg

(In these 2 pics its upside down)

A huge fear for some is the idea of completely disconnecting all the equipment and the time it takes to do the transfer. I solved the worry with a couple power strips at ready next to the tank. Disconnected 1, pulled the wires out of the cabinet, and plugged it all back in immediately. Every time I got interuppted or needed a break, i could just walk away because everything was still running. This lowered the stress level of the project to almost zero.

With doodle diagram at my side, i began routing 1 item at a time. The power supplies need space between them to allow air to cool them properly. And it all went together beautifully. Double-Sided Gorilla tape rated at 30lbs did the trick in the cabinet, so it was the mounting form for this build too.
20200626_151359.jpg

20200626_162150.jpg

There was an errrr on my part in my blueprint, and i had to swap 1 power supply from the bottom to the top. No biggy at all. Gotta be able and willing to adapt on the fly when you are building like this. Or you will pull ur hair out and look like a betta fish bowl by the time ur done, if u dont quit first. Solid planning saves many headaches in anything in life. The unexpected suprises you must deal with as best u can, and keep cool. Routing electronics is not for the bull-in-a-china-closet type.

I made sure to leave at least 16" of lead wire for each component that will be mounted in the front chamber on the panel we havent started yet. You can always shove more chord in the back, you cannot always pull more out if you need it. Plus you need to have play so if need be, the front panel can be removed without unplugging a single component.

Finally, on to the front panel... Hole sawed the traffic points for chords, and screwed 2 small 3/4" screws to mount the power toggle strip. It has the slide-holes built in from the vendor for this purpose. This HAD to be temporarily mounted because if its not removable, access to the rear isnt possible.
20200626_142434.jpg


Here is where all the labels on your chords comes in handy :)
20200626_163236.jpg
20200626_163924.jpg


20200626_164643.jpg


More 2-sided gorilla tape and it really started to take shape. 10 mins later, i flipped the switch, and he we are... a year after the drilling project and sump build, proud to say Rags2Riches is 100%.

Thanks for checking out this build, and i hope this gives you confidence to save some money and DO IT YOURSELF. :)

20200626_165811.jpg


Total project cost:
$56

Cheers all.
#r2r4life
#diy

20200626_172623.jpg
 
Last edited:
OP
OP
RichtheReefer21

RichtheReefer21

Scrap Yard Reefer
View Badges
Joined
Jun 11, 2018
Messages
8,766
Reaction score
49,645
Location
Western Massachusetts
Rating - 0%
0   0   0
Your equipment: the straight lines, the perfect spacing, the neat cords ....
I’m no psychiatrist, but I see “signs” .... :D
My past job in aerospace gave me a great welath of knowledge and experience on laying out plans in blueprint-style form. I would love to try it digitally with cad or an equivalent, but i really enjoy the sketching.

Thanks for dropping by and checking it out.

Cheers
 
OP
OP
RichtheReefer21

RichtheReefer21

Scrap Yard Reefer
View Badges
Joined
Jun 11, 2018
Messages
8,766
Reaction score
49,645
Location
Western Massachusetts
Rating - 0%
0   0   0
Thanks for sharing, lots of great info here.
My father says, "you cannot know what u are not taught. Gotta share what i can. Thanks sam.

Looks great!

Appreciate it. Patience, planning, and a steady hand are my recipe. Nothing fancy. No extras. K.i.s.s.

Thank you both for checking it out
 

Doctorgori

2500 Club Member
View Badges
Joined
Mar 18, 2019
Messages
4,504
Reaction score
6,089
Location
Myrtle Beach
Rating - 0%
0   0   0
My past job in aerospace gave me a great welath of knowledge and experience on laying out plans in blueprint-style form. I would love to try it digitally with cad or an equivalent, but i really enjoy the sketching.

Thanks for dropping by and checking it out.

Cheers
I worked on aircraft also. I also learned Wire management in a environment where vibration, chafing and shorts caN cost $$ and lives. Some of the equip cabinets I’ve seen are awesome
 
OP
OP
RichtheReefer21

RichtheReefer21

Scrap Yard Reefer
View Badges
Joined
Jun 11, 2018
Messages
8,766
Reaction score
49,645
Location
Western Massachusetts
Rating - 0%
0   0   0
I worked on aircraft also. I also learned Wire management in a environment where vibration, chafing and shorts caN cost $$ and lives. Some of the equip cabinets I’ve seen are awesome
The water, waste, and oxygen scrubber recycling cabinets for the I.S.S. is a marvel. Simply put.
 

Bubbles, bubbles, and more bubbles: Do you keep bubble-like corals in your reef?

  • I currently have bubble-like corals in my reef.

    Votes: 28 36.4%
  • I don’t currently have bubble-like corals in my reef, but I have in the past.

    Votes: 9 11.7%
  • I don’t currently have bubble-like corals in my reef, but I plan to in the future.

    Votes: 24 31.2%
  • I don’t currently have bubble-like corals in my reef and have no plans to in the future.

    Votes: 14 18.2%
  • Other.

    Votes: 2 2.6%
Back
Top