
Hi all,
Eric here.
Been reading and learning here for a while so now it's time to have a thread for my journey.
I've had a RSR170 before for a little over a year to kind of determine if this hobby was for me.
It went quite well for some time:
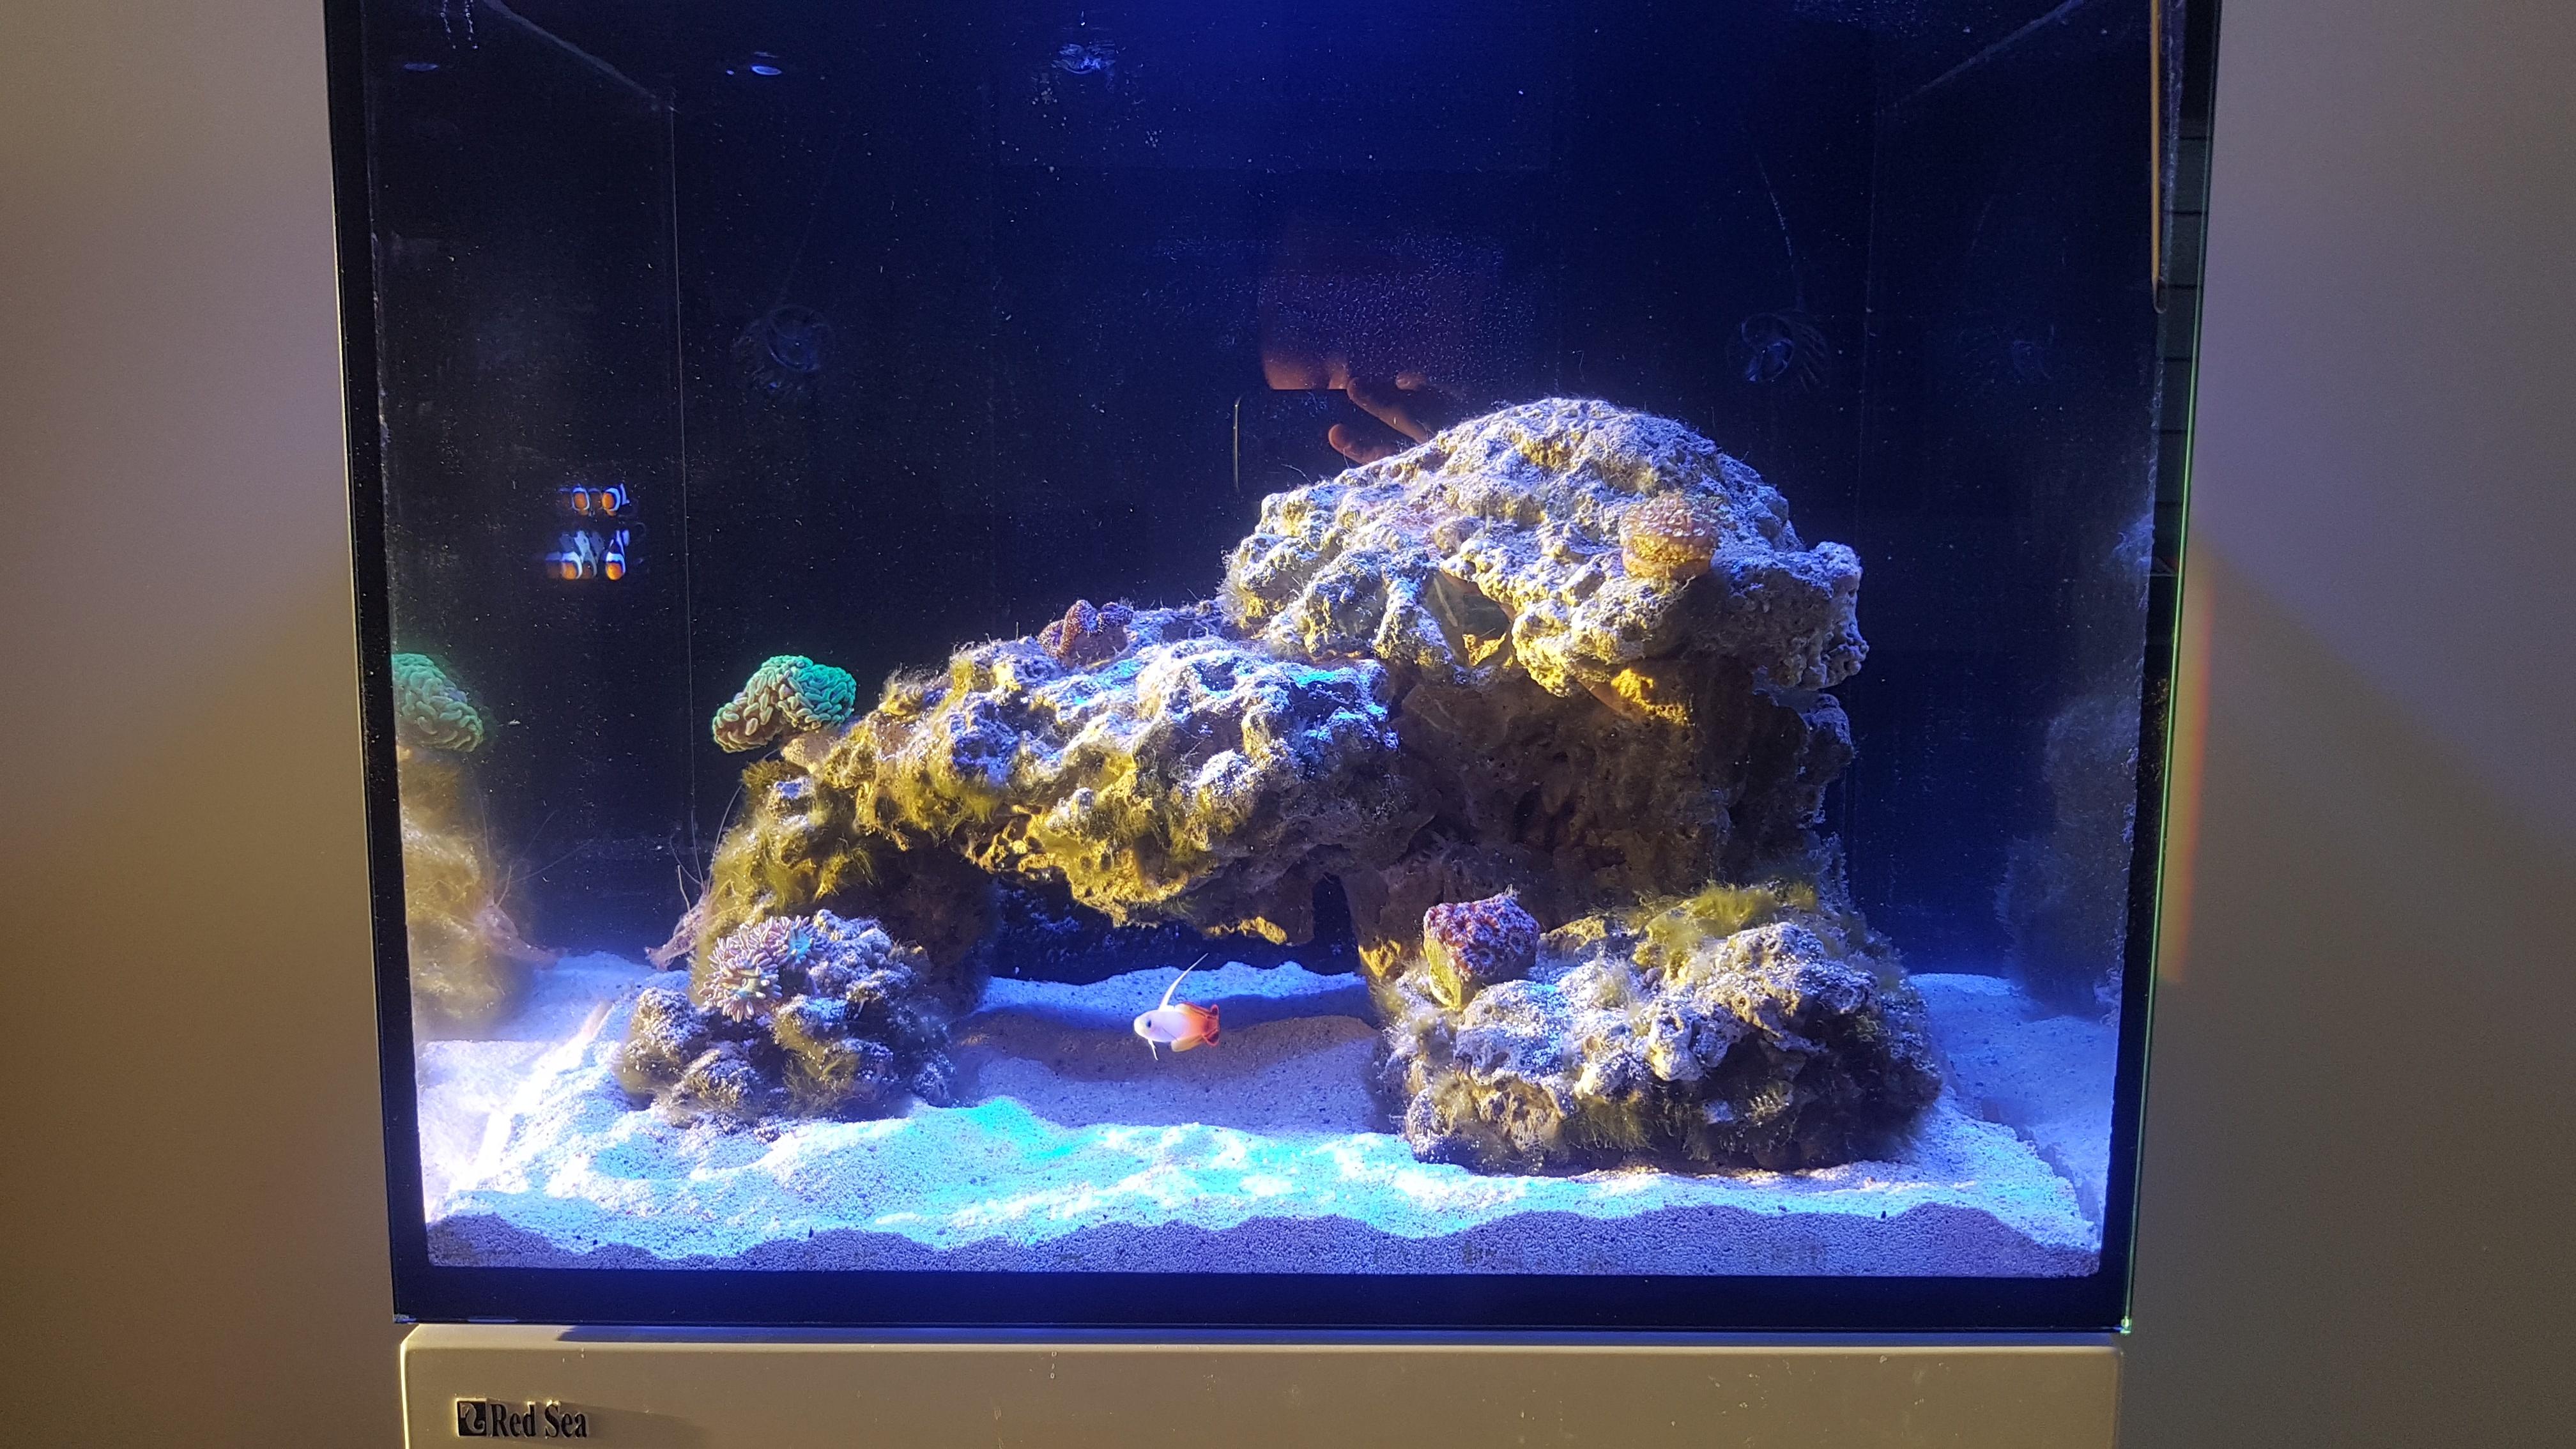
Had a cleaner shrimp, 2 firefish, couple of blackice snowflakes, some snails and some coral.
We then moved house twice in a year. A short while to my parents in law and then to our current home which had some work done before we could move in.
The moves went relatively well, then again almost no bioload and corals.
Sadly it went a bit wrong after that. I added a Royal gramma and orange spot goby which then brought something in which wiped out the fish...
I think brook or velvet.
Thanks to Humblefish here, and on his forum, I then figured out QT was probably the way forward. So during the fallow period I tried my best at QT'ing a tiny yellow tang.
Yes I know, yellow tang, 170l/43g tank is a no no. But at this point I had acquired a RSR425XL!
Sadly I messed up with the QT. I was scared of copper treatment so I tried to go General Cure and black molly as indicators. The mollies were fine and even spawning.
The tang was ok for a while and then deteriorated fast before I could get it into the DT. Which was really sad since it almost acted like a puppy:
Then we had a leak in the kitchen which forced us to remove the oak floor that was ruined by it.
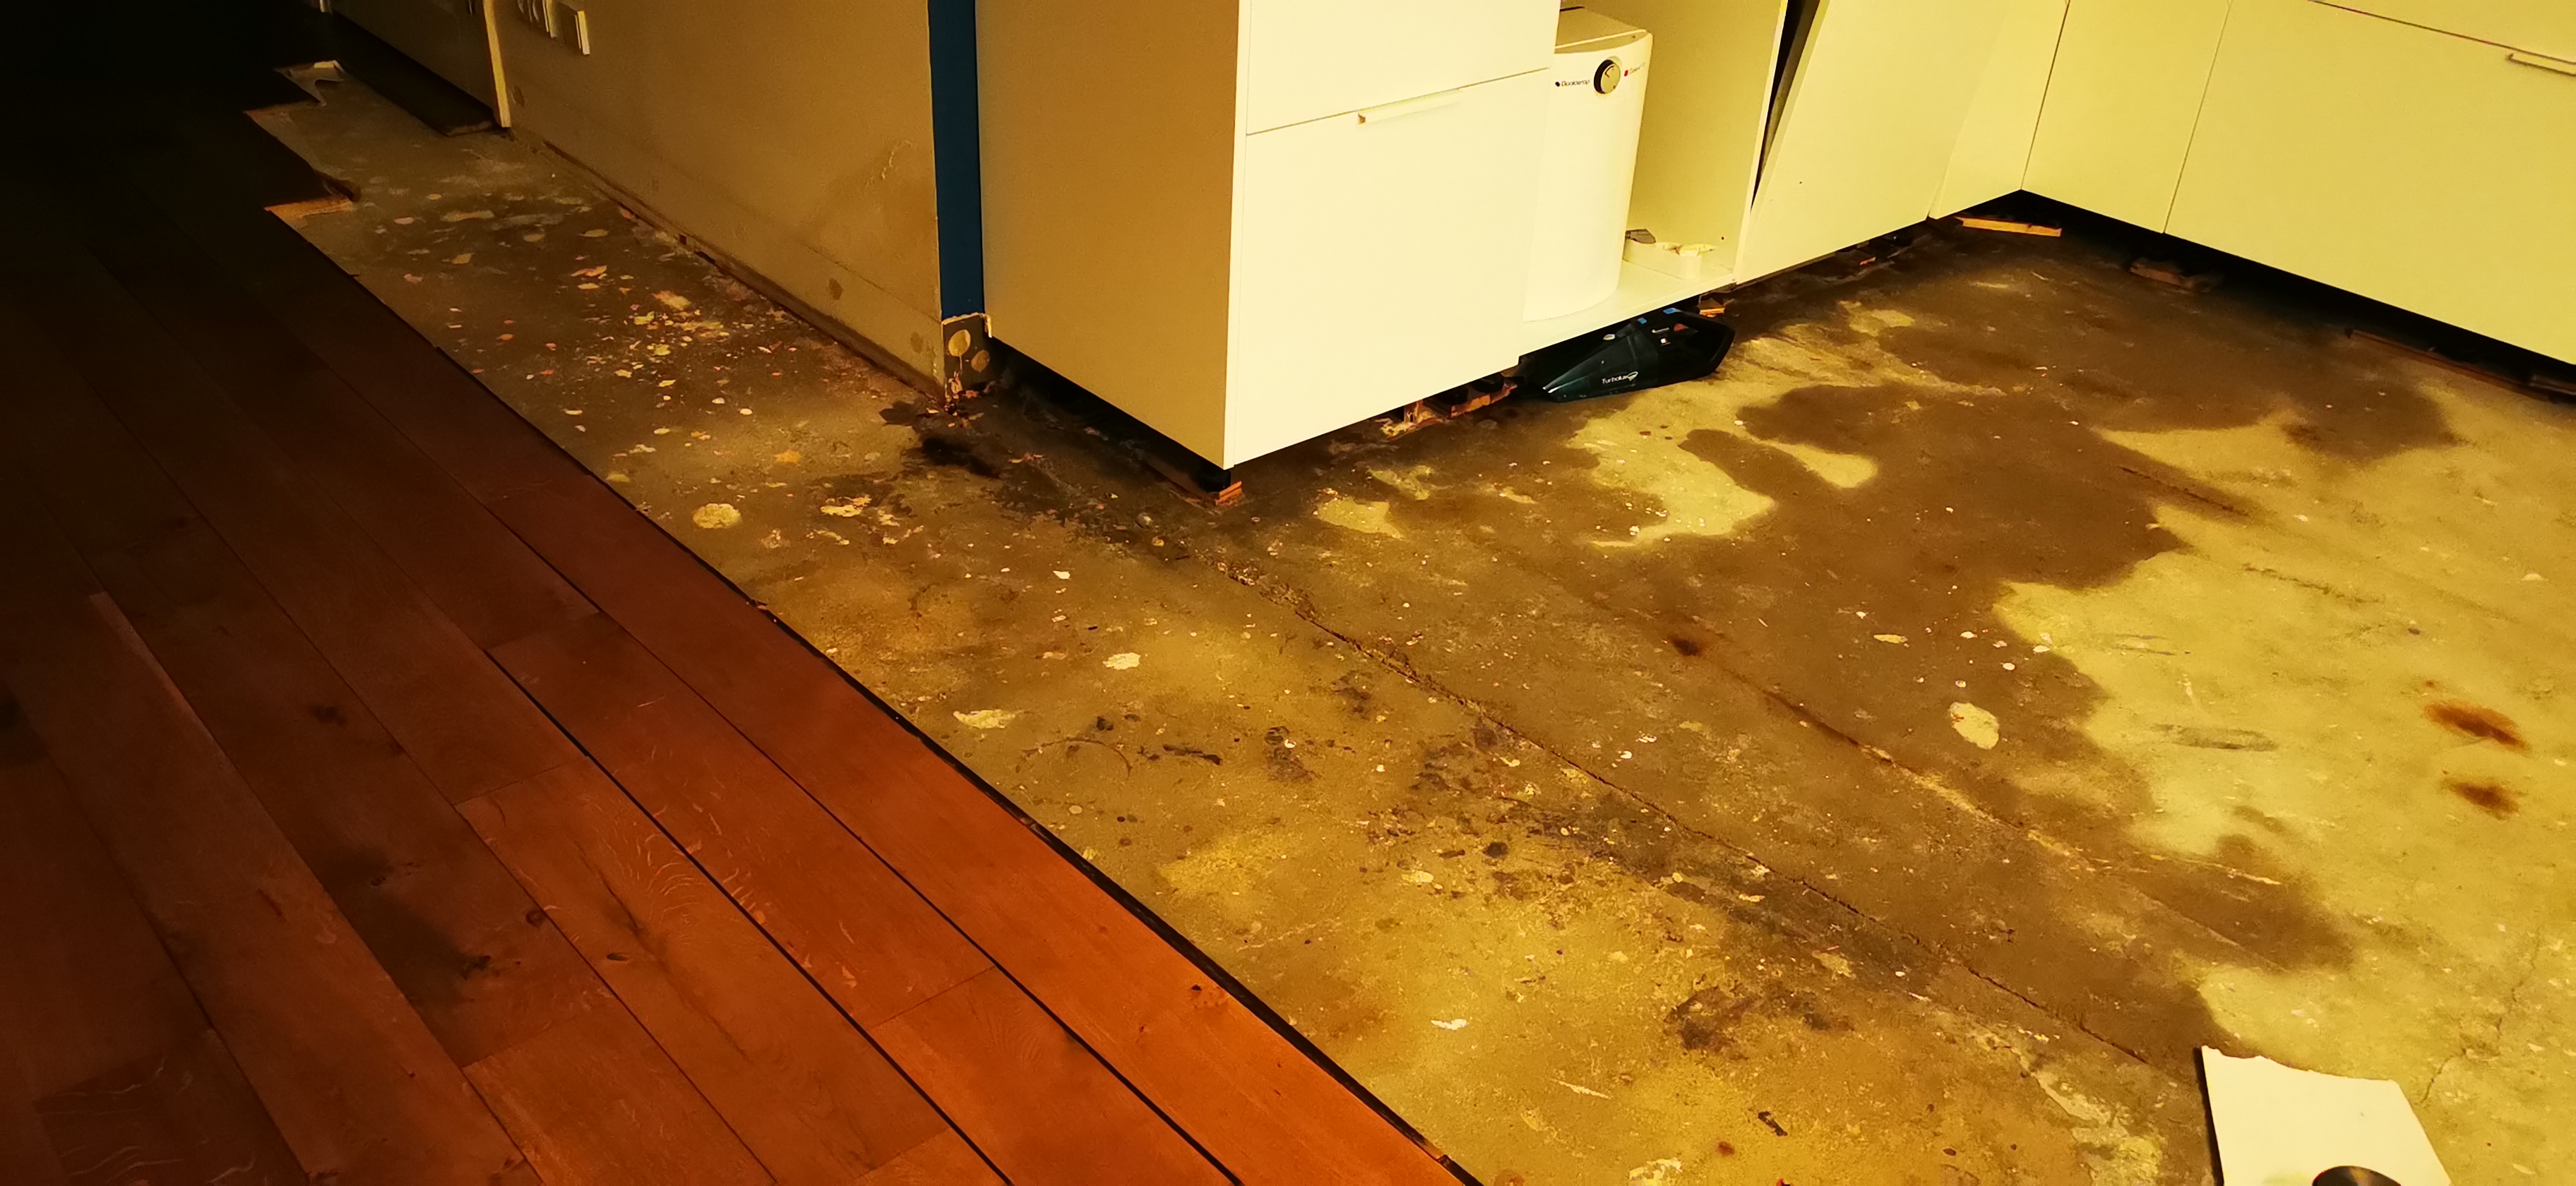
Luckily it was al covered by insurance.
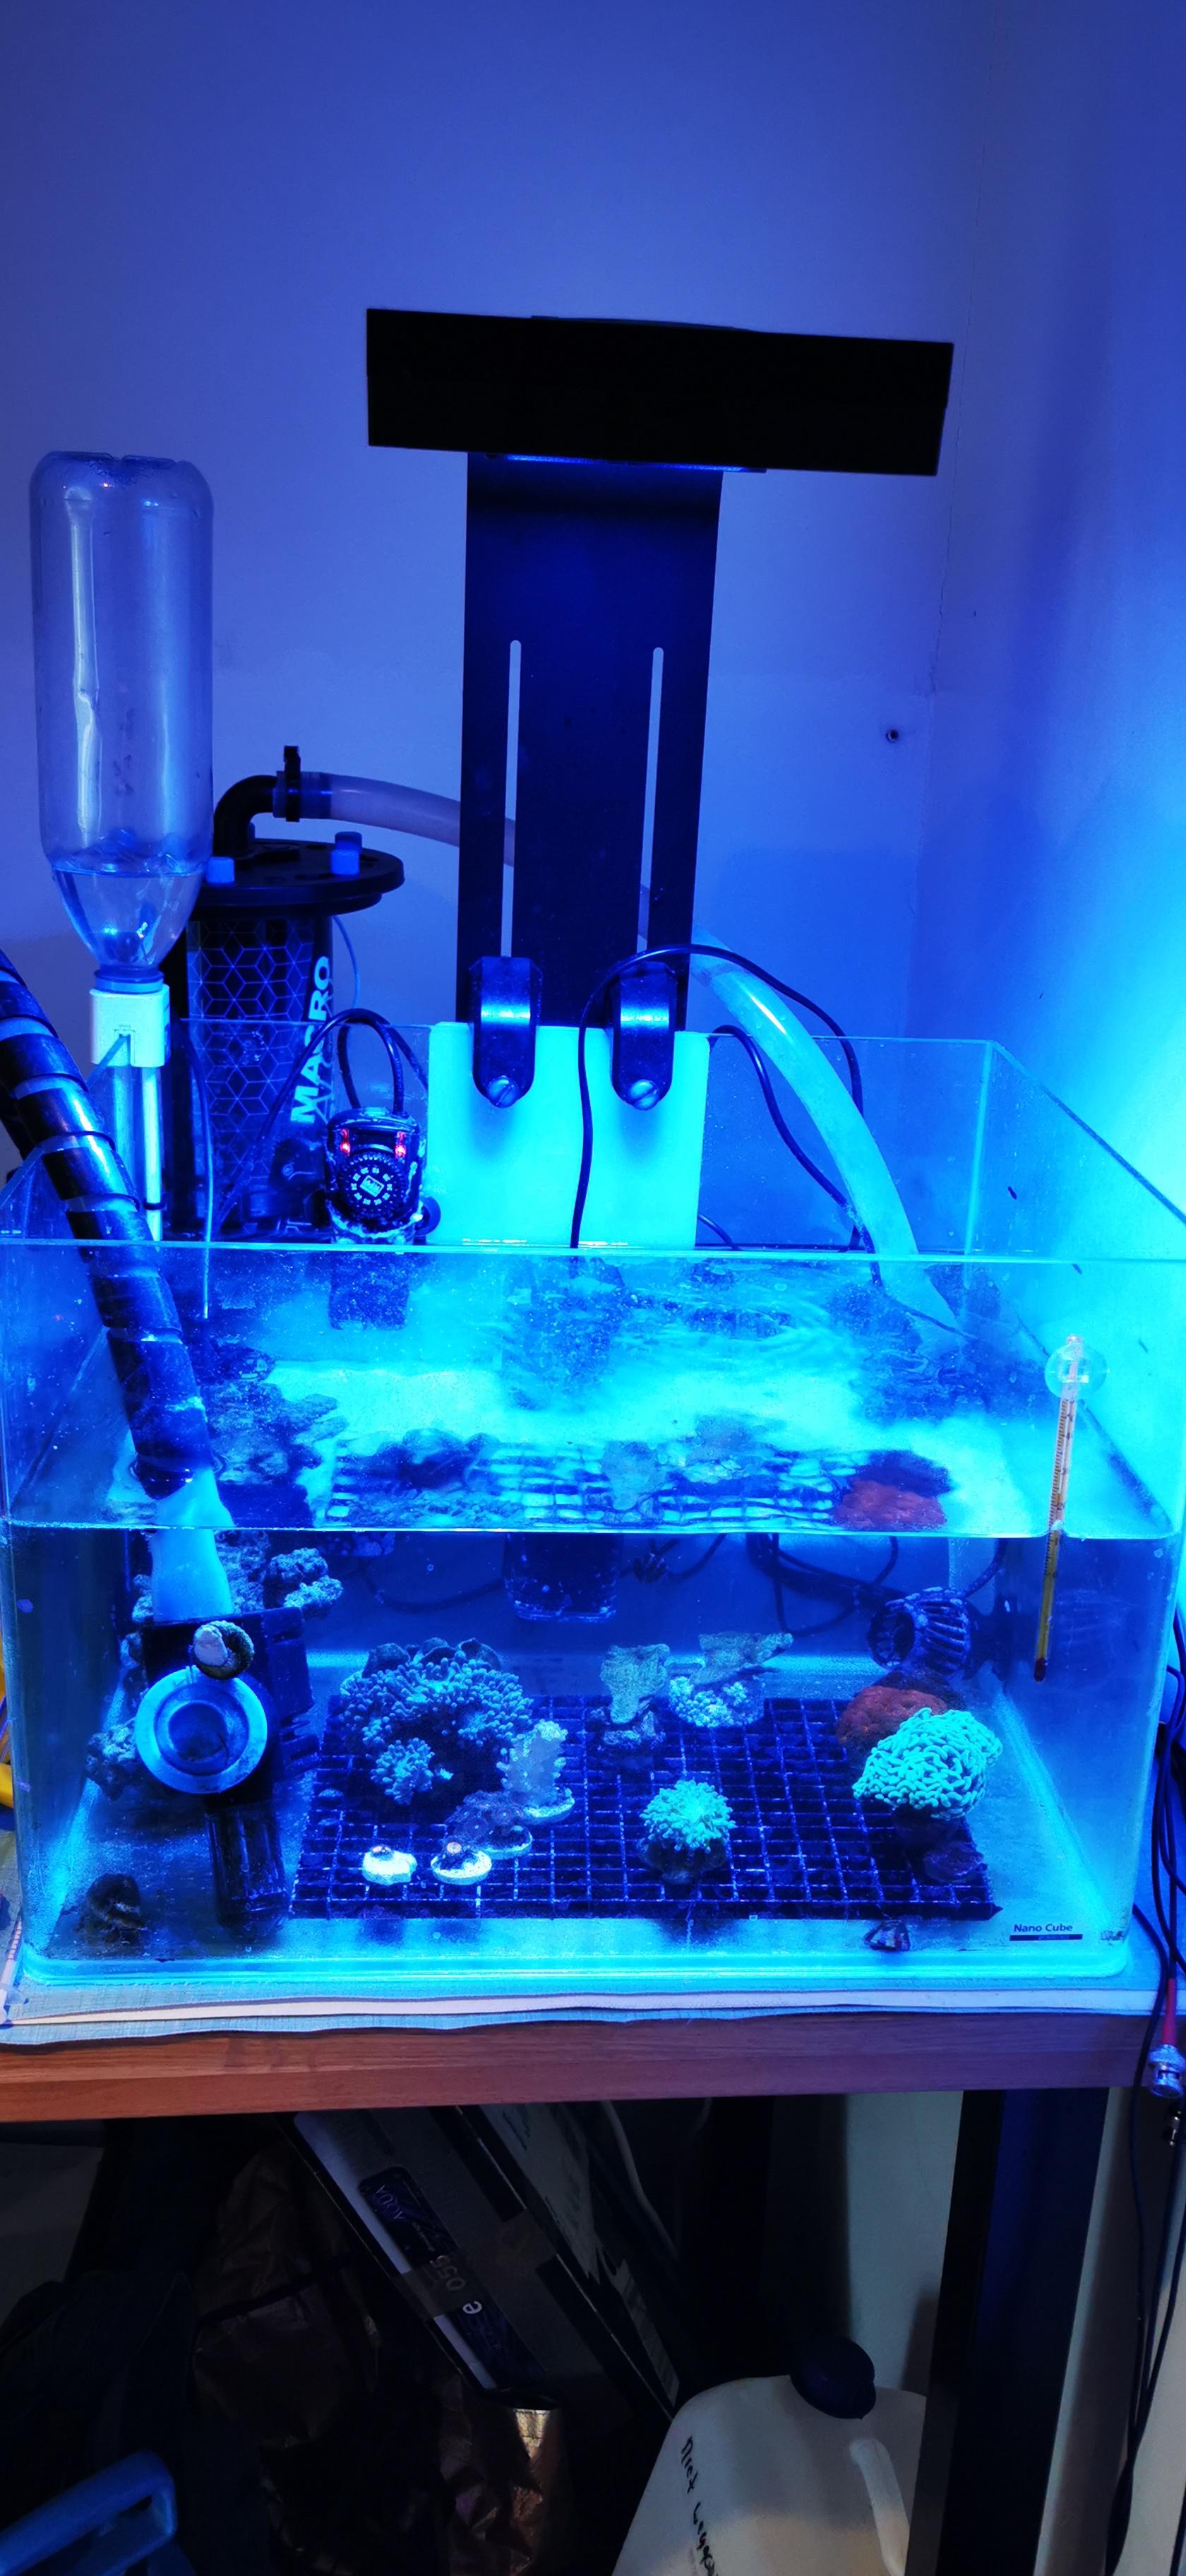
So since the floor was already bare ideas started bubbling. As I had no more fish and moving both the RSR170 and the RSR475XL
around during all this was too much hassle I solde the RSR170 and put up a temp home for the corals and inverts:
Then I started to contemplate putting in channels with RODI lines for AWC.
I stepped up the madness by asking the builder if it was possible to put 4x32mm(ca1 1/4 inch) PVC in the floor.
2 drains, 1 return, 1 to be determined. Probably some wiring for the Apex or something like that. It was open so the 1 extra
line cost next to nothing to put in now.
His answer was why not! So we went to work cutting 2 grooves in the floor when this happened:
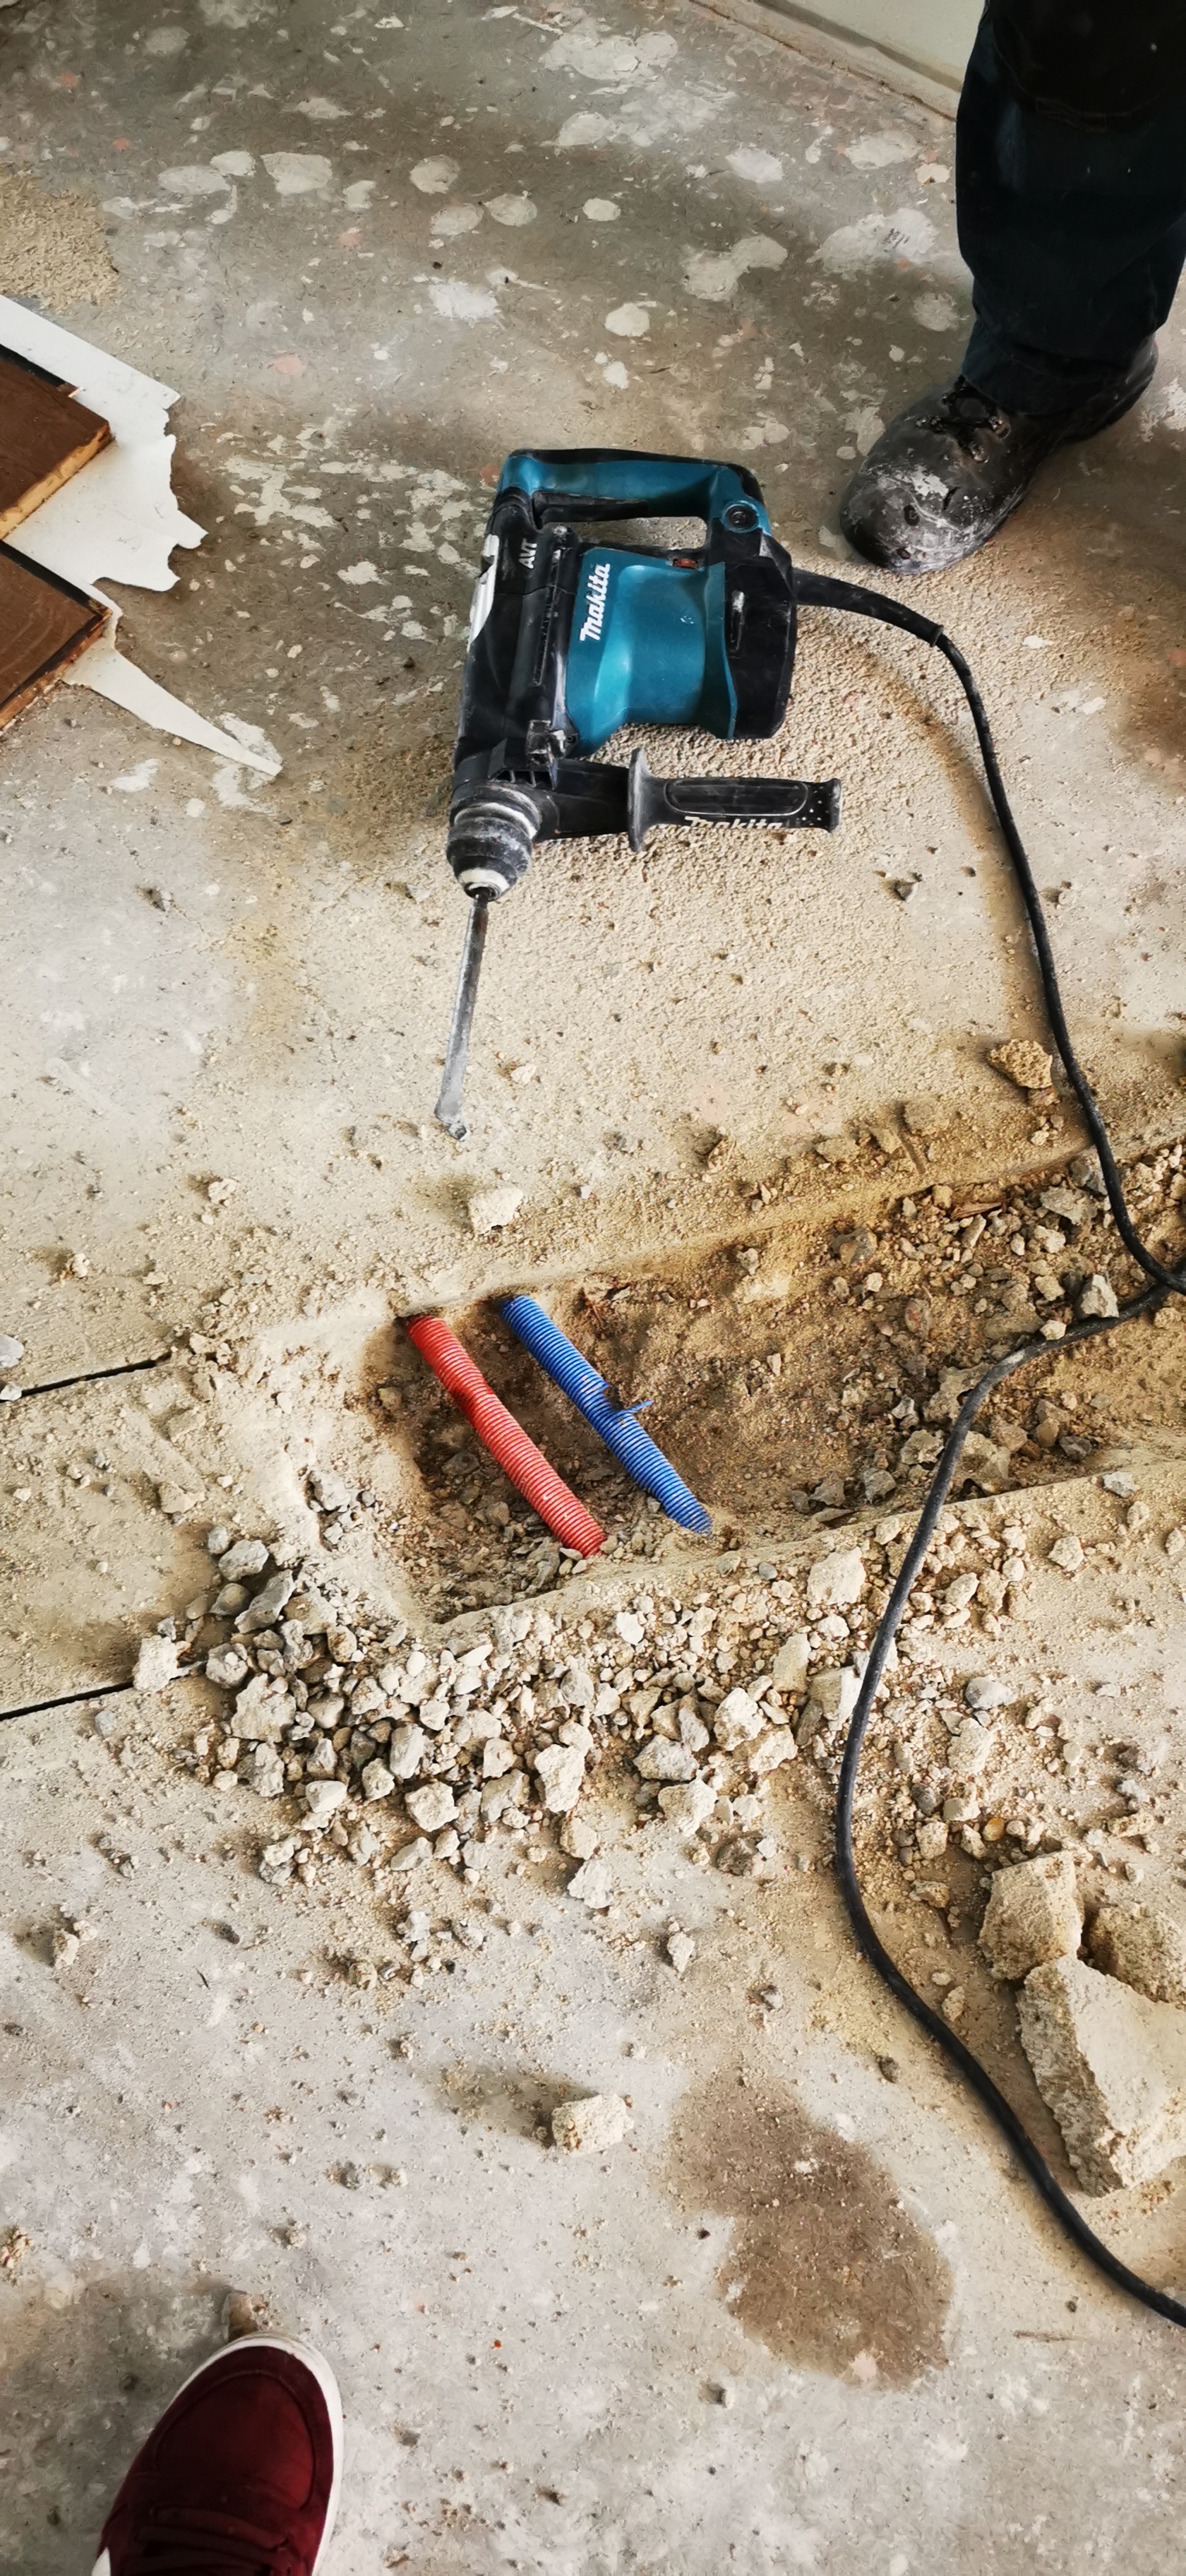
Which lead to some swearing because of this:
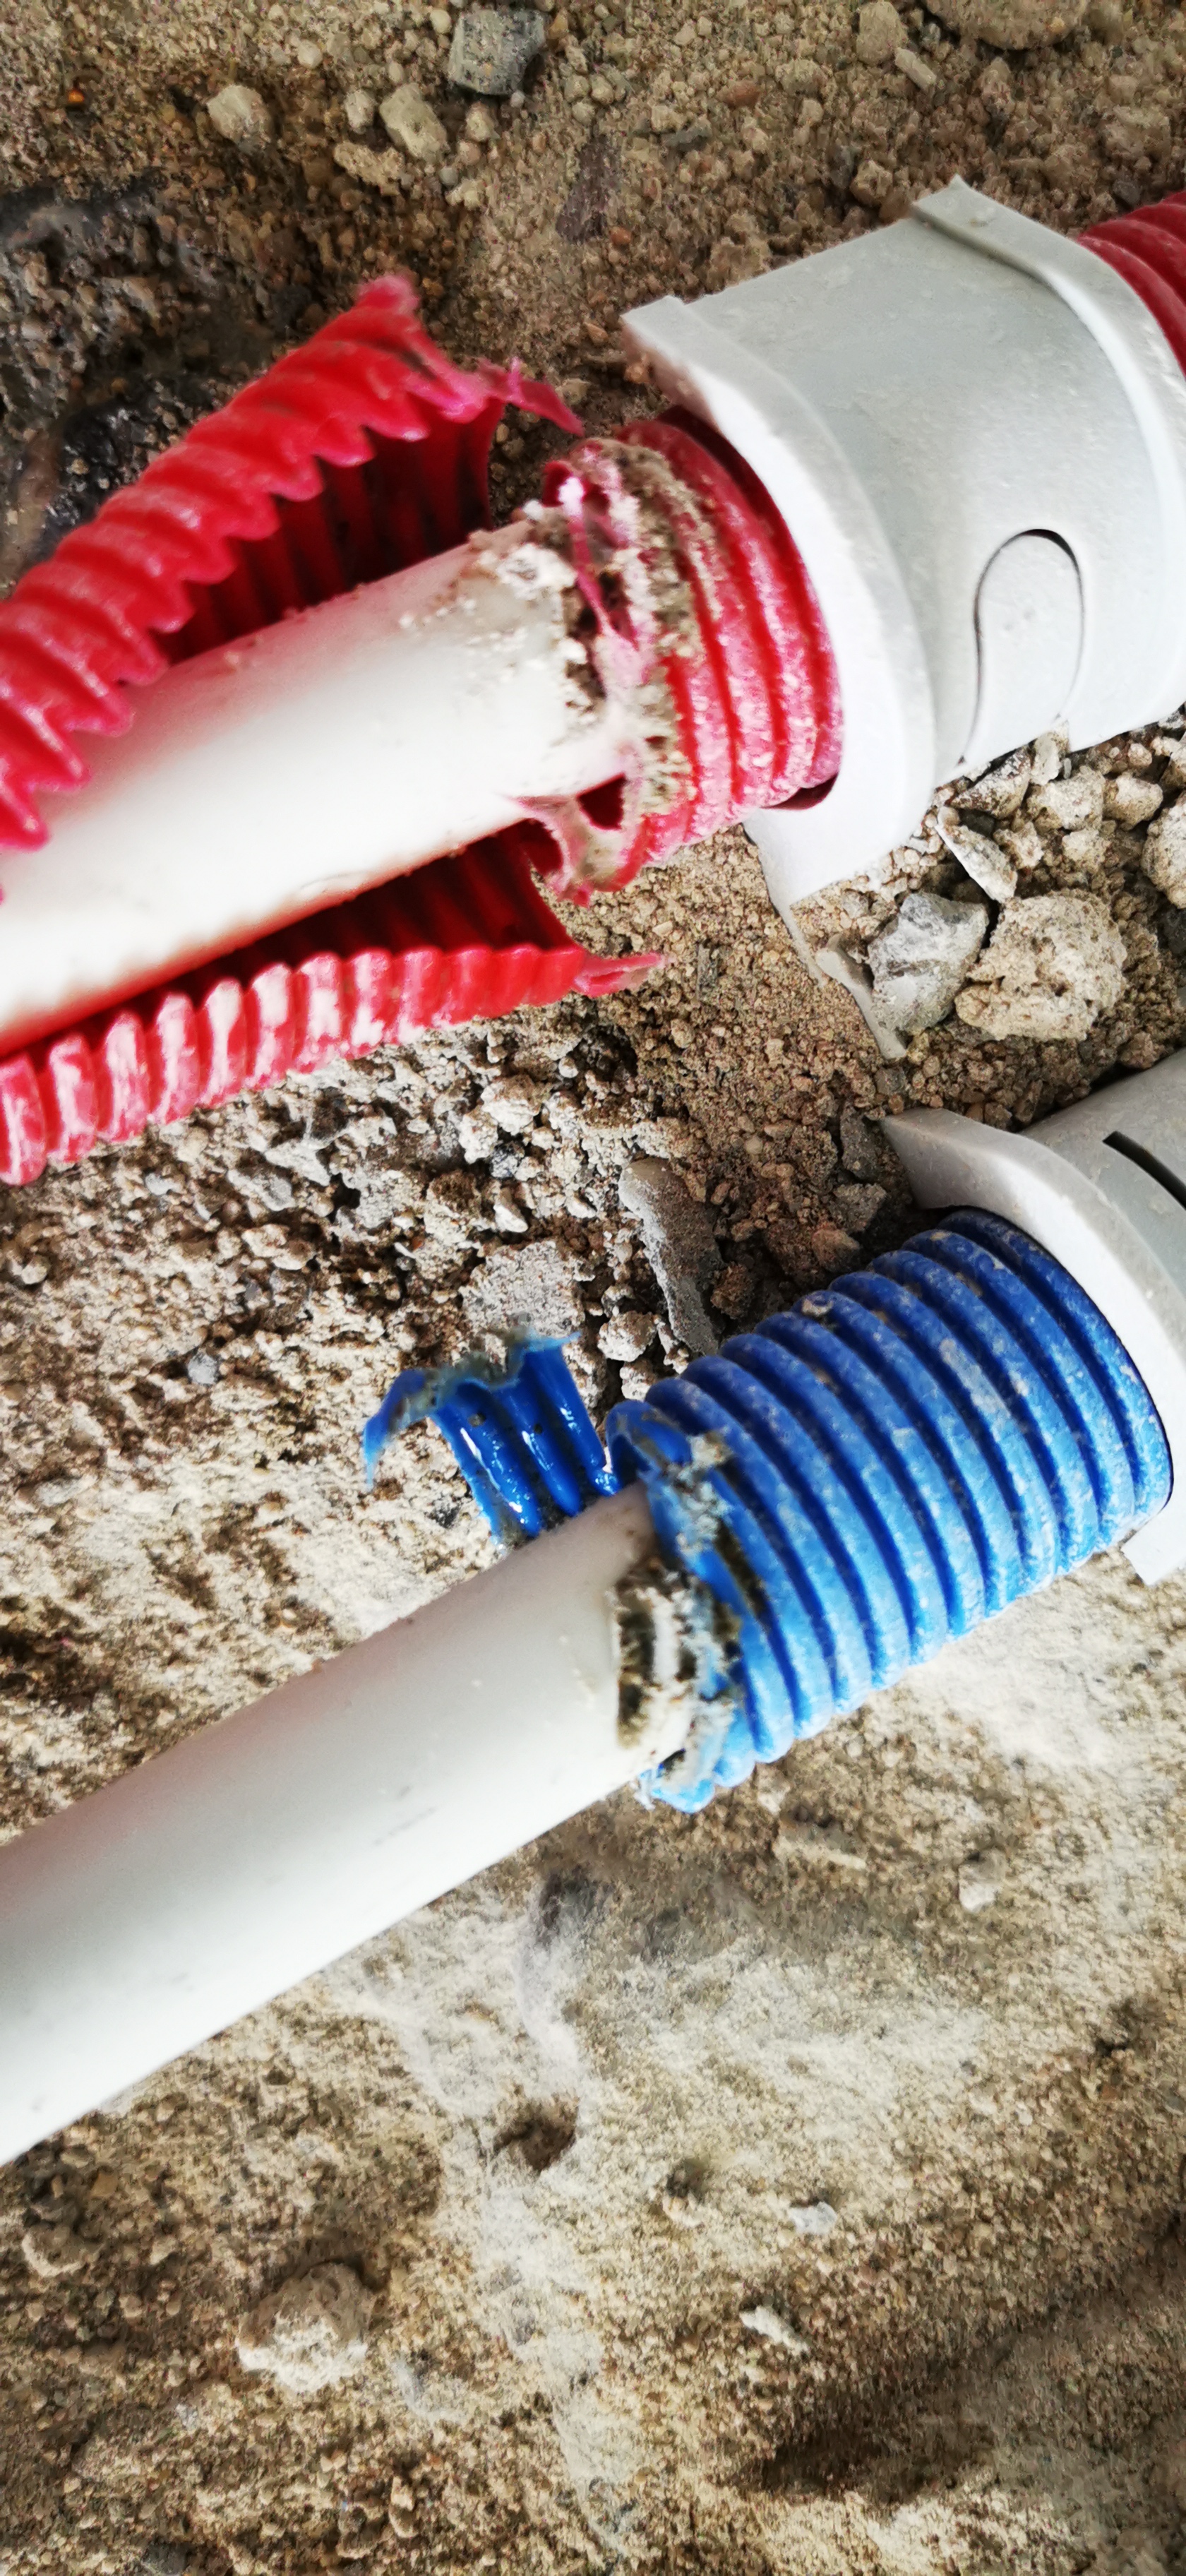
We had just nicked a line for a radiator . Luckily it was only dripping out but still quite a setback.
Our builder wasn't really phased by this. We just drained the central heating, he put in a new piece and I finished hacking out the channel.
Then some holes in the wall for the PVC to come out of.
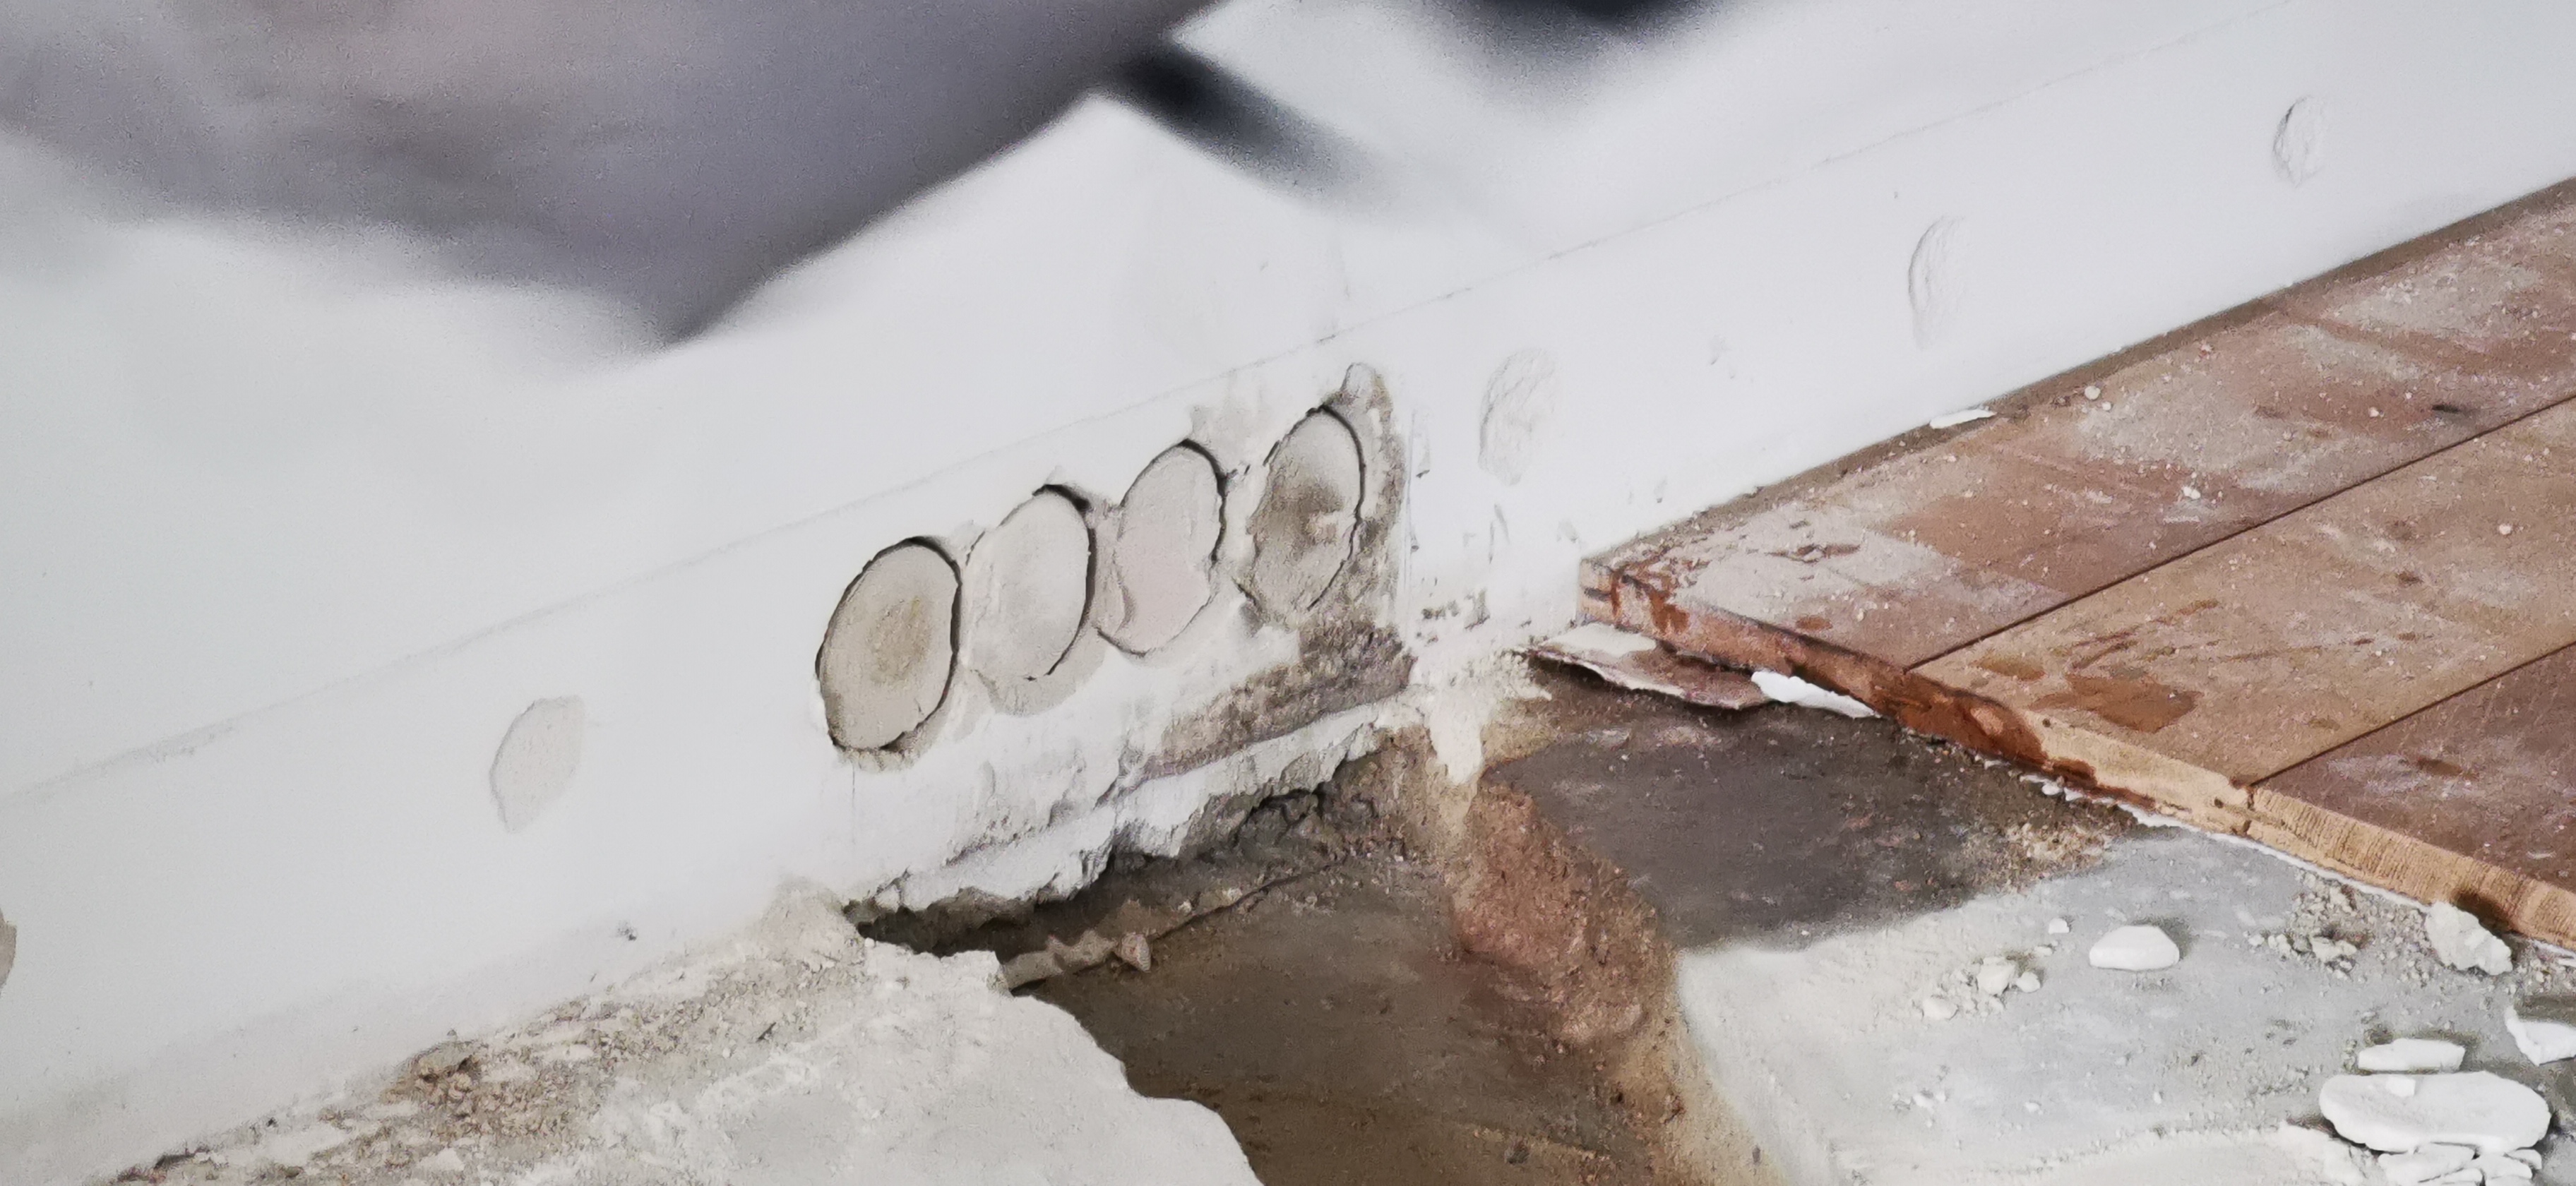
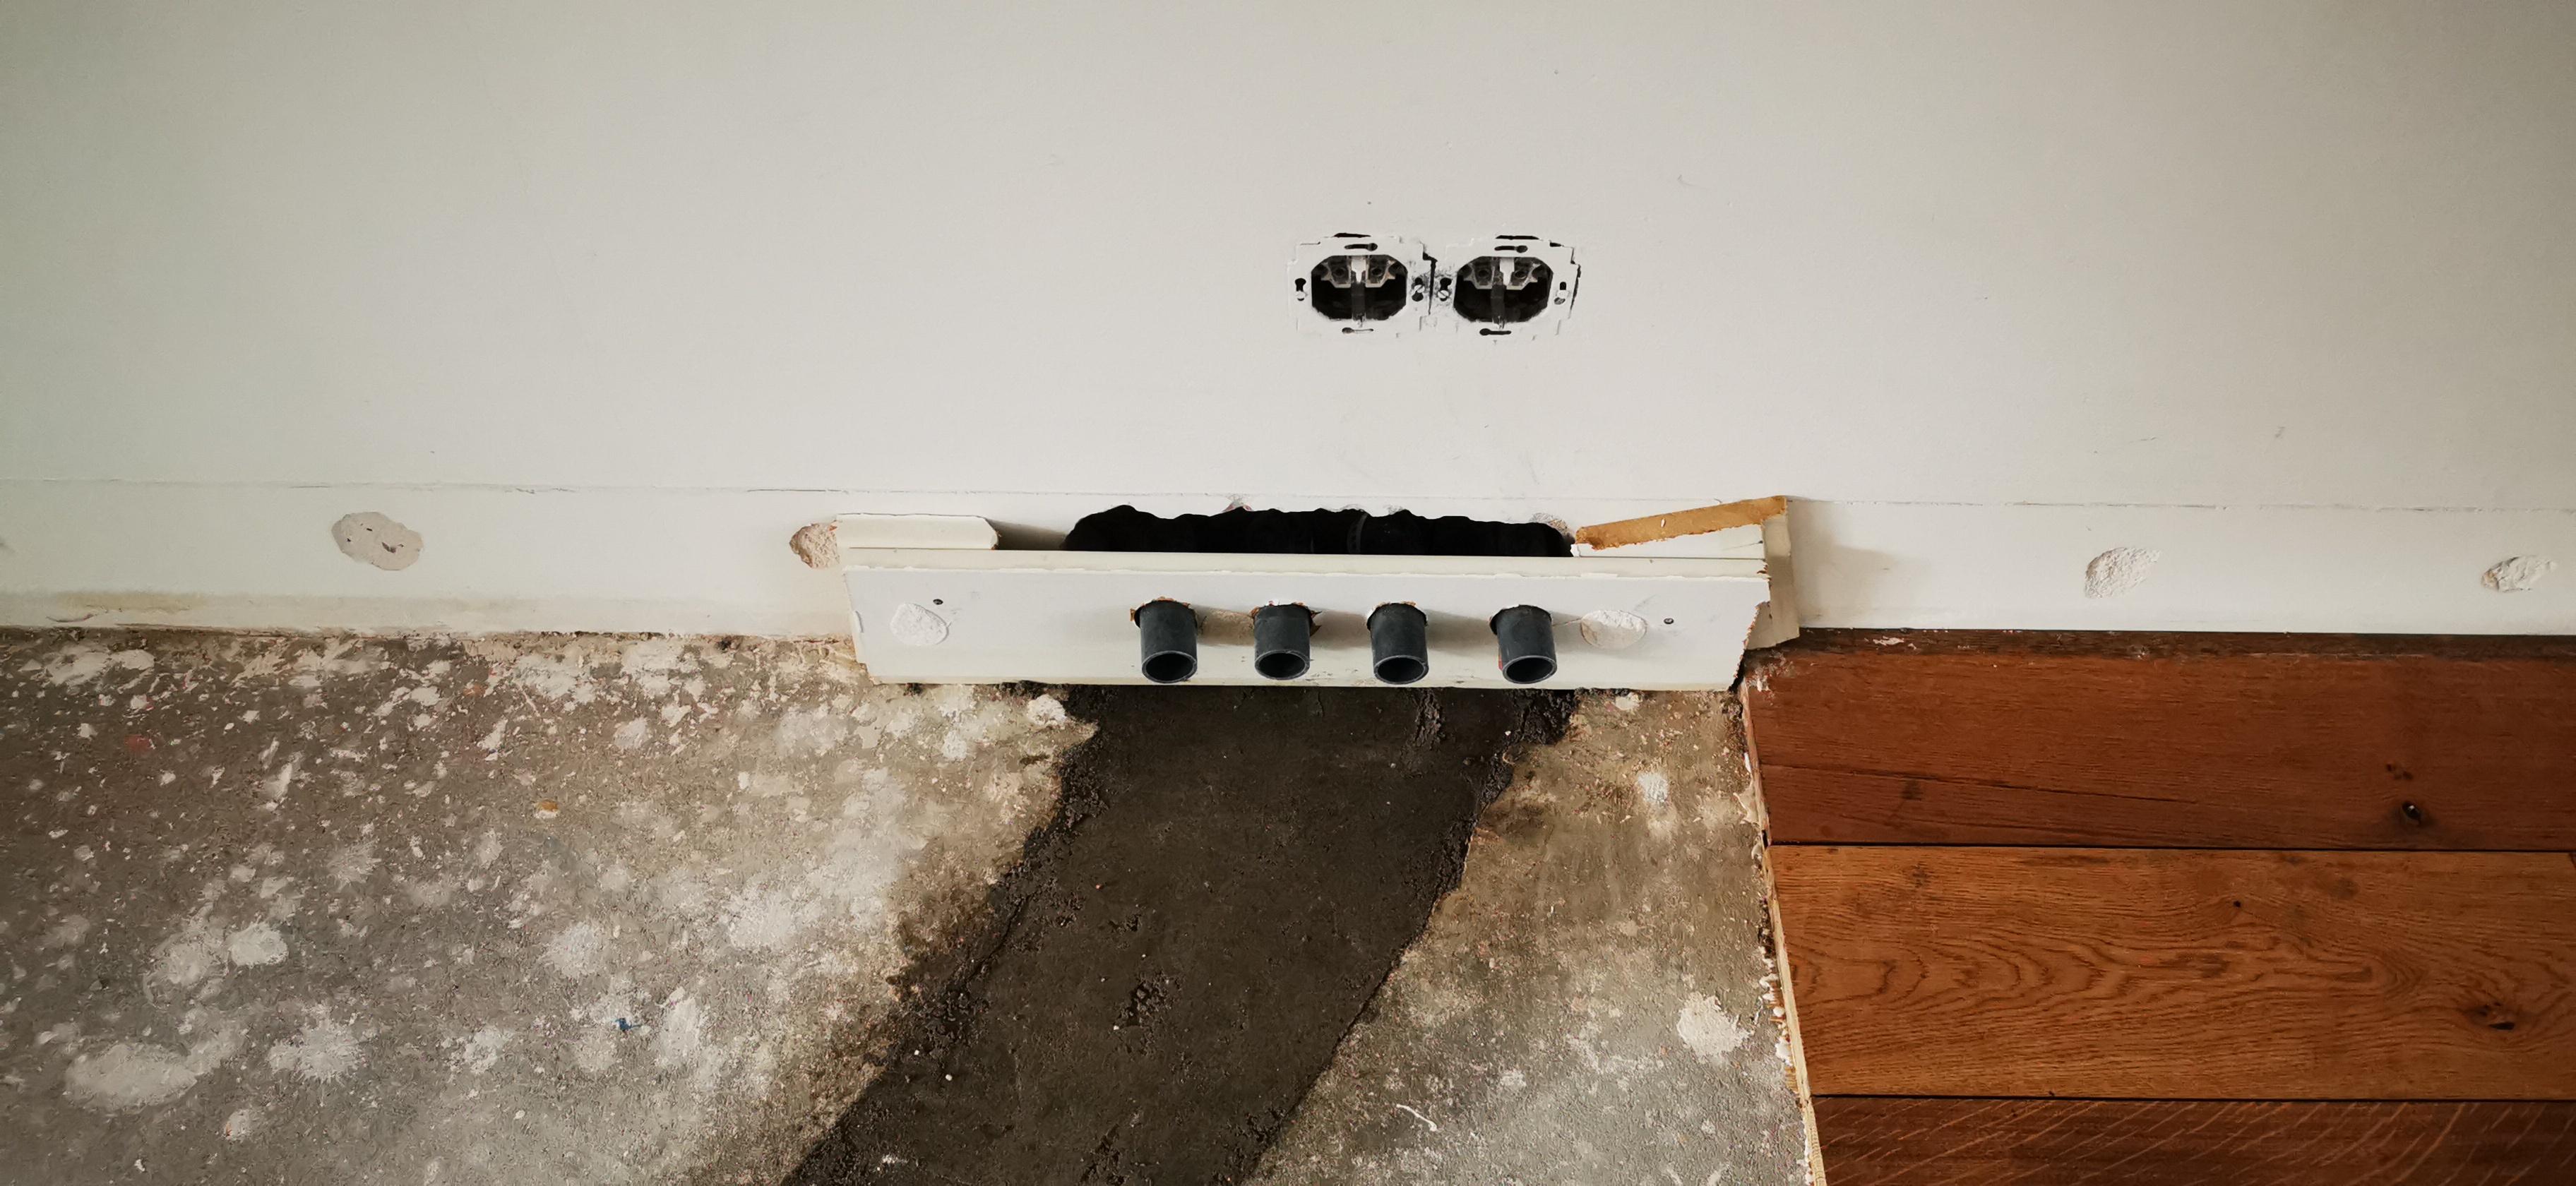
This is just temporary until the cement cures. When the new floor arrives we'll also be getting new baseboards.
Should I ever tire of the hobby I can just cut off the PVC and put a blank piece of baseboard there. No one will ever know...
until they check the garage:
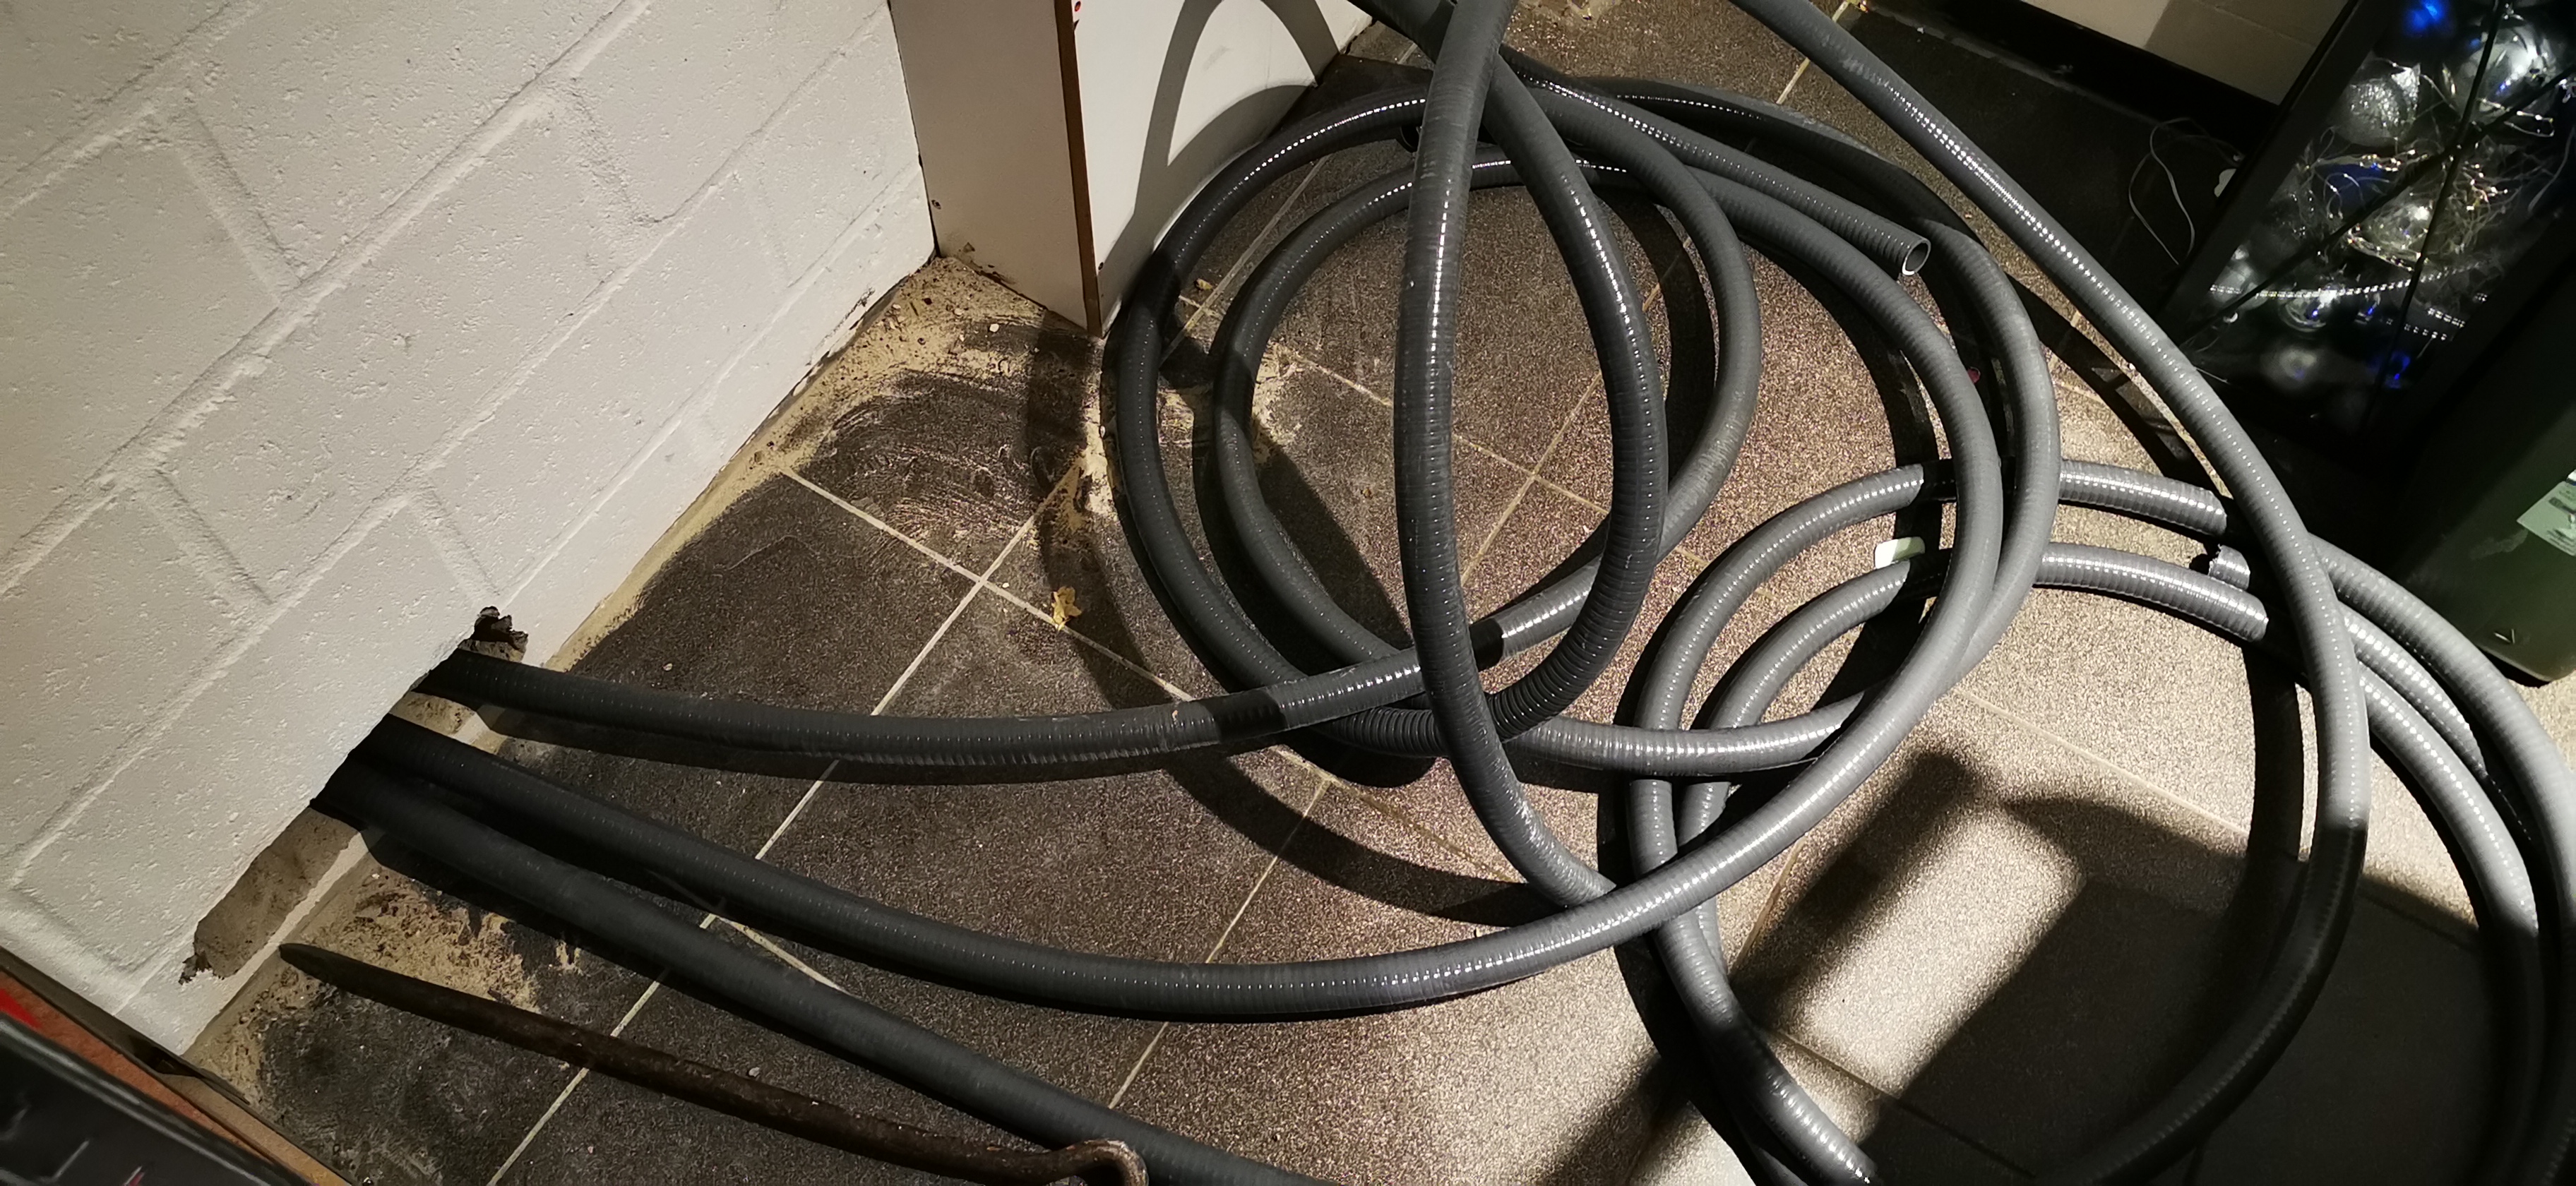
Oh right, I used pool PVC lines which are somewhat flexible since I have to manouver the stuff behind the kitchen and
dishwasher and stuff.
Shouldn't be a problem though as they are 100% PVC for use in ponds/swimming pools/etc and you can still PVC glue
everything on.
That's the story for now. It will go a bit slowly since the new floor will be here end of Februari.
By then I hope to have finalized my reeftank coaster idea.
Basically a sheet of waterresistant wood with a wood rim in which tiles are glued to contain drips or minor spills.
Also the remote sump stand with a backwall for the electronics and a mixing station. Keeps me busy while everything else is on hold...
To be continued...
Eric here.
Been reading and learning here for a while so now it's time to have a thread for my journey.
I've had a RSR170 before for a little over a year to kind of determine if this hobby was for me.
It went quite well for some time:
Had a cleaner shrimp, 2 firefish, couple of blackice snowflakes, some snails and some coral.
We then moved house twice in a year. A short while to my parents in law and then to our current home which had some work done before we could move in.
The moves went relatively well, then again almost no bioload and corals.
Sadly it went a bit wrong after that. I added a Royal gramma and orange spot goby which then brought something in which wiped out the fish...
I think brook or velvet.
Thanks to Humblefish here, and on his forum, I then figured out QT was probably the way forward. So during the fallow period I tried my best at QT'ing a tiny yellow tang.
Yes I know, yellow tang, 170l/43g tank is a no no. But at this point I had acquired a RSR425XL!
Sadly I messed up with the QT. I was scared of copper treatment so I tried to go General Cure and black molly as indicators. The mollies were fine and even spawning.
The tang was ok for a while and then deteriorated fast before I could get it into the DT. Which was really sad since it almost acted like a puppy:
Then we had a leak in the kitchen which forced us to remove the oak floor that was ruined by it.
Luckily it was al covered by insurance.
So since the floor was already bare ideas started bubbling. As I had no more fish and moving both the RSR170 and the RSR475XL
around during all this was too much hassle I solde the RSR170 and put up a temp home for the corals and inverts:
Then I started to contemplate putting in channels with RODI lines for AWC.
I stepped up the madness by asking the builder if it was possible to put 4x32mm(ca1 1/4 inch) PVC in the floor.
2 drains, 1 return, 1 to be determined. Probably some wiring for the Apex or something like that. It was open so the 1 extra
line cost next to nothing to put in now.
His answer was why not! So we went to work cutting 2 grooves in the floor when this happened:
Which lead to some swearing because of this:
We had just nicked a line for a radiator
. Luckily it was only dripping out but still quite a setback.Our builder wasn't really phased by this. We just drained the central heating, he put in a new piece and I finished hacking out the channel.
Then some holes in the wall for the PVC to come out of.
This is just temporary until the cement cures. When the new floor arrives we'll also be getting new baseboards.
Should I ever tire of the hobby I can just cut off the PVC and put a blank piece of baseboard there. No one will ever know...
until they check the garage:
Oh right, I used pool PVC lines which are somewhat flexible since I have to manouver the stuff behind the kitchen and
dishwasher and stuff.
Shouldn't be a problem though as they are 100% PVC for use in ponds/swimming pools/etc and you can still PVC glue
everything on.
That's the story for now. It will go a bit slowly since the new floor will be here end of Februari.
By then I hope to have finalized my reeftank coaster idea.
Basically a sheet of waterresistant wood with a wood rim in which tiles are glued to contain drips or minor spills.
Also the remote sump stand with a backwall for the electronics and a mixing station. Keeps me busy while everything else is on hold...
To be continued...


