Ken's 290 Peninsula

Fiziksgeek

Active Member
View Badges
Joined
Oct 27, 2018
Messages
251
Reaction score
260
Rating - 0%
0   0   0
I figured today is as good as any to officially start a build thread!

Background:
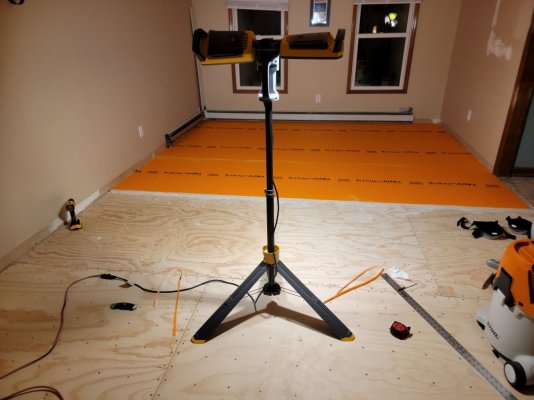
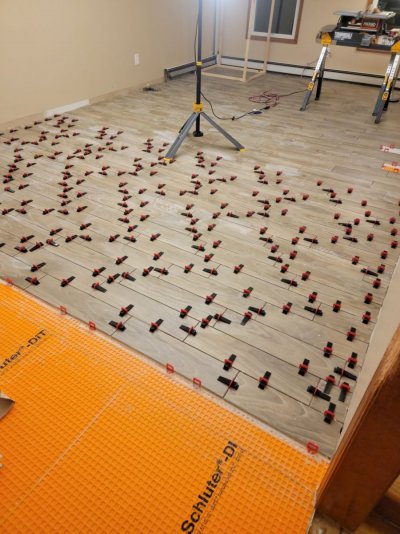
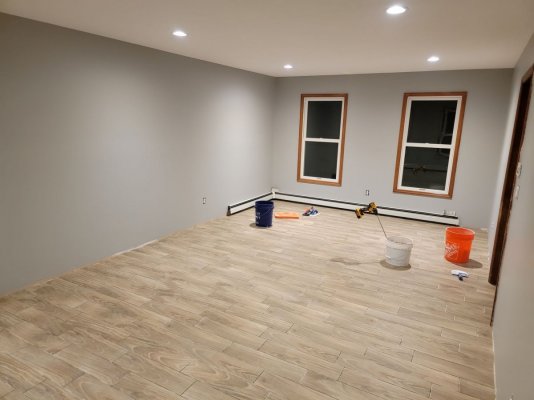
Bought my then girlfriend a 55 gallon tank run off of a couple Fluval canister filters as present when we were living in Boston and attending graduate school. Upon graduation and engagement we moved to CT to start our careers and upgraded to a 125 fully set up by an aquarium store with a wet/dry, skimmer, and large pleated cartridge filter. Both of these tanks were FOWLR. After getting married and buying our first place, I remodeled the basement creating a nice family room with in-wall 210. With the idea of keeping a mixed reef, we stepped up the lighting to metal halides and VHOs. Used a 75 for a sump, started with a huge beckett style skimmer. Got an RO/DI filter and set up a real water station with brute cans. I drilled the tank myself for a closed loop. Had good success with softies and LPS. Through a series of events we ended up moving out of state and at that time I sold off everything. Moved back to CT after just a could years and have been in our house for over 11 years now. Every so often we would discuss a tank, but didn't know exactly where to put it. Thank to the pandemic, I've been working at home now for most of 2 years, and will be working at home, at least part time going forward. So we started discussing it more seriously and finally put together a plan for a peninsula tank that would separate an office area from a sitting area, so I will get to enjoy the tank while I work.

Tank:
72x36x26 (290 gallons) peninsula from Crystal Dynamics Aquariums (CDA), 3 sides starphire, 24" modular marine overflow.
(actual water volume is probably more like 260 gallons)

Stand:
Extruded aluminum from Framingtech
Wood wrap..no idea what I am doing yet...

Flow:
Return Abyzz A200
2xMP40s or 60s
2 closed loops powered by red dragon pump


Lighting:
3-4 Kessil AP9X

Sump and frag tank"
SK-72 (72x18x18) from Synergy reef in red/white color scheme
40x24x12 frag tank from CDA as well.
Both on a 84x24x36 stand from Framingtech as well.
The sump and *** tank will be remote in the basement in a filtration "closet".

Skimmer:
Bubble King 250 deluxe

Control:
Apex
 
Last edited:
OP
OP
F

Fiziksgeek

Active Member
View Badges
Joined
Oct 27, 2018
Messages
251
Reaction score
260
Rating - 0%
0   0   0
Step 1: Tank support

I didn't take any pictures along the way, but the first step was to figure out how to support the tank. It will be on the first floor with a full basement below and will run parallel to the joists. So even at 36" wide, it will only land of 3 joists, that span about 13 feet.

I started by searching for a structural engineer and couldn't get anyone to call me back. I progressed to architects and again, same result. I called a couple contractors, same result again. With the boom in housing that is going on, I just don't think anyone was interested in such a small job.

I ended up at the local lumber yard. They sell Boise Cascade engineered wood products and offer free design services. Even though I am not a contractor, they were happy to help me out. So I made some measurements and drew a rough picture and they sent it off and came back with a 3 beam design. There will be two main carrying beams spanning 13' which will pick up the two long sides of the tank. Each beams is a triple 1.75" x 7.25" LVL. They are small enough to fit up in the existing drop ceiling. One end is at the exterior wall, but the basement is a walk out, so the foundation wall is only about 4' high and traditional framing over that, so I added jack posts to carry the weight down to the foundation wall. On the other end, I used a cross beam that is a double 1.75 x 7.25 LVL that is supported by two jack posts to span an open area.

All this had to be in place for the next part to happen....
 
OP
OP
F

Fiziksgeek

Active Member
View Badges
Joined
Oct 27, 2018
Messages
251
Reaction score
260
Rating - 0%
0   0   0
Step 3: Out with the old!

The room overall is ~13x22 and was carpeted, obviously that is no good for a large aquarium. So we hatched a plan to lay wood look tile. In a move of great stupidity, I made a comment to my wife suggesting it would be nice to replace all the flooring on the first floor where had a mix of carpet, tile, and oak. She jumped on that idea, so the tile job went from doing less than 300 sqft to replacing 1200 sqft or so. Although it will be nice once finished, I am kicking myself for making that comment!

First, remove old carpet. You can see I made a mock up on the tank and placed it in the approximately location before we started down this path.
1.jpg


Since we were going to continue out of this room, I had to start removing the tile in the next room. The entry way, hall closet, half bath, and kitchen were all a porcelain tile on the thick mortar bed. About 350 sqft worth. Meeko cat was not impressed!
2.jpg

I parked my tractor on the front walk and dumped the debris in a low spot way back in the corner of our property. The motar bed was over an inch thick and under that was a metal mesh material that was nailed to the floor with 1,000,000 nails, and a rosin paper or something underneath.

4.jpg


Rented this bad boy to make the job go much faster!
3.jpg
 

megan.911

Community Member
View Badges
Joined
Feb 17, 2022
Messages
46
Reaction score
51
Location
Orange
Rating - 0%
0   0   0
That’s awesome, keep us updated as you go! Love a good home Reno mixed with a fish tale!!!
 
OP
OP
F

Fiziksgeek

Active Member
View Badges
Joined
Oct 27, 2018
Messages
251
Reaction score
260
Rating - 0%
0   0   0
Step 4: In with the new!

To help prevent squeaks, I placed 1,000,000,000 screws in the existing subfloor, then I I laid an additional 3/4 underlayment (7 ply sanded plywood) using 1,000,000,000 more screws. And yes, I counted! On top of that went Ditra uncoupling membrane (orange stuff in the pics), then started with the tile. Just working weekends and a couple evenings here and there. New paint on the ceiling and walls, new baseboards, painted the window trim to match.

The only portion of the work I have paid someone to do was I had an electrician come and put in some can lights. Well worth it to me as he was able to get 6 lights with only a single small hole in the wall. didn't touch the ceiling at all.

I will say that I was extra proud of myself on the tile. There are two entrances to the room, the tile was laid out one door, down the front hall, and when we got back to the other entrance, the tiles lined right up. I had expected to need to use one tile running the opposite direction as a threshold to the room, but it all lined up nicely.
 

Attachments

  • 5.jpg
    5.jpg
    138.7 KB · Views: 169
  • 6.jpg
    6.jpg
    215 KB · Views: 167
  • 8.jpg
    8.jpg
    123.2 KB · Views: 156
  • 7.jpg
    7.jpg
    154.4 KB · Views: 150
  • 9.jpg
    9.jpg
    177.9 KB · Views: 144
OP
OP
F

Fiziksgeek

Active Member
View Badges
Joined
Oct 27, 2018
Messages
251
Reaction score
260
Rating - 0%
0   0   0
Step 5: Ready for use

Here is where we stood last weekend. I've moved some furniture and my desk in since these photos were taken. We continue to work on the flooring in other rooms, but its slow progress.

10.jpg
11.jpg
 
OP
OP
F

Fiziksgeek

Active Member
View Badges
Joined
Oct 27, 2018
Messages
251
Reaction score
260
Rating - 0%
0   0   0
Stands

I've been working with Cameron at Framingtech on a stand for both the tank and sump/frag tank.

Not the final, but close on the tank.

tank stand.JPG


This stand will go in the basement, the synergy reef SK-72 on the bottom and a 40x24x12 frag tank on the top with some open work space.

sump stand.JPG
 
OP
OP
F

Fiziksgeek

Active Member
View Badges
Joined
Oct 27, 2018
Messages
251
Reaction score
260
Rating - 0%
0   0   0
I bought a bunch of equipment during the black Friday sales. I have all the Kessil Apx9 lights, the Bubble King 250 Deluxe, Abbzz A200, RO/DI and booster pump (we have a well), CR220 calcium reactor from Reef Octupus, and the Apex. And enough tropic marine pro to get started!

Still need the closed loop pumps, vortecs, plumbing, heaters, etc. I am also shopping for tanks to set up a proper storage and mixing station.

After we finish all the flooring, I will turn my attention to the basement sump closet.

So that is where we are currently. Tank is on order. Zoya at CDA has been pretty good (not perfect) to work with. Cameron at Framingtech has been very patient with me! Synergy Reef has been very responsive and the sump has also been ordered. Hoping everything will come together in May-ish...My birthday is near the end of May...would be nice to have water of some sort in the tank by then...but that may be pushing it!
 

kgstei

Valuable Member
View Badges
Joined
Apr 28, 2014
Messages
1,104
Reaction score
537
Location
Griswold
Rating - 0%
0   0   0
Nice work! You said you were going big and you did. Do you have a picture added support in the basement to share? Following
 

Devaji

5000 Club Member
View Badges
Joined
Aug 27, 2016
Messages
7,205
Reaction score
6,711
Location
Jackson Hole, WY
Rating - 0%
0   0   0
dang this is going to be a great setup! I have the RS650P and if I was gonna to it again i would like to do something along the lines you are doing. dont get me wrong I love my 650P but you know...

great work on the tile!
 

Gundy

Active Member
View Badges
Joined
Sep 8, 2021
Messages
221
Reaction score
283
Location
Utah
Rating - 100%
1   0   0
I bought a bunch of equipment during the black Friday sales. I have all the Kessil Apx9 lights, the Bubble King 250 Deluxe, Abbzz A200, RO/DI and booster pump (we have a well), CR220 calcium reactor from Reef Octupus, and the Apex. And enough tropic marine pro to get started!

Still need the closed loop pumps, vortecs, plumbing, heaters, etc. I am also shopping for tanks to set up a proper storage and mixing station.

After we finish all the flooring, I will turn my attention to the basement sump closet.

So that is where we are currently. Tank is on order. Zoya at CDA has been pretty good (not perfect) to work with. Cameron at Framingtech has been very patient with me! Synergy Reef has been very responsive and the sump has also been ordered. Hoping everything will come together in May-ish...My birthday is near the end of May...would be nice to have water of some sort in the tank by then...but that may be pushing it!
Good choice on the synergy sump. I ordered the SK72 which has the option for 2 Clarisea roller filters. It was a pain to communicate with them and ordering only through email as you don’t have a number to call. My wait time is 3 months and I should have it in April.
 
OP
OP
F

Fiziksgeek

Active Member
View Badges
Joined
Oct 27, 2018
Messages
251
Reaction score
260
Rating - 0%
0   0   0
Good choice on the synergy sump. I ordered the SK72 which has the option for 2 Clarisea roller filters. It was a pain to communicate with them and ordering only through email as you don’t have a number to call. My wait time is 3 months and I should have it in April.
Interesting, I had a different experience, though maybe I had different questions that were more easily answered. Their website looks nice, but it is missing some of the products they offer, some of that information you can find out by watching their youtube videos. For example, the SK-72 isn't on their website, you need to place an order for the SK-60 and put in the notes section that you want the 72" version, which I believe was an extra $375 over the 60". In addition, they offer an XL version of their CL and TS sumps, 24 inches front to back instead of the standard 18, but there is no way to order them...I shot over an email and got a response fairly quickly. They do not offer an XL version of the SK series, so I settled for the longest one offered to make sure I have enough volume when the return pump is off since my sump will be remote.

Overall, they look to be super high quality builds, so hopefully any inconvenience will fade from memory!
 
OP
OP
F

Fiziksgeek

Active Member
View Badges
Joined
Oct 27, 2018
Messages
251
Reaction score
260
Rating - 0%
0   0   0
what profile of T slot are you going with for the stand?

If I understand correctly, it will be 45x45 and 45x90s. I think the canopy portion, will be 45x45-L for light. I discussed with Framingtech what it need to hold...some lights and a wood skin of some sort, and that I really don't need the canopy to actually cantilever out. I left enough height between the stand and canopy to allow me to put down a piece of plywood or PVC and a foam board. I don't know if its really needed, but I'll shim the very end of the canopy right off the top of the tank for additional support.
 

galantra

Well-Known Member
View Badges
Joined
Jan 16, 2019
Messages
673
Reaction score
161
Location
Greenwich
Rating - 0%
0   0   0
Very interesting I’m loving the style. I feel your issue with wrapping the stand having that issue with my steel stand. Where did the equipment will be kept?
 
OP
OP
F

Fiziksgeek

Active Member
View Badges
Joined
Oct 27, 2018
Messages
251
Reaction score
260
Rating - 0%
0   0   0
Very interesting I’m loving the style. I feel your issue with wrapping the stand having that issue with my steel stand. Where did the equipment will be kept?
My plan is to create a sump "closet" in the basement. Basically the idea is to have the sump, frag tank, and any other equipment hat touches salt water inside a closed area. This will keep the salt spray contained. I will set up a mixing station, slop sink, etc. outside of that.
 
OP
OP
F

Fiziksgeek

Active Member
View Badges
Joined
Oct 27, 2018
Messages
251
Reaction score
260
Rating - 0%
0   0   0
Sounds good, when are you expecting the tank to arrive?
I put the order in right at the end of the year, Dec 29 or 30 if I recall. At that time CDA quoted me 2.5-3.5 month lead time. I did get notice that they had a Covid related shut down for a short time and are behind schedule a bit. Sooo...not really sure, expecting end of April/beginning of May I guess. I wouldn't be surprised with the way the world is right now that there could be additional delays..which is kinda OK by me, I have ton of stuff to do.....
 
OP
OP
F

Fiziksgeek

Active Member
View Badges
Joined
Oct 27, 2018
Messages
251
Reaction score
260
Rating - 0%
0   0   0
Nice work! You said you were going big and you did. Do you have a picture added support in the basement to share? Following
Here are a couple pics. Trying not to show 1. All the mess in the house 2. Personal things. FYI, There were taken before the posts were secured at top and bottom, so don't freak out. I also installed some blocking between the between the lvls and the existing joists. It was all done by myself, so I got no one to blame but me if the tank crashes through the floor!

My overall goal was to not be in the way (no posts in the middle of the room) and to be separate/removable from the existing house structure. So the LVLs are in addition to the house framing, does not replace anything. So in theory, I can remove it all in the future and put the house back to its original state, maybe needing a couple new celling tiles. I plan to box out the posts eventually. The beams fit up under the existing drop ceiling, but they were certainly a pain to get in place!

I shouldn't see more than 1/4" or less of deflection across the 13ft span per the design, but I have a laser tape measure, and my plan it to make a mark in the middle of the lvl and measure the height from the floor as I fill the tank.

This end is an exterior wall. You can see the 2-3ply beams going to short jack posts. One rests directly on the foundation wall, the other on the continuous brick around this massive fireplace the previous owner had put in.

20220317_082617.jpg


The other end lands on an existing tripple beam. No idea if that beam alone could of carried the weight by itself or not. But I wanted to span the opening, so to be sure, I added a 2 ply LVL spanning about 7ft and picked up the ends of the Jack posts. Where I put the posts is right next to existing lally column so for all intense purposes, they share a footing with the existing posts in the house.
20220317_082551.jpg
 

High pressure shells: Do you look for signs of stress in the invertebrates in your reef tank?

  • I regularly look for signs of invertebrate stress in my reef tank.

    Votes: 41 32.3%
  • I occasionally look for signs of invertebrate stress in my reef tank.

    Votes: 29 22.8%
  • I rarely look for signs of invertebrate stress in my reef tank.

    Votes: 25 19.7%
  • I never look for signs of invertebrate stress in my reef tank.

    Votes: 32 25.2%
  • Other.

    Votes: 0 0.0%
Back
Top