Hello R2R -
At long last, it's happening. After 18 years in this hobby I'm jumping in to build the tank I've always wanted: a peninsula reef room divider.
Background: I first started keeping marine fish when I was a poor college student working at a small aquarium shop in Blacksburg, Virginia. I was a student at Virginia Tech and had a 10 gallon nano reef that I kept in my dorm room. Every Christmas and summer break, I'd load the tank into the back of my car and drive it 6 hours to Atlanta, which was home. My dad had kept marine tanks during my childhood, and I remember flipping through J. Sprung's texts for "light reading" on the topic of reef keeping. At the pet shop I started as the freshwater manager, but quickly evolved into overseeing the marine section. I remember telling customers things like "you need 10 watts of compact florescent bulb per gallon of water"... boy how far we've come. In the years since I have kept dozens of marine tanks and have experimented with the gambit of methods for reef keeping, ranging from elaborate algae reactors to full ZeoVit on a nano reef. I'd like to think I've learned some valuable lessons along the way -- though this hobby likes to humble us (see my thread from a year ago where I couldn't figure out what was going on with my salt mix.... sigh). Anyway, this build will be the culmination of my experiences thus far --- all in a tank format I've long lusted to employ --- the peninsula room divider.
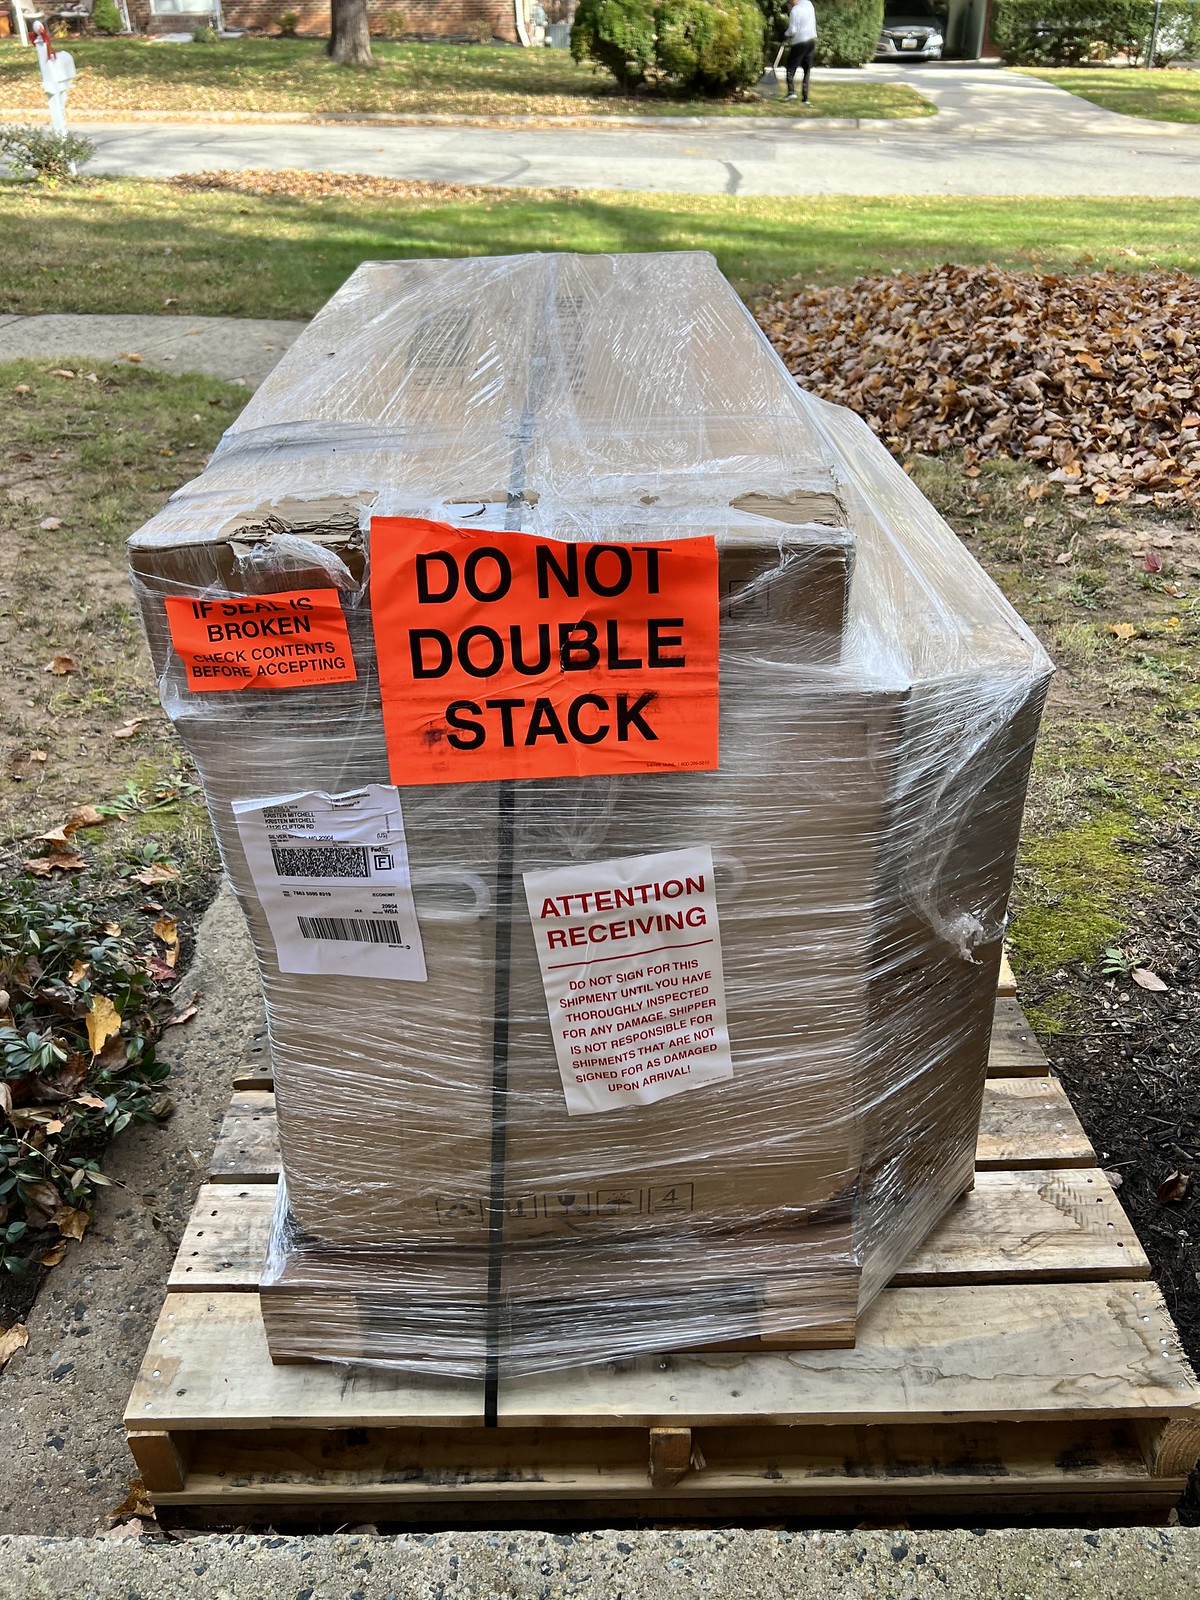
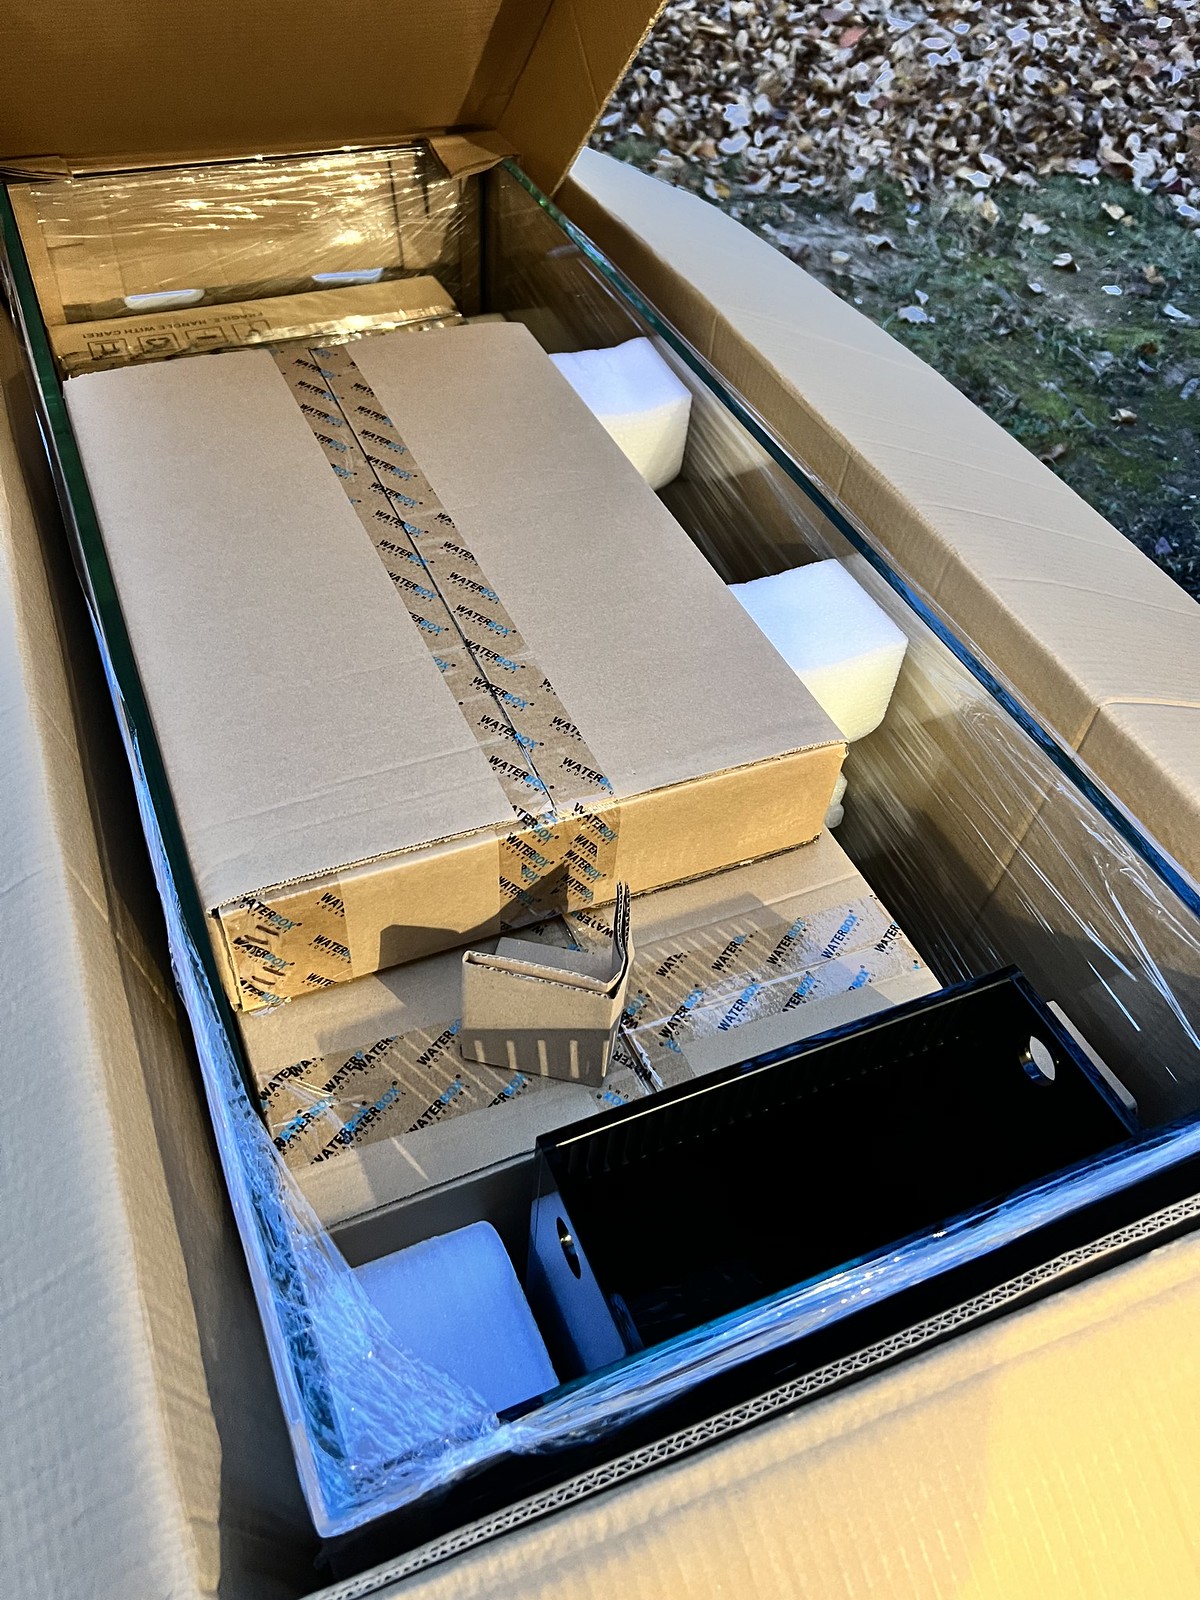
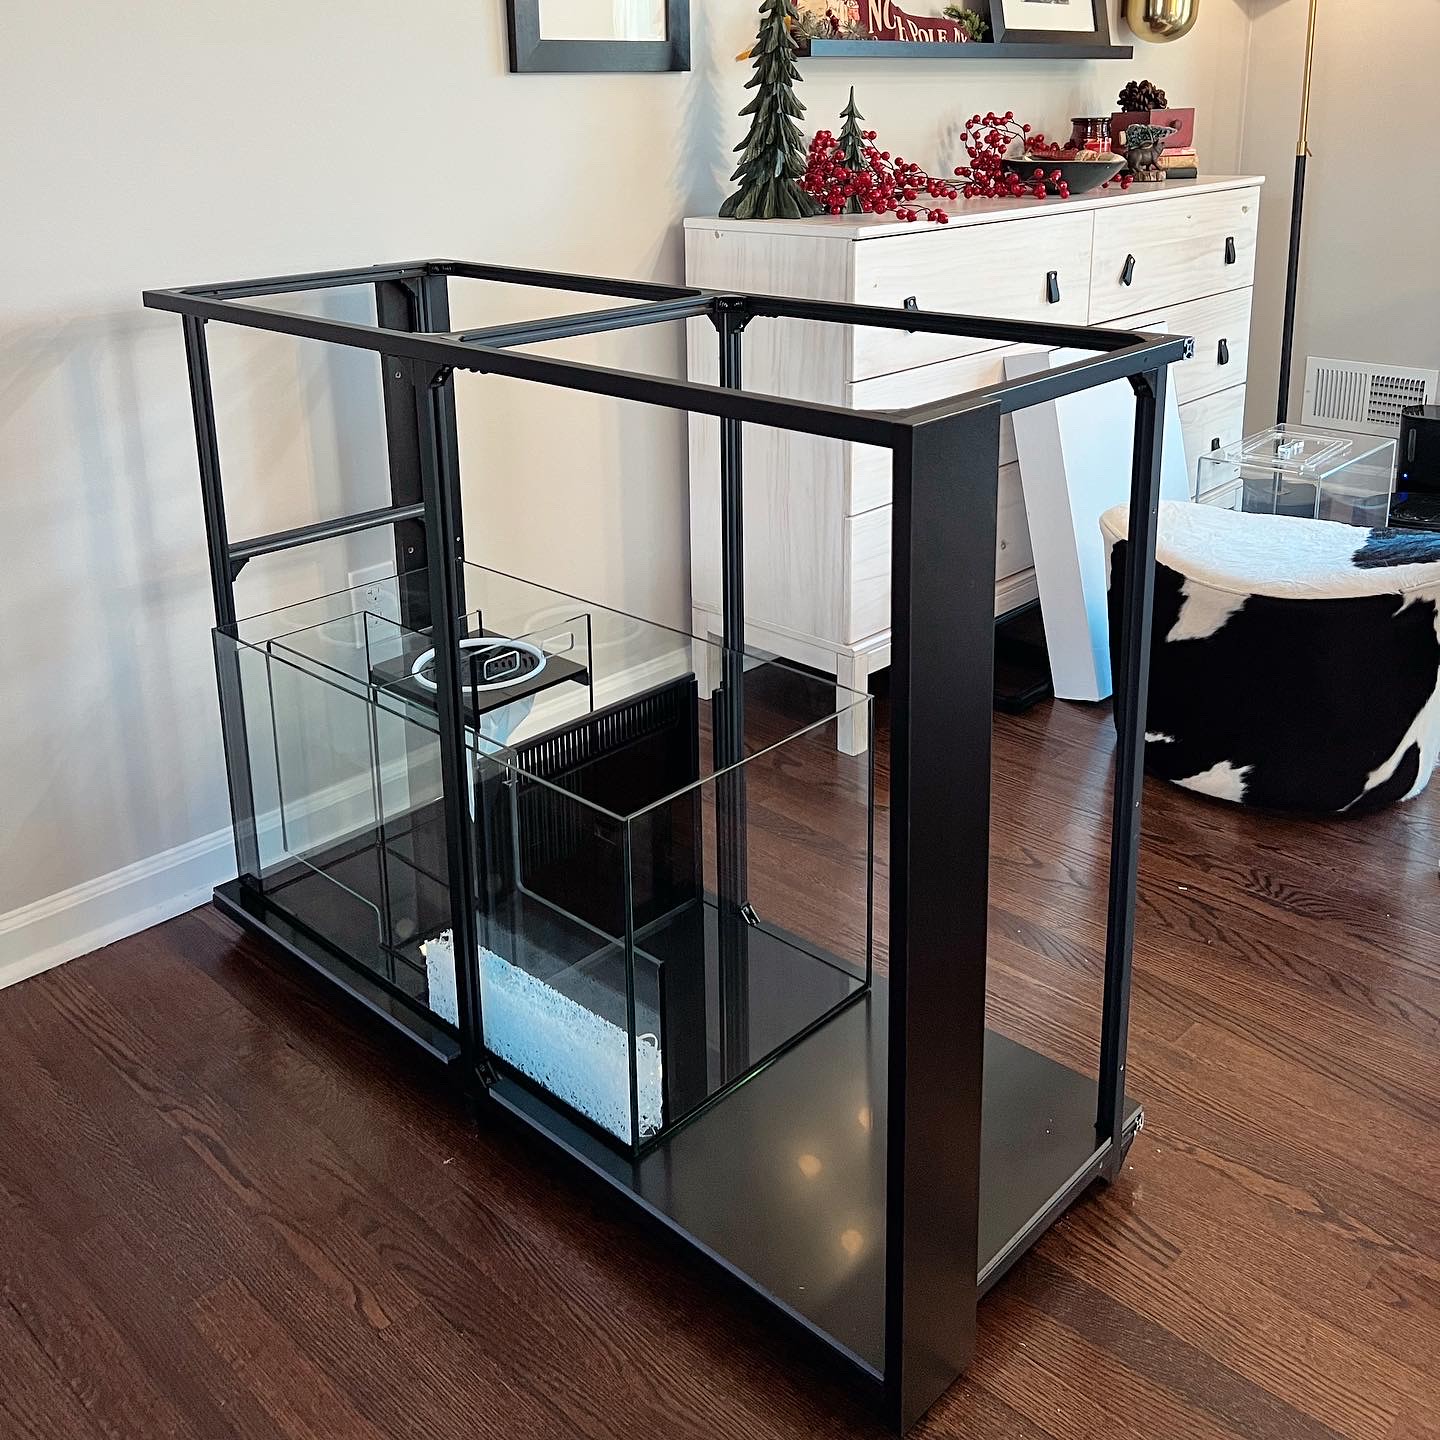
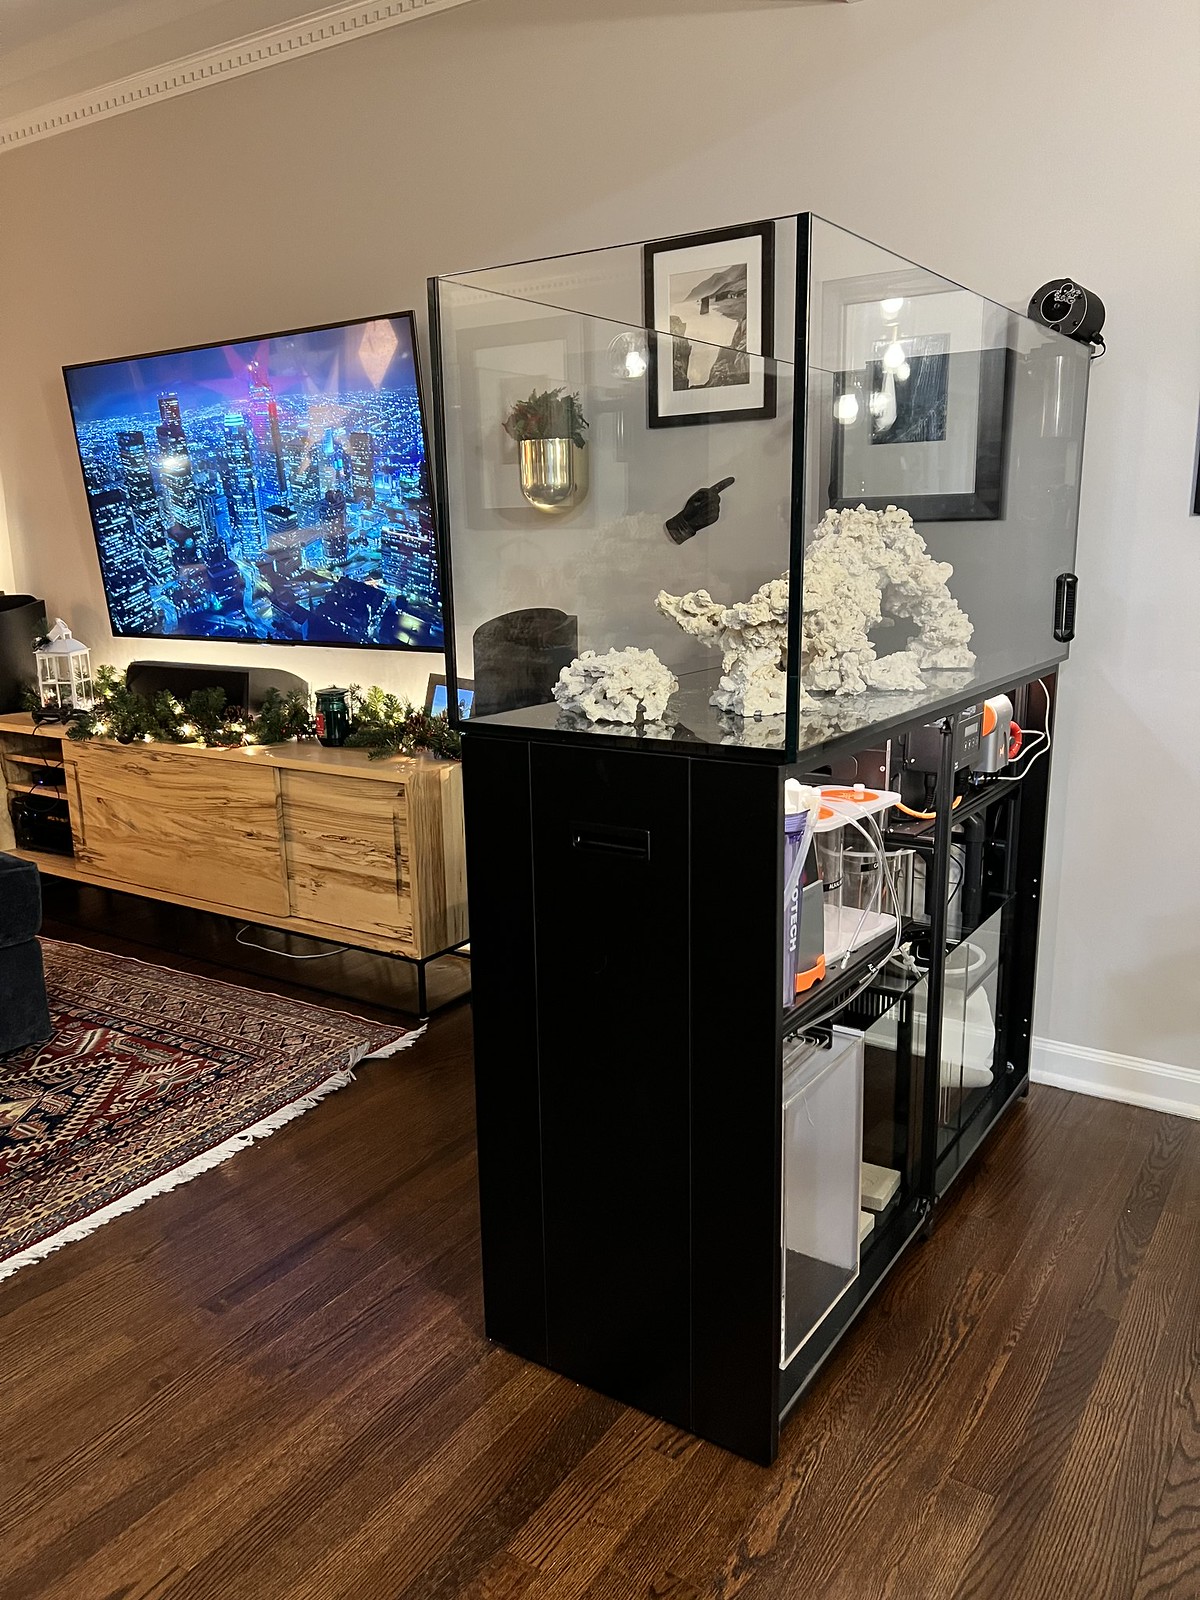
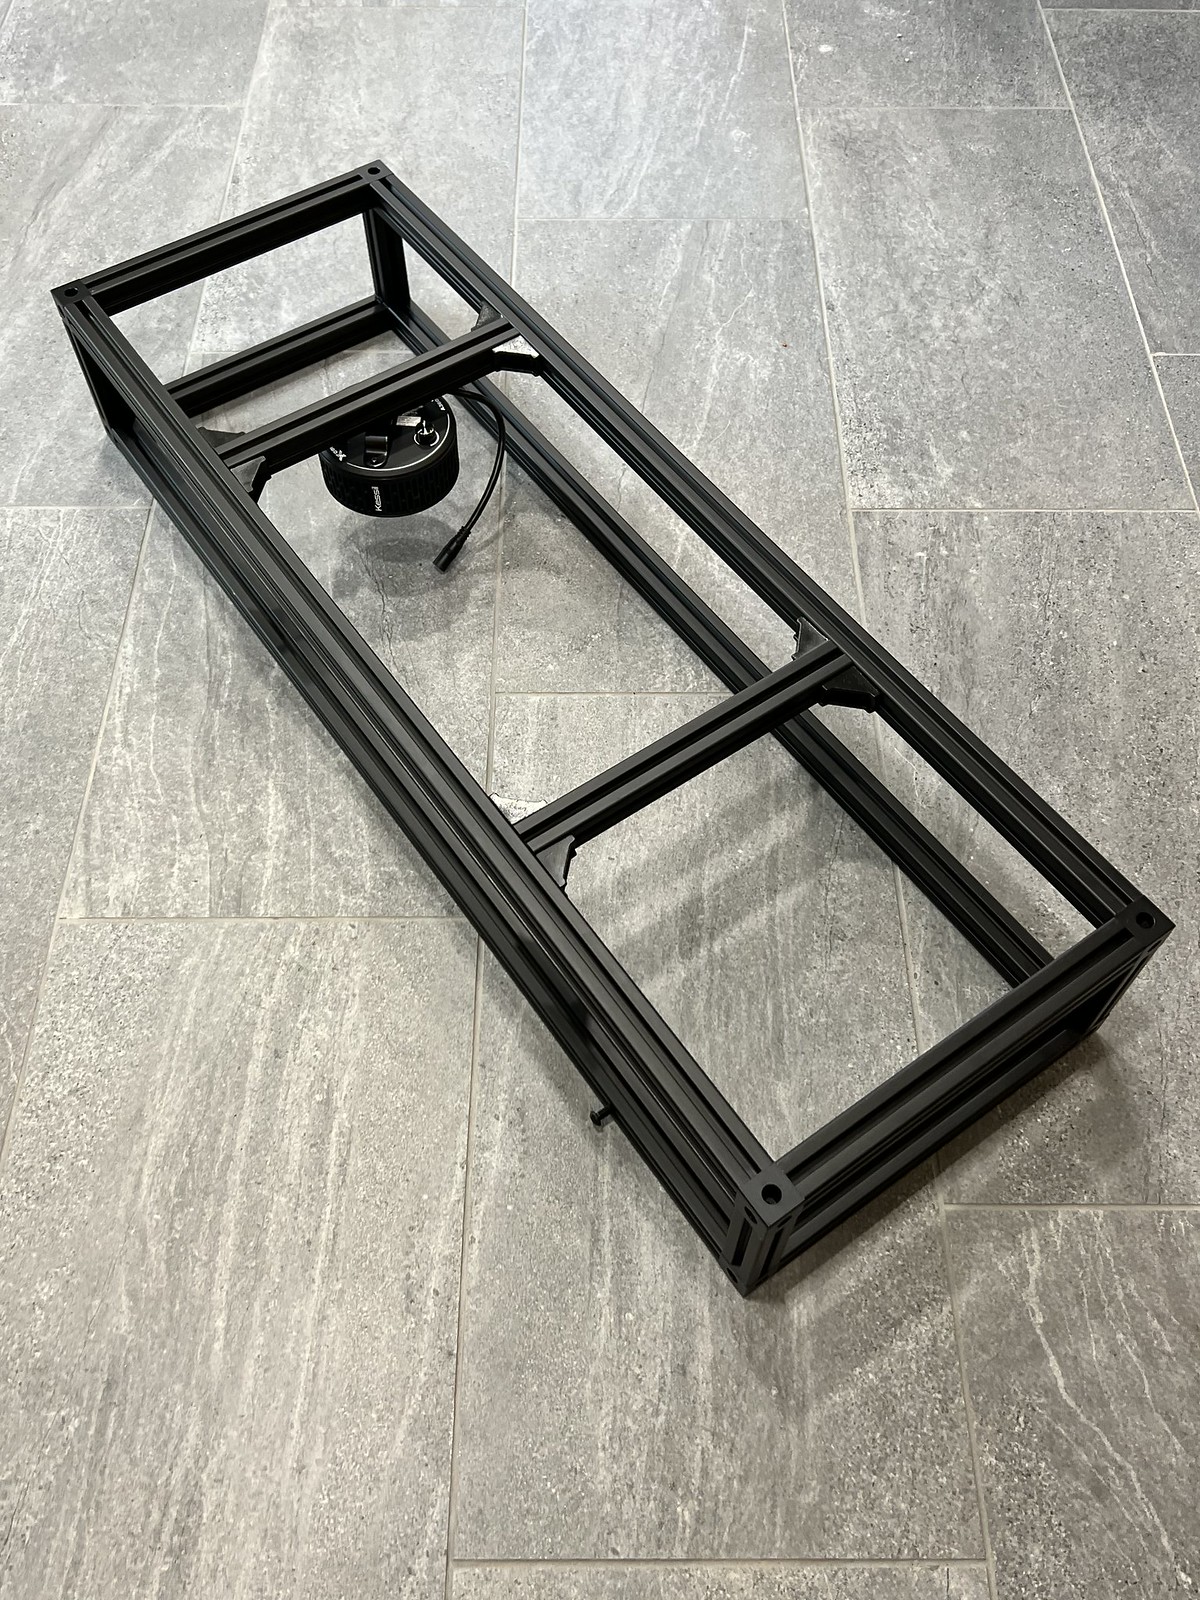
The Tank: We spent the last year renovating a new house in Maryland, and I spent many hours of that renovation thinking about the future fish tank. To the point that I even had our electrical contractor install a separate GFCI circuit independent of our other outlets to power this tank! The ideal aquarium was going to slide in between the living room and dining area, right below a drop down in the ceiling that holds our HVAC ducts and directly above a steel structural beam. After extensive research, comparing Red Sea, Waterbox and Cade's offerings in the ~100 gallon peninsula lineup, I opted for the Waterbox 4820. My rationale for selecting this tank was based on the overall dimensions, the aluminum frame stand, and the price point. While Cade was arguably the better built tank, the dimensions were a touch large for the space. Waterbox customer service also was a major contributor -- I dealt with their agents several times for inventory information, tank specs, and a simple warranty claim, and they were prompt and professional each time.
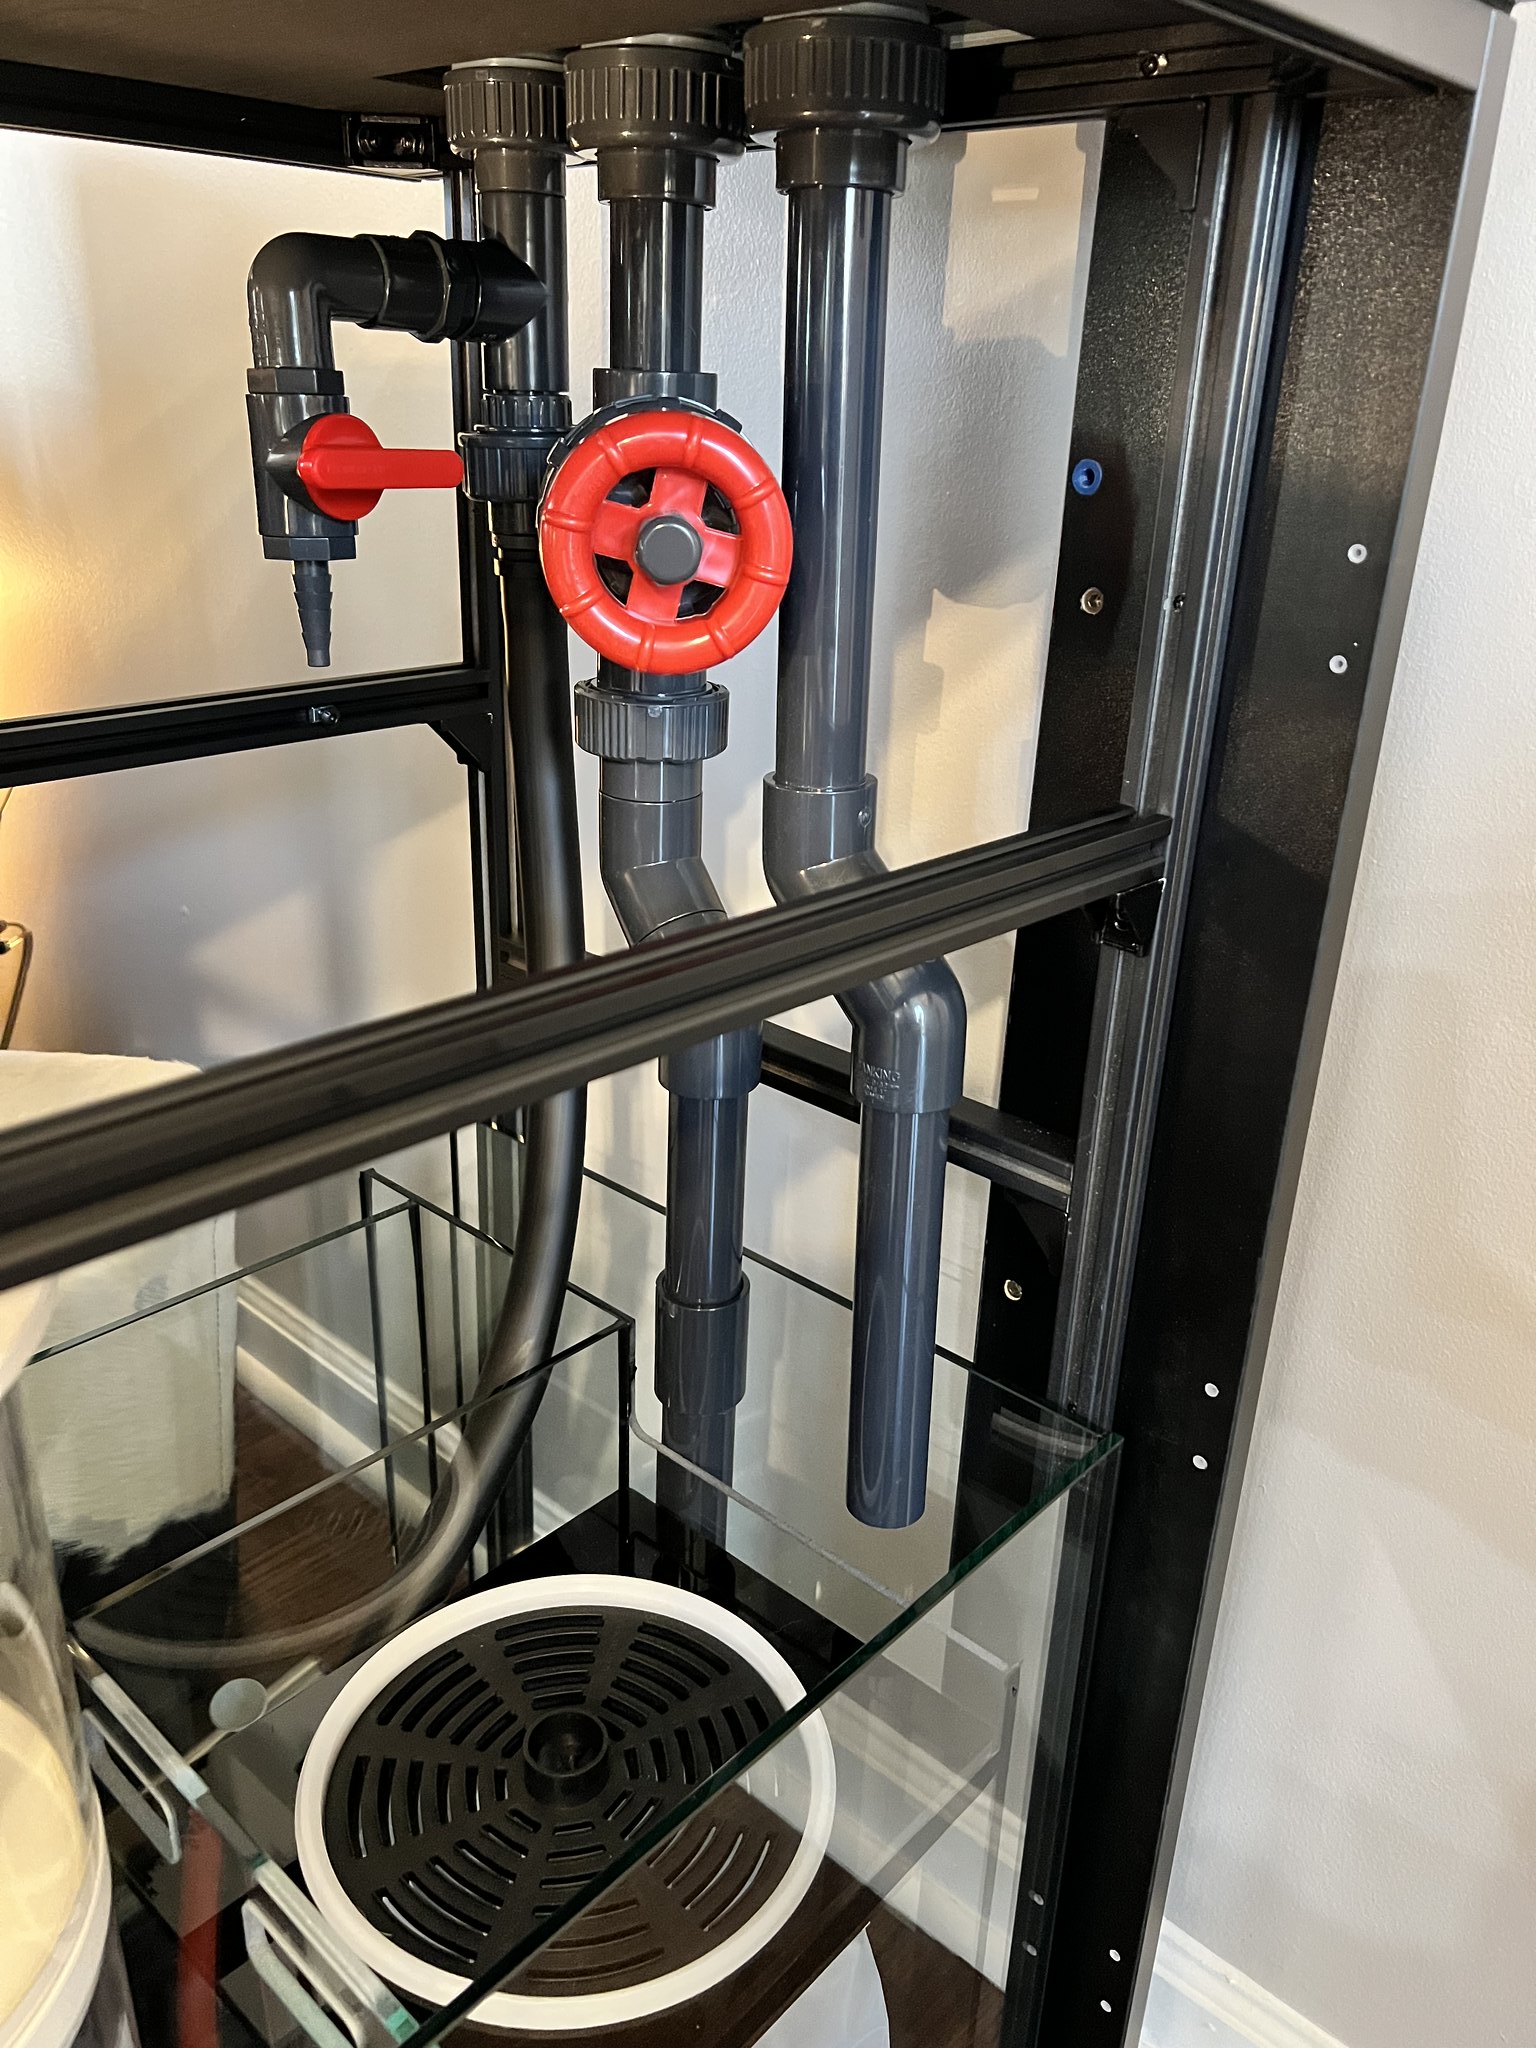
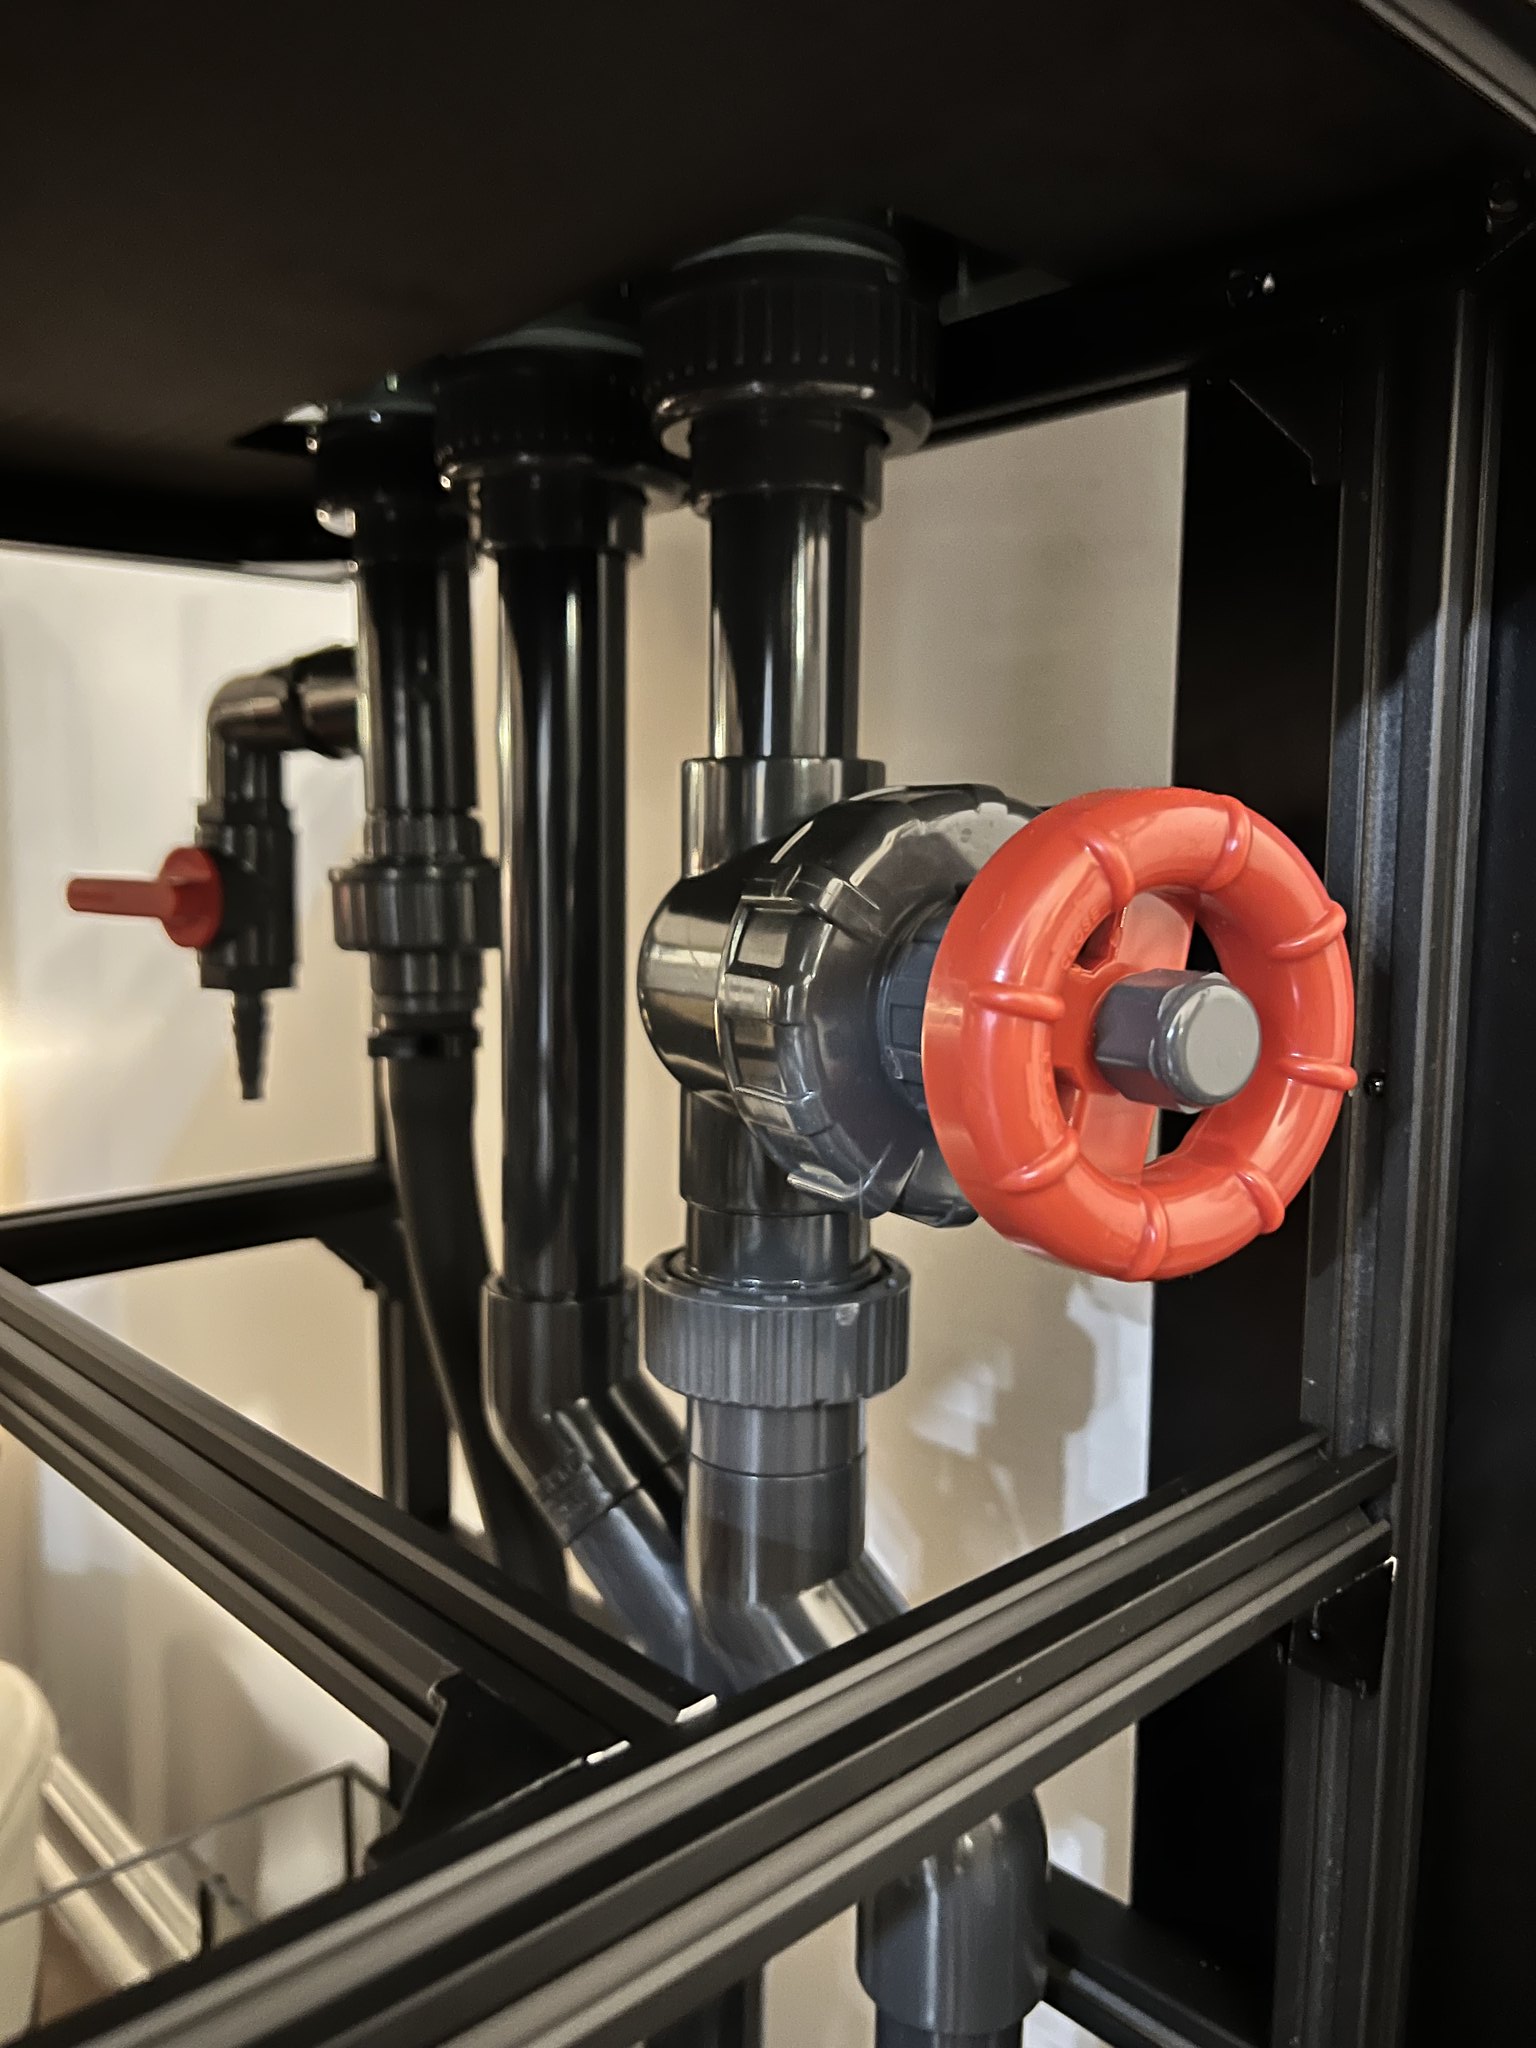
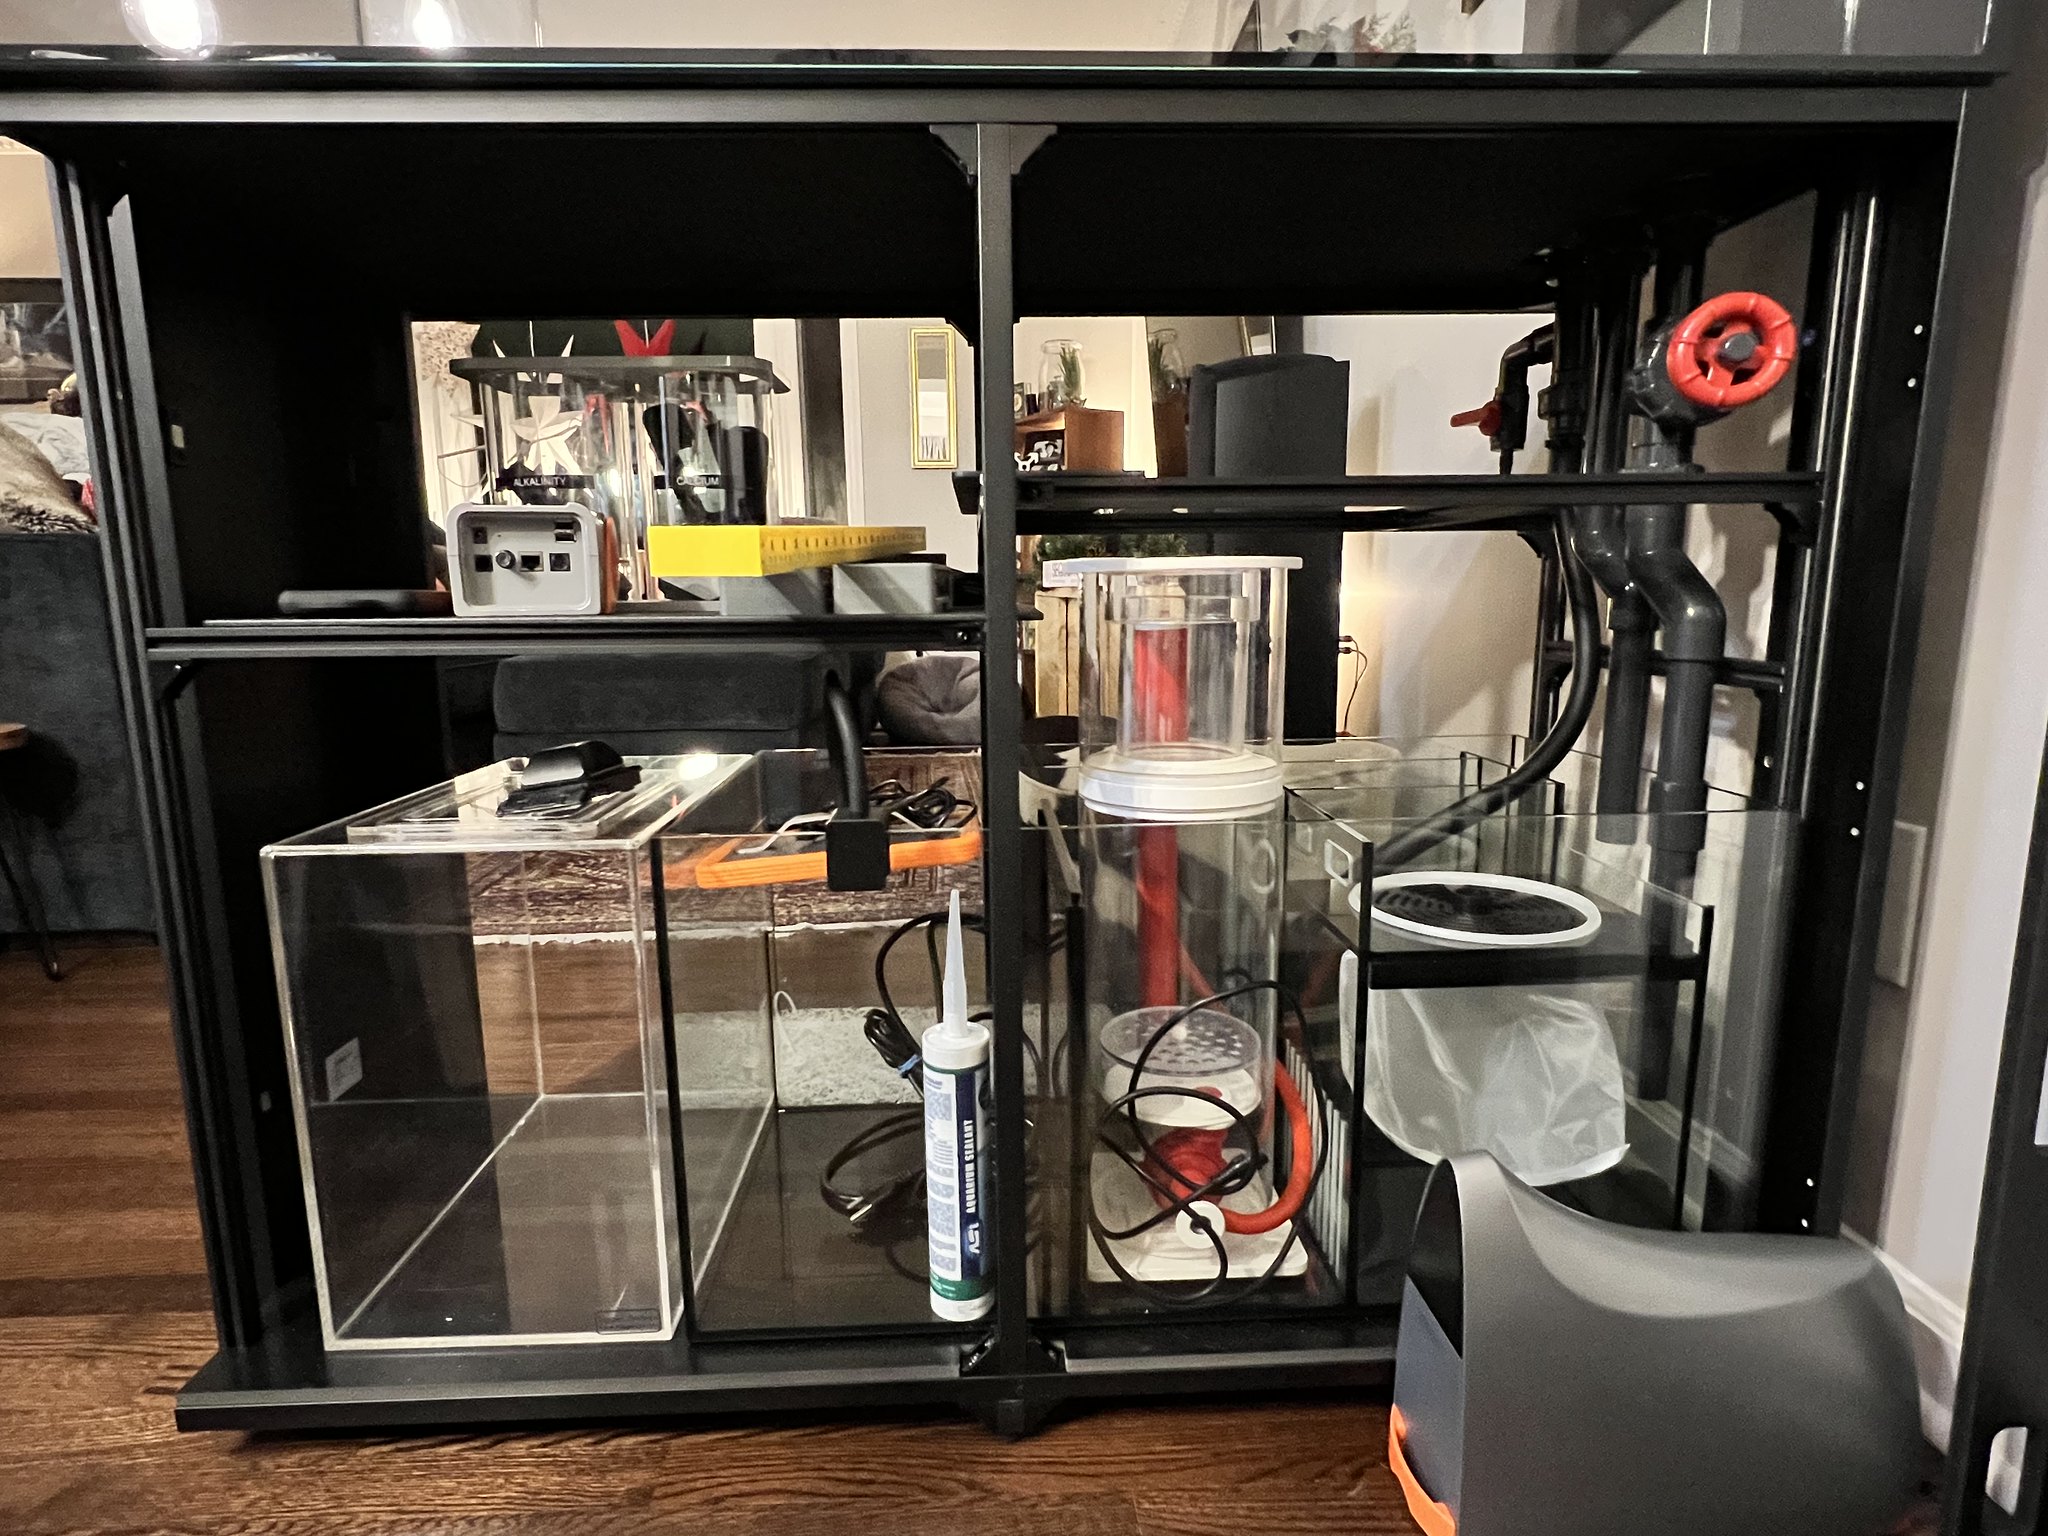
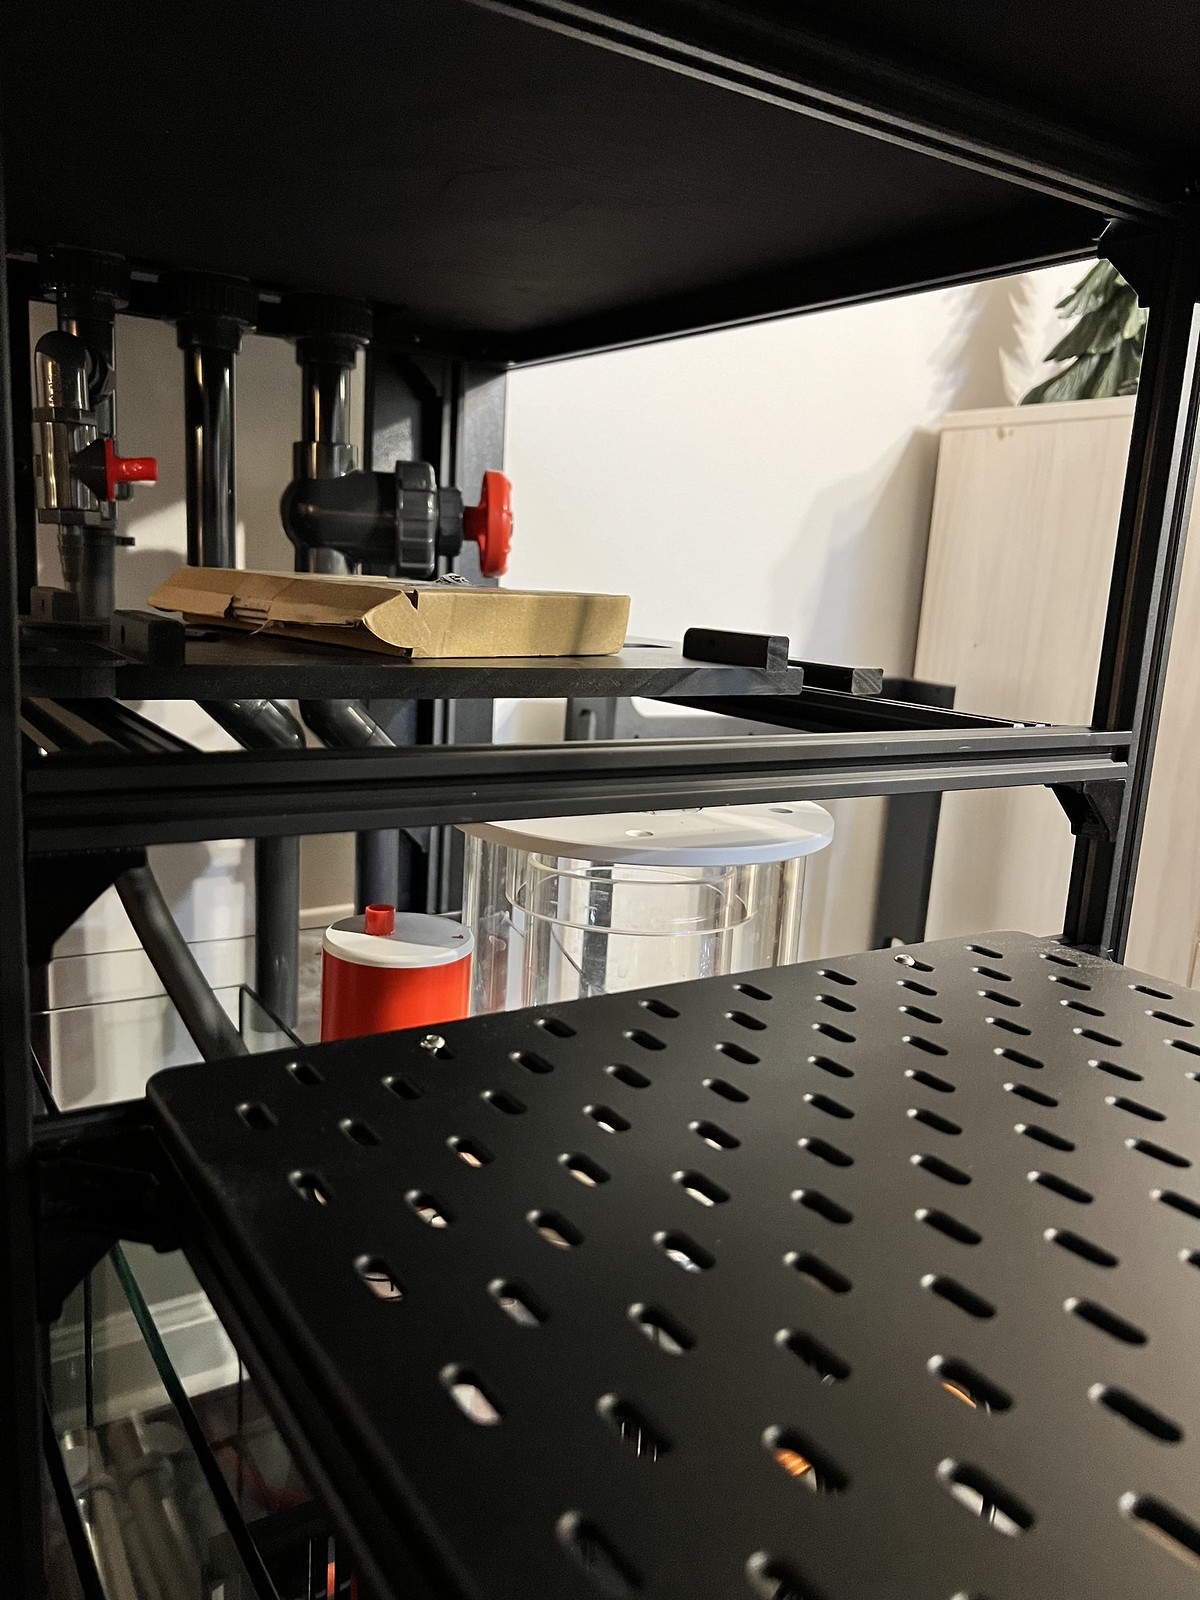
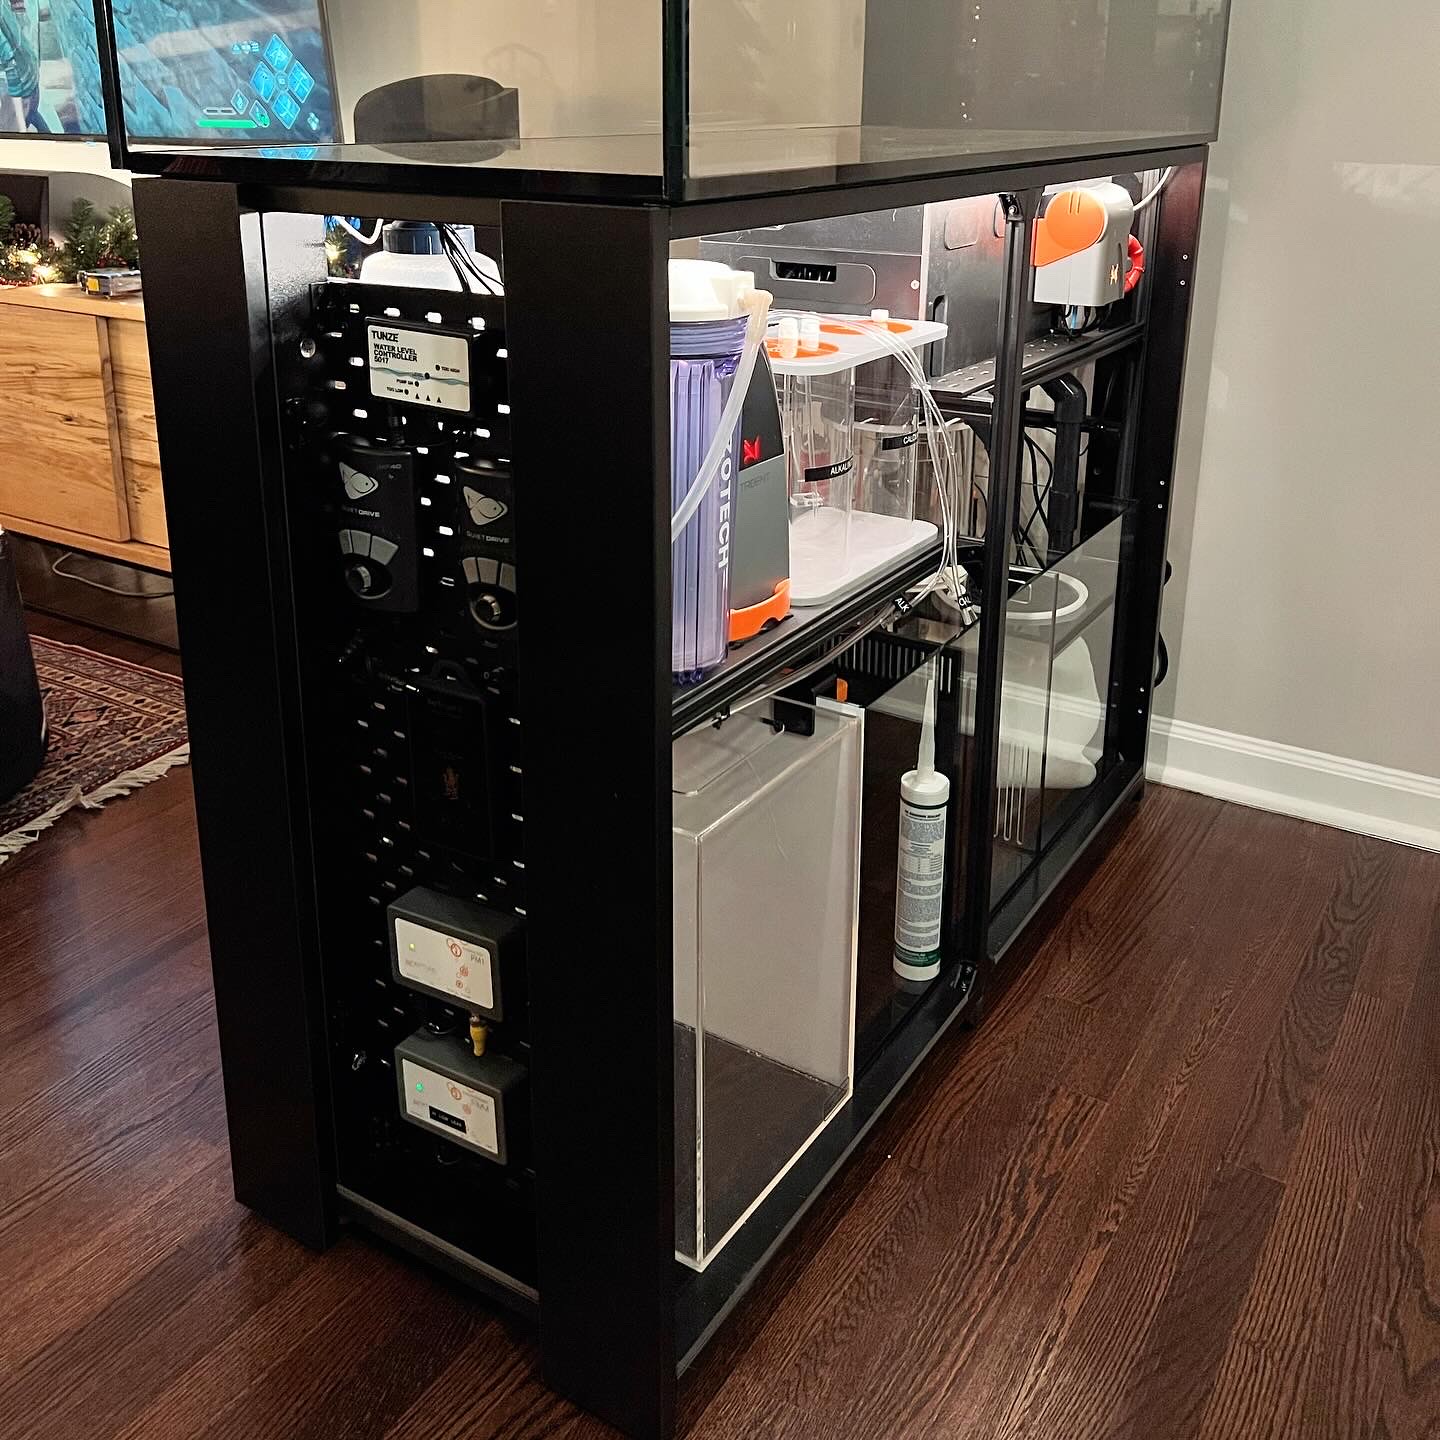
Build Philosophy: Like anyone who has been in this hobby for more than 5 minutes, I've had my share of painful lessons. Failed return pumps. Cracked heaters. Disease outbreaks that wipe out the entire tank. Every pest known to mankind. Gear that leaks, floods, breaks, etc. While I cannot hope to avoid every possible failure in this build, I will be taking precautions to minimize the risk of problems. To that end, my philosophy is simple enough: Trust what works. I have had a long history of success with powerful protein skimming, and so heavy skimming will be a core feature of this build. Likewise, I have had success with algae refugiums as a means of nutrient control. Finally, my dosing and additives will be targeted and focused -- no more "mystery juice" (*cough* Vibrant). With one exception, everything I'm doing in this tank is something I've done before, that I feel comfortable employing for a successful tank, and that straight up makes biological sense. That one exception? This tank will be my first time dabbling with ozone.... eventually.
Equipment List:

Past FTS (1 December 2023):

Table of Contents:
At long last, it's happening. After 18 years in this hobby I'm jumping in to build the tank I've always wanted: a peninsula reef room divider.
Background: I first started keeping marine fish when I was a poor college student working at a small aquarium shop in Blacksburg, Virginia. I was a student at Virginia Tech and had a 10 gallon nano reef that I kept in my dorm room. Every Christmas and summer break, I'd load the tank into the back of my car and drive it 6 hours to Atlanta, which was home. My dad had kept marine tanks during my childhood, and I remember flipping through J. Sprung's texts for "light reading" on the topic of reef keeping. At the pet shop I started as the freshwater manager, but quickly evolved into overseeing the marine section. I remember telling customers things like "you need 10 watts of compact florescent bulb per gallon of water"... boy how far we've come. In the years since I have kept dozens of marine tanks and have experimented with the gambit of methods for reef keeping, ranging from elaborate algae reactors to full ZeoVit on a nano reef. I'd like to think I've learned some valuable lessons along the way -- though this hobby likes to humble us (see my thread from a year ago where I couldn't figure out what was going on with my salt mix.... sigh). Anyway, this build will be the culmination of my experiences thus far --- all in a tank format I've long lusted to employ --- the peninsula room divider.
The Tank: We spent the last year renovating a new house in Maryland, and I spent many hours of that renovation thinking about the future fish tank. To the point that I even had our electrical contractor install a separate GFCI circuit independent of our other outlets to power this tank! The ideal aquarium was going to slide in between the living room and dining area, right below a drop down in the ceiling that holds our HVAC ducts and directly above a steel structural beam. After extensive research, comparing Red Sea, Waterbox and Cade's offerings in the ~100 gallon peninsula lineup, I opted for the Waterbox 4820. My rationale for selecting this tank was based on the overall dimensions, the aluminum frame stand, and the price point. While Cade was arguably the better built tank, the dimensions were a touch large for the space. Waterbox customer service also was a major contributor -- I dealt with their agents several times for inventory information, tank specs, and a simple warranty claim, and they were prompt and professional each time.
Build Philosophy: Like anyone who has been in this hobby for more than 5 minutes, I've had my share of painful lessons. Failed return pumps. Cracked heaters. Disease outbreaks that wipe out the entire tank. Every pest known to mankind. Gear that leaks, floods, breaks, etc. While I cannot hope to avoid every possible failure in this build, I will be taking precautions to minimize the risk of problems. To that end, my philosophy is simple enough: Trust what works. I have had a long history of success with powerful protein skimming, and so heavy skimming will be a core feature of this build. Likewise, I have had success with algae refugiums as a means of nutrient control. Finally, my dosing and additives will be targeted and focused -- no more "mystery juice" (*cough* Vibrant). With one exception, everything I'm doing in this tank is something I've done before, that I feel comfortable employing for a successful tank, and that straight up makes biological sense. That one exception? This tank will be my first time dabbling with ozone.... eventually.
Equipment List:
- Waterbox 4820 Peninsula tank
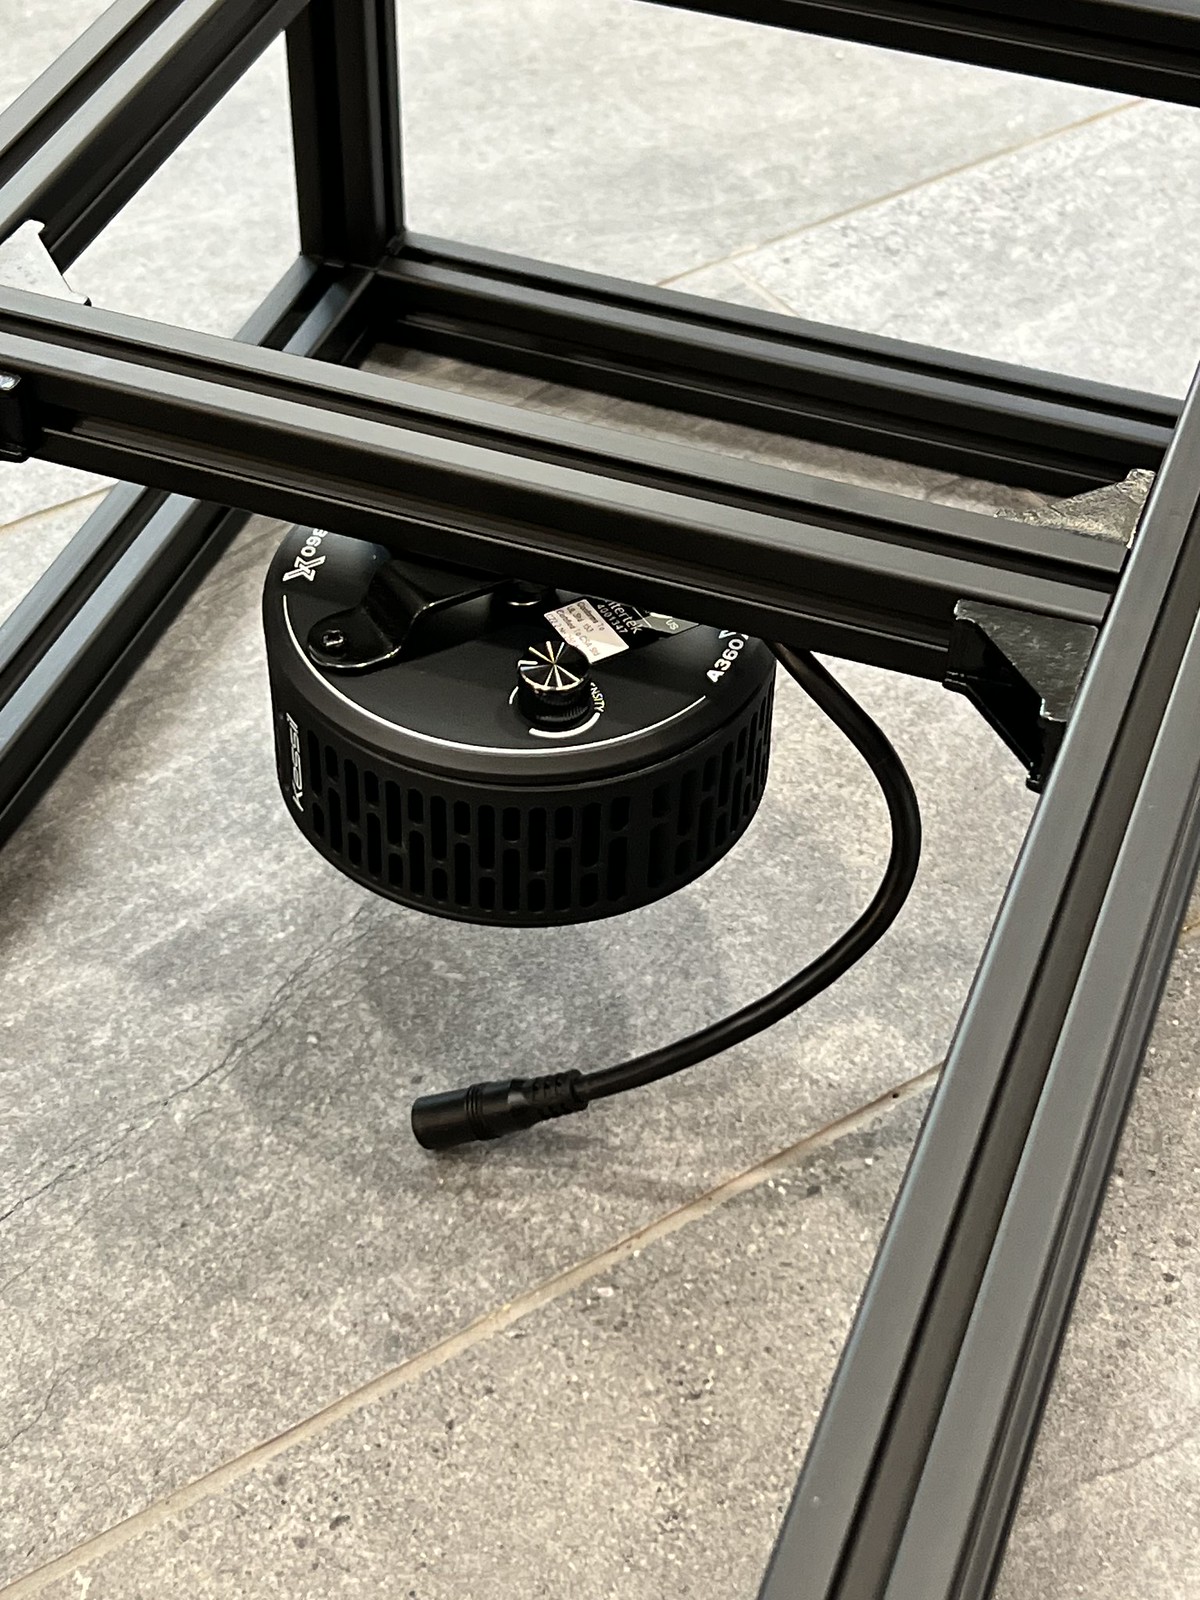
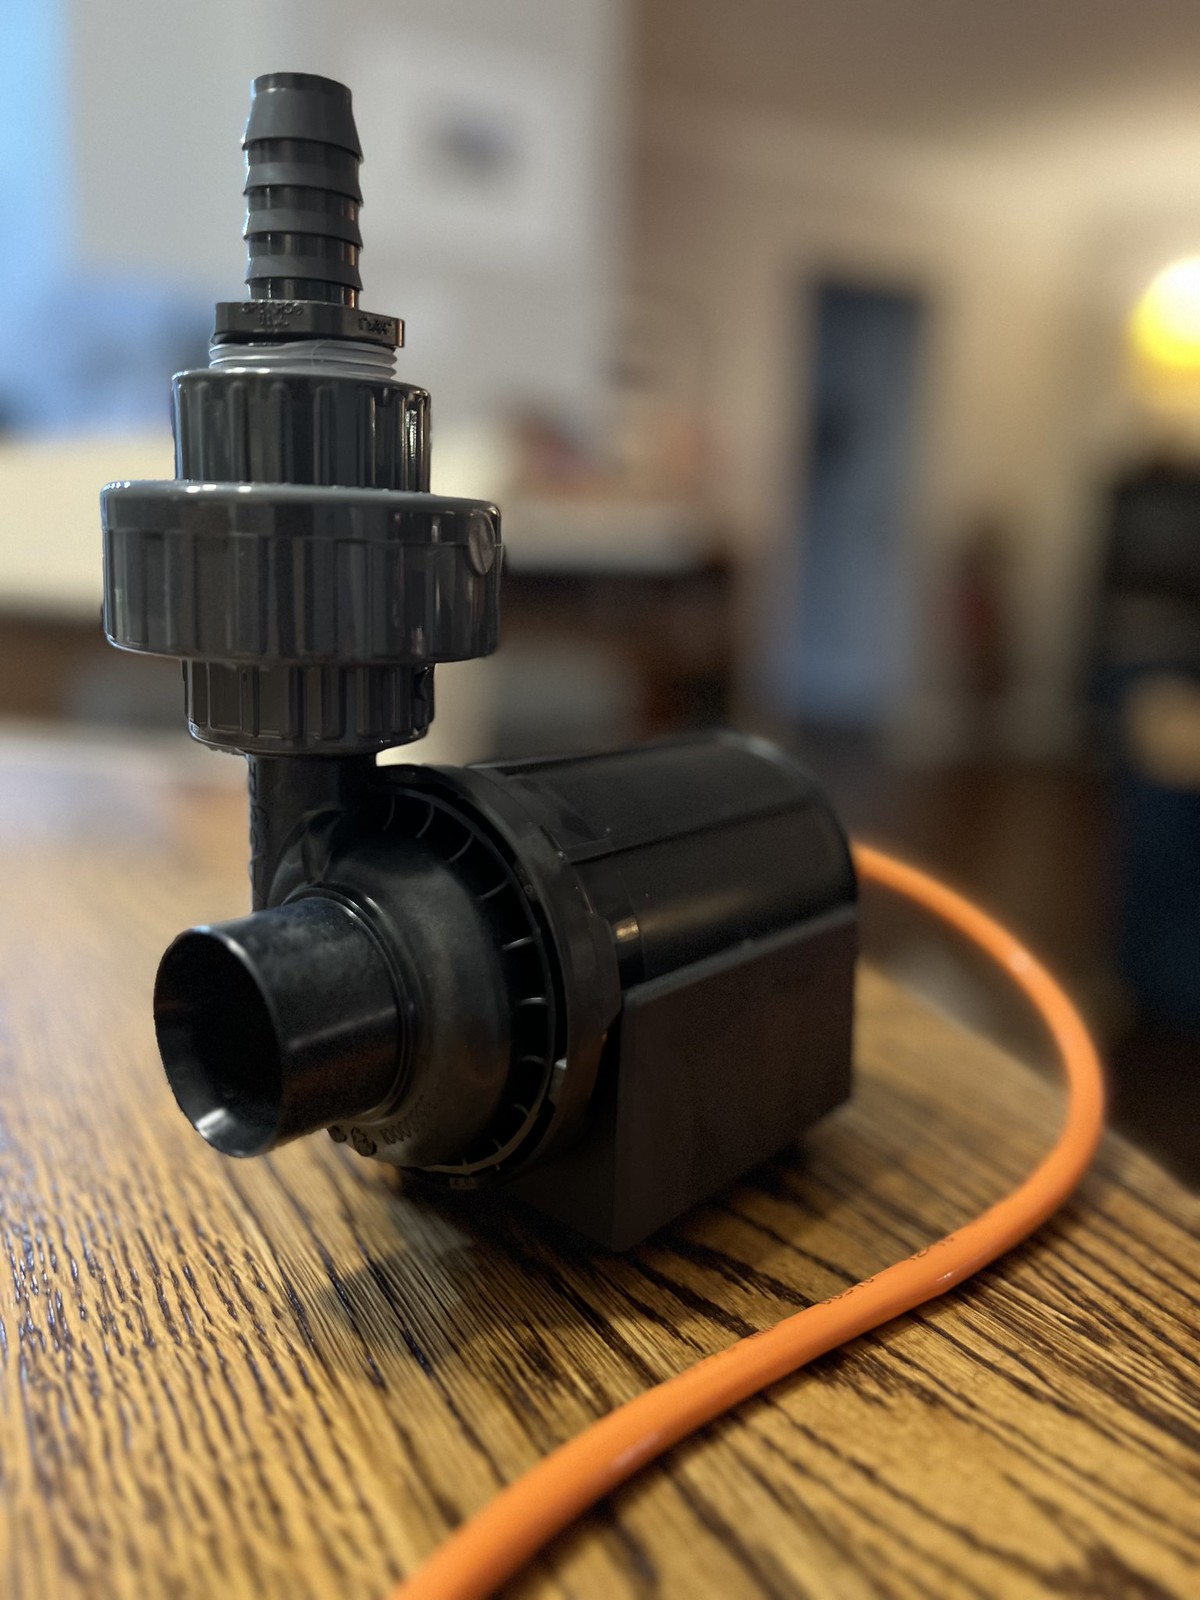
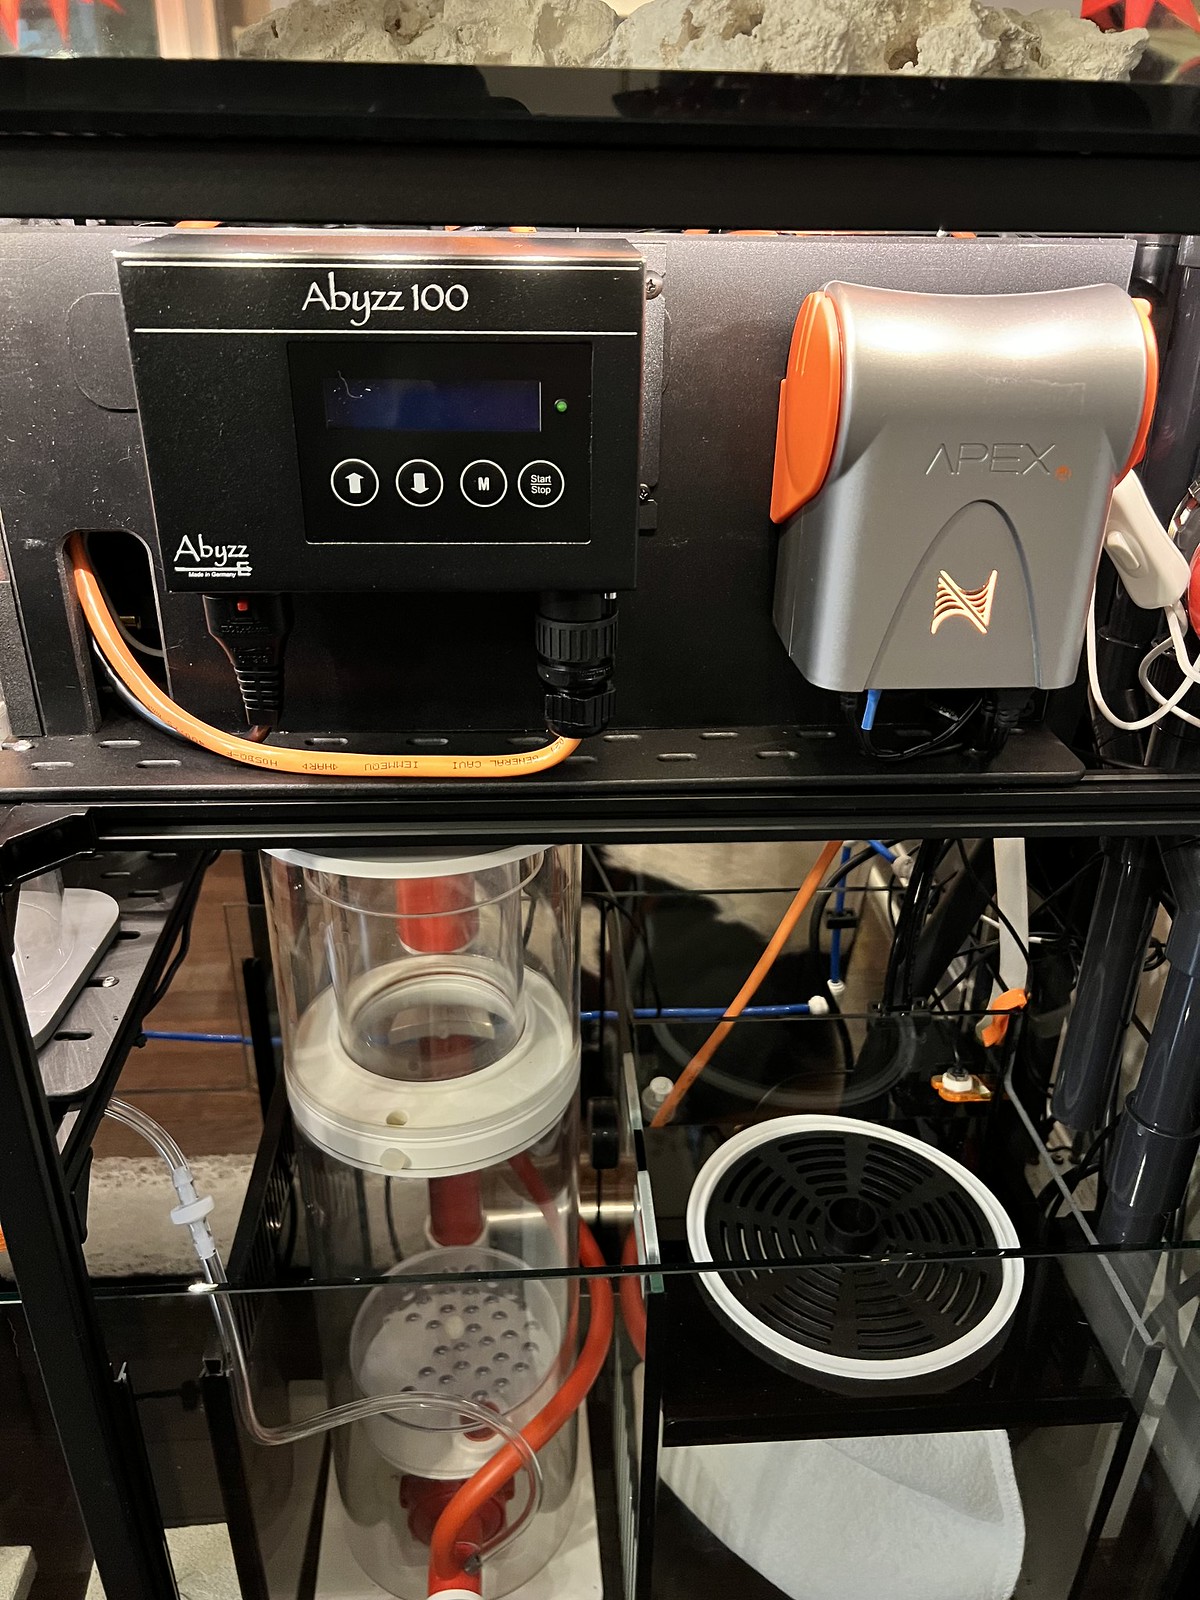
- Abyzz A100 return pump
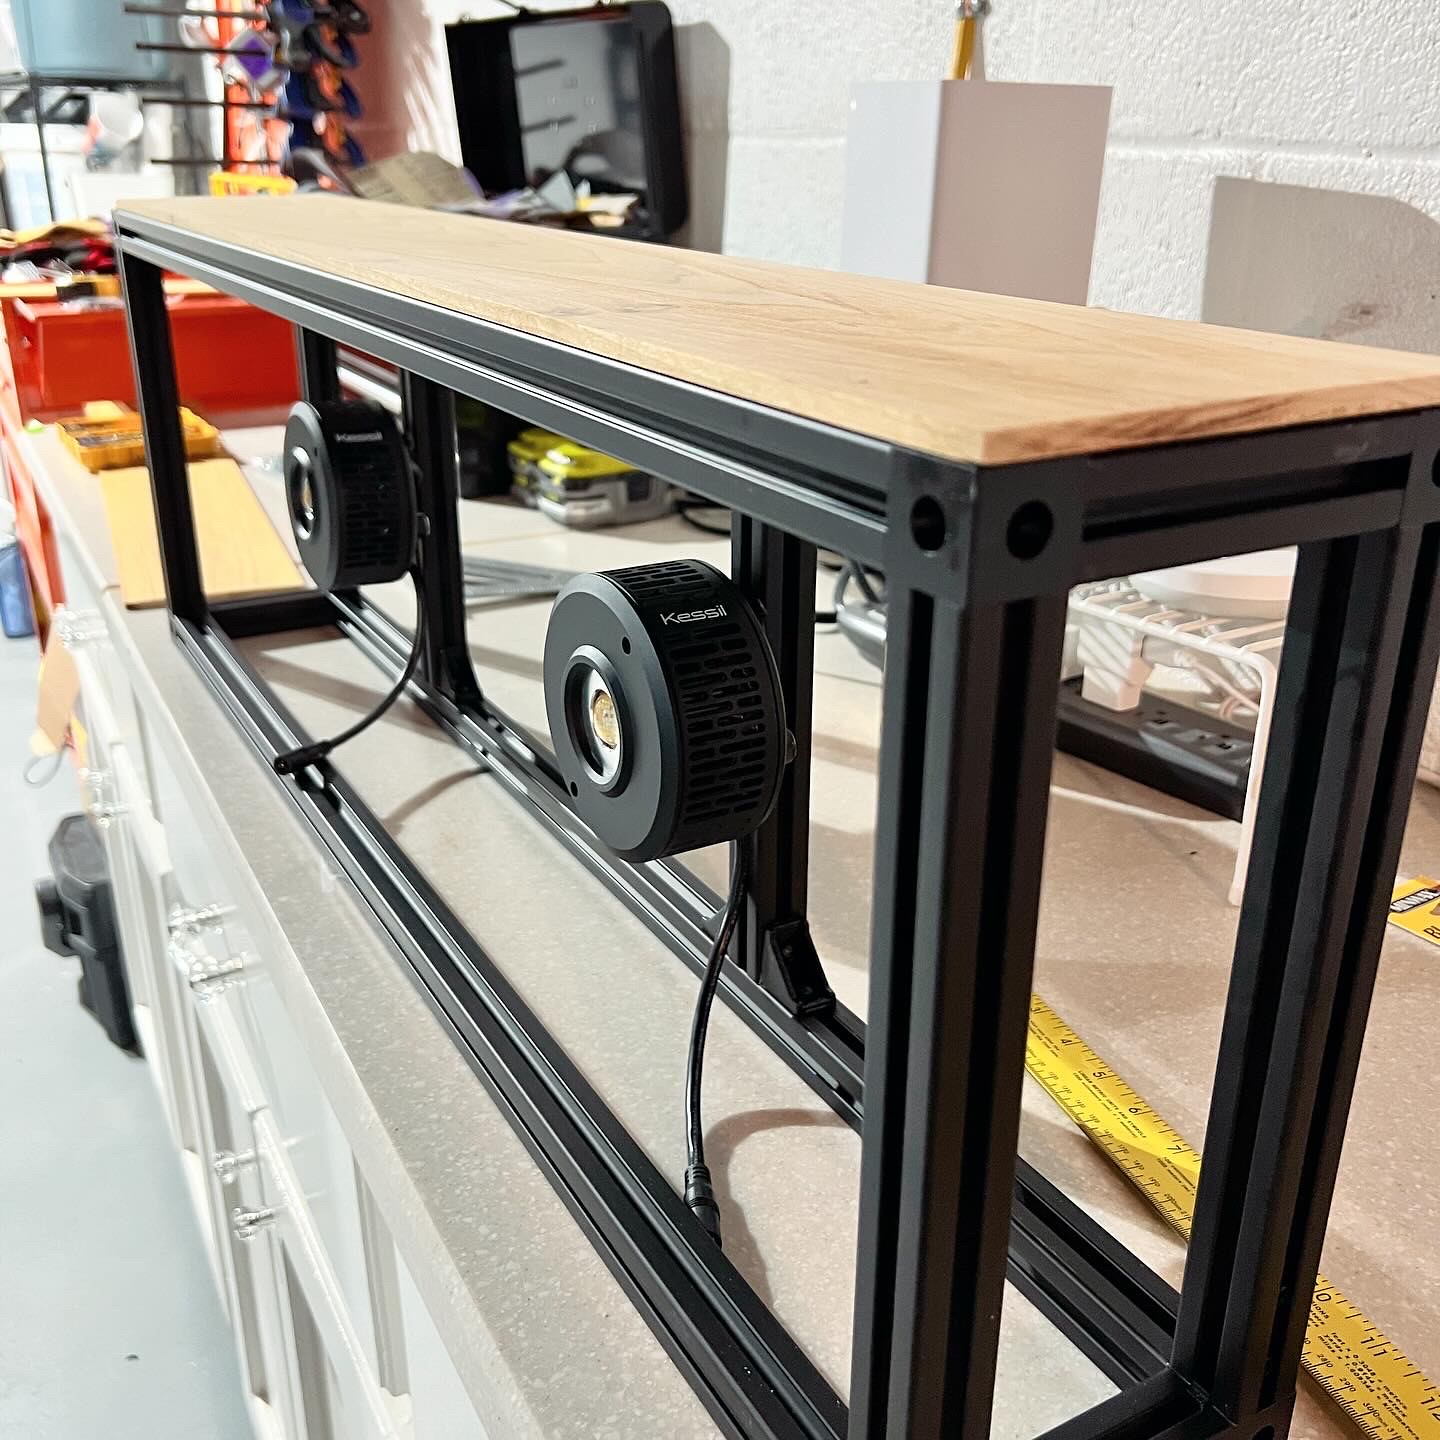
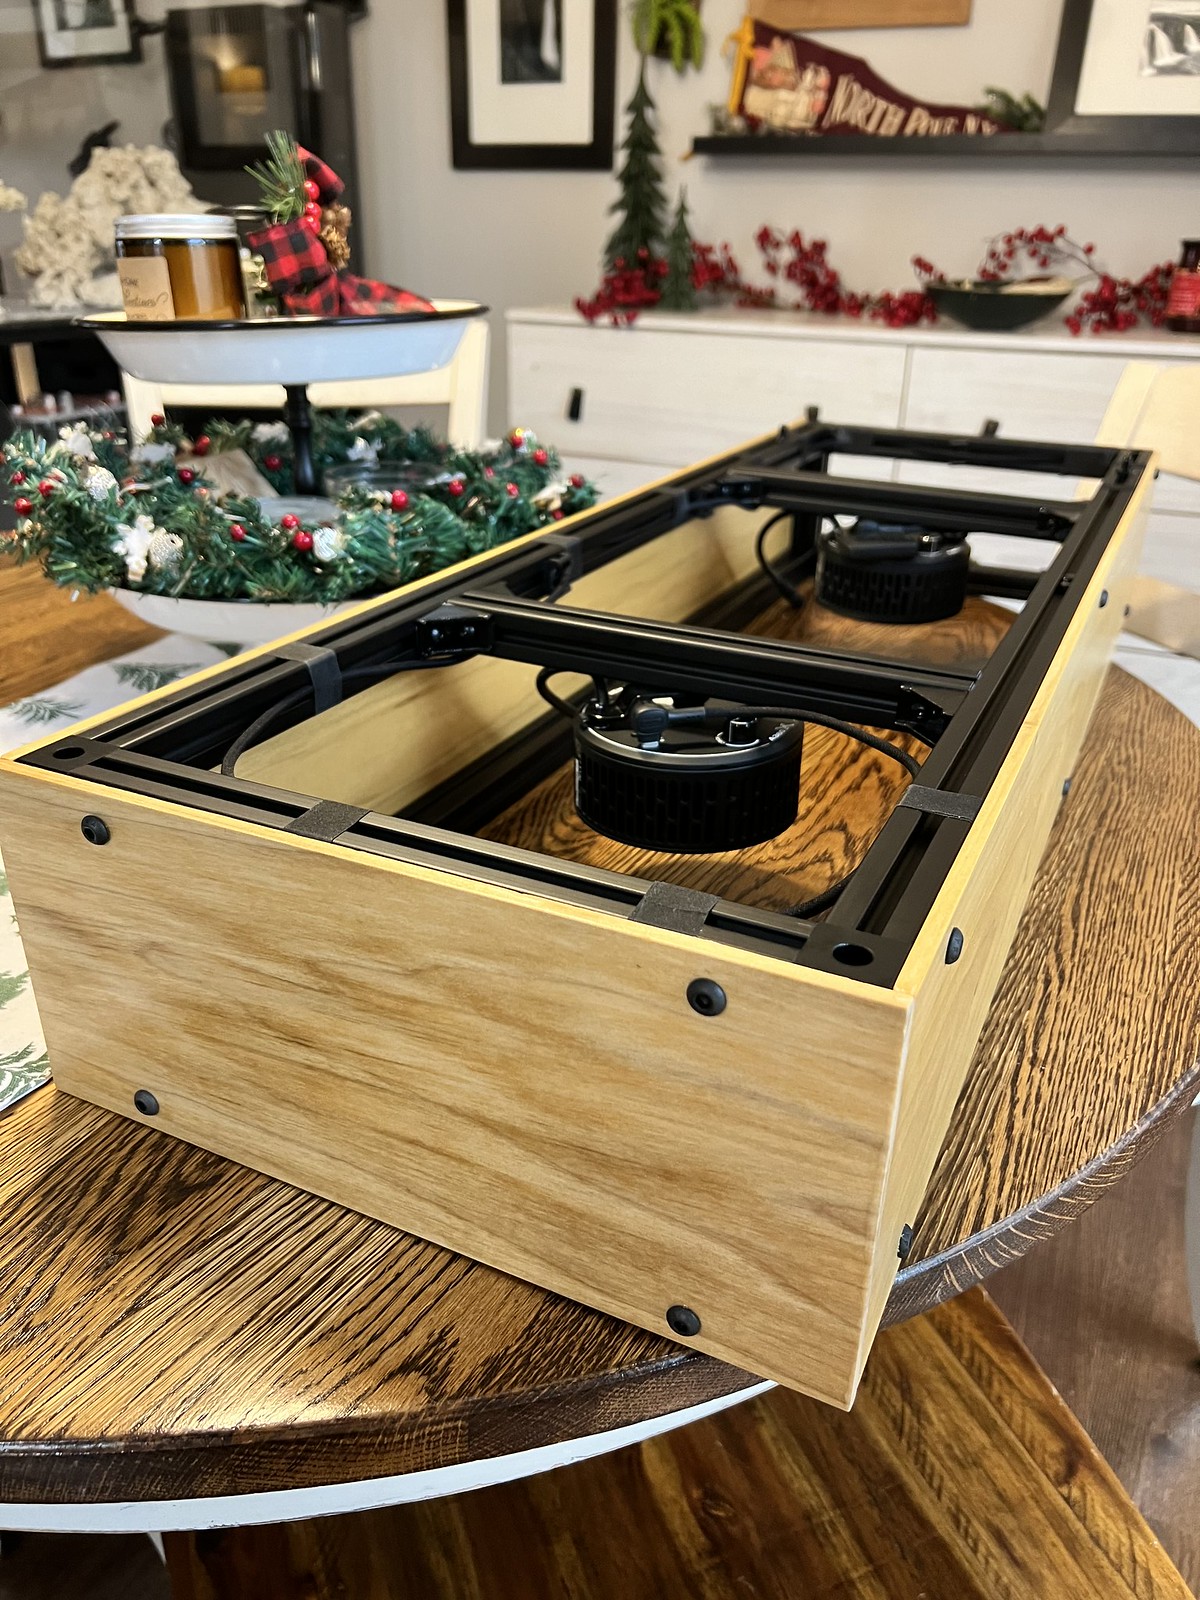
- Kessil A360X Tuna Blue light fixtures in custom DIY pendant
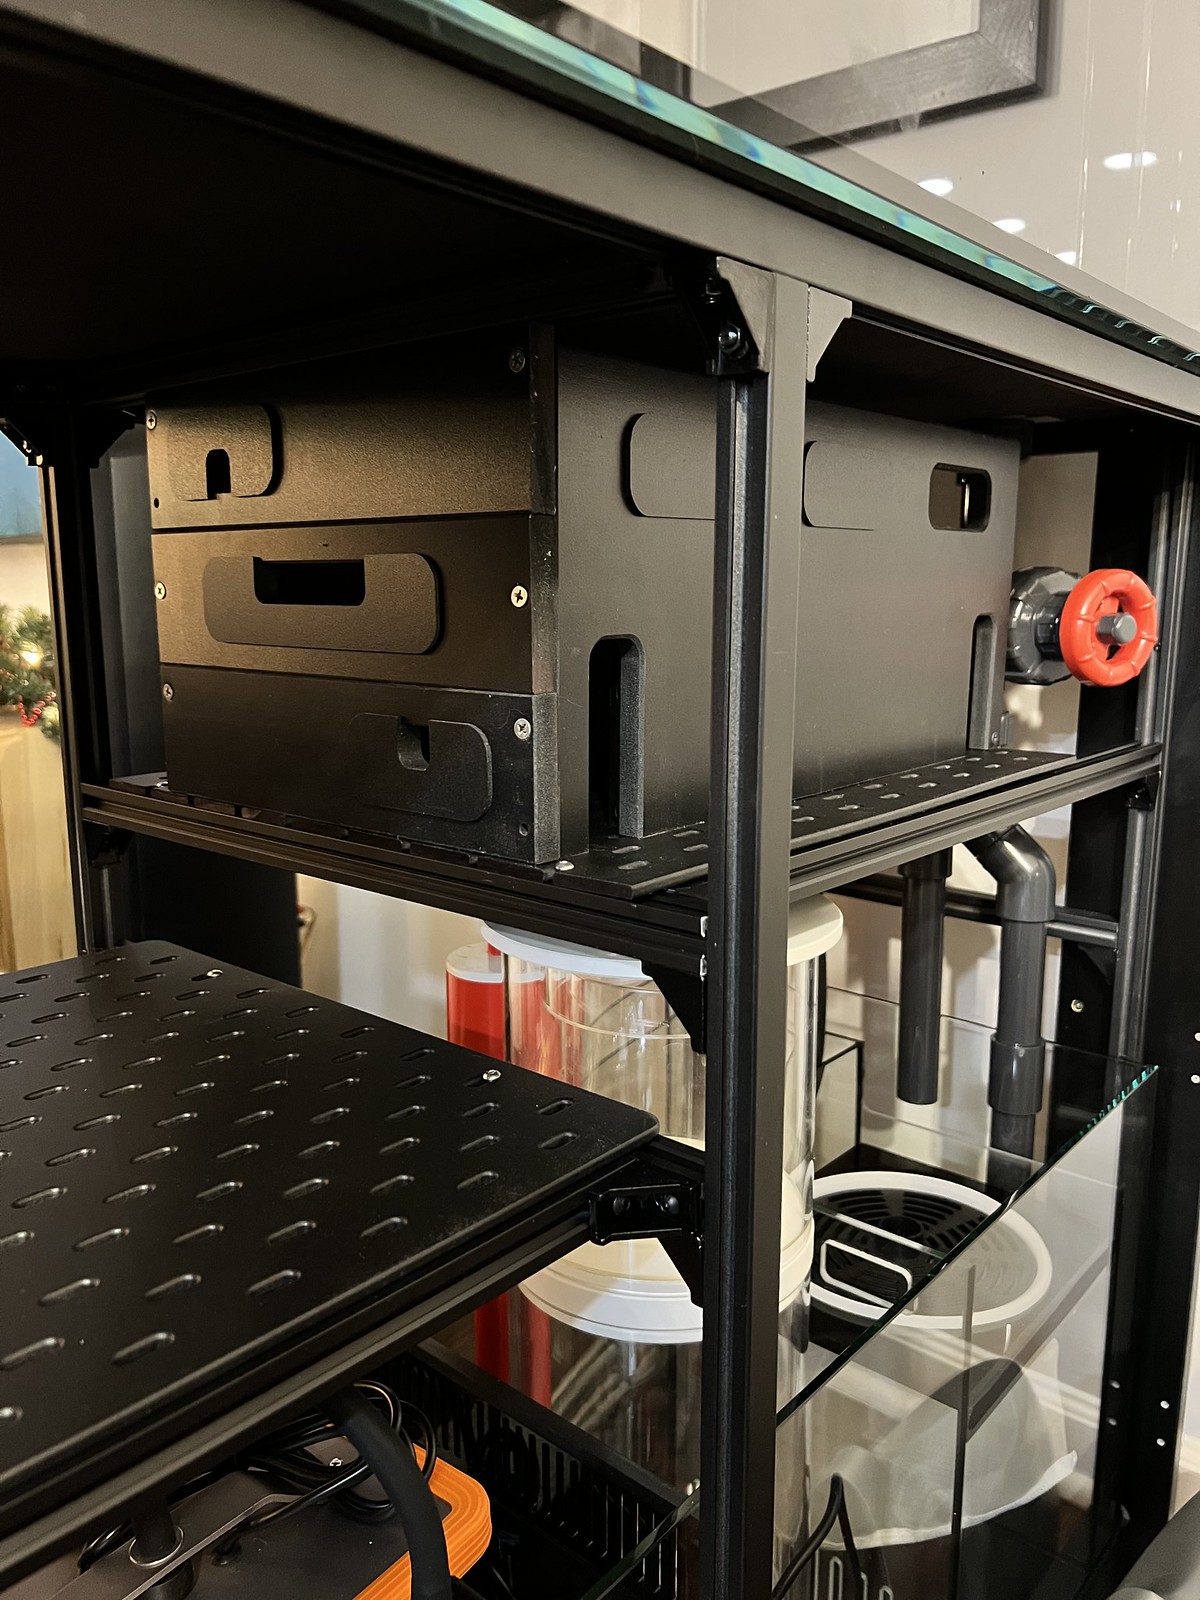
- Royal Exclusiv protein skimmer
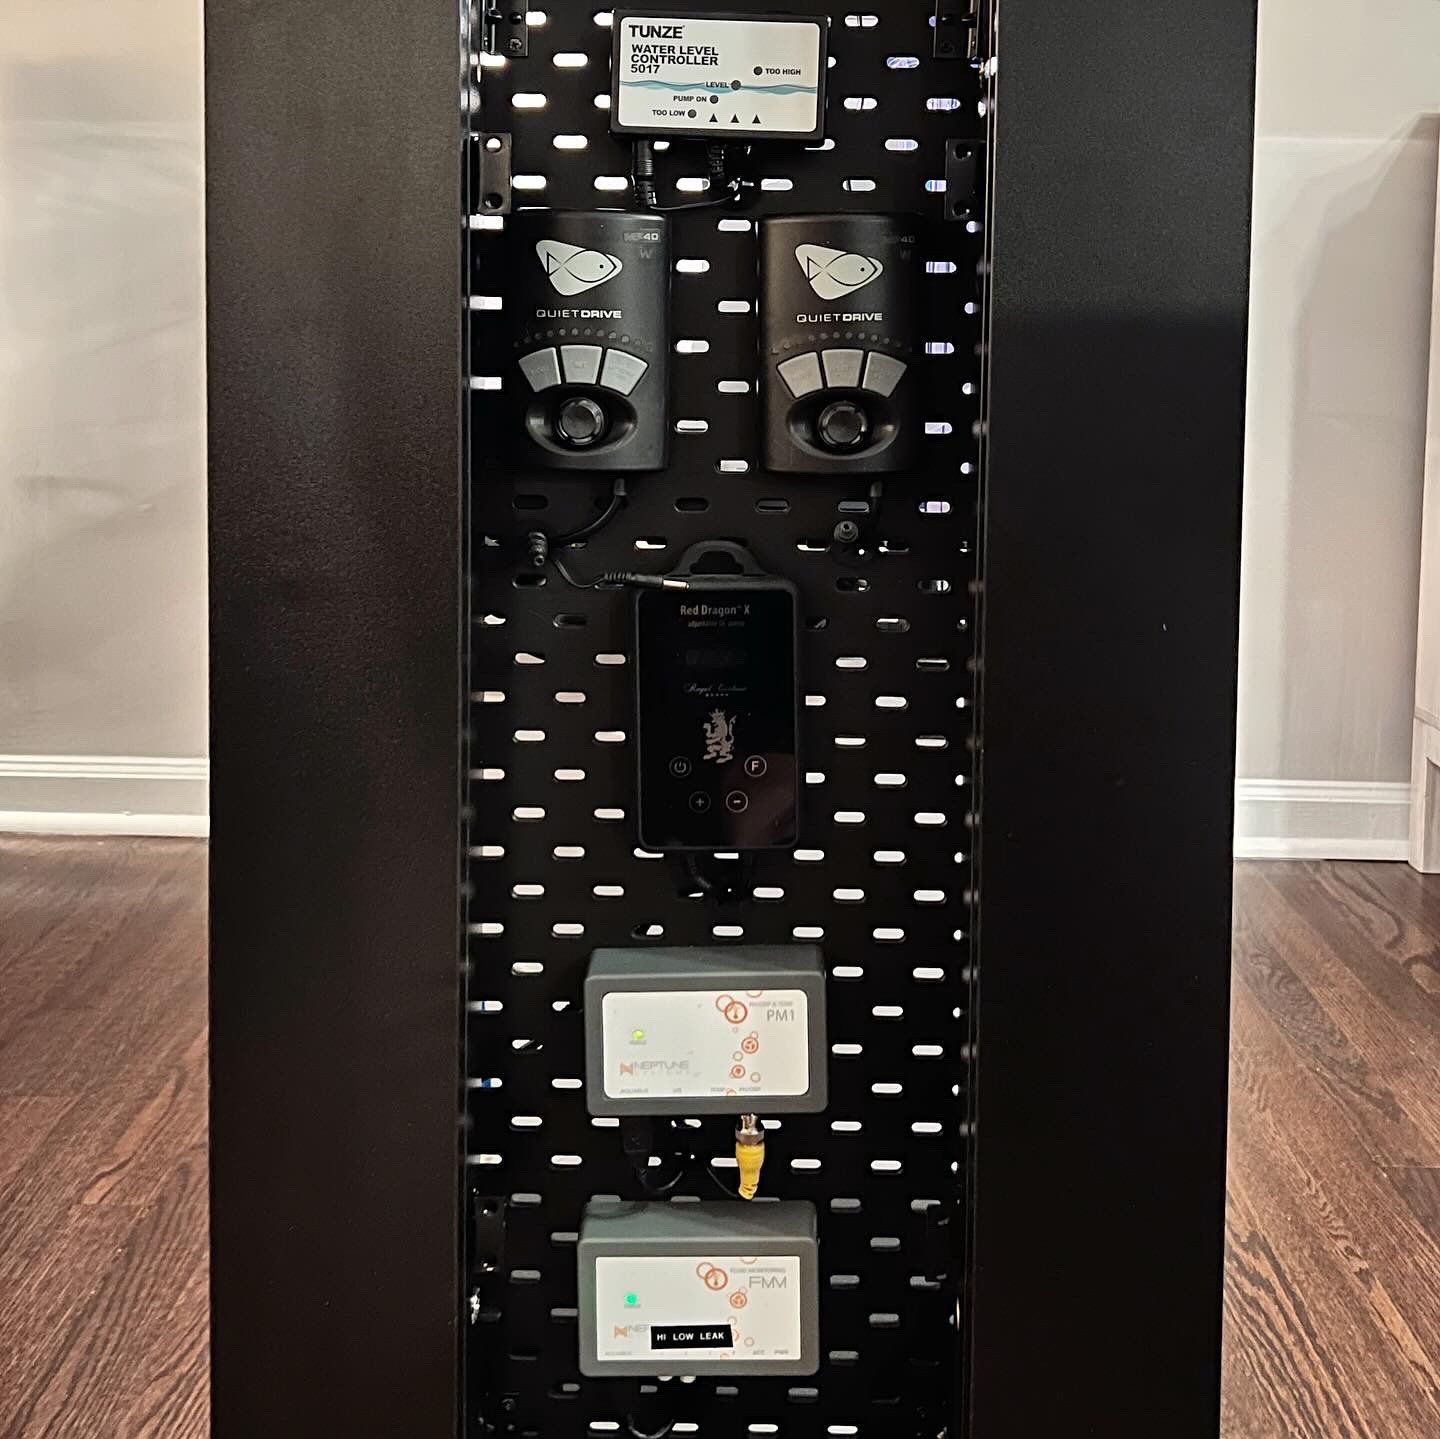
- EcoTech MP-40QD pumps
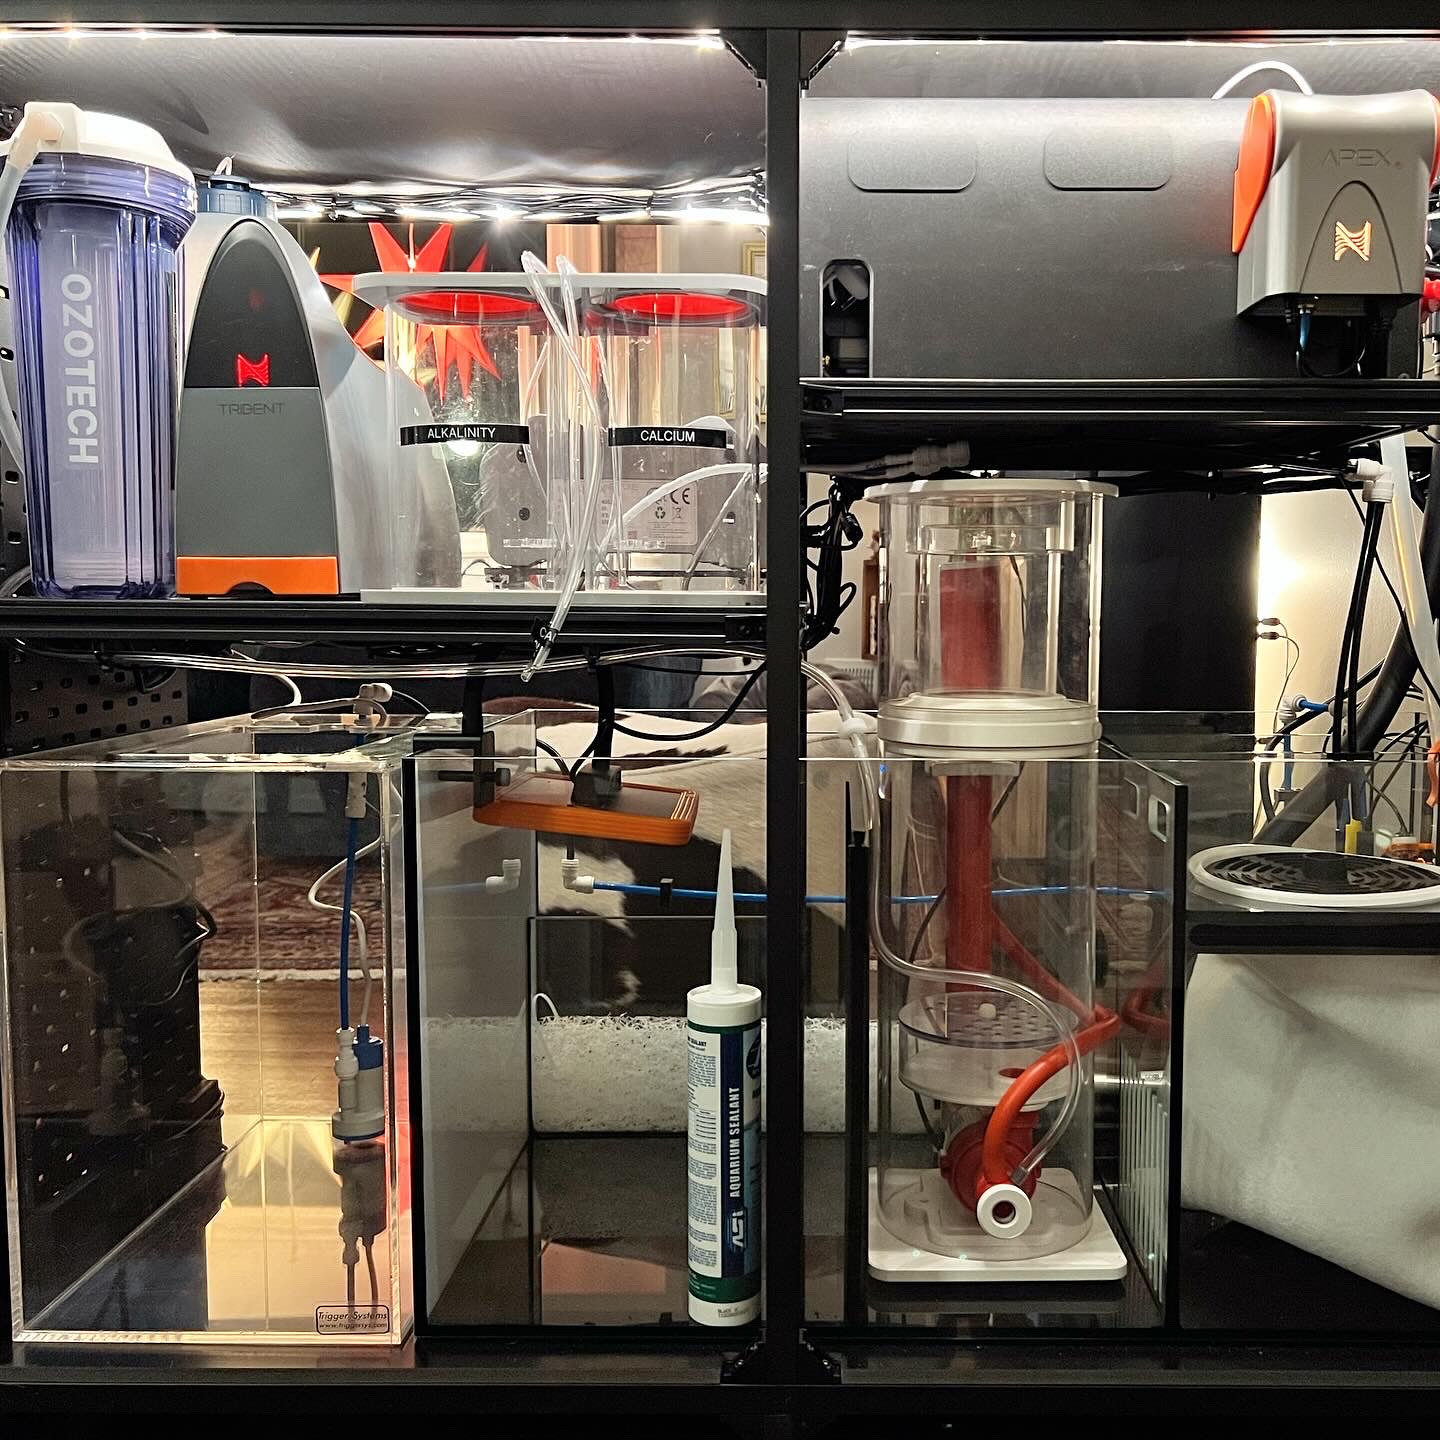
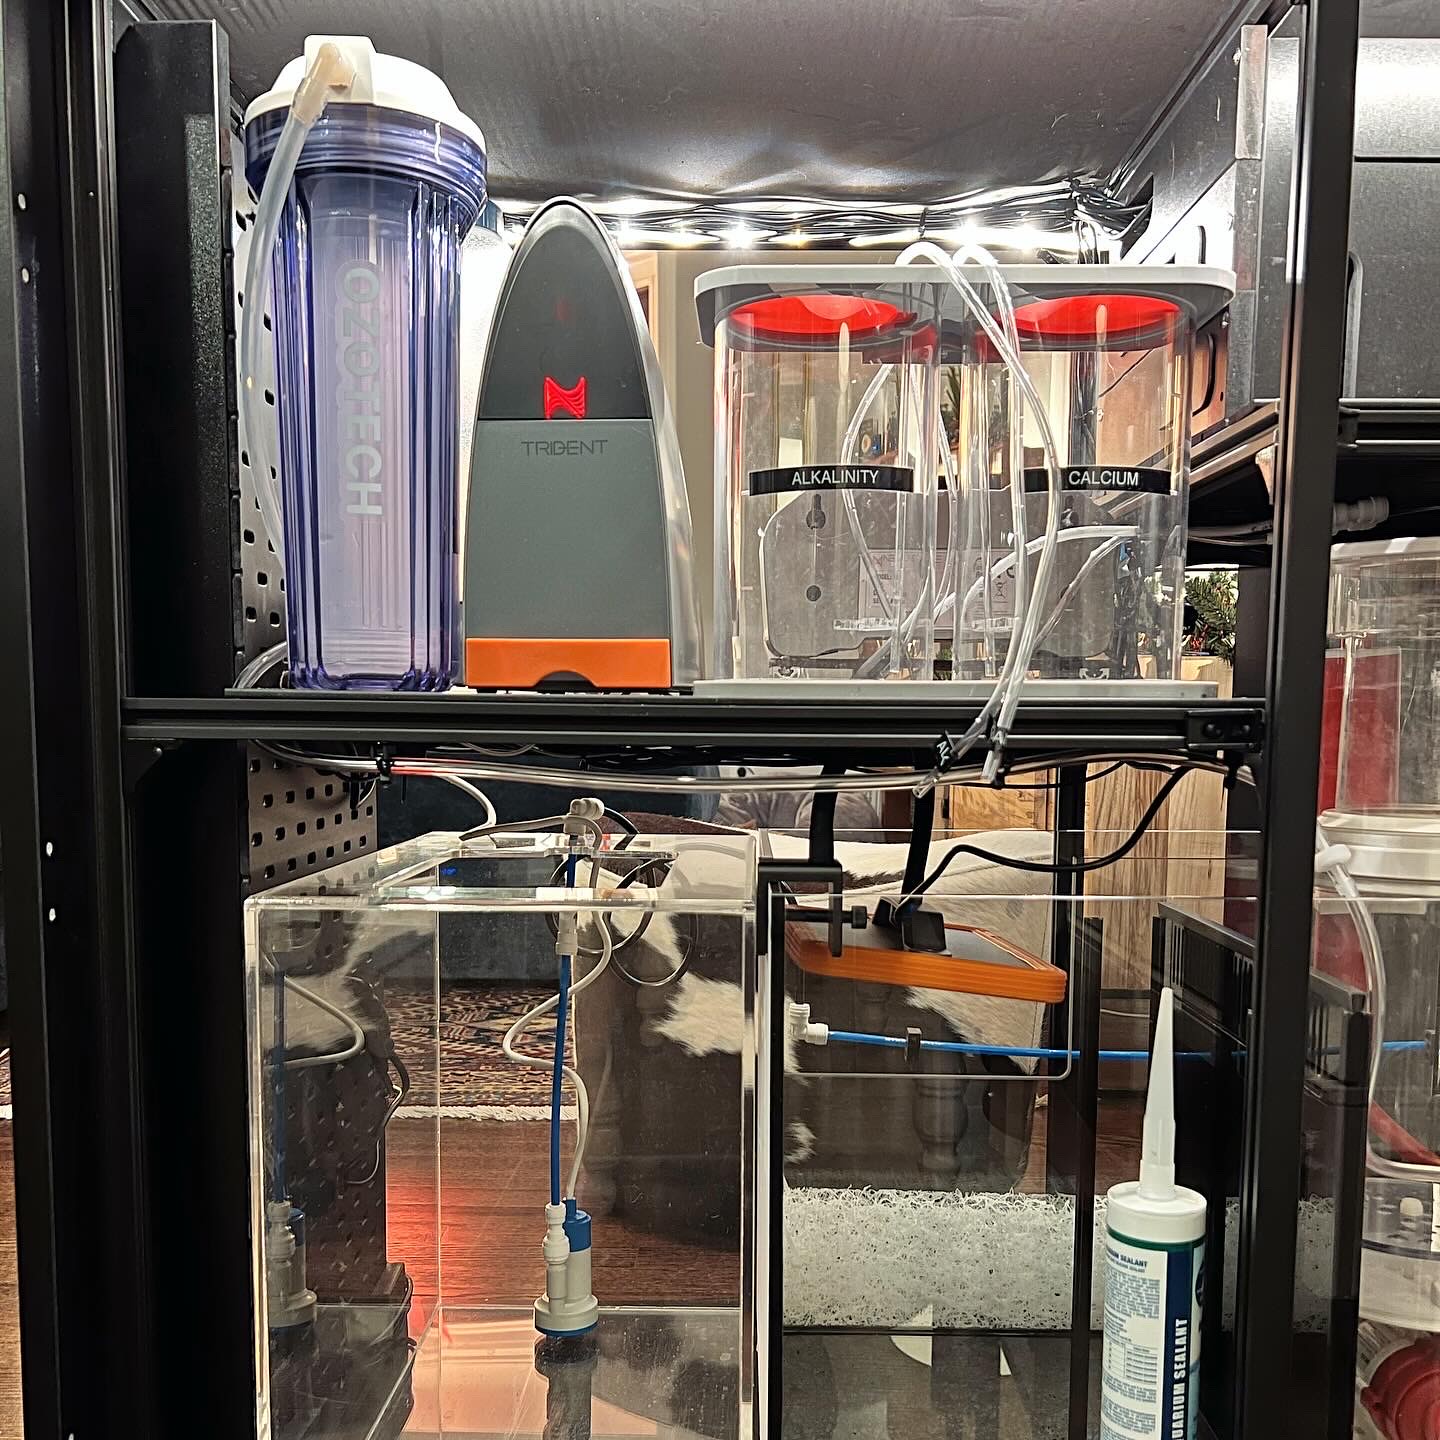
- Neptune Apex
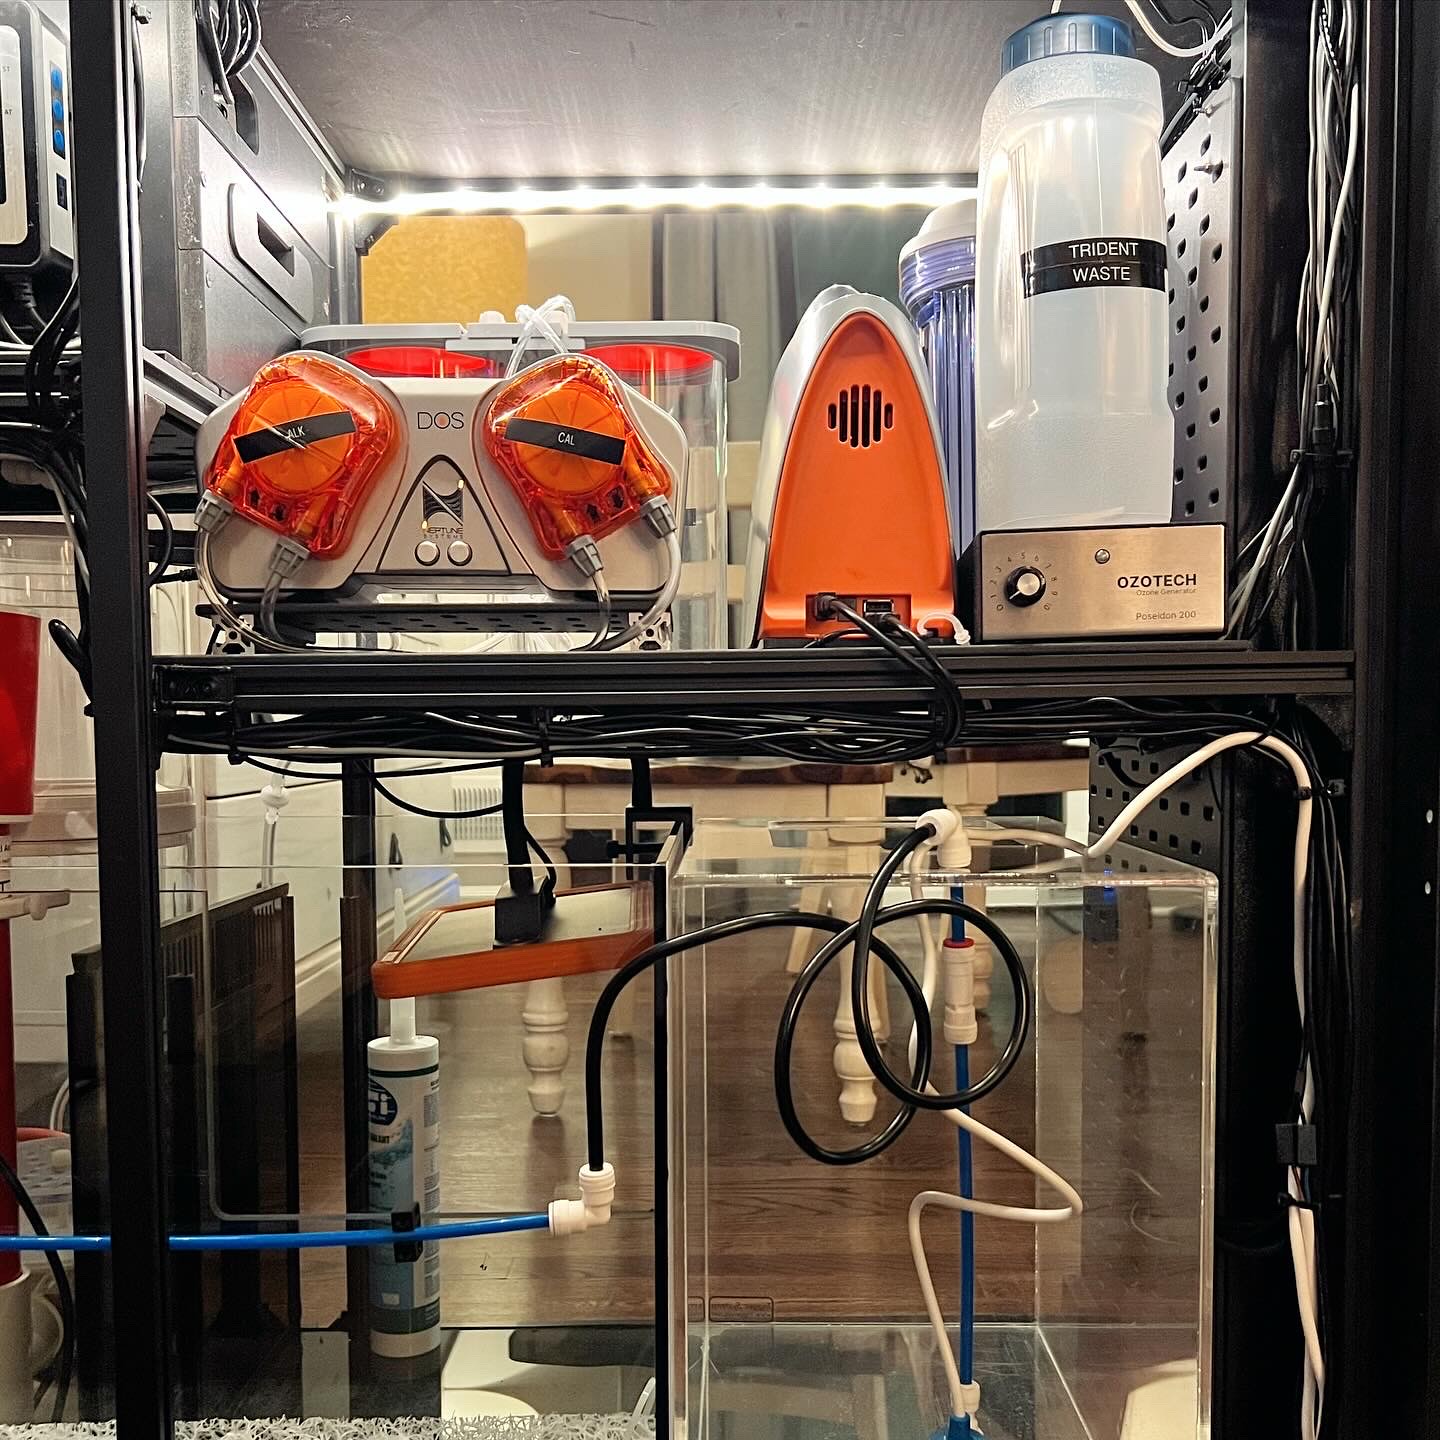
- Neptune Trident
- Neptune DOS and DDR
- Neptune GRO refugium light
- Ozotech ozone generator
- BRS bulk 2 part
Past FTS (1 December 2023):
Table of Contents:
- Chapter I: Tank Delivery and Stand Construction
- Chapter II: Electronics and Life Support Systems
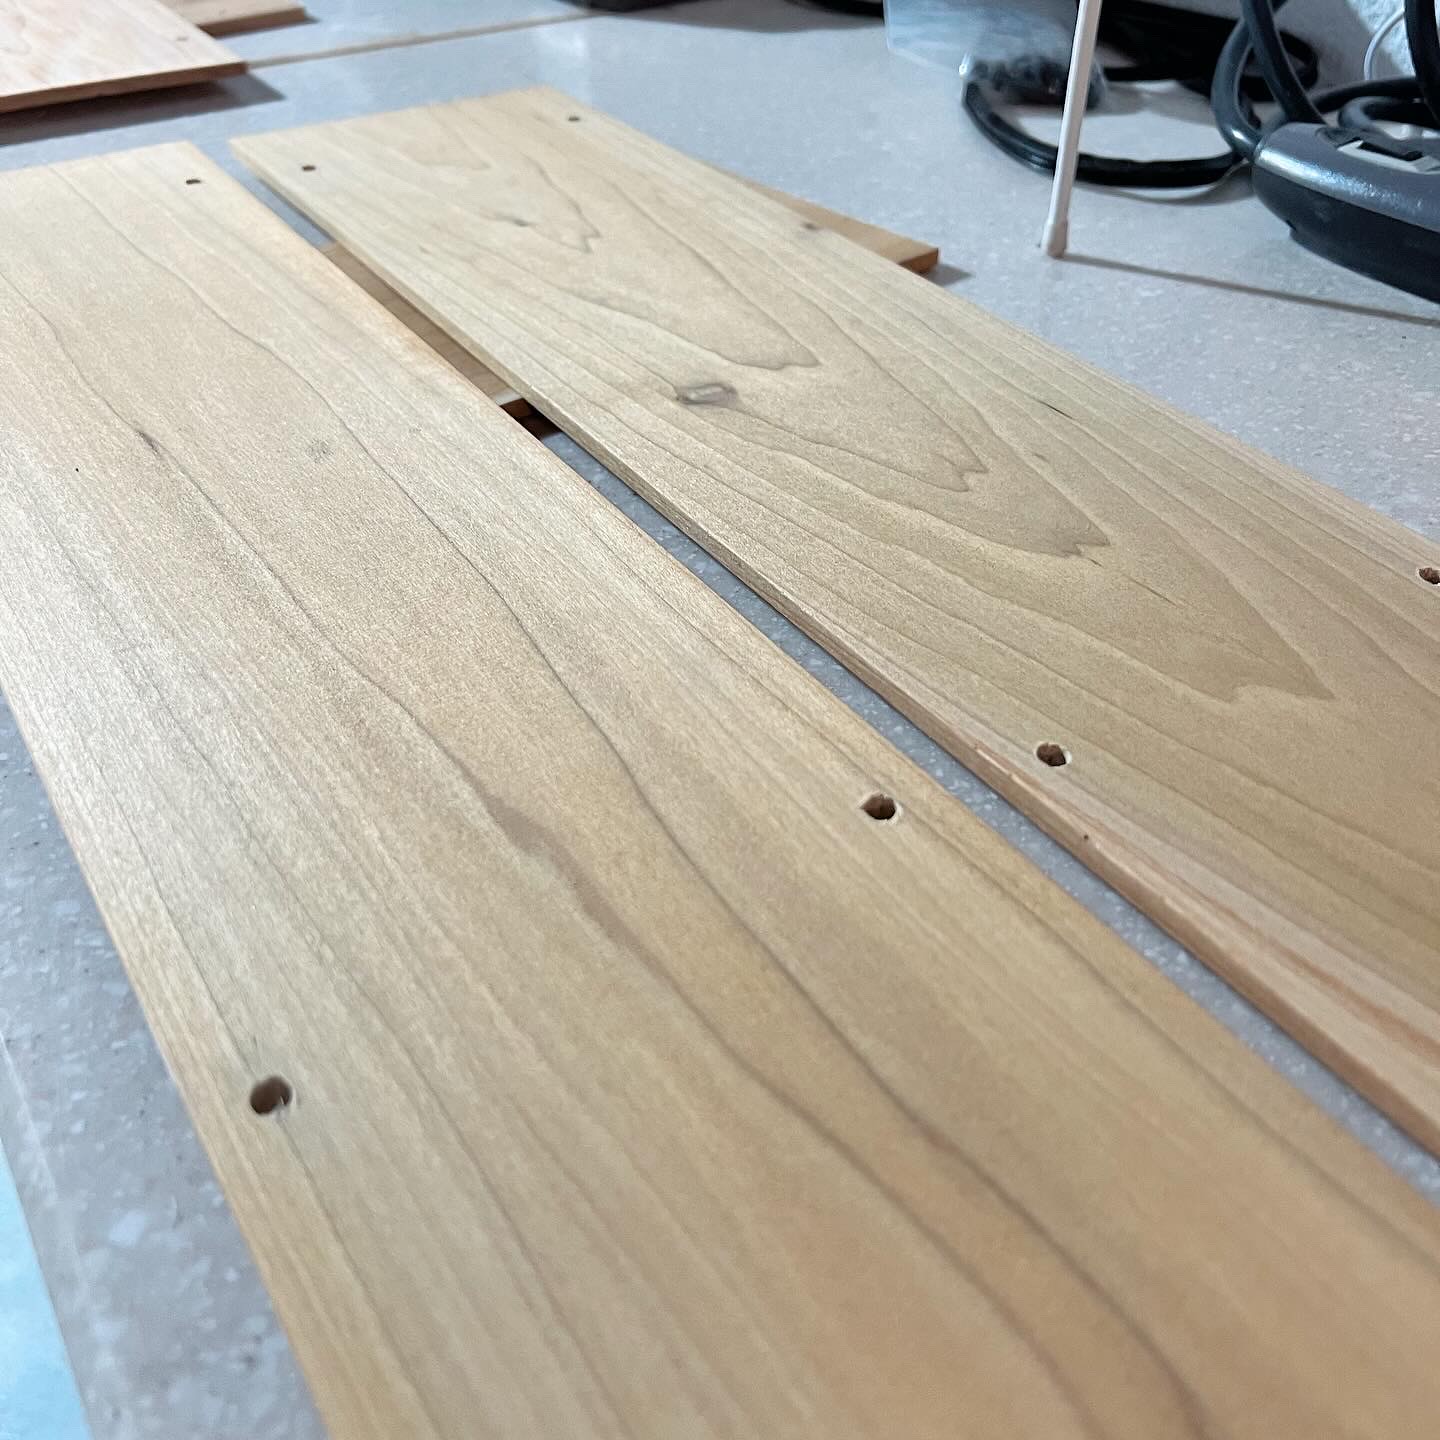
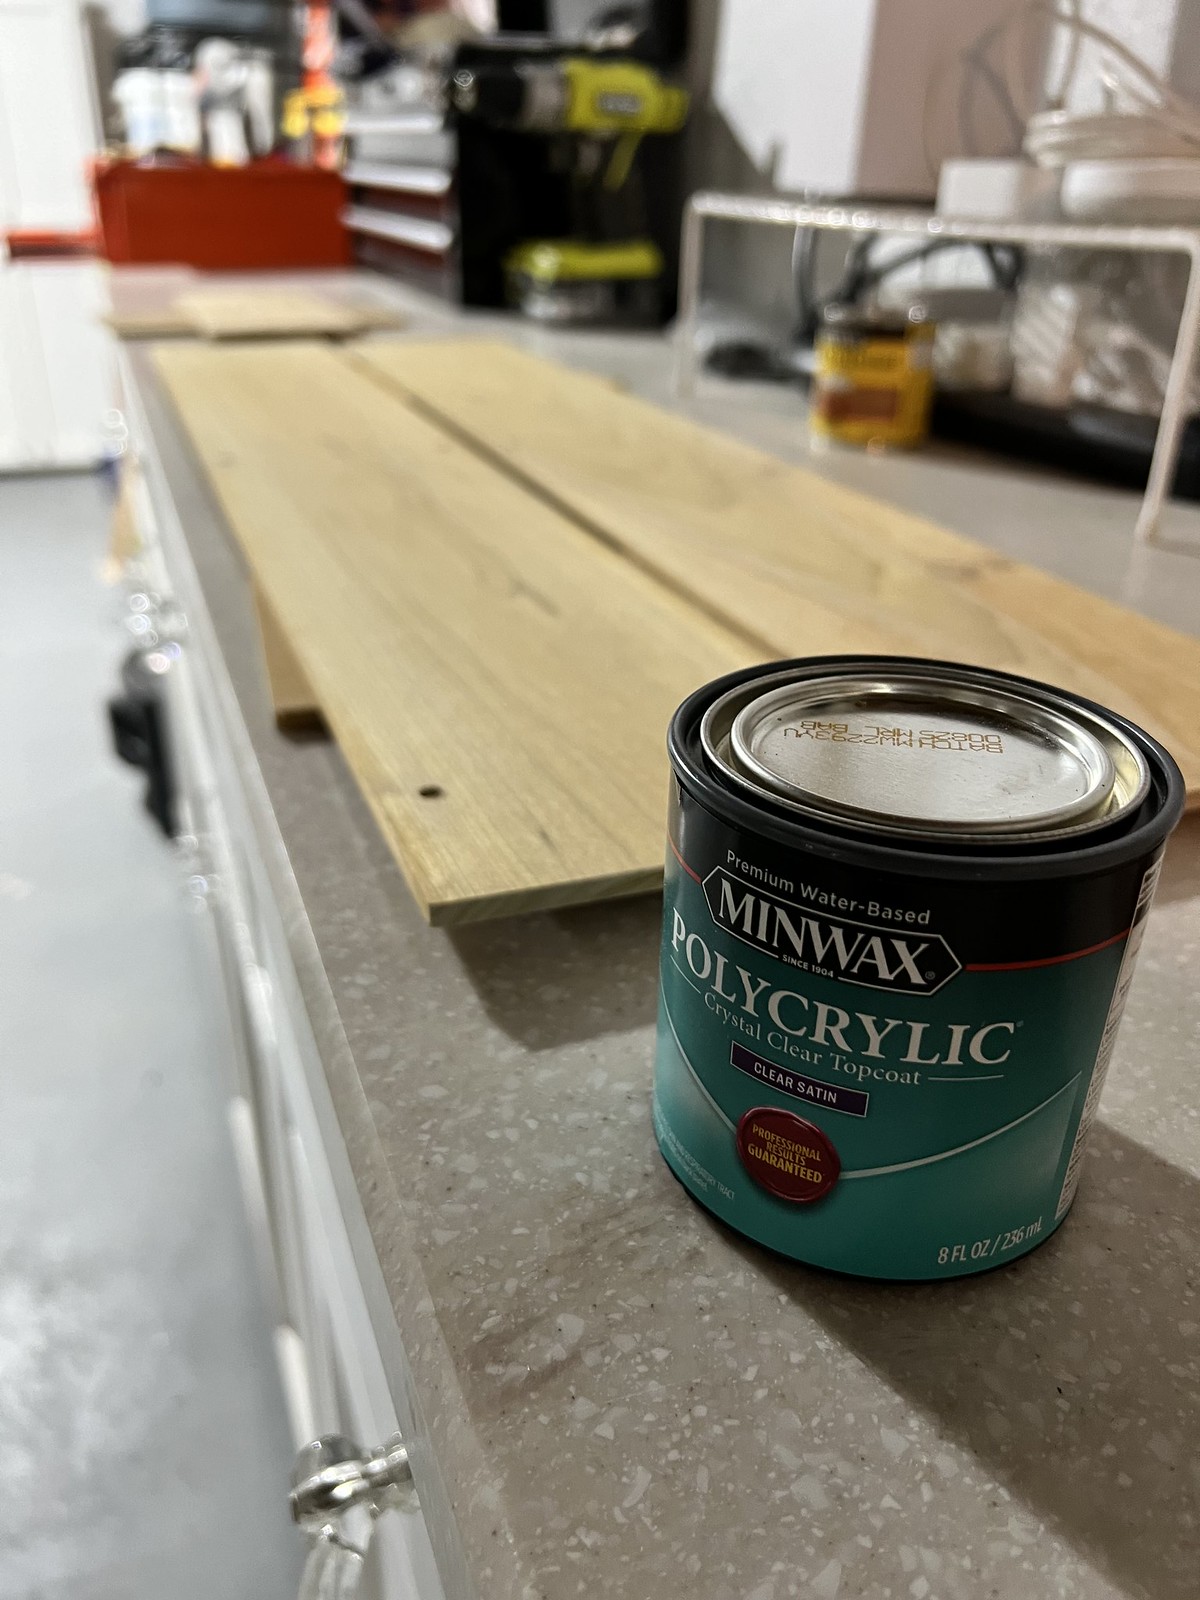
- Chapter III: DIY Light Pendant Build
- Chapter IV: Thoughts on a Return Pump
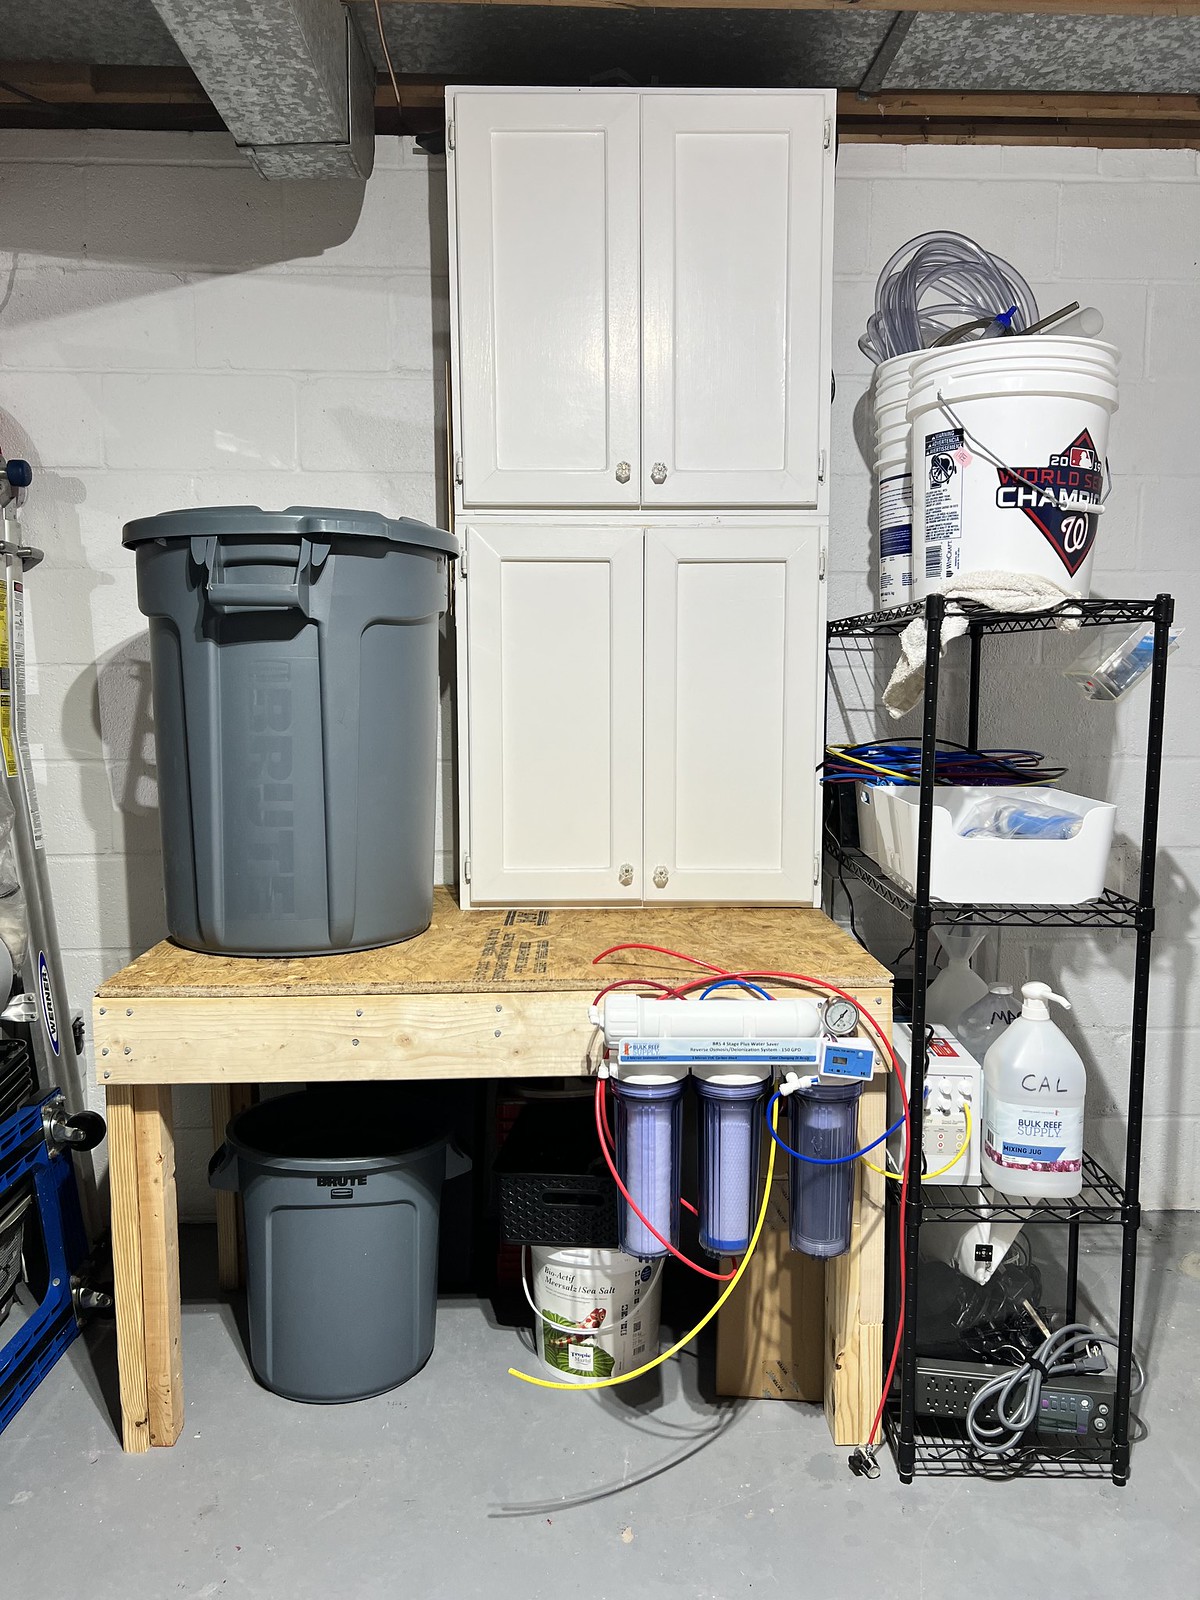
- Chapter V: Water, Water Everywhere
- Chapter VI: Aquascaping
- Chapter VII: Welcome to the Ugly Phase
- Chapter VII: Some New Livestock
- Chapter XIII: When It Breaks & Fails
Last edited: