


Hi all,
I recently acquired a 25 Marine Land aquarium and stand FO FREE!! Well, I was stupid and put it in the garage when I knew the whether was about to change. The temperature dropped 30 degrees in about 3 hours and a lot of condensation got on the particle board tank stand:

Let the new tank stand build begin. I thought that eventually I would have a 40 breeder because I've always thought that they make great frag tanks, so I built it to those dimensions thinking of the future.


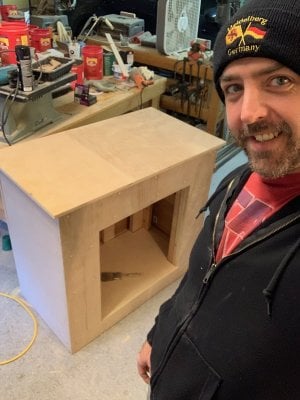
I want this thing to last so we braced it for WWIII. After completing the skeleton, I wrapped it in 3/4 Birch plywood.

(Sorry about the ugly mug. The photo was originally just meant for my wife)
Between the skeleton and skin, we used around 150 screws. We filled the screw holes with wood filler and then sanded everything, and then sanded, and sanded some more, sanding, still sanding....you get the point. I used 120 grit. I bought 180 grit to use after the 120, but it turned out pretty good with just the 120. Then the staining began. I used Minwax Gel Stain (Coffee color). The gel went on thick like a petroleum jelly and didn't need to stay on long before wiping off the excess.

(before wiping off the excess)

All the dots you see on the face is the wood filler over the screws. I'm not sure why it didn't take the stain like the plywood did. Maybe the brand? Maybe I didn't let it dry enough?


I let the stain dry overnight before I put the first coat of sealant on. I used a high gloss Tung Oil for the sealant. That stuff goes on really really "watery" so I had to keep wiping in an upward motion until it didn't want to run anymore. I went back with two coats of the Oil. The instructions said to use a fine steal wool to buff the surface in between applications, but I was lazy and thought it looked ok without it.


The doors were definitely a challenge, but after a few minor plywood dimension modifications I was able to get those on as well. I just sprayed the inside of the cabinet with a can of lacquer and called it good. I'm very pleased with it. I hope it lasts a loooonnnngggg time.


I recently acquired a 25 Marine Land aquarium and stand FO FREE!! Well, I was stupid and put it in the garage when I knew the whether was about to change. The temperature dropped 30 degrees in about 3 hours and a lot of condensation got on the particle board tank stand:
Let the new tank stand build begin. I thought that eventually I would have a 40 breeder because I've always thought that they make great frag tanks, so I built it to those dimensions thinking of the future.
I want this thing to last so we braced it for WWIII. After completing the skeleton, I wrapped it in 3/4 Birch plywood.
(Sorry about the ugly mug. The photo was originally just meant for my wife)
Between the skeleton and skin, we used around 150 screws. We filled the screw holes with wood filler and then sanded everything, and then sanded, and sanded some more, sanding, still sanding....you get the point. I used 120 grit. I bought 180 grit to use after the 120, but it turned out pretty good with just the 120. Then the staining began. I used Minwax Gel Stain (Coffee color). The gel went on thick like a petroleum jelly and didn't need to stay on long before wiping off the excess.
(before wiping off the excess)
All the dots you see on the face is the wood filler over the screws. I'm not sure why it didn't take the stain like the plywood did. Maybe the brand? Maybe I didn't let it dry enough?
I let the stain dry overnight before I put the first coat of sealant on. I used a high gloss Tung Oil for the sealant. That stuff goes on really really "watery" so I had to keep wiping in an upward motion until it didn't want to run anymore. I went back with two coats of the Oil. The instructions said to use a fine steal wool to buff the surface in between applications, but I was lazy and thought it looked ok without it.
The doors were definitely a challenge, but after a few minor plywood dimension modifications I was able to get those on as well. I just sprayed the inside of the cabinet with a can of lacquer and called it good. I'm very pleased with it. I hope it lasts a loooonnnngggg time.


