Newbie from Israel is building a piece of the ocean in his living room (120g DT)

dadarara

Community Member
View Badges
Joined
Nov 16, 2020
Messages
88
Reaction score
38
Location
Israel
Rating - 0%
0   0   0
I love the sea. 15 years ago, did a skipper license, and once in a while go out sailing with the family. Not as much as I would want to though. Wanted to build a reef tank for a long time. For years it stayed within a realm of dreams.
Half a year ago, I have decided it’s time to do something about it, and begun reading, learning and planning.

I am starting this thread mostly for myself, to keep track of my own progress. Maybe it will help others in some DIY aspects.

This will be a kind of peninsula display tank viewable from 2 sides. 150cm x 50cm x 65cm (~60"x ~20"x ~26")
450 liter (~120g) display. The sump I think will hold about 160 additional liters. So total about 600 liters (160g)

My wish to build this with my own hands as a DIY, is the major part of this project.
I have and am, spending lots of time on the forums, learning and absorbing all I can.
Planning, designing gathering information. Things to do and what not to do.

One thing I realize is this is a very long journey :

Sep 2020 - began actively thinking about it.
Jan 2021 - started to build the metal stand.
Mar 2021 - Start manufacturing: rocks, sump, Chiller, Controller , Led lights
May-Jun 2021 - hope to fill water, dependent on the rock aquascape building
Sep-Oct 2021 - maybe will put a small fish inside, considering the cycling etc.

This hobby/project will require many different fields of expertise and knowledge, with various levels of complexity and depth.
And what I don’t know, I will learn. I know how to work with wood, plastic and a little with metal. I know electronics and I am a programmer.
So, I think I can do much of the equipment myself.
Generally speaking, I wish to BUY as little as possible. I realize obviously that I can’t manufacture glass or acrylic or DC pumps. And I will be buying livestock of course :). But I manage to gather materials for a very low cost, if not for free.

For example. I went to look for businesses that work with acrylic. They often throw away lots of material as byproduct or old "street light signs". So, I gathered a substantial amount of acrylic pieces with various sizes and width that will be enough to build 2 systems like mine. I will see how successful I will be though ... :)

I am keeping track of all my current and future expenses in an excel model
currently I am looking at about 5600$ cost for reasonably well-equipped system. Including some corals and fish.
The same size system ordered from my LFS will cost 10,000$ WITHOUT water inside etc...

Apart from wanting a mixed reef tank, I don’t particularly know what type of livestock I will have. And I know that many people say that this should be my first decision, based on which, everything else will follow and be based on. But I am consciously choosing to delay this to a later decision phase
I don’t intend to invest lots of money in various equipment types. So, my basic thinking is that I need to build a platform that will serve me for anything that I envision myself to have.
Basically, the bellow picture shows what I have planned so far. It’s a work in progress, and its changing based on what I learn along the way.
Screen Shot 2021-03-27 at 10.27.39.png


The stand is from metal (will detail the build later). The sump and many of the parts will be from acrylic. the display tank is 15mm extra-clear glass which I intend to glue myself. I have gathered all the technical dimensions of PVC parts and even pumps and various other general parts. Thus, I have reasonably good trust in the placement of parts inside the cabinet. But all the details will follow...

I am following the bellow general plan.
1 - build the stand
2 - build a wooden mockup for the tank, to use for constructing the rock structures and start making the rock. This will take several months for rock to cure and kure...
3 - meanwhile to order the PVC parts. will take a month or so to get here from china.
4 - build the display tank.
5 - build the sump and reservoirs for auto water replacement and RODI etc... (from acrylic as well)
6 - order the pumps and other stuff
7 - build the lights, controller, Heat Exchanger (chiller-heater)

8 - fill with water and bacteria and cycle. (3-4 month I guesstimate. want to do a "No fish cycle" and dry rock startup)
9 - the journey actually begins...


I will be building :

DIY ROCK aquascape
DIY ATO - auto water top-off system with remote reservoir.
DIY Auto Water change system - also with remotely located salt water tank.
semi DIY Heater and Chiller will be based on an Air condition compressor and next to tank heat exchanger unit.
DIY Auto Dosing system
DIY controller based on Reef-Pi / RoboTank board .
DIY UV lamp - trying to design 2 of these. for low and high flow. (changed my mind. bought 2x36W units of Sunsun)
DIY auto fleece roller
DIY Protein skimmer - venturi based
DIY Sump - acrylic . with refugium and DIY algae scrubber
DIY LED lights
 
Last edited:
OP
OP
dadarara

dadarara

Community Member
View Badges
Joined
Nov 16, 2020
Messages
88
Reaction score
38
Location
Israel
Rating - 0%
0   0   0
Chapter 1: Building the metal stand.

Screen Shot 2021-03-27 at 10.36.27.png

Originally, I thought of a wooden stand. I have a finite space for the whole build in my living room. 150 by 50cm is the max I can go. And the loss of space inside a wooden cabinet is immoderate. I rather use the space to have bigger Sump and place for other devices under the tank. Every centimetre counts.

I consider that the effect of salt water on wood vs rust of a steel is more or less the same type of risk. This will depend on the treatment of the material I presume. So, I went for a galvanised metal rods. 5cm x 2.5cm with 3.25mm thickness. and some 2.5x2.5 cm in between.

Ordering a stand from a professional would have cost me 400-500$. I bought the materials for 120$. And I already have the stick welding unit. Might be able to extrapolate the cost of electricity from my monthly bill later on.
The cost of paint was 50$

I wanted the access to the sump not be restricted by anything. So, there is no "leg" in the centre. I have compensated the fact with some other structural details. Believe it will be ok.
The most important thought I had was : no weight should be stressing the welding joints. All the weight should be distributed through the metal rods. And the legs are standing directly on the floor.
Screen Shot 2021-03-27 at 10.36.37.png

I chose not to have levelling screws. I have a ceramic levelled floor, and I will be placing the stand on some heavy-duty rubber material which should be able to help with some imperfections.
The major issue I have is with my stick welding skills. I am inexperienced in this. I am sure the end result will hold for years. But it’s not very pretty and it took me some number of retries to weld it well. For sure this is not a professional work. But its mine. :)
this is the BAD one I "scratched" and redone many of them.
Screen Shot 2021-03-27 at 10.36.47.png

After several retries :
Screen Shot 2021-03-27 at 10.36.54.png

Screen Shot 2021-03-27 at 10.37.03.png


Work in progress:
Screen Shot 2021-03-27 at 15.14.14.png
Screen Shot 2021-03-27 at 15.14.36.png
Screen Shot 2021-03-27 at 15.15.04.png

The end result :
Screen Shot 2021-03-27 at 10.37.15.png


the plan is to cover the stand with acrylic white sheets attached with magnets. It will be also practical to be able to open the cover from the living room side "to show off a little ".
 
Last edited:

Mastiffsrule

Where ever you go, there you are, so be nice 2 you
View Badges
Joined
Feb 10, 2019
Messages
8,440
Reaction score
33,571
Location
Charlotte
Rating - 0%
0   0   0
Hello,

Project looking good. Props for the metal stand. I would never try to weld, but I also have trouble with my laces :D

Keep is updates on the rock placement and livestock plans
 
OP
OP
dadarara

dadarara

Community Member
View Badges
Joined
Nov 16, 2020
Messages
88
Reaction score
38
Location
Israel
Rating - 0%
0   0   0
Chapter 2: "Site preparation - walls, wires, tubes etc."

My plan is to have :
- Auto Water Changing System
- Auto TopOff system.
- Air-conditioning compressor unit coupled with Heat Exchange module for cooling and heating the water.

the reservoirs for salt and RO water will be located in a remote service room and next to it there is an enclave for placing the air condition compressor unit .

Here is the architectural plan where the tank will be located.
1622323482017.png


My construction steps.

step 1 - demolish and cut the wall to hold the structure. Lots of dust and dirt. My wife DID NOT LIKE THIS at all. However well I tried to cover the working area, it didn't help too much. So instead of cutting with the electric saw, I used the chisel and hammer old fashioned and longer way. But less small dust particles in the air.
1622323588479.png

1622323656370.png

step 2 - lay all the electrical cable tubing and wire.


Between where the tank will be located and the RODI and the salt water preparation system will be standing, there are about 13m.
it's 3m up to the ceiling , 7m across and 3m down to the water station.

I have a detailed plan for the RODI unit. (will share later) . But the main concept is to utilise some pressure pumps (maybe the VERSA as a last choice as they are high cost) to push the clean and salt water across the 6mm (1/4") tubing back and forth between the two locations.


Also need the air conditioning gas tubes to push above the ceiling.
So here is the list of things I am pushing above the ceiling :

1 - 6mm tube for clean RO water to the tank (ATO)
2 - 6mm tube for "new" salt water to the tank
3 - 6mm tube for "old" salt water from the tank
4 - 1/4" copper insulated gas tube
5 - 1/2" copper insulated gas tube
6 - 3x CAT5e cables for control of ATO, AWC etc
7 - spare tube
8 - one cable with 2 threads 8AWG for DC power.
9 - 20mm transparent Silicon tube for "whatever"
10 - additional 220v AC separate line with GFCI
11 - empty plastic in-wall tube for power cables to be used for any other unforeseen purpose

1622323824207.png

1622323853677.png


The wall is only 15cm, so I have decided that I will not dig deep and rather cover the tubes and wires with the plaster board. 9mm. worked out great I think.... Have the power for lights from above and the ability to hang the light fixtures by decorative wires system. should be great. I am happy.
1622392834965.png

1622392865850.png

little mess with the parts I received from China. :)
 
Last edited:

DapperCuttlefish

Community Member
View Badges
Joined
May 22, 2021
Messages
71
Reaction score
195
Location
Bartow
Rating - 0%
0   0   0
Chapter 2: "Site preparation - walls, wires, tubes etc."

My plan is to have :
- Auto Water Changing System
- Auto TopOff system.
- Air-conditioning compressor unit coupled with Heat Exchange module for cooling and heating the water.

the reservoirs for salt and RO water will be located in a remote service room and next to it there is an enclave for placing the air condition compressor unit .

Here is the architectural plan where the tank will be located.
1622323482017.png


My construction steps.

step 1 - demolish and cut the wall to hold the structure. Lots of dust and dirt. My wife DID NOT LIKE THIS at all. However well I tried to cover the working area, it didn't help too much. So instead of cutting with the electric saw, I used the chisel and hammer old fashioned and longer way. But less small dust particles in the air.
1622323588479.png

1622323656370.png

step 2 - lay all the electrical cable tubing and wire.


Between where the tank will be located and the RODI and the salt water preparation system will be standing, there are about 13m.
it's 3m up to the ceiling , 7m across and 3m down to the water station.

I have a detailed plan for the RODI unit. (will share later) . But the main concept is to utilise some pressure pumps (maybe the VERSA as a last choice as they are high cost) to push the clean and salt water across the 6mm (1/4") tubing back and forth between the two locations.


Also need the air conditioning gas tubes to push above the ceiling.
So here is the list of things I am pushing above the ceiling :

1 - 6mm tube for clean RO water to the tank (ATO)
2 - 6mm tube for "new" salt water to the tank
3 - 6mm tube for "old" salt water from the tank
4 - 1/4" copper insulated gas tube
5 - 3/8" copper insulated gas tube
6 - 3x CAT5e cables for control of ATO, AWC etc
7 - one cable (5x1.5 strands) air conditioning control cable
8 - one cable with 2 strands of 8AWG for DC power.
9 - 20mm transparent Silicon tube for "whatever"
10 - additional 220v AC separate line and GFCI
11 - empty plastic in-wall tube for power cables to be used for any other unforeseen purpose

1622323824207.png

1622323853677.png


The wall is only 15cm, so I have decided that I will not dig deep and rather cover the tubes and wires with the plaster board. 9mm. worked out great I think....
Wow! Love the plan, excited to continue watching this come together.
 
OP
OP
dadarara

dadarara

Community Member
View Badges
Joined
Nov 16, 2020
Messages
88
Reaction score
38
Location
Israel
Rating - 0%
0   0   0
Thanks. it really takes lots of time and effort. I think I will not be able to put my first fish in the water in September. will see... :)
 
OP
OP
dadarara

dadarara

Community Member
View Badges
Joined
Nov 16, 2020
Messages
88
Reaction score
38
Location
Israel
Rating - 0%
0   0   0
Chapter 3: Chiller and heater based on heat exchange unit.

Leaving in Israel the heat outside may reach some 38c (100F). and inside the house can be about 28-32C (89F)
in the winter it can get to 20C(68F) in the house.
I could buy a chiller 1/4HP like Hailea HC-300A for 900$ new or 450$ used.
But its noisy and not very efficient and who knows how old and used it is....?!
So my choice is to have a heat exchange unit with a standard air conditioning compressor.
1622393419016.png


1 - less noise
2 - more efficient (supposed to be)
3 - standard compressor any HVAC technician knows how to fix.
4 - the initial cost of a new unit is more or less the same or even lower
5 - will have more space under the tank for other equipment

I happen to own an older used 1HP compressor unit. So I don't need to buy a new one, which would cost about 400$.
The choice of heat exchange unit is :

1622393460083.png


The total cost including shipping was 86.5$.
I got acquainted with YingYing from RoCan. She acted as my agent in China. Great lady highly recommend. So she ordered lots of stuff for me based on the shopping list I gave her. I also bought the Heat Exchanger from the manufacturer and they shipped to RoCan for 6$ inside China.
All in all , it was supposed to be cheaper than buying item by item from Aliexpress.
BUT, I paid some extra money for my stupidity. The invoice included qty of items that the local Import FEDEX service charged me import tax and service fees. Really , its not worth to use FEDEX/DHL express service unless you really need it fast and prepared to pay the cost. Better to use China post and pay with Paypal. Paypal will reimburse in case of problems.
Generally speaking the base cost is multiplied by 2 while using FEDEX.
Anyways, the total cost of the chiller system should be around 430$. not much. I am happy .

interesting thing about the cost of the gas copper pipes. If I was to buy 15m of tubing retail, it costs 260$. So I went and bought a full 45m pack from a wholesale for 228$. Now what is left for me to do is to somehow sell off the 30m I don't actually need and just maybe offset the cost of other parts. So if I will succeed in this "venture", the total cost shouldn't be more than 250$-350$ including controller and installation fee.

More over, I think this solution will allow me to NOT use the power hungry water heaters which have their own "negative side".

The controller choice was Eliwell DR4020 unit. cost me 70$.
It has 2 temp points to control. so its cool and heat range.
I chose the DIN model. because I want to build the power box DIN based. Usually people are buying the panel type.
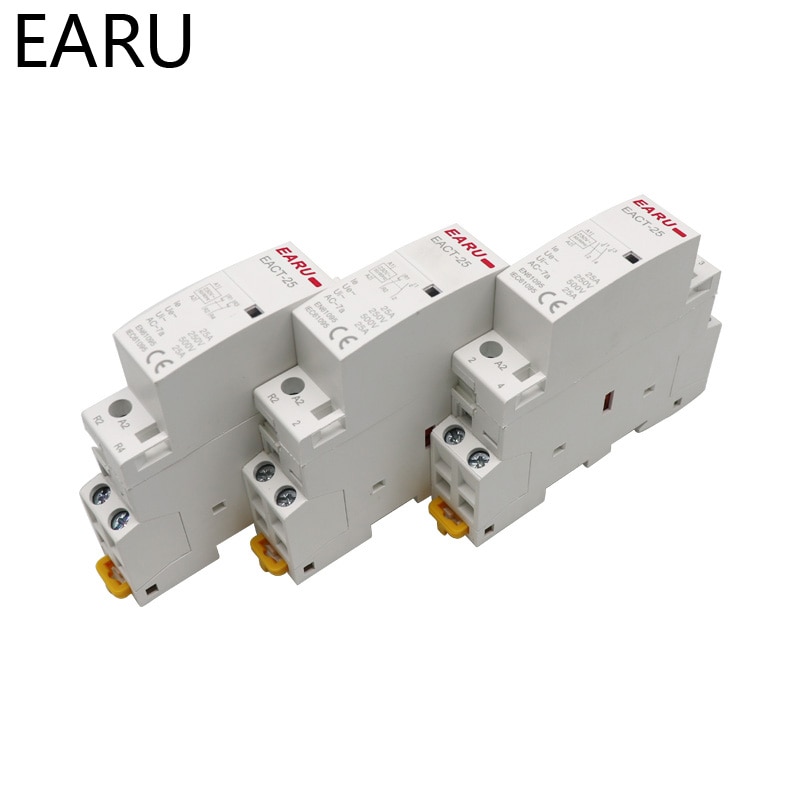
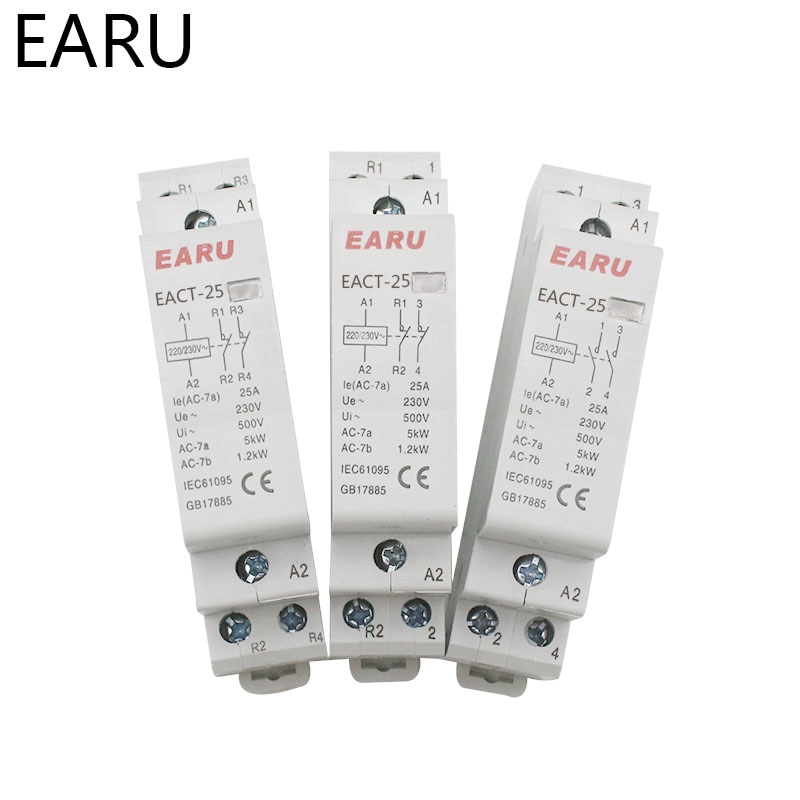
The controller internal relays can happily push the power of the 1HP compressor, but I thought it will be safer to drive the cold and heat via additional inline external relays (230 vac switch)
I bought the bellow
4.4$ per unit. great price. Will it hold for long time? we will find out. I bought extra spare from other brand. We shell see who will hold longer :p

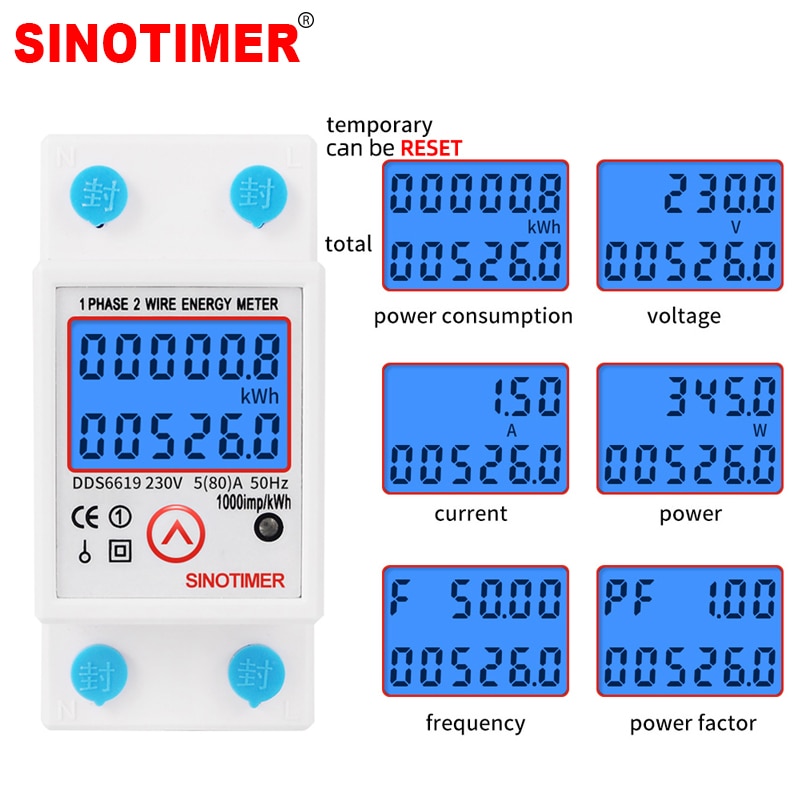
Also I bought the power consumption counter. thought it will be nice to have,

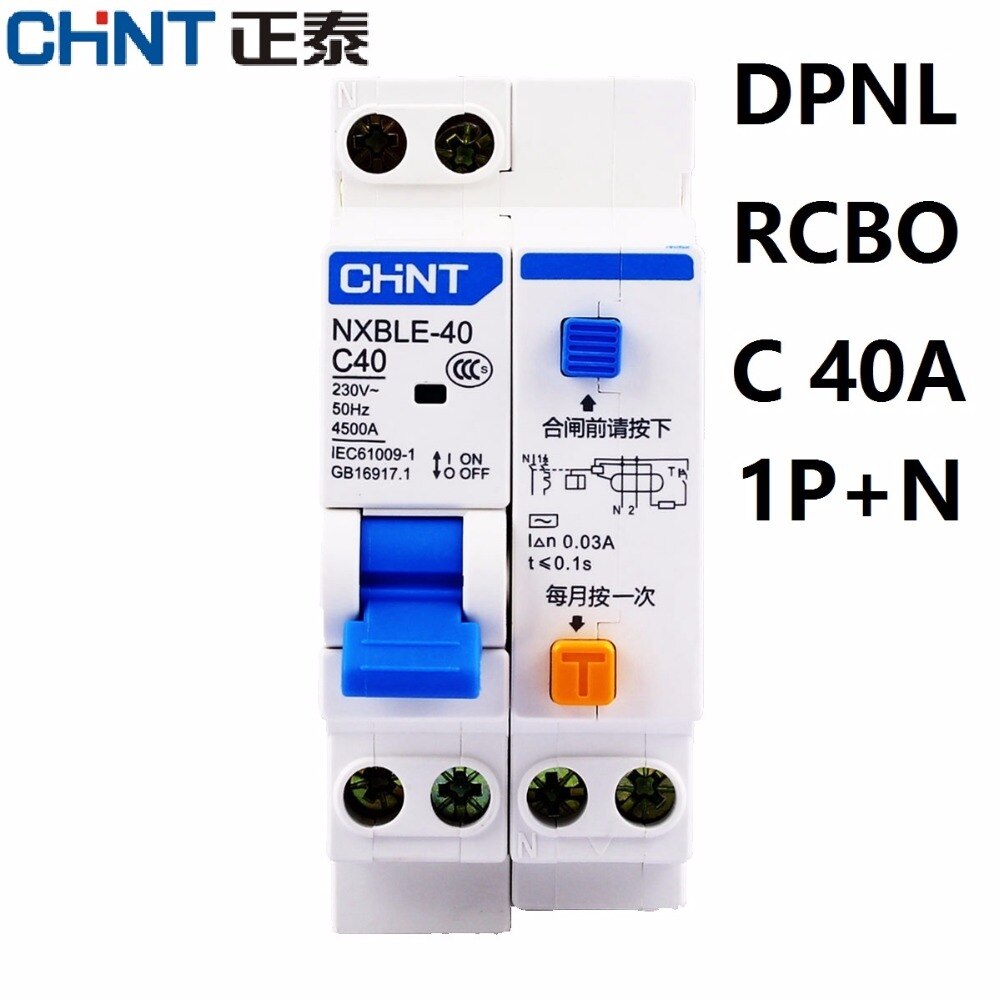
and the 25A circuit breaker :

Again, The cost is a fraction of some known brand, and yes I am aware that this might fail. I am willing to take the risk.


Now the Big question I have is: Will the temperature sensor work via some 13-15m wire length cause this is the distance from the controller and the overflow where I will place it. I guess we will find out when I will switch it on :).

UPDATE: works like a charm. no problem. had to calibrate the reading by about 0.4 of a degree.

Also, not exactly sure yet how to incorporate a failsafe switch for the LOW temperature inside the heat-exchange. unit. I dont want the temps to go too low inside it for some unforeseen failure reason. I am thinking it might get to a freezing temps of 0c. dont know. maybe. thinking it will not hurt to have this failsafe.

UPDATE: easy. put the temp sensor inside the exchanger and configured the reef-pi to switch OFF the main power to the compressor via this unit:
Din rail DC 12V 24V coil Household AC Modular contactor 2NO or 1NO 1NC TOCT1-25-Z TOMZN

here is the final board:
1640725955563.png
 
Last edited:
OP
OP
dadarara

dadarara

Community Member
View Badges
Joined
Nov 16, 2020
Messages
88
Reaction score
38
Location
Israel
Rating - 0%
0   0   0
Chapter 4: RODI water , ATO and AWC plans

The water quality at my home measured about 400 TDS.
My choice for building the RO system is not to buy a new one but to build my own. Actually to construct it from different parts.
Also I think I am adding more than I need but I figured its worth it to plan for the worst case scenario.
The base is a second hand 4 stage system with permeate unit purchased for 60$.
I am adding additional 3 last stages of T33 filter containers to use for Cation DI, Anion DI and Mixed Bed Resins which I will need to order from the US. probably from BRS guys.
T33 has a smaller footprint as I don't want to use 10" big bottles. the change of Resin media will be more frequent though.

Ordered new set of filters for 36$

was lost on the way. getting refund though. so I bought locally.

1st Stage is 10" container with (PP) Sediment filter 5 micron.
2nd Stage is 10" container with GAC
3rd Stage is 10" container with GAC
4th Stage : T33 container (12.44$) with
1622739952849.png


5th Stage : T33 container (14.60$) with
1622739991891.png


6th Stage: T33 container (12.44$) with
1622740033758.png


Have no idea if these are any good. But I bought them for the containers mainly.
UPDATE: the chemicals inside are crap. DON'T BUY.
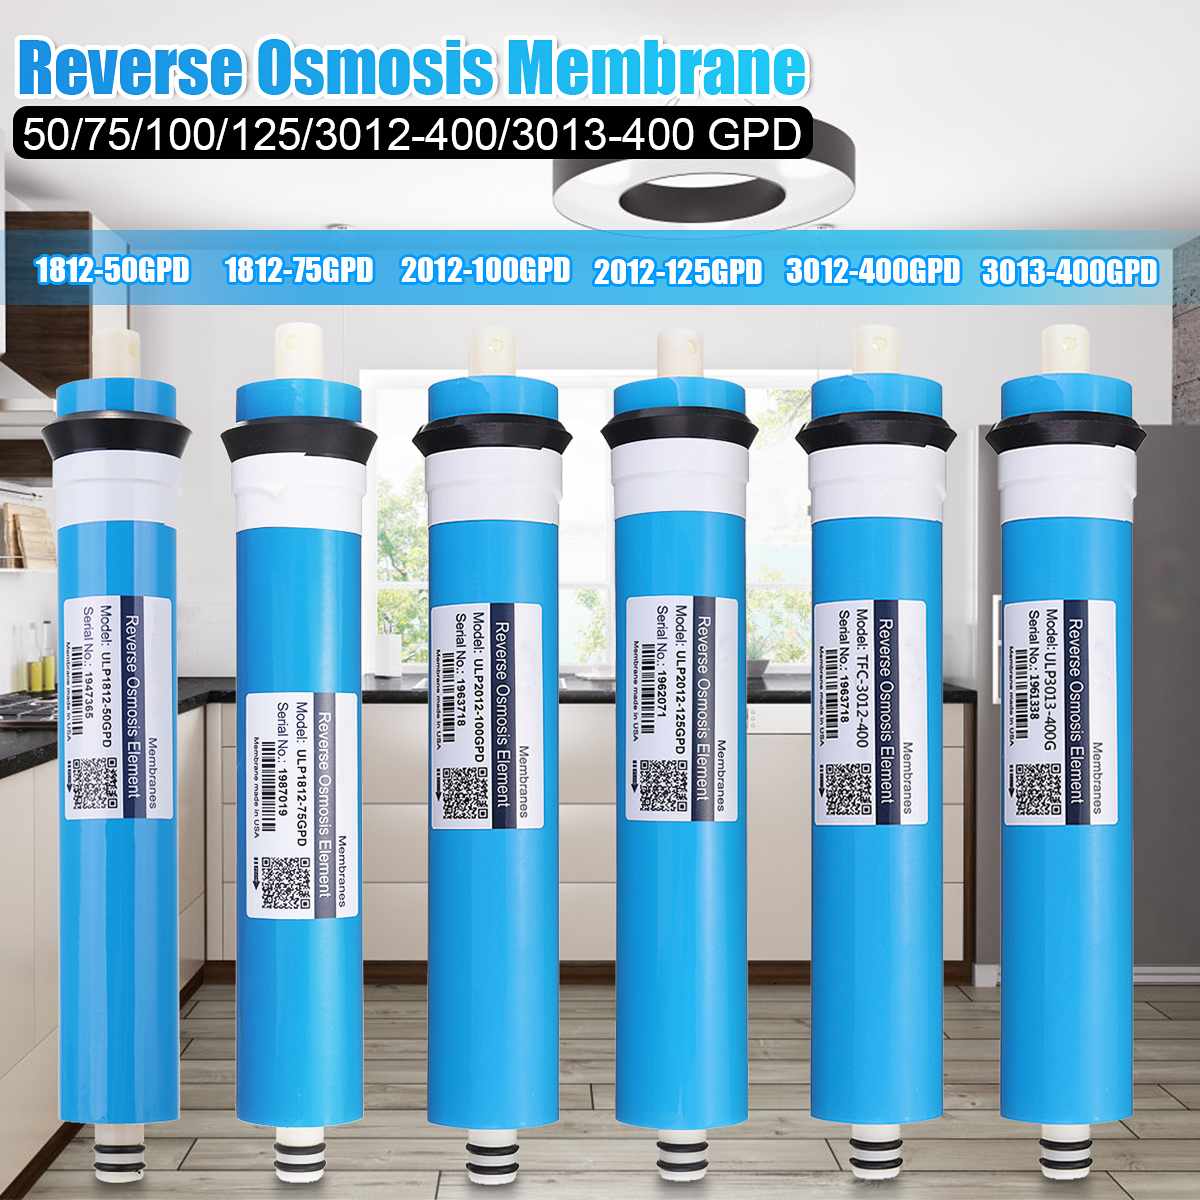
7th part is membrane 100GPD (maybe will replace with 50GPD or 75GPD)
(there is also the inline post carbon filter for taste , which I am not using).

I also ordered the following:
HM Digital Triple Inline RO/DI TDS Monitor with 1/4 inch T-Fittings from Amazon for 45$ incl. shipping

1622740104481.png


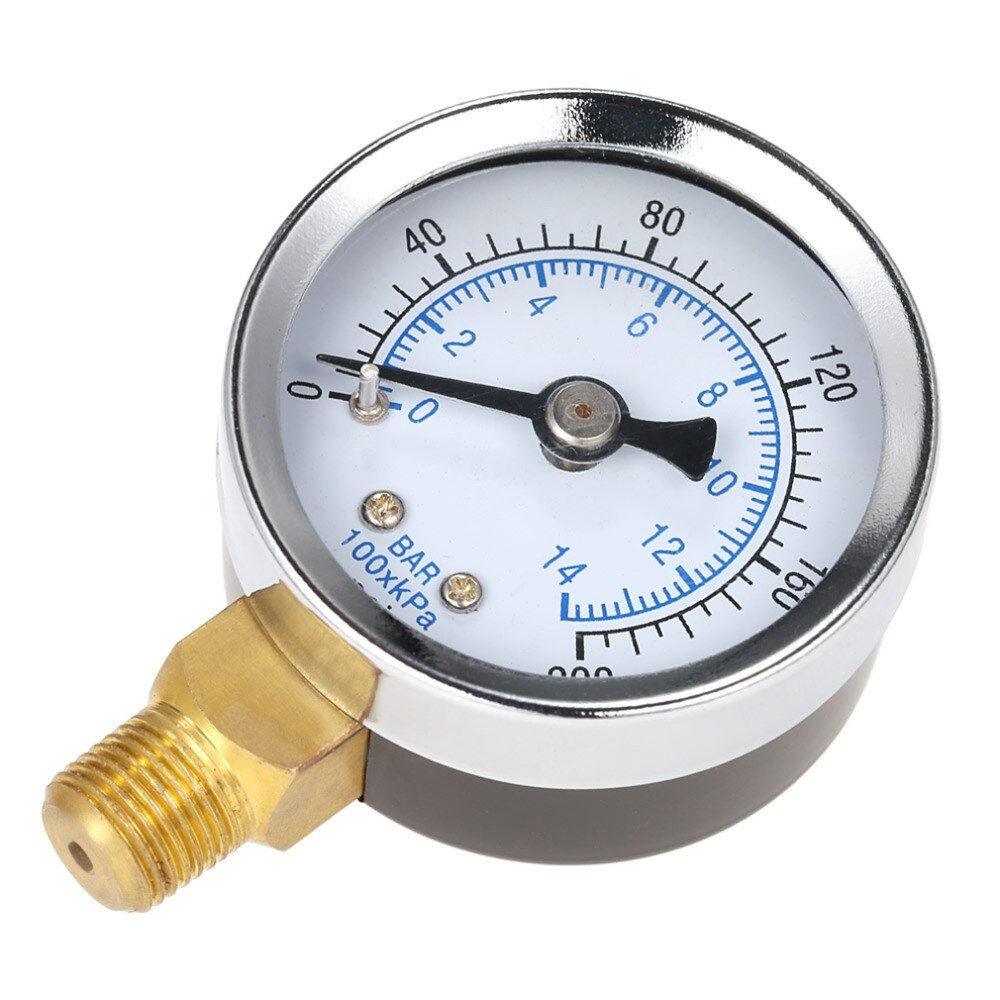
0mm 0~200psi 0~14bar Water Pressure Dial Meter 1/8" NPT - qty 3 - 12.52$

I am not sure if I will get enough pressure and throughput and maybe will need an additional pressure pump.
Will see after installation.
UPDATE: was not needed.

Bellow is my plan for the ATO and AWC systems:
this design has a minimum 3 points of failure before a disaster happens. with Solenoid valves, mechanical gravity float valve, mechanical water level sensors and also optical water level sensors. I think it should be good. First, I will see how it will work and then I will do stress testing.

Most of the designs of an ATO use a dedicated water container which should be filled manually. This should also limit the volume of water that in time of a malfunction may find its way into the main tank. I may follow this design option in the future after testing of my current design.


I know myself as becoming lazy with time, so I am looking for a maximum automation in this case. I chose to have the RO water container to be automatically filled by the RODI system, and from there, automatically to the sump.

At first, I was thinking to connect the Pressurised tank of the standard RODI system directly to the Sump via the bellow float valve.
1622740211365.png


But the thing with RO systems , is that slowly produced water, slowly dripping via the valve , is not very efficient. and the TDS will be high. The initial first few minutes when started the TDS is high and then it drops to 0. (if you have the right filters). SO, need to operate the system in a long intervals of time. so that the average TDS levels will be low. Thus the idea of having a dedicated tank for RO water. This one will be filled only after it gets empty. (level sensor...)
I have decided to use a very cheep logic module that will control this periodic operation.
More over, I have decided to have 2 containers. one is near the SUMP and the other is remote, near the RODI system.
There might be other "users" for RO water near the SUMP like some reactors. Also, I need the RO water for mixing the salt. That's where the 2 reservoirs come from.

Obviously what remains is to include several failsafe measures. Tunze popular design has a controlled pump, optical water level sensor and also mechanical water level sensor as a backup. The controller will stop the pump after 10min.
I chose not to have a pump or controller, but to have optical and mechanical float valve. which I can easily replace or clean and even can add additional sensors for safety. At least this is my plan. Nothing will replace the need for me to check and test the operation periodically.
Also, I am planning to disconnect the auto water change if I am away from home for a long period of time. The ATO I will need to keep operating. obviously.
1640000557544.png

Not exactly sure if to have the second RO water container near the SUMP to be filled directly from the RODI system or from the remote 80L RO water tank. This will demand additional pump. Not sure that the basic pressure from RODI system will be enough to push it 13m up&down. will test and see. Another option is to use a pressurised original tank of the RODI system. This might give the bust to push the water up the 1/4 tubes.

UPDATE: made the second container under the display tank so have a pump filling it remotely. 12v like bellow. works well. Needed some 6mm-1/8" thread connector to connect the 6mm sub to the pump with a pressure kind of contact.

Haven't decided if to place the NO / NC water valves on the SUMP side or on the remote side next the RODI system. will need to think about it and test. 13m running a DC power over CAT5 cable. for the solenoid might be too much.
will need to add some pressure pump obviously to push the water 13m up the 1/4" tube.
maybe something like :
1622740499598.png


Not sure, might need to buy VERSA Peristaltic pumps . I have seen that it works on YouTube. though the price is high.

UPDATE: thats the pump and it works well. no issues. remote 13m line.

Here is the work in progress:
1622740584064.png

1622740617677.png

1622740786256.png


Final location (next to my other project UNRAID server open design board computer) Need to build some cover for the computer. Electronics next to the water not a good thing, I know :) )

Anyways. after connecting the RO tubes and pipes. switched the water and obviously had a small leak. No issue, easily fixed.
Run the system with only filters, without the membrane yet. to clean it. The TDS dropped from 400 to 250. but again, without the membrane, the reading is useless.

So I am waiting for the membrane. Ordered from Aliexpress.


Overall I am happy.
the progress is slow though. Dont have much time for the project because of pressure at work. Making the rocks in parallel. this is another story. ;)
 
Last edited:

paintman

Well-Known Member
View Badges
Joined
Mar 21, 2020
Messages
536
Reaction score
1,025
Rating - 0%
0   0   0
Been building race cars and hot rods for 35 years. Those welds look like they have zero penetration!
 
OP
OP
dadarara

dadarara

Community Member
View Badges
Joined
Nov 16, 2020
Messages
88
Reaction score
38
Location
Israel
Rating - 0%
0   0   0
i know what you mean. the first picture is really bad one. I have scratched lots of welds I did before getting to the point that it was ok. they are penetrating alright. some even burned holes that I had to fill back again.
 
OP
OP
dadarara

dadarara

Community Member
View Badges
Joined
Nov 16, 2020
Messages
88
Reaction score
38
Location
Israel
Rating - 0%
0   0   0
Been building race cars and hot rods for 35 years. Those welds look like they have zero penetration!
i know what you mean. the first picture is really bad one. I have scratched lots of welds I did before getting to the point that it was ok. they are penetrating alright. some even burned holes that I had to fill back again.
 
OP
OP
dadarara

dadarara

Community Member
View Badges
Joined
Nov 16, 2020
Messages
88
Reaction score
38
Location
Israel
Rating - 0%
0   0   0
Updates since the last post:

Been busy ...
Covid19 situation actually forced me to work remotely from home mostly. Dont have much time. But this also presented opportunity to spend some time on the build in between my realtime job ;)

Finished the RO water reservoirs 80L each. Tested for leaks. all is good.
I will describe the acrylic work I learned to do, later.
these are actually the first attempt I made in working in acrylic.


1629476791463.png


Also, the three T33 filters I bought turned out to be $%#%$. they dont clean any water . At least the TDS is not going down.
Weeeell , I bought them for the containers. Need to buy the ION resin to replace the garbage inside these ones.

Also, decided to install 2 Membranes in serial connection. Should have less water waste. waiting for 1 month for the 50GPD membrane to arrive from China. This shipment is really slow.

and also...


Chapter 5 - Display Tank

Ok, went and ordered the glass. Really easy.

I had all the design in the Sketchup program so no mistakes in calculations. Need also to consider the width of the injected silicon between the panels. Thus the measurements should reflect that.
3 days it was ready.
Went to get it with my car. Took lots of blankets. No problem.
I have watched multitude of YouTube videos of how to glue the glass aquarium together.
One important point that is missed in these videos is how actually to clean the silicon after you apply it. And how fast you actually need to do it.
I failed miserably the first time.
I actually did NOT clean it , and let it dry, thinking I will scratch it with the knife. This was a disaster.
IMG_1229.jpg
IMG_1228.jpg

Had to take the glued tank apart again. That was hard work. Took me 2 days.
I knew that I had to sprinkle some diluted soap on the silicon and then its easy to get the excess off.
So, I have started the second attempt. But after one corner, I realised I am doing it wrong. It was not working. Later I understood that you need to sprinkle a LOT of soap… which I failed to do.
IMG_1223.jpg
IMG_1222.jpg

Anyways, decided that it’s probably better not to play with this anymore and I invited a nice professional who actually did it right.
Cost little more, but now I know how to do it. Lesson learned and paid for.
The total cost was 632$ for the extra clear glass 15mm , 7 tubes of black silicon and the professional who glued it in the end.
Amazing that one guy gave me a cost proposal of 2450$ to build the tank for me.

and the end result is:
B0347B42-FBFD-4DFA-AFC2-3CE519909B17.jpg


Chapter 6 - SUMP

I fell in love with working with Acrylic.
It’s so easy to cut it and handle it. And if you follow the procedure right, also not difficult to glue it. Well, actually its not gluing but rather welding with cement.

First, I needed to buy the cement.
Obviously, the forums are full of the WELDON-4 , WeldOn-16 etc.. The problem is, that it comes in small quantities. It can’t be shipped overseas because it’s a restricted chemical.
At first, I thought I will make it myself. Its made of Methylene Chloride 95% CH2Cl2 and pure Glacial Acetic Acid 5% CH3CO2H
But while searching for chemicals supplier I found actually a factory that made this cement locally. A few hours drive and I got myself two , 4-gallon containers.
I bought the low viscosity , like Weldon4 and also one with high viscosity like weldon16.
(total cost 100$ for such volume is a great price)

And now for cutting.
Luckily, I had large amount of acrylic of various sizes I picked up after some local dealer was cleaning his wearhouse. Also, went to see some manufacturer of street signs. He was throwing away smaller pieces that I “helped him to get rid of”.
IMG_1372.jpg


Built myself a work table from a laminated plywood board and attached the small Makita router underneath. Some shade on the roof and I was ready to start cutting.
IMG_1374.jpg
IMG_1373.jpg


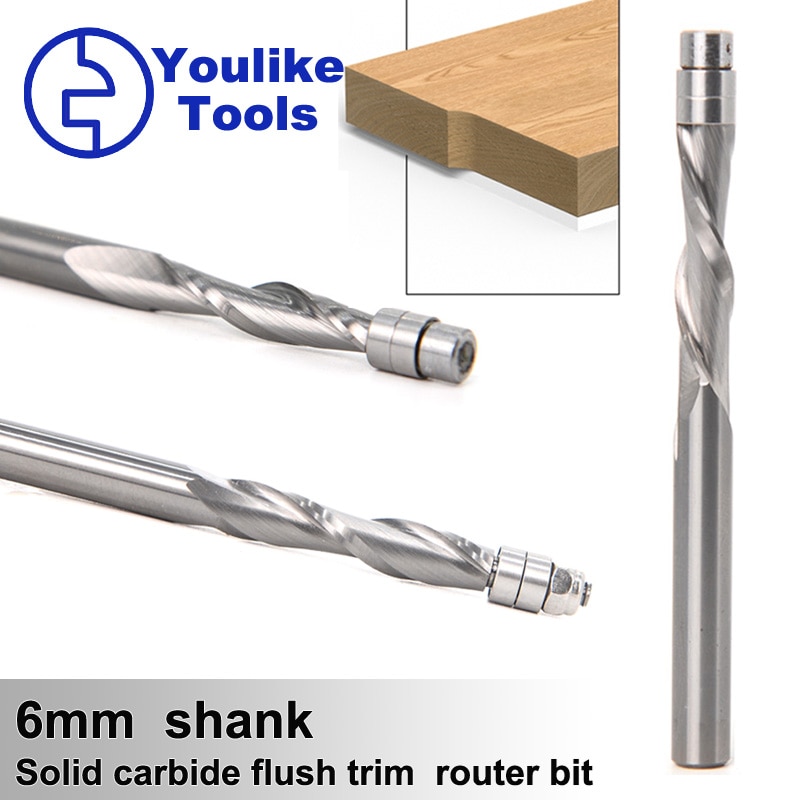
I did not expect that the cutting bits I ordered from china will be really so good.
Especially this one.

Cutting was easy but takes a lot of time. Cutting the approximate size and then slowly shaving off millimeters at a time. Learned a lot how to keep the 90degrees angles from the reef2reef forum, especially from

Acrylic Fabrication Q & A​

Turbo's Aquatics

is the man !! really helped a lot.

Really important to have the design ready in advance with all the measurements etc.
1629478269028.png


Welding with the cements was problematic at first. Apparently, I didn’t calculate the time of about a minute that I had to wait till it started to eat into the acrylic, before I press it hard down. So, I pressed it too quickly and the glue got out in small beads that was impossible to clean. Not a big issue. Its not for commercial use ;) . And although aesthetically I could have done a cleaner job, overall it turned out nice. Considering its my more or less first acrylic work.:oops:
IMG_1355.jpg
IMG_1354.jpg
IMG_1352.jpg
IMG_1351.jpg


Considering that the acrylic i have is scratched and not very clean, I went and bought the NOVUS PC-208 Plastic Fine Scratch remover 64oz from amazon for 50$.


This stuff is amazing. After sanding with 800,1000,3000 grit sand paper and applying this Novus, it made a lot of difference.

and the end result is:
Screen Shot 2021-08-20 at 19.59.48 copy.jpg


Some advisers with lots of experience started to say to me that the trend today is to have small number of compartments in the sump. Frankly even if that is true , I don’t subscribe to this idea. I preferred to have it wide and spacious as much as I can with a future-proof design.
I wanted to have a refugium to grow algae and copepods etc. But I will also build an algae scrubber which will sit on top of the media compartment. No sure which one eventually will be used (or both) but the sump’s design will accommodate both.

Did not want to deal with the cleaning socks, knowing I am a “lazy bustard”, so I am building an automatic roller. Not very hard it seems as long as I have it planned in advance in the sump and the water flow path is right. Adding the paper roller holders on top and attaching the slow gear motor plus some water level sensors should provide me with what I want.

All in all, I think it turned out ok. If you look closely enough you will see some imperfections but considering that after a month of salt drying on the walls, I don’t think it will show. ;Joyful
 
Last edited:
OP
OP
dadarara

dadarara

Community Member
View Badges
Joined
Nov 16, 2020
Messages
88
Reaction score
38
Location
Israel
Rating - 0%
0   0   0
December 2021.... Long silence since my last update. I wasnt idle. spent some weekends on this.
I already have 4 clowns swimming around one bubble mushroom after they passed almost 2 months of Quarantine treatment.
But I don't want to run ahead. Would like to tell my tale in the right sequence.


Chapter 7 - Rocks , Aquascape , PVC tubes, negative space and "I am getting crazy .. "
-----------------------------------------------------------------------------------------------------------------------------
Like everything in this project, I am trying to make it DIY. Rocks are no exception.
Lots of reading and forums lurking and I had a recipe and a vision ...

My rock formation is mainly suspended in "air", sorry under water, in the centre of the display tank.
I made the "skeleton" base from 40mm plumbing pipe fittings. Found a bag of cocktail steering plastic sticks and pushed them through for strength and for the parts to stop moving .
Then I covered this with cotton thread/wire. As the cement will not stick to the plastic otherwise.

1639944549275.png


Then I started to cover that with cement. Letting it dry, turning over , covering the other side, drying, turning over etc. etc. etc...

The mid process pic:
1639944606910.png
1639944639840.png


The cement recipe I used changed over the process.
In the beginning I started to use the Brown Portland cement. Didn't like the colour. Honestly, who will care after it will all be covered by algae you may ask ?? My wife WILL. ;) Anyways, bought a bag of Portland wight cement.

I also went to the sea shore and picked up some shells. Crashed them and used initially in the slurry. Didn't like it. It actually didn't look natural at all. Where do you see pieces of sea shells protrude out of the rocks ??? I didn't. and I had been diving a little.

So I finally used the :

1.5 part cement
1 part of clean white sand from dunes that used to be the sea bed under water. I hope it doesn't have too much silica in it.
3 parts Perlite (3mm size grains)

That worked for me. will it bring disaster in the future ? Hope NOT. based on some people experience it shouldn't. But its a risk that I took.

Here is the END result. But I am jumping ahead.
1639944708549.png


Anyhow, I did some other parts of the aquascape.

A cave. that's a nice trick. cover the inflated balloon with the cement slurry . Then after it dries, take the ballon out. That is of course it didn't "pop" already. had to look for a thick rubber balloons. Long lasting ones...
did one big one on the left in the picture above. and a long low profile one for the Morena / Gobi to hide in the future. Maybe.
And of course lots of pieces to be used to construct anything I want in the future. and some frag smaller pieces. etc

The process of curing and kuring of the rocks takes LOOOOONG time. so I though I better do as many things as I can.

The process of rock building, consists of the following steps.

1-Prepare the adequate amount of recipe mixture for your purpose
2-make it like a semi dry dripping slurry with controlling the water in the mixture - (after some short trial&error)
3-drip the slurry onto a sand bad in some wide plastic box
4-cover the "THING" with dry sand. Because dry is easier to cover the whole formation.
5-spill slowly some water over the sand. need to be wet. I actually put some more water around the edges and covered the whole box, so the moisture didn't evaporate.
6 - let it CURE (dry) for a week. Need to see that it's still wet for the first few days, and if not, put some more water.
7 - take the rocks out and clean them up with soft metal brush and soft brush
8 - Put the rocks in water and changed the water every day and check for PH bla bla bla

Wait, :cool: I did it a little different

because I was in parallel doing other things, the rocks were left in the air for a long time. Much more than suggested by the experts. More like a 40 days. So after they cured, I let them out of the sand, dried them in the sun. brushed the sand as much as I could. Then I left them sit in the sun for a month. It turns out that the longer they sit in the air, the less KURING by water changes I will need to do. Because the cement starts to leach lots of nasty things in the water. and the PH is very high. With my experience, after a month of sitting there in the open air and sun, there was practically no nasty things left in the water. and the PH was really low , like 8-9. I put them in the water and the water stayed clean after a few days. Ok, I changed it once for a good measure.

9 - in the next step, I emptied into the water container where the rocks where submerged, full 2 litter bottle of bleach. The kind without any additives. Let it sit there for 2 days.
10 - took the rocks out and washed them well with high pressure water unit.
11 - let it dry in the sun for 3-4 days.
12- now you can practically eat of these rocks.

I don't like the aquascape where it all sits on the bottom and practically cant see any sand. And I was also thinking that I would like some sand dwelling fish like Bleni or Gobi. SO the sand grain size should be relatively small. Now here is the problem, if I will ever like to grow SPS , I would really need to have strong currents in the tank. Thus my idea was to raise the rock formation above the sand, try to direct the wave makers such that they will kind of wash over the structure and maybe the currents will not need to be so strong and the sand bellow will be left alone for the most part. kind of counterintuitive to leave the sand wide open, but thats my thinking to have rather weak directional currents, instead of strong ones all over the place. In addition, I was thinking that I can put some smaller "islands" of rocks on the bottom to "fence" the currents where it will be needed.
True, very elaborate plan that might not work out at all. But nevertheless, I like the journey anyways. We shell see if it will work or not.
And glueing the smaller pieces together with marble glue was easy.

While I was watching the youtube , saw some very nice Aussie guy (Reef Nerd) that designed the overflow box, such that it had a double wall. And at the bottom it had some cut weir for water to pass through. The physics of it make the water to be pulled from the bottom of the tank in addition to the usual structure of the weir on the top.

qasim rashid what GIF

Now, there was the exact moment when I realised how I will build and hold the rock formation on the side of the tank. I designed the double wall to have a hole in the centre and the plastic tubes are actually hanging on this side wall. The wall itself is made of 2 acrylic boards glued together. Very strong. And it has 2 very thick hinges also from acrylic so they hang on the side of the glass tank.
Might add also, that having the Perlite in the mixture, made the rocks buoyant and float in water. Well, not really so light that they float, but they really put much less weight on the wall in the water.

Long story short, it worked well. :)

1639944851549.png
 
Last edited:
OP
OP
dadarara

dadarara

Community Member
View Badges
Joined
Nov 16, 2020
Messages
88
Reaction score
38
Location
Israel
Rating - 0%
0   0   0
Chapter 8 - Pipes, tubes, valves, designing the manifold and my overflow box.
------------------------------------------------------------------------------------------------------------------
All the parts I ordered from the nice girl in ROHAN company in china. I think I already told her story ...
I can already say that I ordered little more than I actually needed. I still have some unused valves. :)

1639947946200.png
1639948005834.png


I have designed my system with two head-pumps. there are several reasons for that :
1 - redundancy - one fails, the second is there already installed and can be just operated with a higher flow rate.
2 - ease of maintenance - switch one off and take your time to clean it while the other one works.
3 - I want to have 2 IN flows to the tank. One with slow flow for the chiller and UV lights and the other with strong.
4 - I want to have a manifold from which I can feed some other "consumers" like the Ventuty skimmer I am building.

In addition, I wanted the refugium to be fed directly from the overflow. thus I have a dedicated line to it, with a valve to control the flow. In reality , after I started to operate it, it turned out to be rather tricky to calibrate the drain line noise from the overflow in parallel to having the dedicated line to refugium. Kind of two valves that I have to play together to achieve the silent operation and also have the right flow into the refugium. Doable, it works, but tricky.

Having designed all of the structure in advance on computer, helped immensely. I knew where each part had to go.
Almost no surprises that I couldn't handle. Glueing it all was really easy. Don't really understand why people make so much fuss about it . asking for EXPERTS to come and do the work.

My father once told me the proverb I try to use all the time (many times unsuccessfully ;) ) : "Measure 10 times , cut once". Working on the manifold was one of these times, where this was true more than ever.

One thing to mention maybe relates to the length of the pipes. The pipes ordered from China, all had 50cm length. While designing , I did consider that fact so I ordered some extender fittings. But what I didn't consider, was the level of the water in the first chamber in respect to where the pipe ended. so the noise of falling water was more than I wanted to have. Needed to order more extenders for the 40mm pipe that I didn't consider before.
Small thing, but annoying a little.

Overflow Box:

Made it out of Acrylic and Siliconed it to the glass side of the tank. Hate and dont want to work with glass !
Cosmo Kramer Omg GIF

Everyone you ask will say that the Silicone doesn't go well with glass. And they are right.
The only place where an acrylic can be bonded to glass with silicon , is where you are not looking for a tight long lasting fit with no leaks.

But in my design, I have several aspects that make it ok for me (time will tell
Best Wishes Reaction GIF by GIPHY Studios Originals
) . It is really perfect fit of the overflow box in between the tank and the wall. Had to push it. It is "cramped" in there. Also , I have designed the box with hinges that it hangs on the glass side panel. It is not just glued to it. In addition, the pipes on the bottom of it , are actually helping to support the box from bellow and thee last but not least, I have cut support legs to the structure from acrylic 15mm piece someone threw to the garbage. Someone's garbage is someone else's treasure.

HOW MUCH GARBAGE WE ALL PRODUCE, IS AMAZING AND MIND BOGGLING !!!
Personally , I don't see how humanity can survive this adolescence period.
Unless we invent the way to make energy from garbage. And the clock is ticking !
1639988480183.png
 
Last edited:
OP
OP
dadarara

dadarara

Community Member
View Badges
Joined
Nov 16, 2020
Messages
88
Reaction score
38
Location
Israel
Rating - 0%
0   0   0
Chapter 9 - DIY auto fleece roller
------------------------------------------------------------------------------------------------------------------

When one designs the whole sump by himself, it's easy to incorporate devices like this one.
1639991019584.png


Simple DC motor with control board. Allows both directions and speed control. for 19$.
Should I go and buy CLARISEA SK-3000 for 400$ ? I don't think so. But hey, I do realize that not everyone can DIY.

Bringsmart 3V 6V 9V 12V 24V DC Worm Gearbox Engine Brush Motor DC 25MM Shaft Length Self-lock Electric Motor For DIY JGY-370

Also I found this part on Aliexpress that now is already gone from store.
Bread Machine Small 15T Belt Gear Motor Shaft Kitchen Appliance Tool For Donlim
1639991097250.png

I just stuck it into a 25mm pipe, glued it from inside and outside and the rotor is turning the pipe. so when I take the whole motor assembly out, it also includes the pipe with the dirty fleece paper.

Issues :
1 - the speed I chose was 30 RPM. its too fast. Yes can be controlled but the motor torque at low speed is weak. Better something like 7 RPM.

2 - stems from the above but not only, is the interesting and troubling malfunction. I have small grain sand, and it finds its way to the sump and to the roller. While it accumulates on the fleece it actually jams the bottom rotating tube. The motor is not strong enough to turn it.

The solution I currently employ, is to CLEAN it. But I also already bought a stronger motor.

Worm Gear Motor 12V 24V Reversed 12-470rpm DC Motor High Torque 3.4-70kg Self-Lock For Curtain Machine Billboard Home Equipment

Didn't yet build the box/enclosure for it. Maybe will not do it at all. Worst case scenario the roller is not working and the water overflows to the next SUMP chamber. Not a disaster. YET.
And the new motor , I think I will use it for the Skimmer I am building, for the cleaning head on the top.
1639991186727.png
 
Last edited:
OP
OP
dadarara

dadarara

Community Member
View Badges
Joined
Nov 16, 2020
Messages
88
Reaction score
38
Location
Israel
Rating - 0%
0   0   0
Chapter 10 - filling the water and sand.
------------------------------------------------------------------------------------------------------------------
Alright !!!! I was ready to fill the water.

My plan was :
1 - fill the RODI water
2 - test run the system for leaks and fix issues (better to do with fresh water rather than to spill salt on the floor my wife so painstakingly cleans.
3 - Add salt. first in a refugium space and then it spills over to the rest of the system
4 - add sand. It was Caribsea live sand . so I was thinking need salt water for not completely kill whatever is left inside the bag. IF there was anything there in the first place. Honestly, in hindsight, I think its crap. should have bought a dry sand and add the Microbacter7.

Didn't ! AM Sorry I didn't!

RODI water. The cost of the ION RESIN in the stores was 27$ a small T33 one time replaceable container. 27$/litter Too much.
SO I went and found a company that specialises in water purification and they import the stuff. I bought a 50 liter bucket for 230$ . 5$/liter.
And I published to friends in the hobby and they came to take some of it off my hands. Low cost , additional friends that I help to. I am happy.
Transferred the cost to them. this is not how I will get rich.... I am already rich !! I have my family.
My automatic water top of system works great. It takes a few hours to fill the 70 liter container I built.

So with about 550 total water volume, my ION RESIN had to be changed once. Started to get 3-4 TDS. Happy I had 50 litters of the stuff.
Did not have to carry buckets of water back and forth . Had the 6mm rodi tubes to the tank and the small 12v pump did the trick.
Slow process, but I am not running anywhere !

And YES, I did have some leaks. Definitely in places that I have decided to NOT glue. Just to have the opportunity to adjust it a little.
But overall, it was great. working without issues , so far.

Because the Sand is a live sand, I couldn't rinse and clean it. So it went in to the tank as is. IT WAS DIRTY. Its 0.5-1mm sand. lots of small particles.
At first I constructed some funnel , through which I started to slowly pure the sand down to the bottom. This was a waste of time. The water very quickly became cloudy. So I just said "FU%#$ IT" and emptied the two bags to the tank, and let it settle for 5 days.

1640726906581.png


YES 5 days it took the water to clear. The Caribsea provide some small bags with a clarifying powder (organic magnets). I didn't use it. Thought I will leave it maybe for the future.
Maybe I should have used it, as it was designed for the purpose....
Obviously all the rocks were covered with sand. Had to "dust" them off several times. Still dirty today.
Today, after I have it already cycled, I believe I made a mistake and should have bought the "Special size" sand. thinking maybe to replace it. not sure.
 
Last edited:
OP
OP
dadarara

dadarara

Community Member
View Badges
Joined
Nov 16, 2020
Messages
88
Reaction score
38
Location
Israel
Rating - 0%
0   0   0
Chapter 11 - DIY controller based on Reef-Pi / RoboTank board .
----------------------------------------------------------------------------------------------
I ordered the ROBO-TANK board in December 2020. It got lost on the way. Good thing Rob @robsworld78
had it insured.
He sent me a new one. Great guy. great service. Very much recommend !!
I ordered the DIY kit without the box, as I am building my own.
The board arrived in April. but I only got to it in October. Was so busy at work and didn't really had much time.

At that period I had spent little time on the project. So much so, that even hurt my best friend by not spending time talking to him.
I have started with the 220v AC power board. Figured I have space in the cabinet for 8 ports and I should not need more than that.
Also decided to incorporate a dual switch for each port. So that I can decide to bypass the Reef Pi controller and manually switch it on and off.
At first I made the mistake of ordering the 5v relay board. The Raspberry / ROBOTANK is sending the 3.3v signals. So had to reorder a new one. Didn't want to play with fire and use the 5v instead of 3.3v. Should work but why risk it.

1640729845206.png
1640729873183.png


Built the Controller box. This one is intended to host also the Peristaltic dosing pumps as well as air 12v pumps and the 48v wires for lights.
I also included a separate 4 relay board. Which is very useful. On the ROBOTANK there are only 7 12vDC control ports. (without the extension)
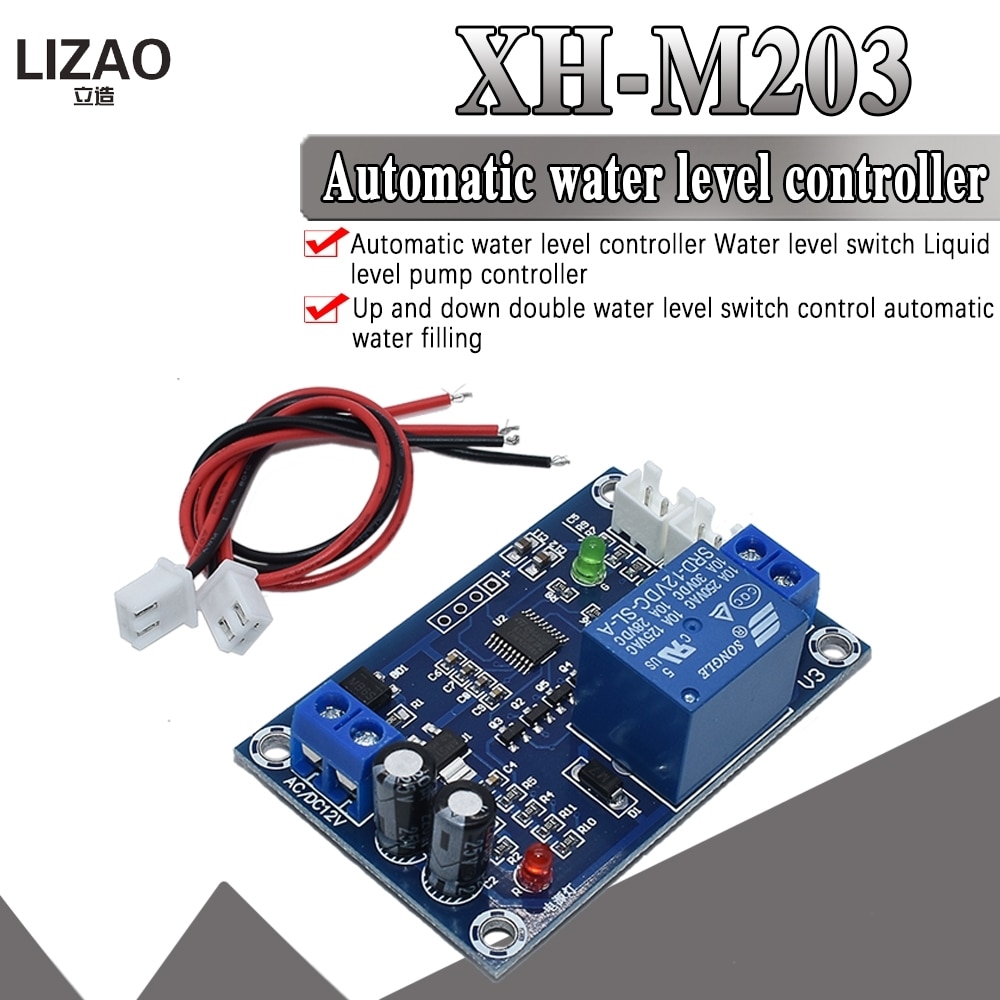
I have decided to use a separate water top-off container board. the same one that I used for the RODI water container. XH-M203. This is instead of using the ROBOTANK and reef pi setup. I thought I will not "put everything in one basket" . Can use the Raspberry ports better.
1640729948314.png
1640729973680.png
1640730001123.png

Also built the containers for the dosing. One regret, should have done 6 pumps not 5. If I will use the Triton method, thats 4 bottles already and 1 for NoPox dosing and 1 for Reef elements RedSea AB+ maybe . So 6 would have been better. But then I should not need the Auto Water changer system so... running ahead here

And no mater how I tried, could not keep the wires tidy. its a mess.
1640730041744.png

After switching it on and working with for a week or so, the PH stopped functioning No matter what I did, by hard reset the circuit with Rob's help. It didn't succeed to make it work.
Pity. But Rob was so gracious that he sent me a separate PH board to replace the functionality. Again, great service and person. Now I will just need to see how to connect the i2c interface
 
Last edited:

Aquatic acrobat in your aquarium: Have you ever kept an eel?

  • I currently keep an eel in my tank.

    Votes: 27 14.4%
  • I have kept an eel in my tank in the past.

    Votes: 32 17.0%
  • I have not kept an eel in my tank, but I hope to in the future.

    Votes: 32 17.0%
  • I have no plans to keep an eel.

    Votes: 94 50.0%
  • Other.

    Votes: 3 1.6%
Back
Top