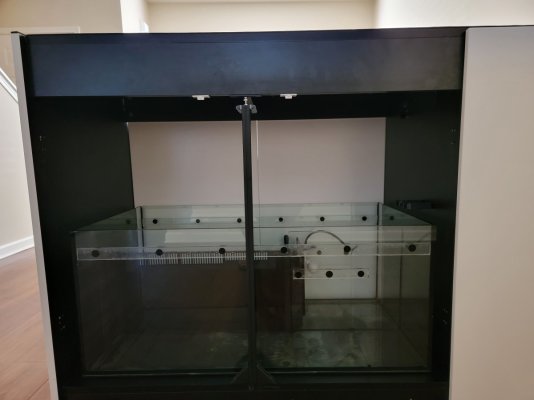
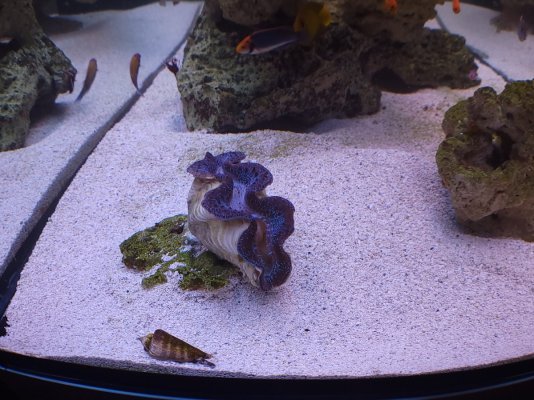
So I had the chance to get a Red Sea Reefer 650 from a friend that was thinking of making it into a Freshwater tank but his wife didn't like it since it was to big for the living area. This Reef build was no where in my plans since I just moved back to TN and I'm renting a townhome and won't be purchasing a home for two years. I was planning on just getting a little AIO just to tinker with while I'm here but then here comes this Reefer 650. I finally got it moved into my place with the help of a couple of guys I asked at the swimming pool since it is right behind my back door. How convenient right?! Since that's the only way I could get the tank into my place. Offered 3 of them 20 bucks each for 10 minutes of their time and Bam its all in my living room. For the most part this tank is almost in pristine condition minus a few blemishes on the stand. Since then I just disassembled all the plumbing and soaked them in a bucket with Ro and vinegar running with a pump. I took out the sump and did a deep clean on the stand and readjusted anything I needed to. I made sure it was leveled out as much as I could while also cleaning the tank and sump. Now I just have to reinstall everything and get the glass into position. This wasn't a planned build so now I will just have to piece things together to start getting this tank up. Thinking of making it more on the SPS dominate with a little Torch garden and a Clam. So here goes this build...


Navigation
Install the app
How to install the app on iOS
Follow along with the video below to see how to install our site as a web app on your home screen.
Note: This feature may not be available in some browsers.
More options
You are using an out of date browser. It may not display this or other websites correctly.
You should upgrade or use an alternative browser.
You should upgrade or use an alternative browser.
Reefer 650
- Build Thread
- Thread starter Huynhter_Soldier
- Start date
- Tagged users None


Looks like a great find! Just a tip: if you're going to go the ReefMat route, modify the sump now while it's dry (it's an absolute PITA doing it once you have it in the cabinet and filled with water). If you check out my build thread I've documented what you all need in terms of parts to retrofit the (older, pre-G2) Red Sea tanks.

OP
OP
Me and you were talking about this the other day remember on another post I did. I am planning on getting the reefmat but it blew my mind when I put the sump into the stand. Either way I have nothing but time since I'm still trying to get situated here. It will give me time to plan what I really want to do with the build for equipment. I also was thinking of taking the front doors off and just have an open concept. Ehhh we'll seeLooks like a great find! Just a tip: if you're going to go the ReefMat route, modify the sump now while it's dry (it's an absolute PITA doing it once you have it in the cabinet and filled with water). If you check out my build thread I've documented what you all need in terms of parts to retrofit the (older, pre-G2) Red Sea tanks.
OP
OP
Thanks! But no thanks from my pockets.Nice score
OP
OP
When you mean parts to retrofit the older G2, did you mean about the front brace? If so I've already contacted Red Sea and they are shipping it to me.Looks like a great find! Just a tip: if you're going to go the ReefMat route, modify the sump now while it's dry (it's an absolute PITA doing it once you have it in the cabinet and filled with water). If you check out my build thread I've documented what you all need in terms of parts to retrofit the (older, pre-G2) Red Sea tanks.

Time is good. The doors are great for dampening vibrations and sound as well as cutting back on evaporation. I meant the plumbing parts to modify the overflow pipe to seamlessly attach to the ReefMat as well as the Red Sea sump modification kit. Here's the link. If you look at my build thread starting around page 6, I detail the actual process and what additional tools you need.Me and you were talking about this the other day remember on another post I did. I am planning on getting the reefmat but it blew my mind when I put the sump into the stand. Either way I have nothing but time since I'm still trying to get situated here. It will give me time to plan what I really want to do with the build for equipment. I also was thinking of taking the front doors off and just have an open concept. Ehhh we'll see
Red Sea ReefMat Reefer Retrofit (pre-G2)
For those of you with pre-G2 Red Sea Reefers, here are the parts you need to retrofit any 40mm overflow in the US and Canada. I sourced mine at Home Depot for a grand total of $6.80 CAD. Being ABS parts, you can just use standard ABS cement with the existing Red Sea plumbing and ReefMat adapter...
OP
OP
Thanks a lot! Will definitely read it.Time is good. The doors are great for dampening vibrations and sound as well as cutting back on evaporation. I meant the plumbing parts to modify the overflow pipe to seamlessly attach to the ReefMat as well as the Red Sea sump modification kit. Here's the link. If you look at my build thread starting around page 6, I detail the actual process and what additional tools you need.

Red Sea ReefMat Reefer Retrofit (pre-G2)
For those of you with pre-G2 Red Sea Reefers, here are the parts you need to retrofit any 40mm overflow in the US and Canada. I sourced mine at Home Depot for a grand total of $6.80 CAD. Being ABS parts, you can just use standard ABS cement with the existing Red Sea plumbing and ReefMat adapter...www.reef2reef.com
And if you have any questions, feel free to PM me (I've had mine running without incident for 2 weeks, and have troubleshot several of the occasional errors or issues people run into).Thanks a lot! Will definitely read it.

OP
OP
Whenever you get a chance, do you mind sending me pictures or a link of the procedure?And if you have any questions, feel free to PM me (I've had mine running without incident for 2 weeks, and have troubleshot several of the occasional errors or issues people run into).
My build thread pertaining to the ReefMat starts at post #158, but here are most of the progression images.Whenever you get a chance, do you mind sending me pictures or a link of the procedure?
Large Build - Blaxsun's Abyss: Red Sea 750XXL
June 12. Who Framed Roger Rabbitfish And I decided to pull the trigger on a One Spot Foxface Rabbitfish that I've been eyeing all week. He's just a little guy (under 2"), but super friendly (and hungry). We've decided to call him "Roger"... "Roger Rabbitfish". Yes, I'm starting to amass an...
What you get. Store the legs and media tray.
The parts to modify the main overflow so you can just screw on the ReefMat connector.
What they look like assembled (top goes on modified overflow pipe).
ABS cutting tool recommended for straight cuts.
Modified overflow pipe (not that emergency overflow pipe is left as is).
Just taped a 1-1/4" PVC pipe to minimize splashing while getting setup.
Adapter cemented.
Top piece gets cemented to the reduced overflow pipe, center piece screws to that (recommend plumbers tape on the threads) and the bottom piece that Red Sea provides just screws into that - and then the flex hose screws onto the bottom.

OP
OP
Thanks!Whoa! Nice find! I'm jelly.
OP
OP
Thanks! That link you sent me only had 1 pageMy build thread pertaining to the ReefMat starts at post #158, but here are most of the progression images.
Large Build - Blaxsun's Abyss: Red Sea 750XXL
June 12. Who Framed Roger Rabbitfish And I decided to pull the trigger on a One Spot Foxface Rabbitfish that I've been eyeing all week. He's just a little guy (under 2"), but super friendly (and hungry). We've decided to call him "Roger"... "Roger Rabbitfish". Yes, I'm starting to amass an...
What you get. Store the legs and media tray.

The parts to modify the main overflow so you can just screw on the ReefMat connector.

What they look like assembled (top goes on modified overflow pipe).

ABS cutting tool recommended for straight cuts.

Modified overflow pipe (not that emergency overflow pipe is left as is).

Just taped a 1-1/4" PVC pipe to minimize splashing while getting setup.

Adapter cemented.

Top piece gets cemented to the reduced overflow pipe, center piece screws to that (recommend plumbers tape on the threads) and the bottom piece that Red Sea provides just screws into that - and then the flex hose screws onto the bottom.

Weird - I thought it would jump to that point. Just click on my build link to the left and find post #158.Thanks! That link you sent me only had 1 page

OP
OP
My Red Sea retrofit kit came in today!

Now, I'm just waiting for my Red Sea sump razor blade kit to come in so I can modify the sump for a Reefmat.
Now, I'm just waiting for my Red Sea sump razor blade kit to come in so I can modify the sump for a Reefmat.
OP
OP
OP
OP
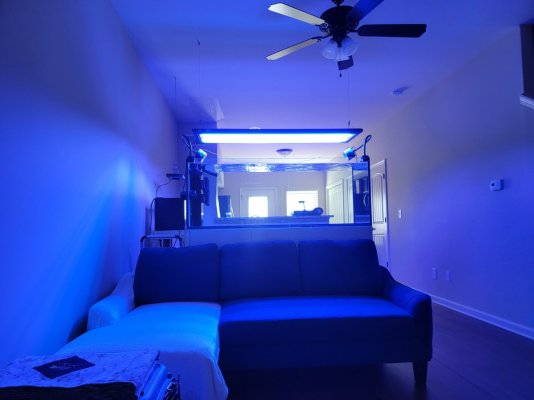
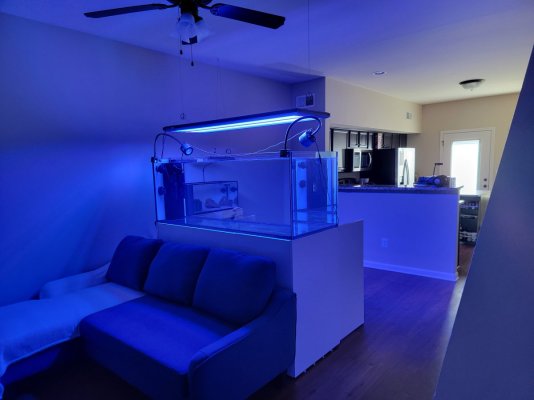
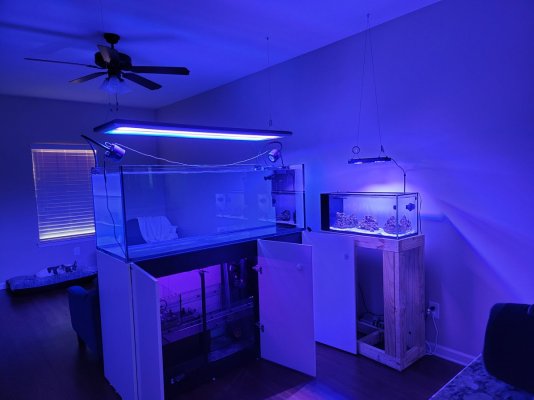
Today I finally got the tank onto the stand. Recieved my return pump several days ago so I installed that and filled up the tank and let it run with water and vinegar. Just a little extra cleaning and leak testing while I'm at it. I did tint the back of the peninsula a frost tint as well today.


OP
OP
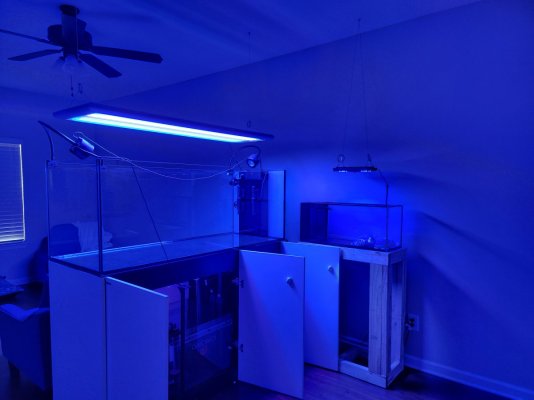
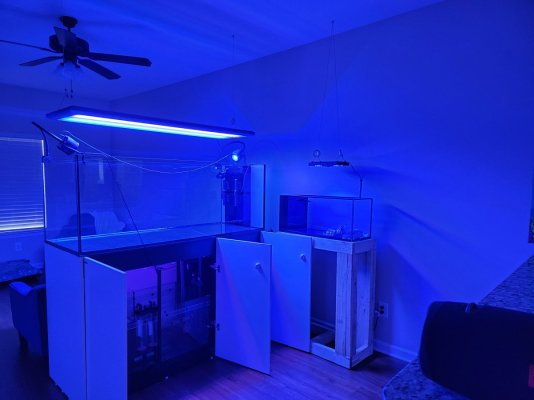
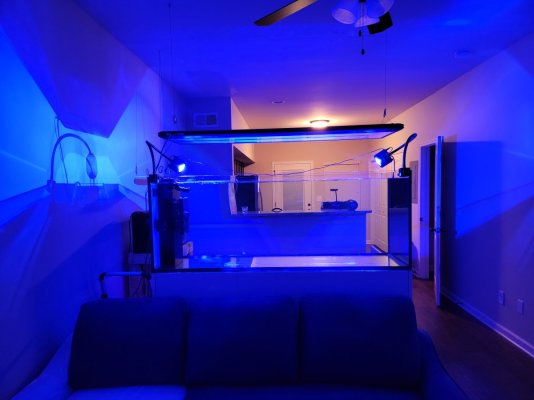
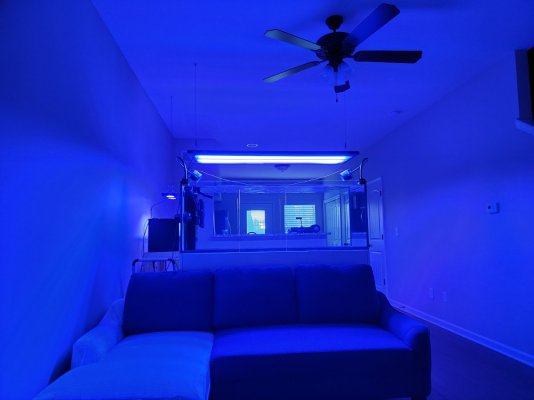
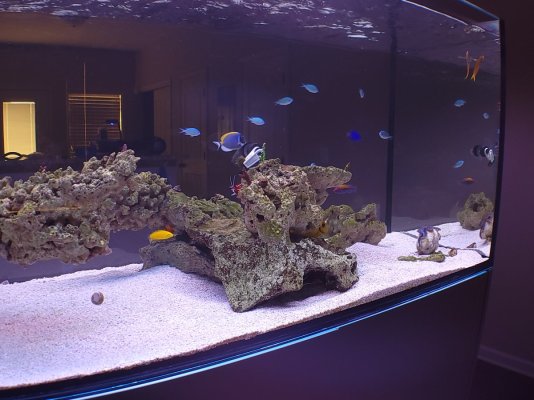
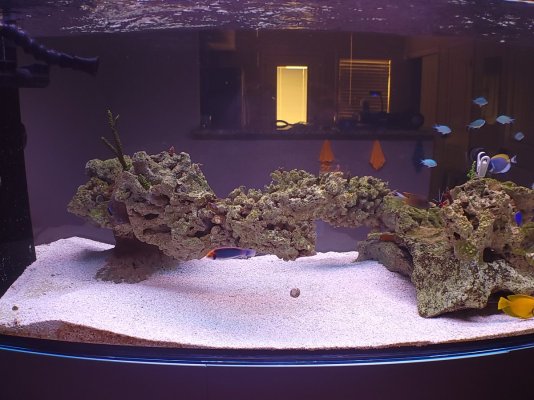
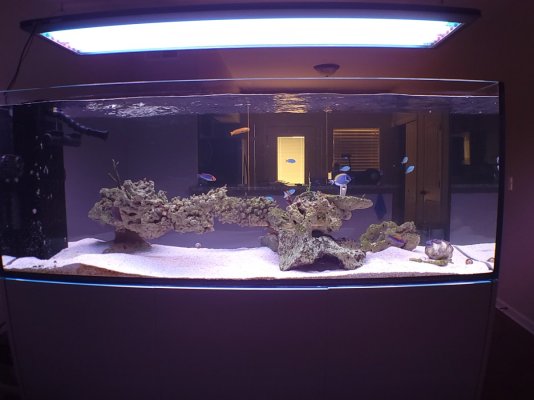
So far this is what it looks like as of today. Might be the last post for this build since it will be gone tomorrow. Wish I could have gotten it up with the vision I had. One day I'll have a big build again in the future when I purchase another home. Where I can go balls to the walls with no limit on what I could do at the property.
Attachments
-
 20220905_120941.jpg97.2 KB · Views: 26
 -
 20220905_120957.jpg106.8 KB · Views: 29
 -
 20220911_210120.jpg144.6 KB · Views: 29
 -
 20220911_210154.jpg98.9 KB · Views: 21
 -
 20220911_210301.jpg101.2 KB · Views: 31
 -
 20220911_220049.jpg142.5 KB · Views: 28
 -
 20220911_222522.jpg102.2 KB · Views: 29
 -
 20220911_222651.jpg119.6 KB · Views: 23
 -
 20220914_111814.jpg99.1 KB · Views: 24
 -
 20220914_111828.jpg100.9 KB · Views: 22
 -
 20220914_175440.jpg110.9 KB · Views: 23
 -
 20220914_175451.jpg149.1 KB · Views: 20
 -
 20220914_175519.jpg84.6 KB · Views: 25
OP
OP
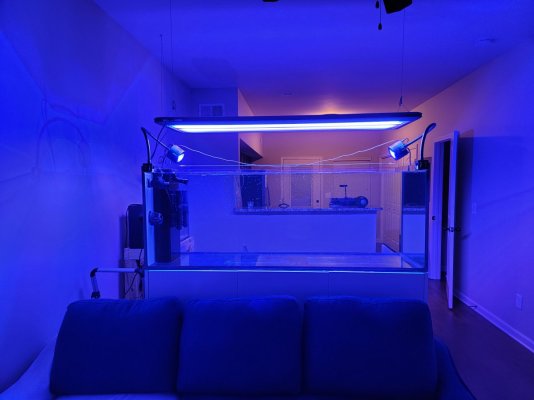
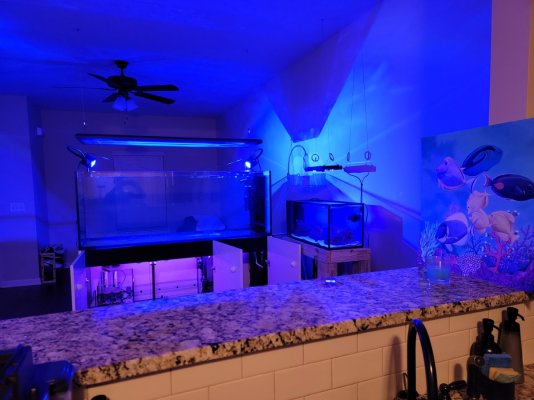
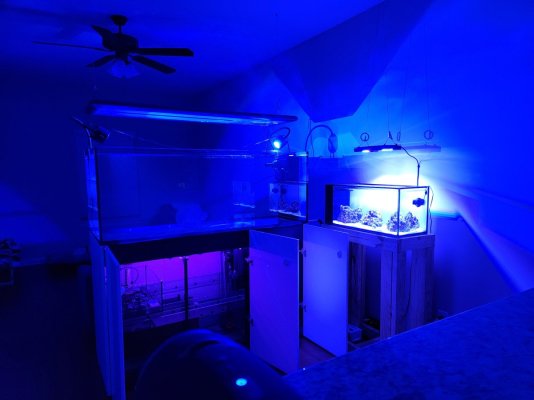
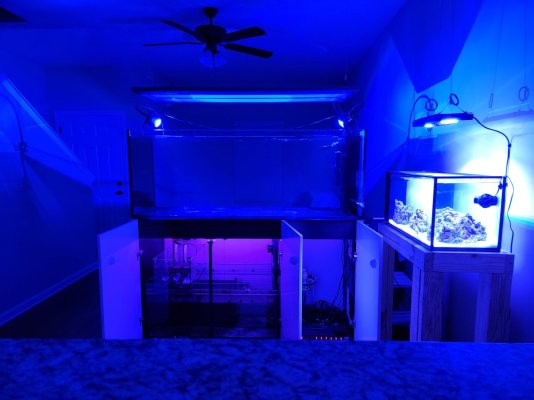
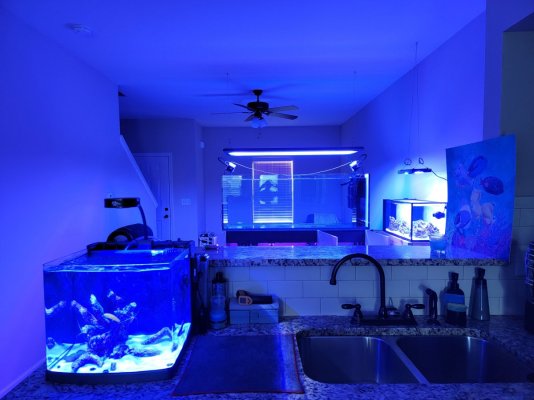
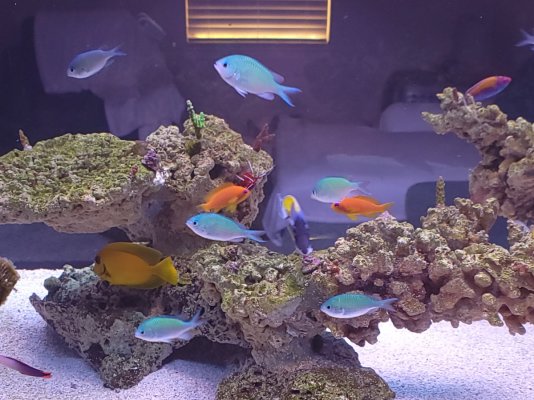
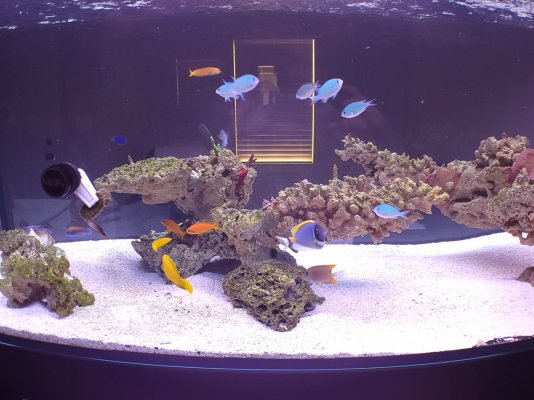
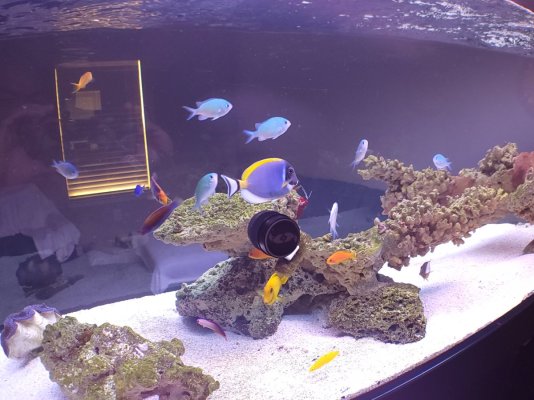
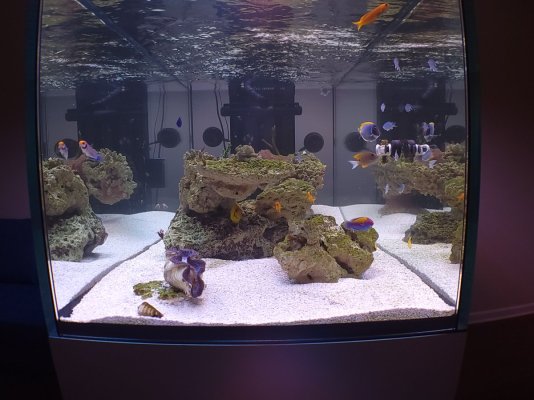
Update on my build
Attachments
-
 20230225_114943.jpg191.5 KB · Views: 23
 -
 20230225_114938.jpg221 KB · Views: 13
 -
 20230225_114934.jpg125.7 KB · Views: 16
 -
 20230225_114922.jpg214.7 KB · Views: 18
 -
 20230225_114916.jpg195.6 KB · Views: 20
 -
 20230225_114907.jpg200.3 KB · Views: 21
 -
 20230225_114903.jpg194.1 KB · Views: 14
 -
 20230225_114857.jpg265.1 KB · Views: 18
 -
 20230225_114852.jpg192.5 KB · Views: 14
 -
 20230225_114839.jpg138.7 KB · Views: 16
Similar threads

- Replies
- 1
- Views
- 72
- Replies
- 15
- Views
- 379


