Seeking Feedback: DIY Stand Design for 25 Gallon AIO

OldRed1

Well-Known Member
View Badges
Joined
Mar 4, 2022
Messages
960
Reaction score
1,419
Location
New York
Rating - 0%
0   0   0
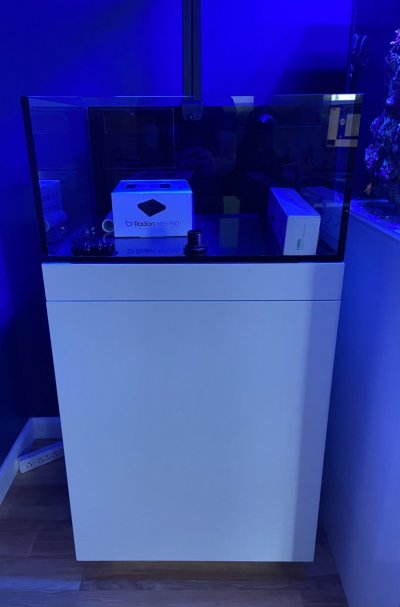
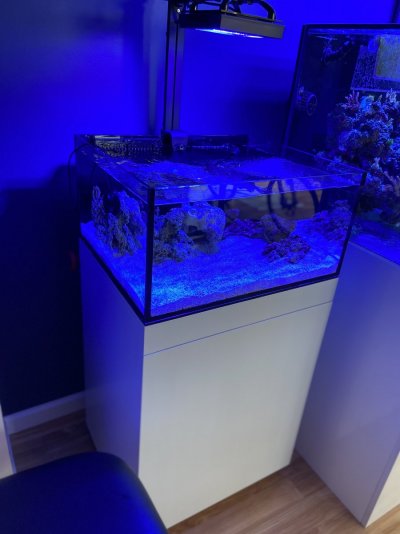
Hello, everyone! After searching for an affordable tank stand without success, I decided to design my own. Through a family member, I have access to the tools necessary to construct this build. That said, I have never built something like this and am seeking feedback from the community to make sure my design will be sturdy enough for a Waterbox 25 gallon AIO (mini peninsula model).

As far as materials are concerned, I plan to use 3/4" plywood for the majority of the project. To form the base of the stand, I will use 2x4's. Images of the design are included below. What do you think?

TankDesign.DoorOpen.png


TankDesign.Side.NoDoors.png


TankDesign.Bottom.png


TankDesign.Front.png
 

NoahLikesFish

2500 Club Member
View Badges
Joined
Nov 16, 2020
Messages
3,481
Reaction score
1,877
Location
Indiana
Rating - 0%
0   0   0
what kinds of joinery are you using? what kind of tools do you have? FYI, if you go to a lowes & you want to get pre cut wood, you still gotta trim it. they will not correctly cut it.
 

shwareefer

Valuable Member
View Badges
Joined
Jun 29, 2020
Messages
1,194
Reaction score
1,312
Location
The Shwa of course!
Rating - 0%
0   0   0
I think most people just use screws and call it a day. I like adding adhesive because it's a small step for piece of mind. Dowels are great too - I mean it is a cabinet after all. :)
 
OP
OP
OldRed1

OldRed1

Well-Known Member
View Badges
Joined
Mar 4, 2022
Messages
960
Reaction score
1,419
Location
New York
Rating - 0%
0   0   0
I think most people just use screws and call it a day. I like adding adhesive because it's a small step for piece of mind. Dowels are great too - I mean it is a cabinet after all. :)
The family member with whom I will work on this project looks for excuses to make things more complicated, so who knows! Thanks again for sharing your thoughts, much appreciated.
 

eloser

Community Member
View Badges
Joined
Aug 11, 2009
Messages
47
Reaction score
48
Location
Bay Area, CA
Rating - 0%
0   0   0
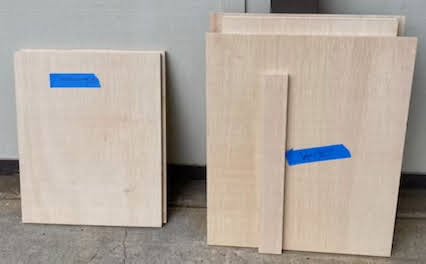
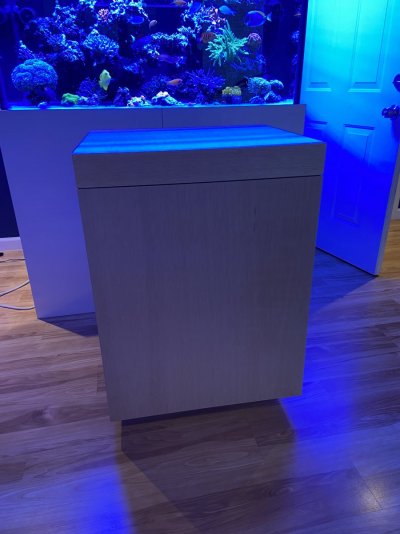
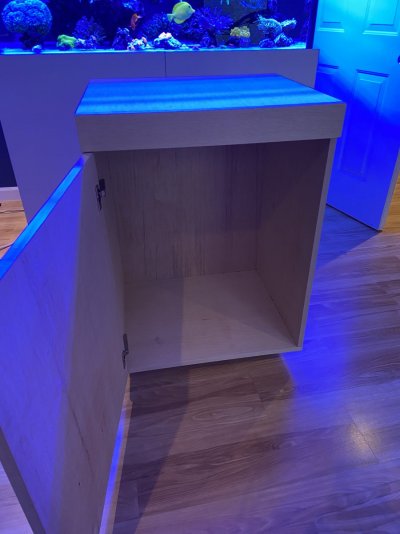
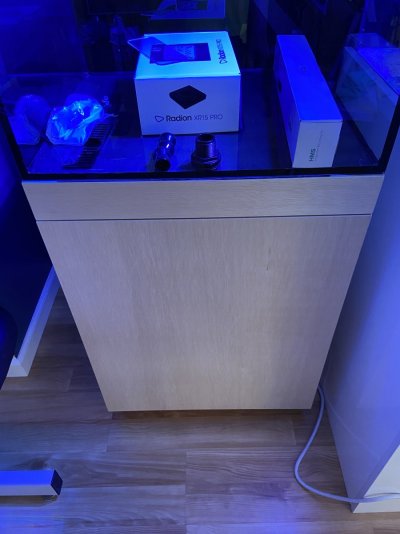
The finish on the 2x4 base will be a bit rough compared to the ply unless you plane it down and fill it with wood filler/bondo and sand it smooth...way too much work. A better option is to get some finished dimensional lumber or use some scrap ply from your cuts if you want to make a base for the stand...the 2x4's is an overkill and not needed. Dowels are used mainly for alignment and not for strength. If you have access to a dowel jig then use it...it really helps with the assembly. Definitely use glue on the joints along with the screws. I personally trust a well glued wood joint more then the screws for strength. Try to use clamps if you have access to them for the assembly...you'll need quite a few of them. I built a stand recently for my IM25 Lagoon with 3/4" ply. I built a small 3" tall base just to keep the bottom of the stand off the floor...see attached pics

Cut Plywood.jpeg IMG_3127.jpg IMG_3128.jpg IMG_3133.jpg IMG_3220.jpeg IMG_3241.jpeg
 

Reef Jockey

Active Member
View Badges
Joined
Jun 20, 2021
Messages
485
Reaction score
950
Location
Under the sea
Rating - 0%
0   0   0
The finish on the 2x4 base will be a bit rough compared to the ply unless you plane it down and fill it with wood filler/bondo and sand it smooth...way too much work. A better option is to get some finished dimensional lumber or use some scrap ply from your cuts if you want to make a base for the stand...the 2x4's is an overkill and not needed. Dowels are used mainly for alignment and not for strength. If you have access to a dowel jig then use it...it really helps with the assembly. Definitely use glue on the joints along with the screws. I personally trust a well glued wood joint more then the screws for strength. Try to use clamps if you have access to them for the assembly...you'll need quite a few of them. I built a stand recently for my IM25 Lagoon with 3/4" ply. I built a small 3" tall base just to keep the bottom of the stand off the floor...see attached pics

Cut Plywood.jpeg IMG_3127.jpg IMG_3128.jpg IMG_3133.jpg IMG_3220.jpeg IMG_3241.jpeg
wow that nice!!!
 
OP
OP
OldRed1

OldRed1

Well-Known Member
View Badges
Joined
Mar 4, 2022
Messages
960
Reaction score
1,419
Location
New York
Rating - 0%
0   0   0
The finish on the 2x4 base will be a bit rough compared to the ply unless you plane it down and fill it with wood filler/bondo and sand it smooth...way too much work. A better option is to get some finished dimensional lumber or use some scrap ply from your cuts if you want to make a base for the stand...the 2x4's is an overkill and not needed. Dowels are used mainly for alignment and not for strength. If you have access to a dowel jig then use it...it really helps with the assembly. Definitely use glue on the joints along with the screws. I personally trust a well glued wood joint more then the screws for strength. Try to use clamps if you have access to them for the assembly...you'll need quite a few of them. I built a stand recently for my IM25 Lagoon with 3/4" ply. I built a small 3" tall base just to keep the bottom of the stand off the floor...see attached pics

Cut Plywood.jpeg IMG_3127.jpg IMG_3128.jpg IMG_3133.jpg IMG_3220.jpeg IMG_3241.jpeg
Wow, thank you for the great feedback! This is super helpful. I feel dumb asking, but could you tell me a little bit more about how you made your base? From the phots, it looks like there is a lip at the bottom; or is that just the reflection of light off the floor?
 

eloser

Community Member
View Badges
Joined
Aug 11, 2009
Messages
47
Reaction score
48
Location
Bay Area, CA
Rating - 0%
0   0   0
There's no lip. It's just bottom of the stand sitting on a 3" tall base. Imagine the stand sitting on top of a 3" tall picture frame made of plywood. I believe I recessed it evenly on all sides around 2.5". I would have went a little less but my ply scraps only allowed me to make what you see. I think a good size would be roughly 10-20% smaller then the actual size of your stand. You can make the base taller or shorter...whatever your heart desires. If you decide to go this route, make sure your sides rests on top of the bottom ply. Notice the small gap at the right bottom corner...there's a shim under there.

base.jpeg
 
OP
OP
OldRed1

OldRed1

Well-Known Member
View Badges
Joined
Mar 4, 2022
Messages
960
Reaction score
1,419
Location
New York
Rating - 0%
0   0   0
There's no lip. It's just bottom of the stand sitting on a 3" tall base. Imagine the stand sitting on top of a 3" tall picture frame made of plywood. I believe I recessed it evenly on all sides around 2.5". I would have went a little less but my ply scraps only allowed me to make what you see. I think a good size would be roughly 10-20% smaller then the actual size of your stand. You can make the base taller or shorter...whatever your heart desires. If you decide to go this route, make sure your sides rests on top of the bottom ply. Notice the small gap at the right bottom corner...there's a shim under there.

base.jpeg
I see, got it. One other question if I may, do you remember the name of the hinges you used in your door? I’ve tried Googling that hinge to find a brand or model name, and I have not been successful.
 

OHReef

New Member
View Badges
Joined
Jul 6, 2021
Messages
24
Reaction score
21
Location
Cleveland
Rating - 0%
0   0   0
Hey, following up on your reply to my stand build thread from yesterday.

I think you have a great design that will look extremely professional. 3/4" plywood should be fine. Baltic Birch plywood is what I would recommend using. Stay away from particle board, it sucks up moisture like crazy and could cause the stand to warp and fail. MDF is another good option. Baltic Birch is not the cheapest plywood, but is one of the strongest options; it is also one of the best plywood options for painting as there is virtually zero knots or holes that need to be filled.

As for attaching the plywood pieces together, I would use pocket holes and glue. Put a bead of glue on both edges needing to be joined then wipe your finger down the glue line to spread it out. You will then screw the pocket holes in and wipe the excess glue off. Also, make sure to apply enough glue to see it squeeze out when the panels are joined.

Glue Options:
Either Titebond II or Titebond III. III is exterior grade and water proof, while II is just water resistant. Frankly, II should be more than sufficient and it is what I most commonly use.
Link: Titebond II

Pocket Holes:
Get yourself a pocket hole jig. I use a Kreg jig as they are the easiest to find. You'll also need the appropriate screws. You will need to make sure you get the plywood course thread screws and not the hardwood fine thread screws. The threads ensure the screws won't over penetrate the panel. For 3/4" plywood you need to use 1-1/4" screws. You will probably need 4 screws on each side of the panel length, and 3 screws on each end of the panel width.
Link to jig: Kreg Jig
Link to Screws (3/4" plywood): Pocket Hole Screws

If you are planning to paint the stand, I recommend spraying the entire piece with Helmsman waterproofing spray after your final coat dries. I would use the clear satin as it won't add any extra sheen or texture and will stop any water from penetrating into the plywood.
Link: Helmsman Waterproofing Spray

I hope this helps! I'm here if you have any questions.
 
OP
OP
OldRed1

OldRed1

Well-Known Member
View Badges
Joined
Mar 4, 2022
Messages
960
Reaction score
1,419
Location
New York
Rating - 0%
0   0   0
Hey, following up on your reply to my stand build thread from yesterday.

I think you have a great design that will look extremely professional. 3/4" plywood should be fine. Baltic Birch plywood is what I would recommend using. Stay away from particle board, it sucks up moisture like crazy and could cause the stand to warp and fail. MDF is another good option. Baltic Birch is not the cheapest plywood, but is one of the strongest options; it is also one of the best plywood options for painting as there is virtually zero knots or holes that need to be filled.

As for attaching the plywood pieces together, I would use pocket holes and glue. Put a bead of glue on both edges needing to be joined then wipe your finger down the glue line to spread it out. You will then screw the pocket holes in and wipe the excess glue off. Also, make sure to apply enough glue to see it squeeze out when the panels are joined.

Glue Options:
Either Titebond II or Titebond III. III is exterior grade and water proof, while II is just water resistant. Frankly, II should be more than sufficient and it is what I most commonly use.
Link: Titebond II

Pocket Holes:
Get yourself a pocket hole jig. I use a Kreg jig as they are the easiest to find. You'll also need the appropriate screws. You will need to make sure you get the plywood course thread screws and not the hardwood fine thread screws. The threads ensure the screws won't over penetrate the panel. For 3/4" plywood you need to use 1-1/4" screws. You will probably need 4 screws on each side of the panel length, and 3 screws on each end of the panel width.
Link to jig: Kreg Jig
Link to Screws (3/4" plywood): Pocket Hole Screws

If you are planning to paint the stand, I recommend spraying the entire piece with Helmsman waterproofing spray after your final coat dries. I would use the clear satin as it won't add any extra sheen or texture and will stop any water from penetrating into the plywood.
Link: Helmsman Waterproofing Spray

I hope this helps! I'm here if you have any questions.
Thank you so much for your wonderful feedback!
 

High pressure shells: Do you look for signs of stress in the invertebrates in your reef tank?

  • I regularly look for signs of invertebrate stress in my reef tank.

    Votes: 42 31.8%
  • I occasionally look for signs of invertebrate stress in my reef tank.

    Votes: 30 22.7%
  • I rarely look for signs of invertebrate stress in my reef tank.

    Votes: 26 19.7%
  • I never look for signs of invertebrate stress in my reef tank.

    Votes: 34 25.8%
  • Other.

    Votes: 0 0.0%
Back
Top