Let's get into the AIO DIY build
Here is a link if you have not seen the Build Thread for the DIY stand - OHReef's DIY 20 Gallon Long Stand - Build Thread
Current Equipment:
I chose to go with 1/8" black acrylic for the AIO filtration. I purchased a 1/2" bulkhead, 1/2" NPT connector, 6 segments, and 2 different outlet nozzles; a straight flow and flare nozzle.
Now this is where it gets fun... While finishing up the silicone of the acrylic to the tank, I noticed something on the corner of the aquarium. A nice big chip... Not sure if it was from the factory or myself, but either way this tank was now unusable. I had to buy another 20 long, another batch of acrylic and start all over again. This was heartbreaking.
After some thought, I decided to change my design a bit. I added 1-1/2" to the chamber to allow for a larger skimmer. I was planning on a reef glass skimmer, but couldn't keep my eyes off of the Ice Cap K1 Nano Skimmer. So what you are seeing below is my second go around on the DIY AIO.
I started by cutting the acrylic to size. I subtracted 1/2" to 5/8" from the sizes and bottom to allow the acrylic to expand. You CAN attach acrylic to glass, but the bond between the 2 is only held together by silicone. Also, acrylic expands much more than glass will, so you need to allow movement for the acrylic or it could potentially cause the glass to crack under pressure.


You will see 2 routed lines in the acrylic. This is a dado insert where the baffles will be. This ensures the acrylic baffles sit parallel to one another and are at a perfect 90 degree angle. I also used an acrylic bit to cut the opening for the bulkhead, and cutout the intake.


I used IPS - WeldOn 16 to bond the acrylic baffles to the acrylic wall and let it sit for 2 days.


I then siliconed the piece to the aquarium allowing a 1/4" to 3/8" gap between the glass and acrylic. My silicone skills are anything but perfect, but they hold water, so I'm happy.

I also built a custom caddy for the filtration. It has 3 levels: 1 for filter floss, 1 for Seachem Matrix and 1 for chemi-pure blue.
While taking everything apart during testing, I dropped the bulkhead due to wet hands. It skipped across the basement floor and right down into the grey water drain. I stood there in disbelief. It was 10 FT away... That drain is DEEP and small and after 30 minutes of trying everything to get it out I gave up. So, I ordered another one and waited... In the meantime, I painted the back of the tank with flat black paint.
The pump I am using is a Sicce Syncra Silent 1.0 (rated at 251 GPH).
I then put the tank on the stand and let out the biggest sigh of relief. It felt so good for everything to be finished. Here is the finished product!!


I was very pleased with how it turned out. I then moved on to dry rock aquascaping. I cut a piece of cardboard to the size on the inside of the tank to make my design more precise.


I ended up settling with #4. It was not too heavy on the rock, and created 2 nice structures with room for my future clowns to swim. Also offers a decent amount of real-estate for coral placement at different heights. The rock at its highest is 6-1/2" with sand leaving another 5-1/2" to the water height.


Here is the filtration compartment. I turned to Skimmer on at Day 5. Just running for a few hours a day to find the best placement and to break it in.

Day 1 - Using Bahama Oolite Live Sand. Not a huge fan of it... My Current USA eFlux Wave Pump has a great time making hills and valleys in the substrate. I'm still playing with where it will be best placed.

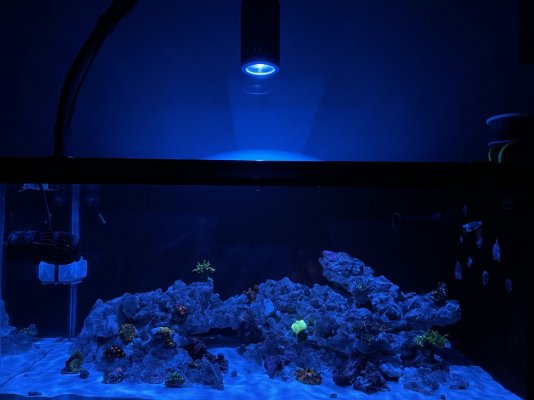
Day 2 - starting to clear up a bit. Using a crappy light that I've had for years so I can take photos. I turn it off a majority of the day, but am still super tempted to leave it on so I can dream about what the tank will look like in a few months... UGHHH!!!
I am either going to go with a Kessil A160WE, RedSea 50 or Current USA R24. I still can't decide.
I am using MicroBacter7 for the bacterial colony, and Dr. Tim's Ammonium Chloride to get the cycle going. The Ammonia has been sitting around 2.0ppm to 4.0ppm. I think API's test kits are hard to read, or maybe I'm just a dummy.

Day 6 - Ammonia still sitting between 2.0ppm & 4.0ppm. Thinking of doing a water change to get it down closer to 2.0ppm as I think it's a little closer to 4.0ppm.
I have an XP Aqua Duetta ATO on order that should arrive today (12/11/21).
I will be updating this thread as the cycle goes on. I am testing ammonia and adding MicroBacter7 daily. Please share any thoughts you might have.
Here is a link if you have not seen the Build Thread for the DIY stand - OHReef's DIY 20 Gallon Long Stand - Build Thread
Current Equipment:
- Sicce Syncra Silent 1.0 - 251GPH
- Eheim 75W heater
- 2 - Current USA eFlux Wave Pumps 660GPH (only running 1 currently, as 2 seems to be too much flow)
- IceCap K1 Nano Skimmer
- DIY filter media caddy
- Filter Floss
- Matrix
- Chemi Pure Blue (not running as cycle is still underway as of 12/11/21)
I chose to go with 1/8" black acrylic for the AIO filtration. I purchased a 1/2" bulkhead, 1/2" NPT connector, 6 segments, and 2 different outlet nozzles; a straight flow and flare nozzle.
Now this is where it gets fun... While finishing up the silicone of the acrylic to the tank, I noticed something on the corner of the aquarium. A nice big chip... Not sure if it was from the factory or myself, but either way this tank was now unusable. I had to buy another 20 long, another batch of acrylic and start all over again. This was heartbreaking.
After some thought, I decided to change my design a bit. I added 1-1/2" to the chamber to allow for a larger skimmer. I was planning on a reef glass skimmer, but couldn't keep my eyes off of the Ice Cap K1 Nano Skimmer. So what you are seeing below is my second go around on the DIY AIO.
I started by cutting the acrylic to size. I subtracted 1/2" to 5/8" from the sizes and bottom to allow the acrylic to expand. You CAN attach acrylic to glass, but the bond between the 2 is only held together by silicone. Also, acrylic expands much more than glass will, so you need to allow movement for the acrylic or it could potentially cause the glass to crack under pressure.
You will see 2 routed lines in the acrylic. This is a dado insert where the baffles will be. This ensures the acrylic baffles sit parallel to one another and are at a perfect 90 degree angle. I also used an acrylic bit to cut the opening for the bulkhead, and cutout the intake.
I used IPS - WeldOn 16 to bond the acrylic baffles to the acrylic wall and let it sit for 2 days.
I then siliconed the piece to the aquarium allowing a 1/4" to 3/8" gap between the glass and acrylic. My silicone skills are anything but perfect, but they hold water, so I'm happy.
I also built a custom caddy for the filtration. It has 3 levels: 1 for filter floss, 1 for Seachem Matrix and 1 for chemi-pure blue.
While taking everything apart during testing, I dropped the bulkhead due to wet hands. It skipped across the basement floor and right down into the grey water drain. I stood there in disbelief. It was 10 FT away... That drain is DEEP and small and after 30 minutes of trying everything to get it out I gave up. So, I ordered another one and waited... In the meantime, I painted the back of the tank with flat black paint.
The pump I am using is a Sicce Syncra Silent 1.0 (rated at 251 GPH).
I then put the tank on the stand and let out the biggest sigh of relief. It felt so good for everything to be finished. Here is the finished product!!
I was very pleased with how it turned out. I then moved on to dry rock aquascaping. I cut a piece of cardboard to the size on the inside of the tank to make my design more precise.
I ended up settling with #4. It was not too heavy on the rock, and created 2 nice structures with room for my future clowns to swim. Also offers a decent amount of real-estate for coral placement at different heights. The rock at its highest is 6-1/2" with sand leaving another 5-1/2" to the water height.
Here is the filtration compartment. I turned to Skimmer on at Day 5. Just running for a few hours a day to find the best placement and to break it in.
Day 1 - Using Bahama Oolite Live Sand. Not a huge fan of it... My Current USA eFlux Wave Pump has a great time making hills and valleys in the substrate. I'm still playing with where it will be best placed.
Day 2 - starting to clear up a bit. Using a crappy light that I've had for years so I can take photos. I turn it off a majority of the day, but am still super tempted to leave it on so I can dream about what the tank will look like in a few months... UGHHH!!!
I am either going to go with a Kessil A160WE, RedSea 50 or Current USA R24. I still can't decide.
I am using MicroBacter7 for the bacterial colony, and Dr. Tim's Ammonium Chloride to get the cycle going. The Ammonia has been sitting around 2.0ppm to 4.0ppm. I think API's test kits are hard to read, or maybe I'm just a dummy.
Day 6 - Ammonia still sitting between 2.0ppm & 4.0ppm. Thinking of doing a water change to get it down closer to 2.0ppm as I think it's a little closer to 4.0ppm.
I have an XP Aqua Duetta ATO on order that should arrive today (12/11/21).
I will be updating this thread as the cycle goes on. I am testing ammonia and adding MicroBacter7 daily. Please share any thoughts you might have.

")