Show off your DIY projects

firechild

Active Member
View Badges
Joined
Nov 23, 2020
Messages
214
Reaction score
311
Location
Sydney
Rating - 0%
0   0   0
I love DIY projects for my aquariums and I'd love to see what everyone else is doing. I wanted to start this thread as a place for everyone to drop their photos and maybe a bit of detail as inspiration for others. I go digging for ideas all the time so it would be nice to have a repository of sorts to just scroll through. Add a link too if you already have a build thread for your project.

I'll start with a few of mine.

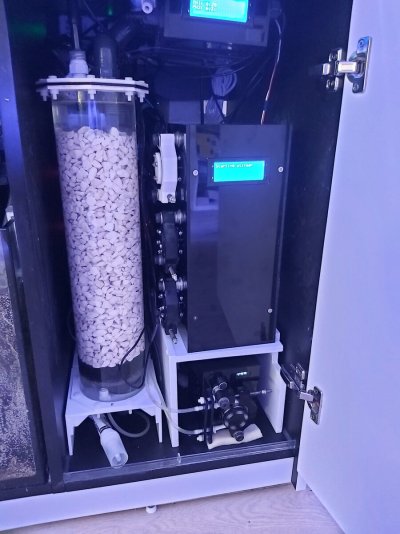
DIY fluidised filter/reactor

reactor_1.jpg
reactor_parts.jpg
Reactor_running.jpg


DIY LED 1

DSCN0331.jpg
light_front.jpg
SNC00057.jpg
tank_01082012.jpg


DIY LED2

20210202_115833.jpg
20210202_133208.jpg


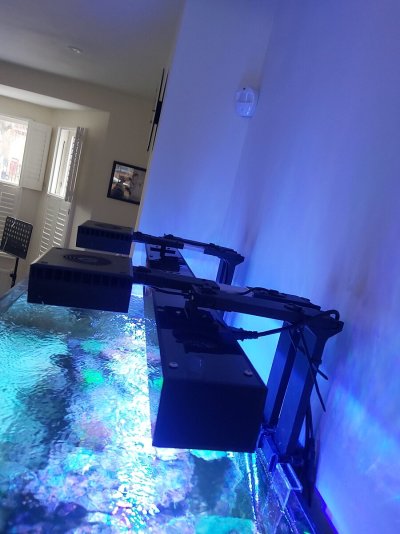
DIY LED 3

20220824_162540.jpg
20220824_162527.jpg


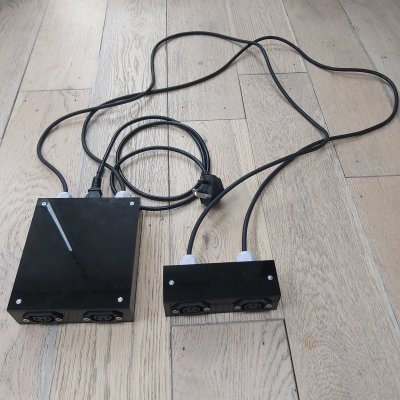
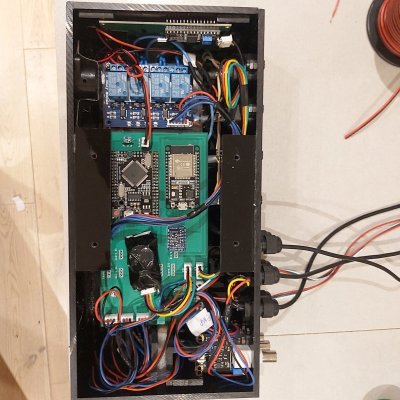
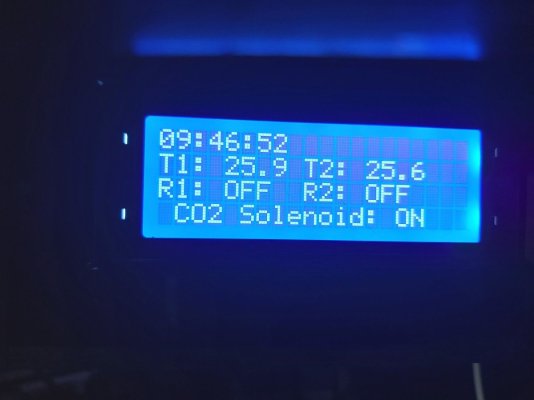
Heater controller (was running schego heaters which have no internal thermostat)

Heater controller.jpg


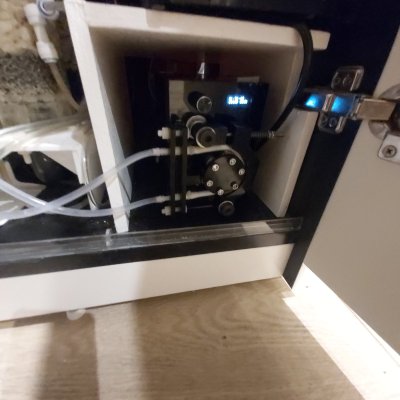
Reservoir ATO. The solenoid controlled the RO/DI to refill the reservoir. The middle (unconnected) socket was for the float switch.

solenoid_ATO.jpg


ATO. I don't have any photos of this, just some concept images. I will be making a couple more of these for current tank and my upcoming frag tank so I will update with photos when possible.

bracket_2.jpg
assembled pcb_sml.jpg
open.jpg
DSCN0485[1].jpg
 

monkeyCmonkeyDo

7500 Club Member
View Badges
Joined
Mar 4, 2019
Messages
8,288
Reaction score
8,088
Location
Puyallup, Wa USA
Rating - 0%
0   0   0
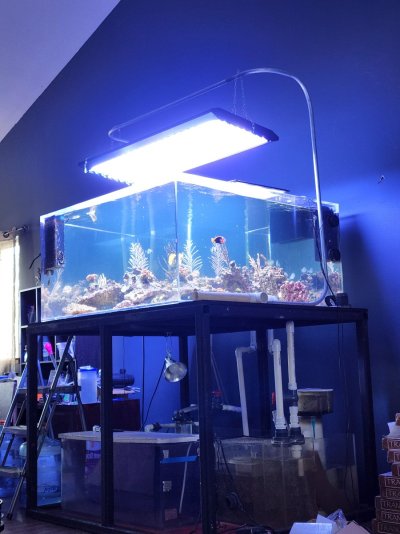
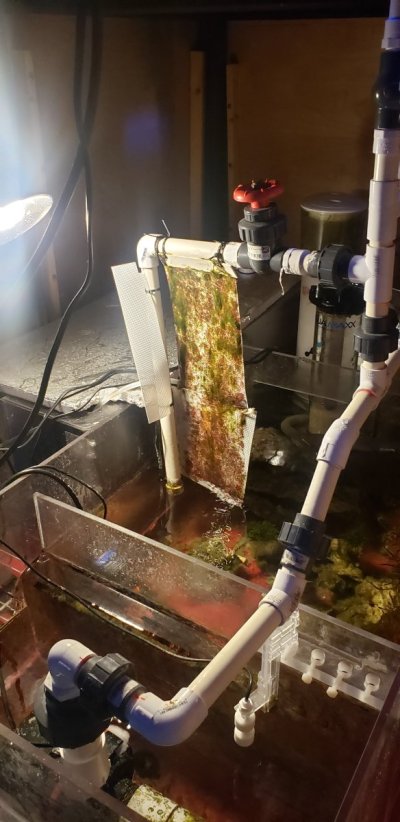
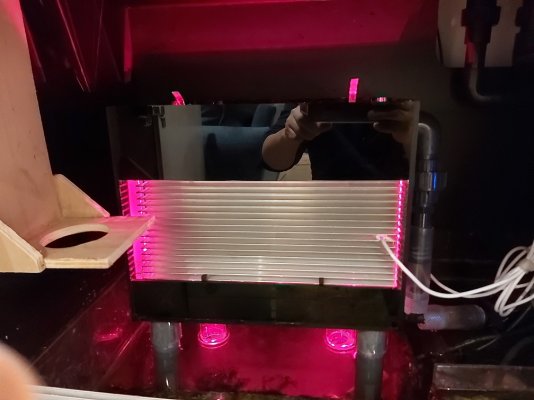
I bent this conduit pipe for my light hanger and I DIYd this algae turf scrubber too.
:)
Reef on!
D
 

Attachments

  • 20220610_131141.jpg
    20220610_131141.jpg
    175.7 KB · Views: 55
  • 20220224_010855.jpg
    20220224_010855.jpg
    128.4 KB · Views: 54

Projects with Sam

5000 Club Member
View Badges
Joined
Dec 2, 2021
Messages
6,931
Reaction score
27,778
Location
Western Springs, IL
Rating - 100%
3   0   0
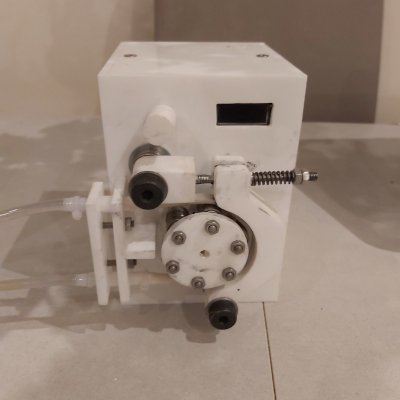
DIY Kalk Stirrer:
KalkStirrer-083022w.gif
IMG_1739.JPEG
 

Joe81

Community Member
View Badges
Joined
Aug 14, 2022
Messages
33
Reaction score
174
Location
FL
Rating - 0%
0   0   0
I love DIY projects for my aquariums and I'd love to see what everyone else is doing. I wanted to start this thread as a place for everyone to drop their photos and maybe a bit of detail as inspiration for others. I go digging for ideas all the time so it would be nice to have a repository of sorts to just scroll through. Add a link too if you already have a build thread for your project.

I'll start with a few of mine.

DIY fluidised filter/reactor

reactor_1.jpg
reactor_parts.jpg
Reactor_running.jpg


DIY LED 1

DSCN0331.jpg
light_front.jpg
SNC00057.jpg
tank_01082012.jpg


DIY LED2

20210202_115833.jpg
20210202_133208.jpg


DIY LED 3

20220824_162540.jpg
20220824_162527.jpg


Heater controller (was running schego heaters which have no internal thermostat)

Heater controller.jpg


Reservoir ATO. The solenoid controlled the RO/DI to refill the reservoir. The middle (unconnected) socket was for the float switch.

solenoid_ATO.jpg


ATO. I don't have any photos of this, just some concept images. I will be making a couple more of these for current tank and my upcoming frag tank so I will update with photos when possible.

bracket_2.jpg
assembled pcb_sml.jpg
open.jpg
DSCN0485[1].jpg
Nice work, can you share any info on the leds?
 

Borat

Valuable Member
View Badges
Joined
Apr 4, 2021
Messages
1,495
Reaction score
1,731
Location
United Kingdom
Rating - 0%
0   0   0

Projects with Sam

5000 Club Member
View Badges
Joined
Dec 2, 2021
Messages
6,931
Reaction score
27,778
Location
Western Springs, IL
Rating - 100%
3   0   0
Is that a DIY nuclear reactor?
haha! Isotope decay for those pesky power outages...
I'm ready for a Kalk explosion! May be a bit overkill; that is how tedious I find setting up kalk. - my own fault... I am doing 1 gallon jugs. I should have specified a shorter motor. I may still print the complete top cover. I agree its um... form follows function at the moment.
 

Dreminon

Active Member
View Badges
Joined
Aug 8, 2022
Messages
352
Reaction score
1,436
Location
Avon Park
Rating - 0%
0   0   0
DIY Kalk Stirrer:
KalkStirrer-083022w.gif
IMG_1739.JPEG
Love the look of this when I start needing to use kalk may have to look into doing this nice and sleek
 

Borat

Valuable Member
View Badges
Joined
Apr 4, 2021
Messages
1,495
Reaction score
1,731
Location
United Kingdom
Rating - 0%
0   0   0
Love the look of this when I start needing to use kalk may have to look into doing this nice and sleek
Kalk stirrers (and Kalk dosing) are a thing of the past... I got so much instability from using Kalk reactor that I ditched it all after all..
 

Borat

Valuable Member
View Badges
Joined
Apr 4, 2021
Messages
1,495
Reaction score
1,731
Location
United Kingdom
Rating - 0%
0   0   0
Look at this thread - I went into great lengths into building it, but had no hesitation of scrapping it after trying it for 3 months or so..


Projects with Sam

5000 Club Member
View Badges
Joined
Dec 2, 2021
Messages
6,931
Reaction score
27,778
Location
Western Springs, IL
Rating - 100%
3   0   0
Kalk stirrers (and Kalk dosing) are a thing of the past... I got so much instability from using Kalk reactor that I ditched it all after all..
I looked at a lot of coral farms and noted their primary source of alkalinity and calcium is kalkwasser so that is why I decided to go that route.
That's an impressive build from my quick skim (picture looking) I'm sorry you were unable to get it to work. I hope I don't have the same experience.
I plan to stir the Kalk for 20 seconds every 5 minutes to keep it in solution. I am hoping the size of my chamber (6" wide) is enough to allow the slurry to stay at the bottom as the solution drips into my sump from the top.
Will be updating my build thread.
I wanted to do a clear chamber but for an experiment, I saved a ton of $$ going with drain pipe. So far I am in about $40USD, paint, and some PETG.
I have no problem scrapping it; I just hope it'll work well enough to get me to my next flawed solution ;)

I want to emphasize that the size may save me and simplicity works. Or, as Elon puts it: “The best part is no part. The best process is no process.
 
Last edited:

Borat

Valuable Member
View Badges
Joined
Apr 4, 2021
Messages
1,495
Reaction score
1,731
Location
United Kingdom
Rating - 0%
0   0   0
I looked at a lot of coral farms and noted their primary source of alkalinity and calcium is kalkwasser so that is why I decided to go that route. That's an impressive build from my quick skim (picture looking) I'm sorry you were unable to get it to work. I hope I don't have the same experience.
I plan to stir the Kalk for 20 seconds every 5 minutes to keep it in solution. I am hoping the size of my chamber (6" wide) is enough to allow the slurry to stay at the bottom as the solution drips into my sump from the top.
Will be updating my build thread.
I wanted to do a clear chamber but for an experiment, I saved a ton of $$ going with drain pipe. So far I am in about $40USD, paint, and some PETG.
I want to emphasize that the size may save me and simplicity works. Or, as Elon puts it: “The best part is no part. The best process is no process.
..and the best thing is no Kalk reactor thing..
 
OP
OP
firechild

firechild

Active Member
View Badges
Joined
Nov 23, 2020
Messages
214
Reaction score
311
Location
Sydney
Rating - 0%
0   0   0
Nice work, can you share any info on the leds?
Sure. The first was fairly simple, using only a combination of Cree XP-E royal blue and XP-G neutral white emitters on 6 custom PCBs with 12x RB and 6x NW per board. I ran these on 2 Inventronics 0-10V dimmable drivers connected to a Floramate controller (these no longer exist and there's hardly any references for them on the internet), which was designed for dimmable T5 ballasts and programmable through a Windows GUI. The enclosure was a custom enclosure from Takachi in Japan.

The next 2 were built in the bodies of some old LED units that I've been holding onto for years, I stripped out the old PCBs and electronics and in the case of LED 2, designed my own PCBs with 12 separate channels, running UV, RB, blue, red, green, warm white and neutral white emitters and had the boards manufactured and assembled locally. For LED 3, I just got these customized: https://www.aliexpress.com/item/32911128947.html
Both units run Meanwell ldd drivers and connect to an arduino for PWM dimming.

I use 60 degree to allow me to raise the lights to an aesthetically pleasing height above the tanks.

Overall, LED 2, which runs on my main tank, is giving me the best overall colour and growth. LED 3 is running on a tank that is mostly zoanthids, a couple of LPS and a few anemones.
 

Creating a strong bulwark: Did you consider floor support for your reef tank?

  • I put a major focus on floor support.

    Votes: 56 40.3%
  • I put minimal focus on floor support.

    Votes: 29 20.9%
  • I put no focus on floor support.

    Votes: 49 35.3%
  • Other.

    Votes: 5 3.6%
Back
Top