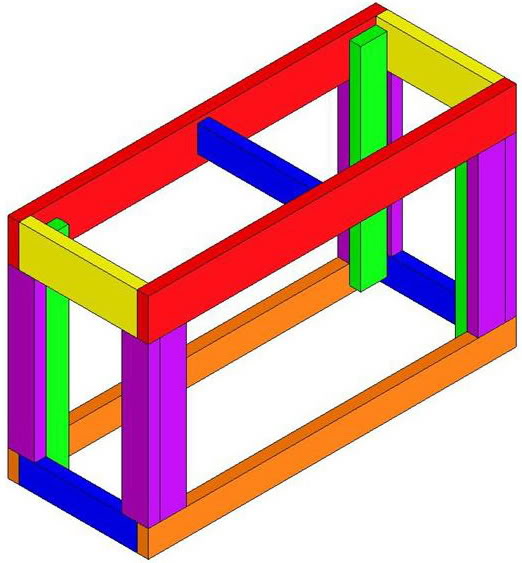
This is a proven design. Just skin the stand with whatever floats your boat.....1/4 plywood, bead board, planking, etc. For a six foot tank, you'll want that top frame to be 2 x 6 lumber. All other lumber is 2 x 4's. No center brace is needed.
Here is the one I did for a five foot tank, with 3/8 ply skin. The open panel in the front door exposes the refugium of the sump.