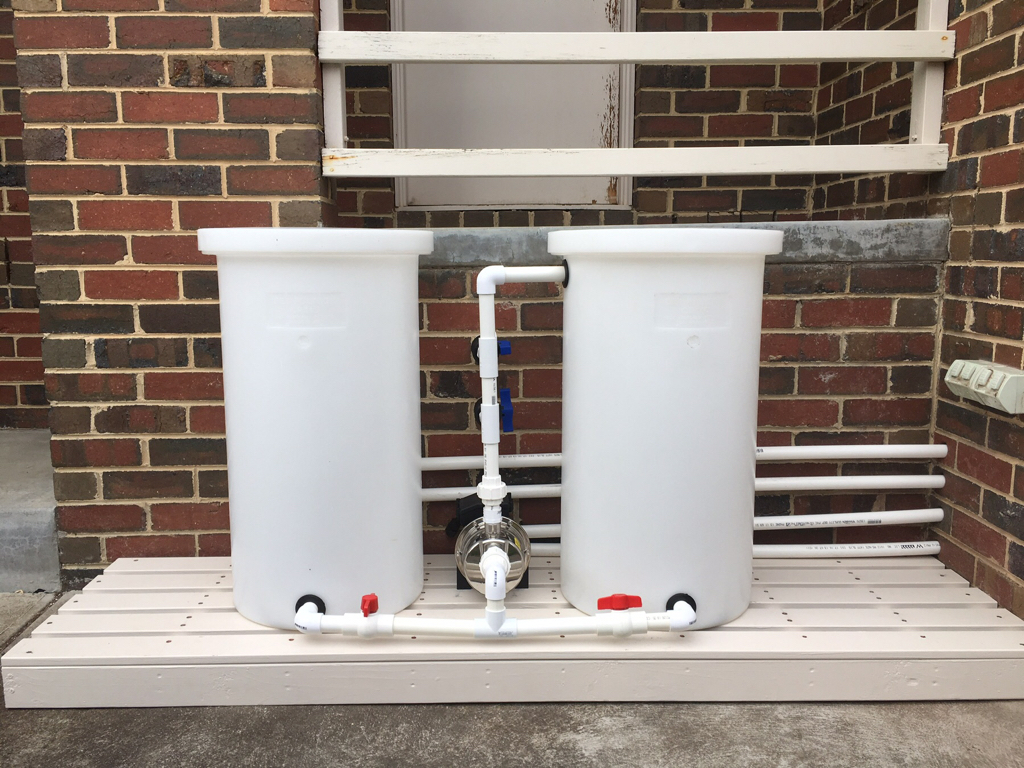
Taking the plunge

OP
OP
dowsetts101

dowsetts101

Active Member
View Badges
Joined
Apr 21, 2017
Messages
206
Reaction score
258
Location
Melbourne, Australia
Rating - 0%
0   0   0
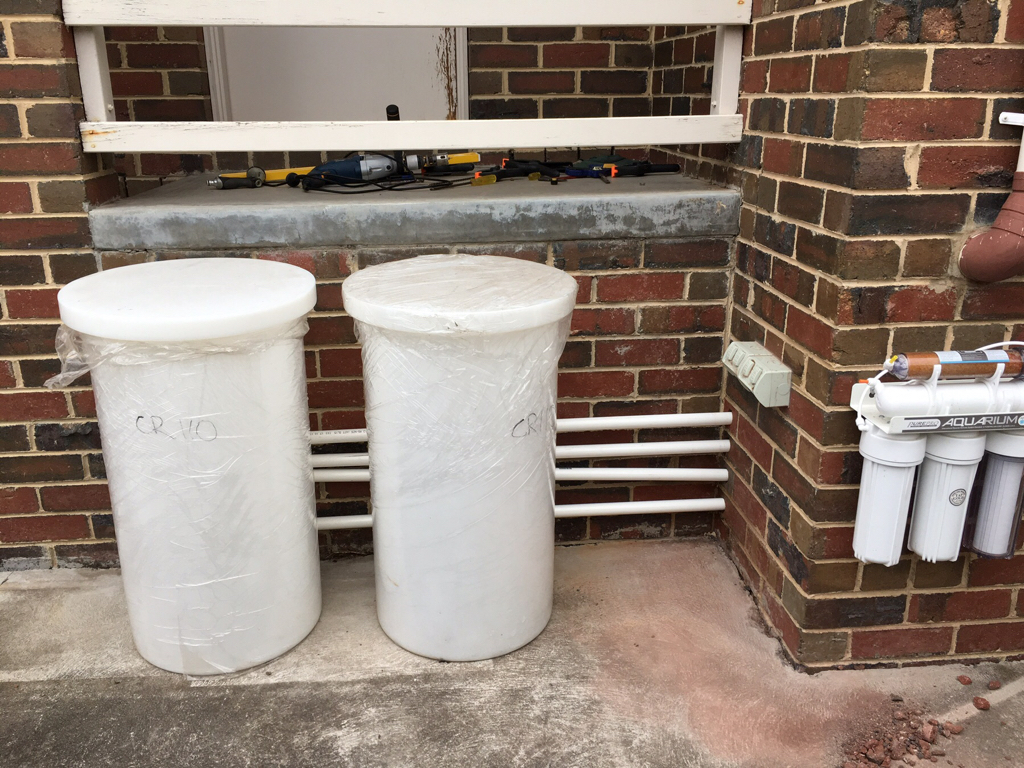
Happy New Year everyone...hope you’ve all been good over the festive season!!!

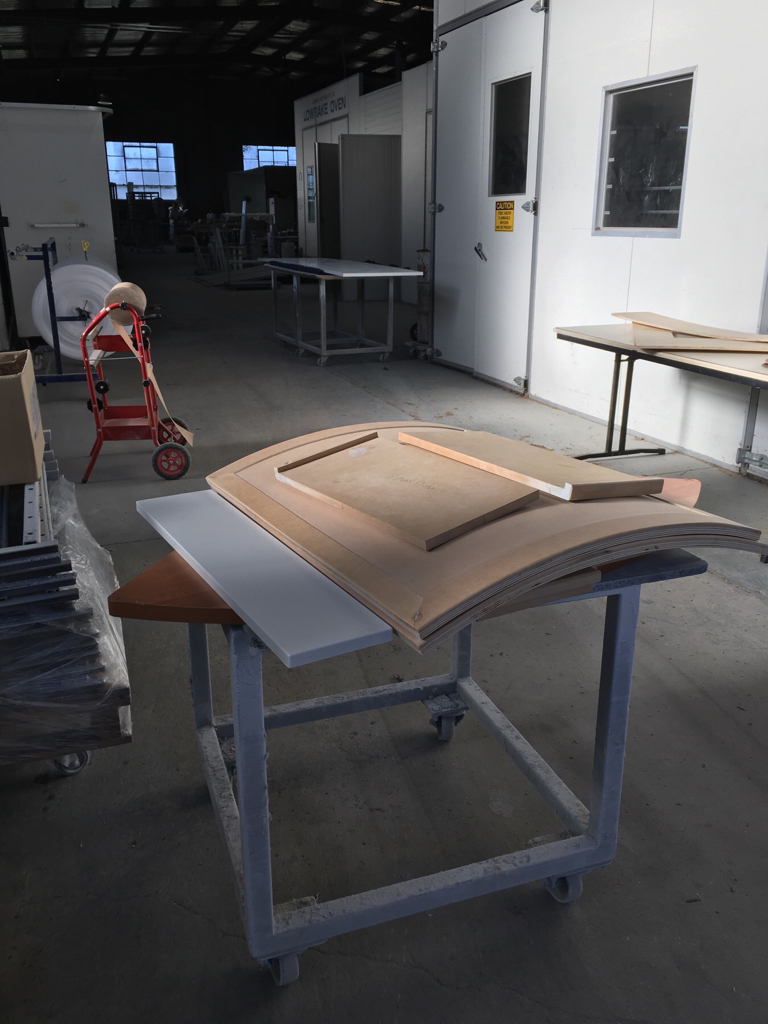
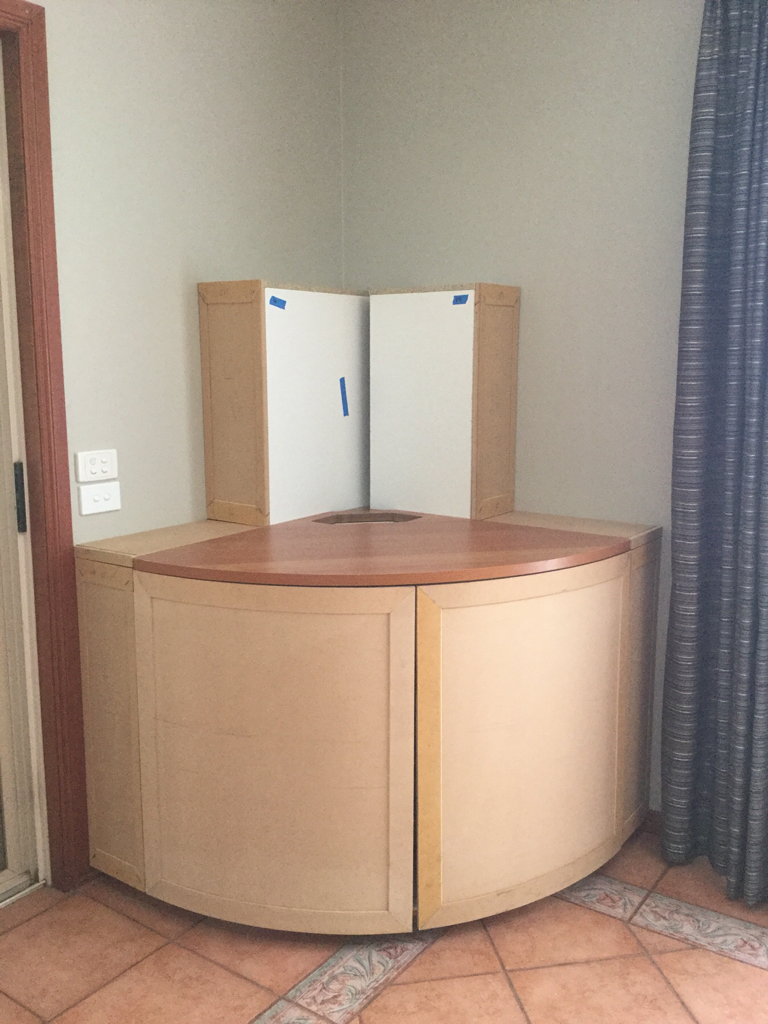
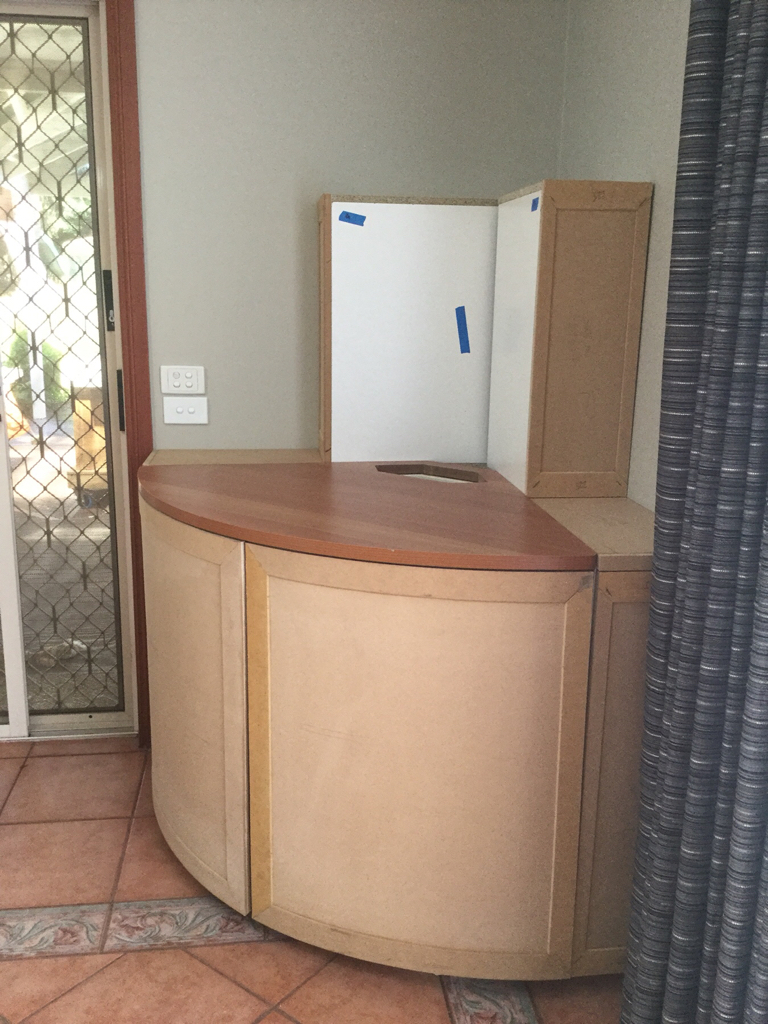
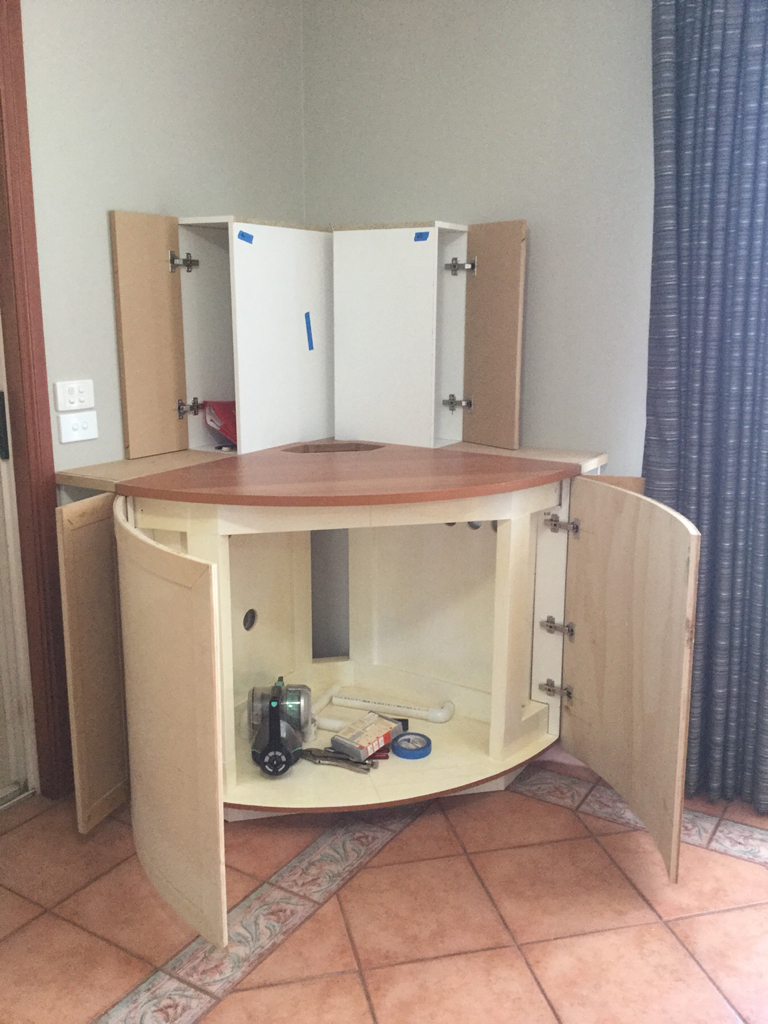
Amazing what a few days off can do with making a bit of progress on my stand. I finally finished hanging the doors to the cabinet today. Major milestone, as I need to finish painting the insides of the doors to the sump, and let them stop fuming for a couple of weeks before I can put the tank together and fill with water for full scale wet test!!

So pretty happy now. Lots of fiddly bits still to do on the cabinet, but the bulk of it is done...which means I can start to look forward to the fun stuff!!

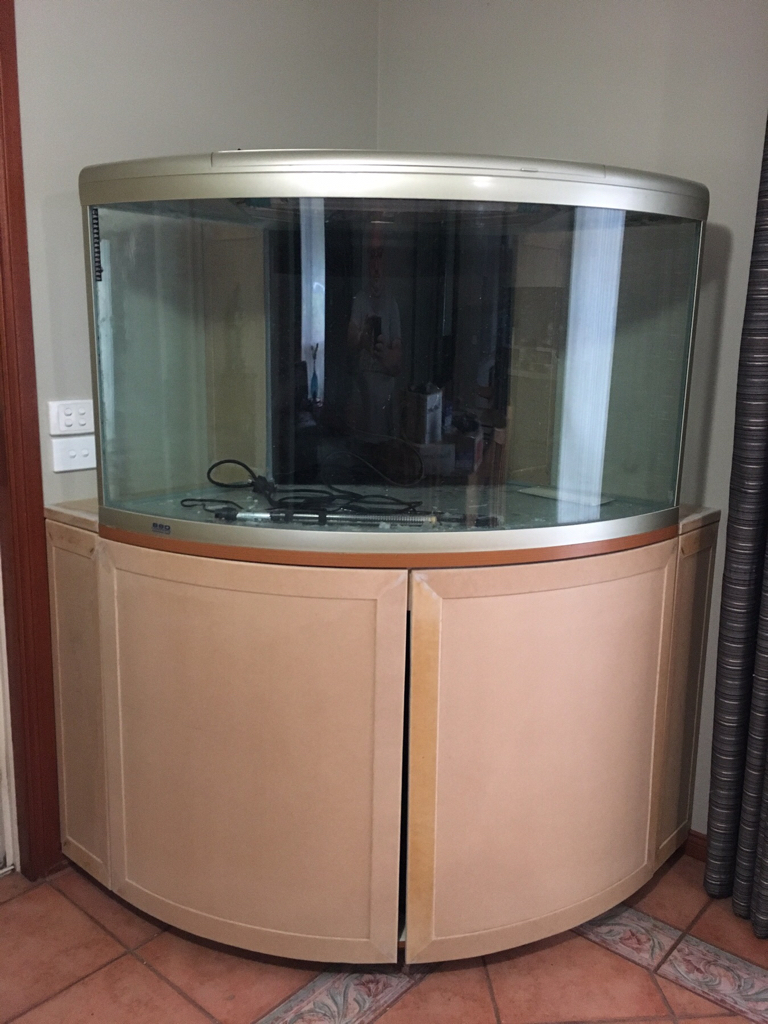
A couple of pics below (don’t look too closely at the gaps in the doors...they are pretty horrible at the moment, but I will do some tweaking once everything is finished and they should end up better than what they are at the moment)

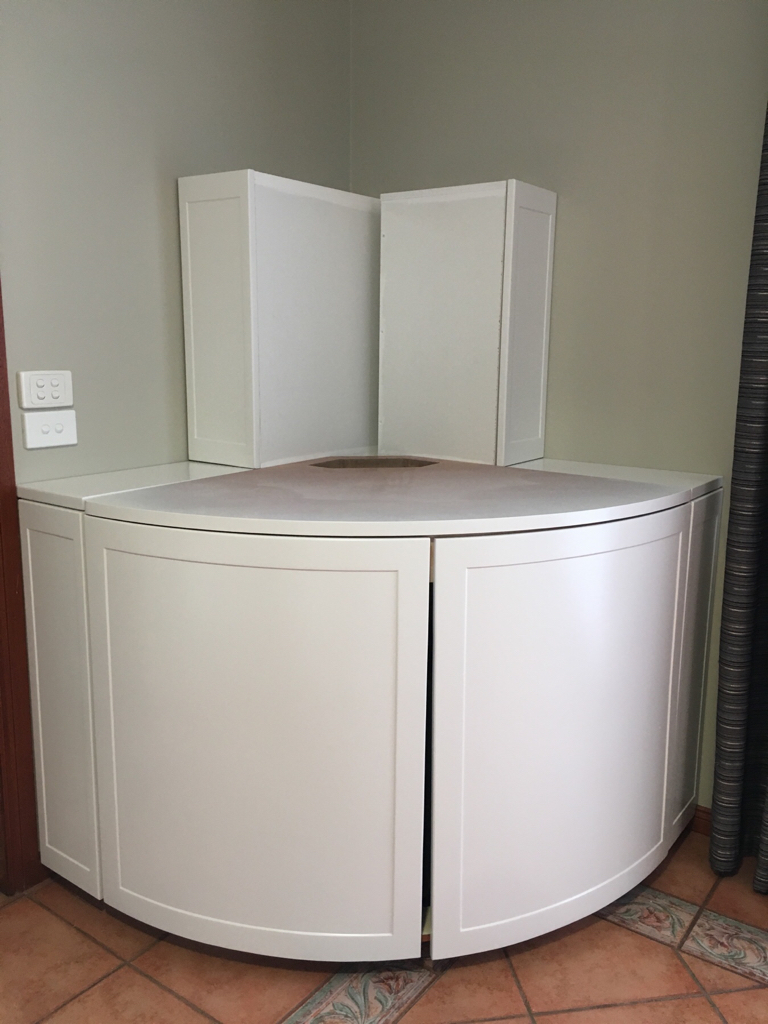
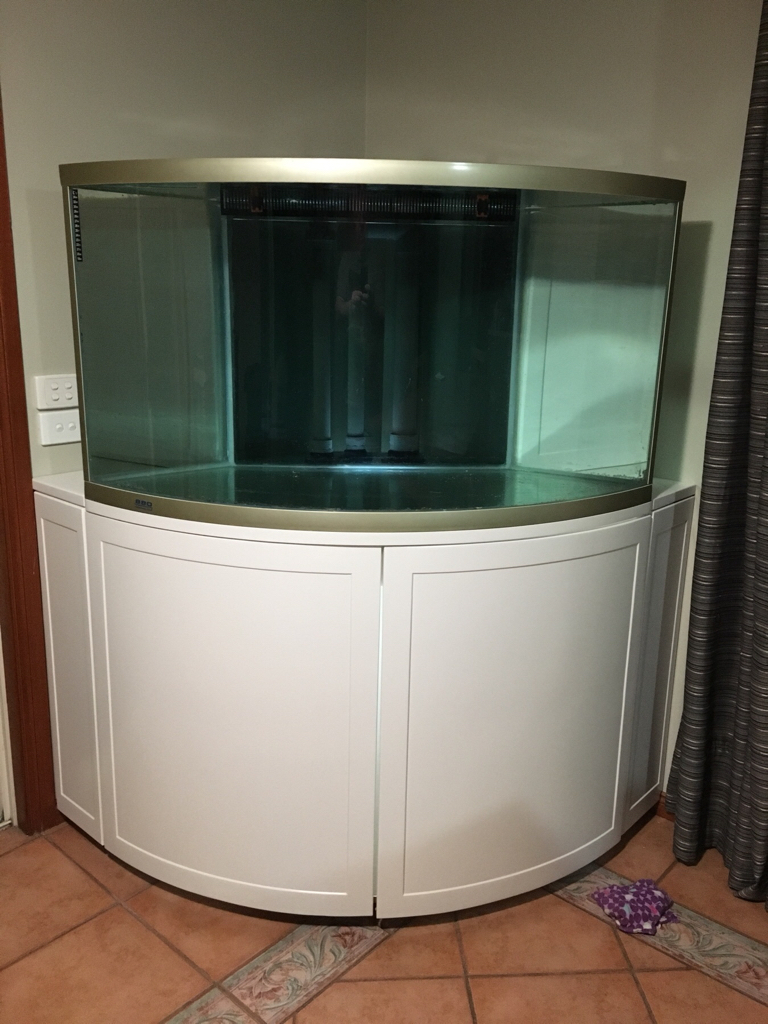
Overall pic of the cabinet
704bcb8dd2dd04b75aaa964a76c2ac72.jpg


From the side
6e61645cd7e21c5347280772d435efca.jpg


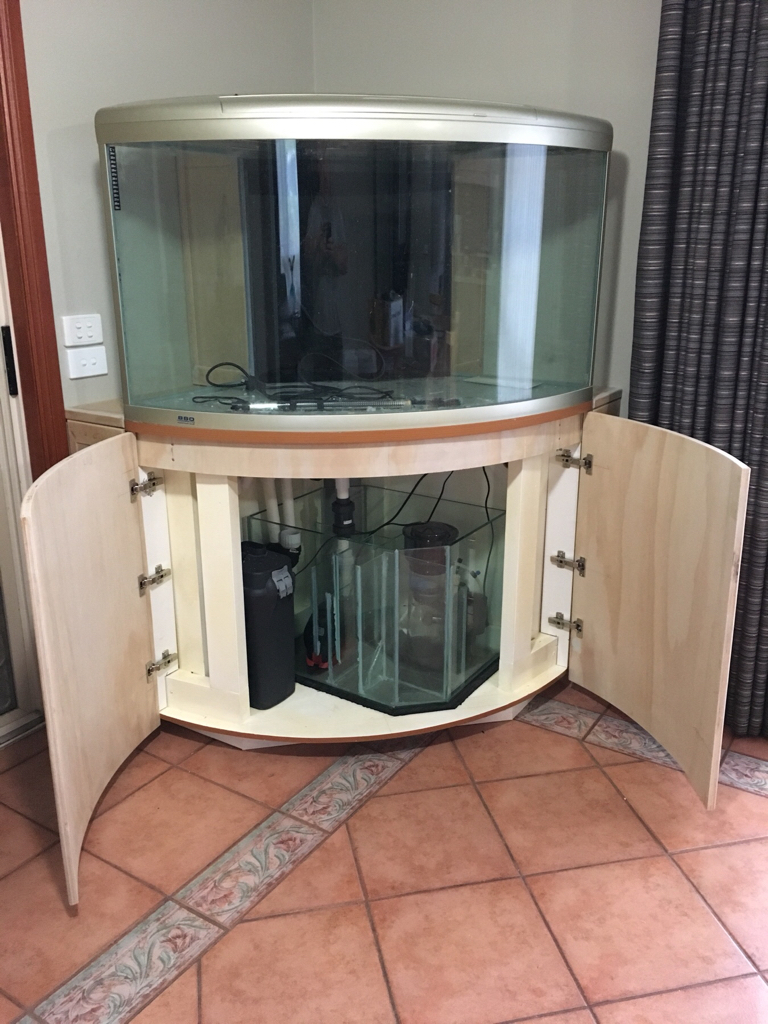
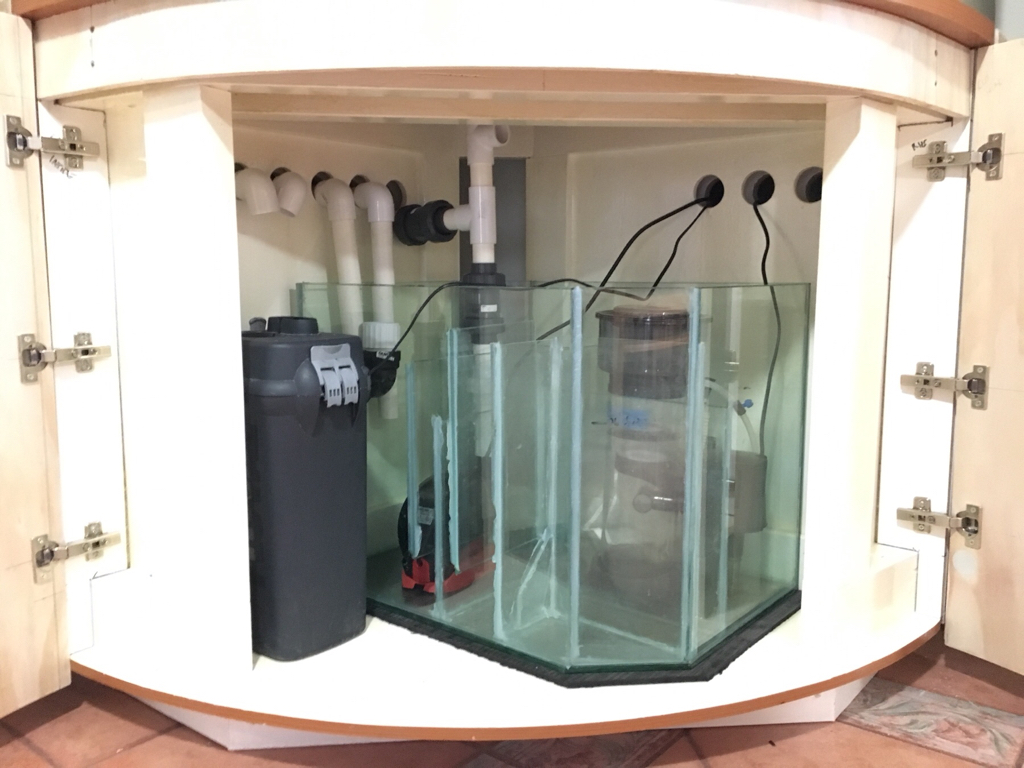
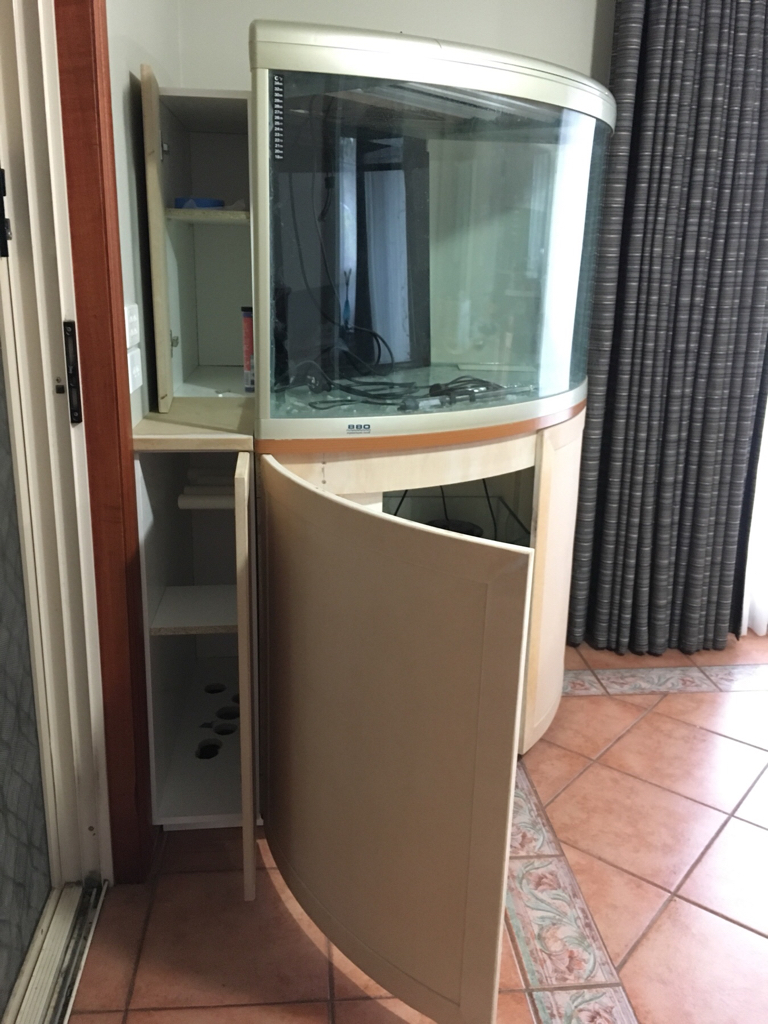
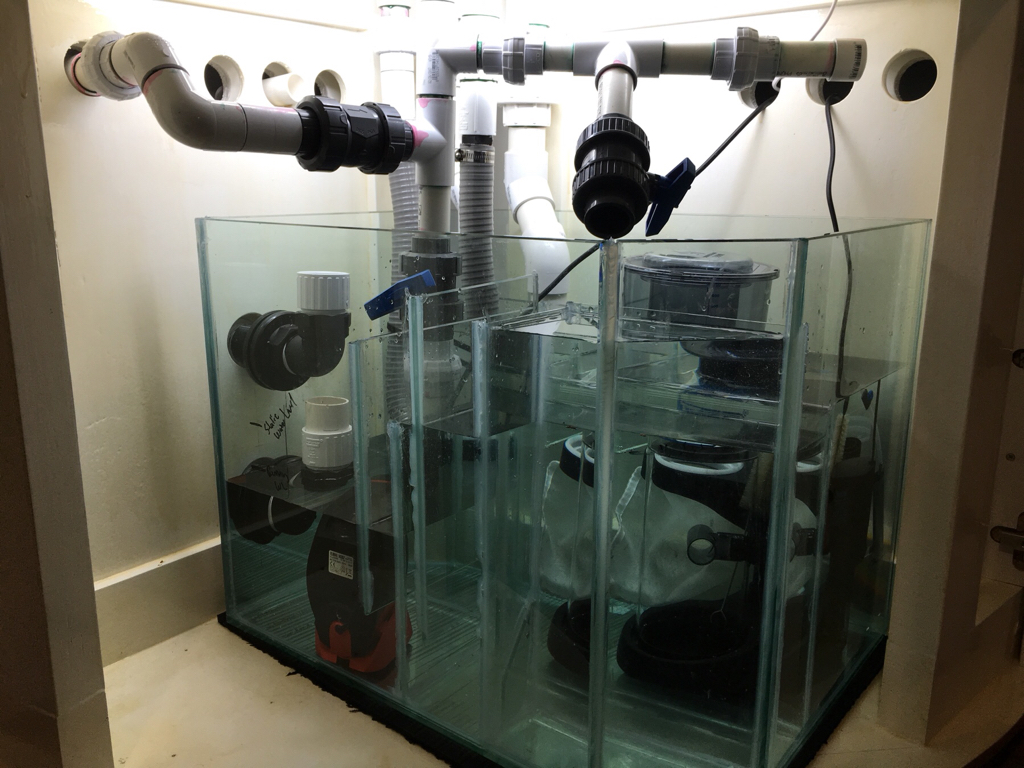
With all the doors open
a14bbe0897bcfee284bc707cd42ac8ac.jpg
 
OP
OP
dowsetts101

dowsetts101

Active Member
View Badges
Joined
Apr 21, 2017
Messages
206
Reaction score
258
Location
Melbourne, Australia
Rating - 0%
0   0   0
The last few days holidays before I head back to work on Monday have let me make a bit more headway on the build. Unfortunately the local businesses that do the two-Pack epoxy spray painting that I am planning to do on my doors have all still been on their Christmas break and don’t get back till next week so I haven’t been able to get them painted yet...but it’s given me the opportunity to do a bit of work on the plumbing.

Drilled the penetrations in the brickwork for the 4 x 25mm PVC pipes from the sump to my mixing/RODI station
fc4df16d7daf489d0a824258a887d4c2.jpg


Placed the aquarium on the stand for some dry fitting of the pipework and sump
f0bae09851f6ecc272fde04a8467fec0.jpg


Overall shot showing the sump and doors under the tank
f80607733dc88d2bd7cad0a35e8f25ea.jpg


Close up of the sump layout. Testing out space for my old canister filter which I thought might be useful for vacuuming out the tank (when I finally get any water in it!!!)
e802c99f4ec696d6ace00af12706538d.jpg


bccc6c34adb0352386d8454abbee34e4.jpg
 

itisjp

Active Member
View Badges
Joined
Oct 29, 2017
Messages
301
Reaction score
223
Location
NC
Rating - 0%
0   0   0
Silicon is a pain is the butt, I did the same thing, broke down a 125 gallon tank and made it my maintenance tank... it’s not pretty but it holds water. I took 1/4 inch glass and reinforced anywhere I thought the glass had a little nick in it after stripping it down.
 
OP
OP
dowsetts101

dowsetts101

Active Member
View Badges
Joined
Apr 21, 2017
Messages
206
Reaction score
258
Location
Melbourne, Australia
Rating - 0%
0   0   0
A bit more excitement today...took my doors off to the painters for spray painting with two-Pack epoxy paint. Hopefully a bit more professional then I would do at home with a brush!!!

Unloading them at the painters
0f291781b13bebdc488ce0bf0380049d.jpg


On the trolley heading into the factory
06d1ae39ef6bb21e321a387c29411b83.jpg


And not sure if they will be using this on my doors...but robotic painting anyone???

 
OP
OP
dowsetts101

dowsetts101

Active Member
View Badges
Joined
Apr 21, 2017
Messages
206
Reaction score
258
Location
Melbourne, Australia
Rating - 0%
0   0   0
Looks great ! I would say use the canister filter as a little carbon reactor or something like that

Yeah, that’s what I was sort of thinking about. Maybe as a part time vacuum cleaner, maybe a reactor...something like that. I wasn’t planning to run it first off.

I was also thinking about using that spot in the stand for breeding brine shrimp or similar so I can provide some live food.
 
OP
OP
dowsetts101

dowsetts101

Active Member
View Badges
Joined
Apr 21, 2017
Messages
206
Reaction score
258
Location
Melbourne, Australia
Rating - 0%
0   0   0
Silicon is a pain is the butt, I did the same thing, broke down a 125 gallon tank and made it my maintenance tank... it’s not pretty but it holds water. I took 1/4 inch glass and reinforced anywhere I thought the glass had a little nick in it after stripping it down.

It was the first time I’d done any serious siliconing, probably should have practiced a bit more first. I’m happier with my second effort...clamps, squares and soapy water certainly helped get a much better result.
 
OP
OP
dowsetts101

dowsetts101

Active Member
View Badges
Joined
Apr 21, 2017
Messages
206
Reaction score
258
Location
Melbourne, Australia
Rating - 0%
0   0   0
Great progress over the Easter Long Weekend

Happy Easter everyone...hope you’ve had a great relaxing time over the weekend.

With the four days off, allowed me to make some great progress. This weekend I have
- completed the stand for the saltwater mixing station, installed the drums and finalised the pipe work and prepared the transfer pump
- Fitted all the internal sump pipe work including overflow to waste and installed the sump
- Fitted the standpipes and overflow pipe work
- installed the return pump, connected all the pipe work and ran tests.

I had a few issues with the bulkheads from the tank for the standpipes...I’ve previously fitted and tested them when the tank was separate to the stand and I had better access to the bulkhead nuts...in the permanent position they were an absolute pain to tighten...eventually got them sorted though.

This evening I’ve put everything together and run individual and combined wet tests with freshwater only (I’ll discard after I’m happy with tests)

So far...

I’m really happy with
- getting to this point of having water in the tank
- fit and layout of the sump, cabinet, tank etc

I’m not happy with
- level of my weir...I think that I’ve left it too high...the water level is only 40mm (1 1/2”) below the top of the frame...probably not enough freeboard for when I get circulation pumps, wave makers etc
- flow from the return pump. I’m being constrained by the durso overflow that I’ve gone for...even in 40mm PVC (1 1/2”) it’s not giving me enough flow...I’ve had to reduce my return pump down heaps...so getting very little flow/turnover

But generally, I’m stoked with getting to this point. A couple of things to look at improving, but getting slow close to starting my cycle I can smell it!!!

Water mixing station
d585671149f2ba21f70b6e178f189c4a.jpg


Overall of the tank on the stand and full of test water
bc0f6d00209ababcdbe39f38e2141d8b.jpg


Cabinet under the tank, showing sump and equipment
22a474320a1091ec55bb8c1189a390b6.jpg


Top view showing weir, comb and standpipes/overflow
880280cac833de53880af84ecf8ca408.jpg


Close up of weir top (comb removed) standpipes and overflow
de931ec945c700814ae37d39d84cc863.jpg
 
OP
OP
dowsetts101

dowsetts101

Active Member
View Badges
Joined
Apr 21, 2017
Messages
206
Reaction score
258
Location
Melbourne, Australia
Rating - 0%
0   0   0
Ages since my last update, but finally...after over 12 months, my tank is wet...and even with saltwater this time.

Over the past month or so I have installed all the final plumbing on my overflow and sump, made some tweaks to the weir level and then finally added my RealReef rockwork and fine/sugar fine coral sand and then presto...it’s actually starting to look like something!!!

I started my cycle with Ammonia Chloride on 3rd May (covered elsewhere in post to Brew) and now just waiting and watching.

I’ve also bought and setup my QT (60 litre 30x38x60cm) and plan to get some CUC this weekend.

I’ve got to say, that even though I have literally no life in the DT (the bacteria don’t count!!!) I’m actually enjoying looking at the tank. I’ve been playing around with modes and speed on my MP40 (trying to balance turnover with sandstorms!!!) and have got some micro bubbles so can only imagine how much I’m going to enjoy it when I actually get livestock!!!

I’m almost regretting not having live rock in there so I can watch the critters...but with my ammonia as high as it has been I probably would have killed everything anyway!!!

Couple of pics of the setup as it currently is

968568a7edb35c0c0d5bac8d66b812a3.jpg


5e89fa68467a78a2aac5747cc77bf049.jpg


b41e56e8808d4c8999bc394d6db5fe8e.jpg


837665d481c38d5c0e9fe75b8c74cd1b.jpg


ba9334779b69e32c362e651587c22f59.jpg
 
OP
OP
dowsetts101

dowsetts101

Active Member
View Badges
Joined
Apr 21, 2017
Messages
206
Reaction score
258
Location
Melbourne, Australia
Rating - 0%
0   0   0
Looks great and I love the aquascape!

Thanks for that...did a few test runs on the workbench and it didn’t quite translate over to the tank after I dismantled and rebuilt it, but pretty close.

Still not 100% sure on the stability, I added some epoxy but it hasn’t done very much. It ok for the moment, just hope the fish don’t knock it over!!!
 

Caring for your picky eaters: What do you feed your finicky fish?

  • Live foods

    Votes: 14 26.4%
  • Frozen meaty foods

    Votes: 44 83.0%
  • Soft pellets

    Votes: 7 13.2%
  • Masstick (or comparable)

    Votes: 4 7.5%
  • Other

    Votes: 2 3.8%
Back
Top