So, if I decided to follow through and build a shallow tank, of lets say 48l x 20-24w x 20h, would it need bracing? And would 1/4" be adequate enough or 3/8"? I'm not exactly savvy with tools, so is having a router absolutely necessary? (if so, I'm going to have to learn. Purchasing a tank someone else has built is definitely not the most cost effective option.) I just don't want to cause a flood in my home from something so easy to mess up.

Navigation
Install the app
How to install the app on iOS
Follow along with the video below to see how to install our site as a web app on your home screen.
Note: This feature may not be available in some browsers.
More options
You are using an out of date browser. It may not display this or other websites correctly.
You should upgrade or use an alternative browser.
You should upgrade or use an alternative browser.
Acrylic Fabrication Q & A
- Thread starter Turbo's Aquatics
- Start date
-
- Tags
- acrylic diy fabrication
- Tagged users None


cromag27
octoaquatics.com - ig = @octoaquatics. view my sig
View Badges
Gold Sponsor
Article Contributor
So just use the router to clean up the edges and apply weld-on?
the best option would be to cut the pieces with a cnc router. if that’s not possible then what floyd said. before i had cnc routers i would cut pieces with my table saw using an expensive plastic blade, then prep the edges on a big router table.
This thread needs to be sticky-ed.
Anyway I want to cut slots in acrylic to make a frag rack like Bashsea's what kind of router bit would I need. Would I need to drill a hole first?
?
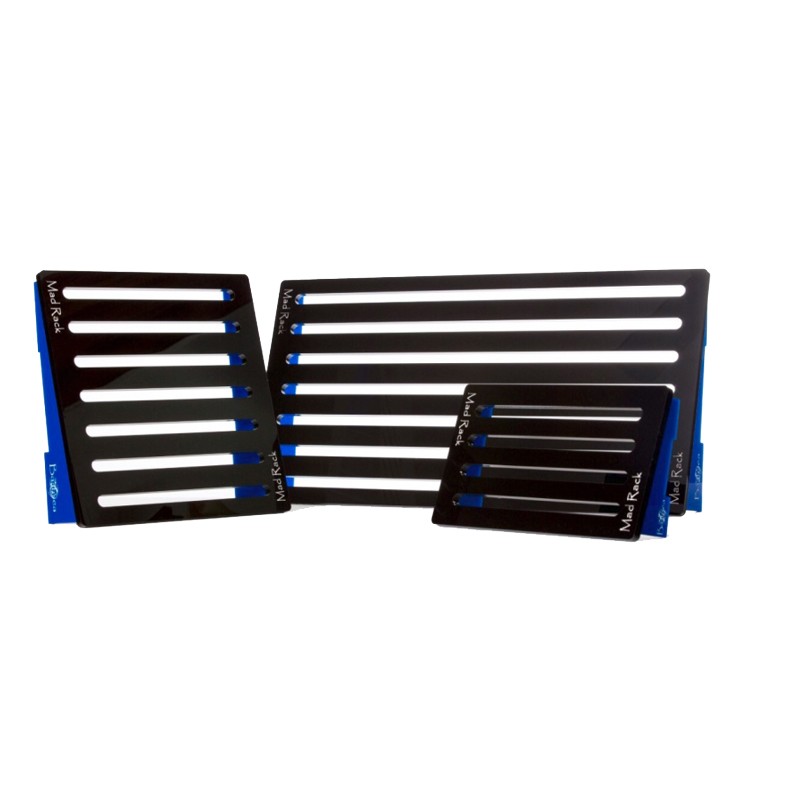
Anyway I want to cut slots in acrylic to make a frag rack like Bashsea's what kind of router bit would I need. Would I need to drill a hole first?
?

OP
OP
For something like this, I personally would make a slot template, then use a 1/4" flush cutter, and you would indeed pre-drill a hole (with an acrylic bit) before laying down the template.
That said, you don't "have" to use a template, you can take 2 pieces of acrylic and double-stick tape them parallel on the outline of the slot, then use those as a guide, drill a hole at each end so you have an open (no bit contact with material) stop and start, then make 2 passes.
Where it gets hairy is when you start the router and then place the work piece with the pre-drilled hole over the running bit. Sound dangerous but IMO it's more dangerous to have one hand on the piece and the other turning on the router bit than it is to carefully guide the piece over the running bit with 2 hands in full contact with the work piece.
If you've ever had a piece get away from you and spray you with hot acrylic shavings, you know that this is something you will want to avoid.
ok I was hoping to do this on my table and use the fence. Dill 1/2 hole and use a 1/2" slot type cutter. I do not use my router much other than for wood and cleaning the edges on acrylic so far.
cromag27
octoaquatics.com - ig = @octoaquatics. view my sig
View Badges
Gold Sponsor
Article Contributor
before i had cnc machines i would use a 1/2” bit on a router table with movable fence. i didn’t pre drill holes.

before i had cnc machines i would use a 1/2” bit on a router table with movable fence. i didn’t pre drill holes.
What kind of bit? That is how I was thinking of doing it. Making slots seems much better than drilling 1000 holes for Plugs.
I also do not need it perfect they are for my own use. I may need allot and buying them retail just gets way expensive plus I can custom fit them.
OK Gurus
What would you say I need to do about this, it is the bottom seem on my 185gl. 60x24x30. i think I;m looking at trouble. Thanks for any help


What would you say I need to do about this, it is the bottom seem on my 185gl. 60x24x30. i think I;m looking at trouble. Thanks for any help
OP
OP
the bubbles look like they are in the seam, were they there from day one? The "muted" bubbles look like maybe salt creep underneath that is refracted, so not actually bubbles.
Also note that you're not supposed to put acrylic tanks on foam. I wouldn't tear it down just to remove it but just note for future reference. The good side is that you used the pink foam instead of white styrofoam, the pink has less propensity to compress and cause deformation of the bottom panel.
Also note that you're not supposed to put acrylic tanks on foam. I wouldn't tear it down just to remove it but just note for future reference. The good side is that you used the pink foam instead of white styrofoam, the pink has less propensity to compress and cause deformation of the bottom panel.

the bubbles look like they are in the seam, were they there from day one? The "muted" bubbles look like maybe salt creep underneath that is refracted, so not actually bubbles.
Also note that you're not supposed to put acrylic tanks on foam. I wouldn't tear it down just to remove it but just note for future reference. The good side is that you used the pink foam instead of white styrofoam, the pink has less propensity to compress and cause deformation of the bottom panel.
No, everything looked good when I received it, the crack like issues showed up about a month later. I actually put the foam underneath because I read on the forums it was a good idea to use the pink foam to take out any variations in the wood. I have noticed on the show Tanked that they always have a piece of wood underneath but I thought that was to spread the load over the entire metal frame they use.
The stuff I circled in red looks like it is on the inside seam. Is this correct? Maybe lack of full solvent on that edge.
The stuff circled in blue looks like its below the tank as Floyd suggests. Is this correct?
One of the blue circles looks like it goes the full width of the seam. Is this correct?
If its not under the bottom then it should be leaking if it is in between the bottom and side panels.
As Floyd suggest it might be salt creep or moisture condensation between the foam and the bottom.
OP
OP
Yeah, there's a lot of misinformation out there. Foam is only supposed to go under rimless glass tanks, and then that's the white foam (the kind that is tiny beads pressed into a board) because that compresses and takes out any bumps in the wood which can cause glass to fracture.
Acrylic is much more forgiving so you don't need foam. The reason for the plywood is not to spread the load, but to give the acrylic full coverage so that it won't sag anywhere, even a little. Both rimless glass and acrylic tanks need full coverage (plywood) and full framing support underneath, specific to acrylic, this is because without it, it will bow. One tank I maintained and eventually replaced was acrylic with laminated MDF under it and 2x 2" steel tubes running along the front and back of the tank, and the tank (a 125) bowed so bad that the front and back seam started cracking open from the inside
If you set an acrylic tank on white foam, it will bow and compress in the middle over time. But if the stand is sturdy, this will be limited.
If you set the same tank on the same stand with pink foam, the compression will be much less IMO, and the thinner the foam, the less compression
If you were to set an acrylic tank on anything, 1/4" neoprene is actually the best (but $$$)
All you need to do is ensure that your top piece of plywood is as flat and level as possible and then set it directly on that. @acrylics recommends 2x 3/4" layers, glued and screwed together on top of an adequate frame. I recommend Aruco brand plywood because it cuts easy and doesn't splinter. It's expensive but super awesome (23/32" if you want to get technical)

OP
OP
to me that looks like those have always been there, but you tell me - are you just starting to notice them, or do you distinctly recall that seam being bubble-free?The stuff I circled in red looks like it is on the inside seam. Is this correct? Maybe lack of full solvent on that edge.
Yup that's what I'm referring toThe stuff circled in blue looks like its below the tank as Floyd suggests. Is this correct?
You can find out by sliding something thin like a piece of paper in there somewhere and seeing what it looks like before & after. You could use a flat toothpick too, which would deform the foam in that area but that's no a big deal at all. If you have a piece of black paper, and you can slide it in, or deform the foam in a small area so that you can slide it in, then you can eliminate the refraction effect and if that is in the seam, then it'll show up very wellOne of the blue circles looks like it goes the full width of the seam. Is this correct?
If its not under the bottom then it should be leaking if it is in between the bottom and side panels.
As Floyd suggest it might be salt creep or moisture condensation between the foam and the bottom.
The stuff I circled in red looks like it is on the inside seam. Is this correct? Maybe lack of full solvent on that edge.
The stuff circled in blue looks like its below the tank as Floyd suggests. Is this correct?
One of the blue circles looks like it goes the full width of the seam. Is this correct?
If its not under the bottom then it should be leaking if it is in between the bottom and side panels.
As Floyd suggest it might be salt creep or moisture condensation between the foam and the bottom.[/QUOTE
to me that looks like those have always been there, but you tell me - are you just starting to notice them, or do you distinctly recall that seam being bubble-free?
Yup that's what I'm referring to
You can find out by sliding something thin like a piece of paper in there somewhere and seeing what it looks like before & after. You could use a flat toothpick too, which would deform the foam in that area but that's no a big deal at all. If you have a piece of black paper, and you can slide it in, or deform the foam in a small area so that you can slide it in, then you can eliminate the refraction effect and if that is in the seam, then it'll show up very well
The red is on the outside of the seam, the stuff in Blue is actually where water from me doing things in the tank ran down the side & seeped between the tank & the foam. i did not see anything when I first setup the tank, the crack like issues started showing up about a month later but have not gotten worse but there are a few more of them. Do you think I need to worry about the seam splitting anytime soon or at all?
Thanks for all the help with this issue.
to me that looks like those have always been there, but you tell me - are you just starting to notice them, or do you distinctly recall that seam being bubble-free?
Yup that's what I'm referring to
You can find out by sliding something thin like a piece of paper in there somewhere and seeing what it looks like before & after. You could use a flat toothpick too, which would deform the foam in that area but that's no a big deal at all. If you have a piece of black paper, and you can slide it in, or deform the foam in a small area so that you can slide it in, then you can eliminate the refraction effect and if that is in the seam, then it'll show up very well
Maybe these pics will help
The red are at the frt of the Seam, the blue is water that seeped between the tank & foam from working in the aquarium & not be able to get the towel quick enough to wipe my arm off LOL. None of the issues where there at the time off setup. the cracks(RED) started showing up about a month later but have not gotten any bigger in the yr it has been running, just have a few more.

I added more pics in another response & answered your questions, thanksThe stuff I circled in red looks like it is on the inside seam. Is this correct? Maybe lack of full solvent on that edge.
The stuff circled in blue looks like its below the tank as Floyd suggests. Is this correct?
One of the blue circles looks like it goes the full width of the seam. Is this correct?
If its not under the bottom then it should be leaking if it is in between the bottom and side panels.
As Floyd suggest it might be salt creep or moisture condensation between the foam and the bottom.
OP
OP
Ha I was falling for the optical illusion as well - I can see now they are on the outside
You'll want to keep an eye on these but these are not technically "cracks" they are seam separations. Do you have other physical cracks elsewhere?
I've seen some seam separations that look like they are all the way through, and inches long. So this example is not horrible, but it points to some potential fabrication issues
Similar threads

- Replies
- 17
- Views
- 402


