Acrylic Fabrication Q & A

Scrubber_steve

2500 Club Member
View Badges
Joined
Feb 19, 2018
Messages
3,224
Reaction score
4,828
Location
down under
Rating - 0%
0   0   0
First is it on the outside? if so I think you are on the right track
You need to "wet sand" the large scratches so you cannot feel them with your finger nail. Maybe 600 grit or 800 grit. Try to go in 1 direction only. It makes it a bit less messy if you tape off the area, so you are not sanding any more area than needed. Then using finer and finer wet sand paper, you sand in the opposite direction each time you change grits. Once you get to 3000 grit, its time to polish. You can do this with a buffing pad like they use to polish a car or a drill mounted sponge made for this. Novus or Meguiars makes polishing liquids. If you are at 3000 grit you can use the Novus #1 to polish/clean the area. Try not to put too much pressure on the pad or cloth or you will create more swirl marks. Use a lot of water with the polish. This will make for less haze., but a bigger mess. I find that if I still have some haze I use a new clean microfiber cloth to finish off the area. Make sure between sanding and polishing you clean the area as not to create more scratches. It also helps to change polishing pads often. I find if I do the final polishing by hand it comes out better than with power tools. This is a labor intensive process. Easier to do with an empty tank. I have spent hours restoring tanks so it can be done. Remember that people will be looking into your tank at the wonders. Only you are going to see those very fine haze scratches.
I find black acrylic hard to polish up well. Any haze at all is also a little less black (greyish color). I wet sand to 3000 & then use novus. But it seems impossible to get a finish near original.
Any tips ?
 

lapin

10K Club member
View Badges
Joined
Dec 16, 2017
Messages
10,762
Reaction score
17,913
Location
Austin
Rating - 0%
0   0   0
I find black acrylic hard to polish up well. Any haze at all is also a little less black (greyish color). I wet sand to 3000 & then use novus. But it seems impossible to get a finish near original.
Any tips ?
I dont think you can get a perfect polish with black. A buffing wheel or cloth is cotton and its going to leave some very small scratches. On clear acrylic you cant see these. On black you can. Professionally they use a chemical vapor to melt a thin layer of the acrylic to achieve a clear finish. Flame (heat) can be used but it can quickly turn into a mess . It is mostly used for edges that are not bonded.
 

Matthias7

Active Member
View Badges
Joined
Apr 26, 2014
Messages
446
Reaction score
146
Location
Las cruces, nm
Rating - 0%
0   0   0
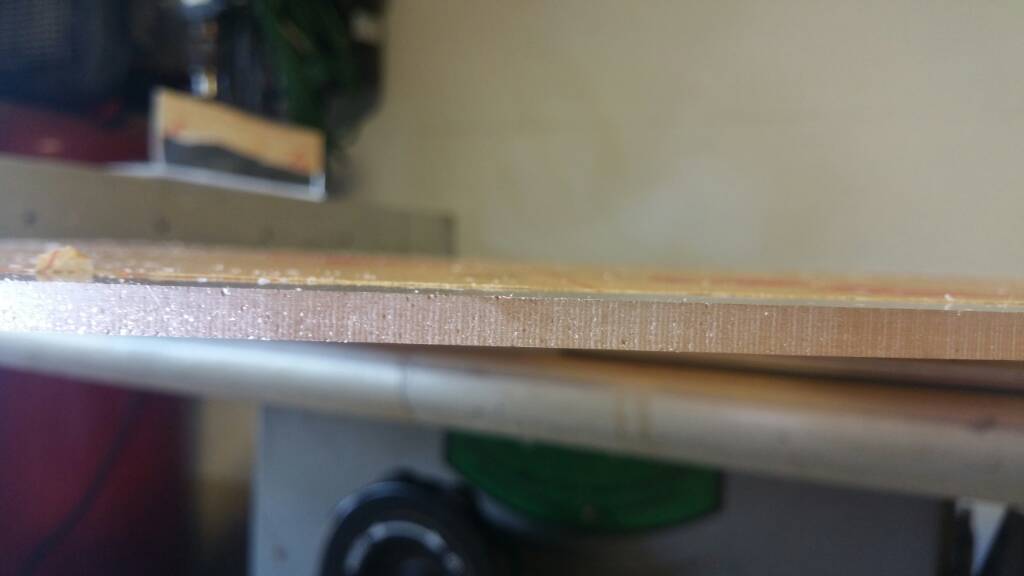
Hello everybody, I have been reading and haven't been able read every bit of this thread. I finally have the guts to try and build a sump. This may have been covered at some point but this thread is super long. I have cut and routed and now I'm seeing what looks like voids in the acrylic. I'm not sure if I should worry about it or not. TIA
4dd2f2cfaafb8bfc14d0d64923eb09fb.jpg

Thin wall I had similar issues with a prior build. I found that routing that acrylic slower and using a spiral bit fixed the issue for me
 

lapin

10K Club member
View Badges
Joined
Dec 16, 2017
Messages
10,762
Reaction score
17,913
Location
Austin
Rating - 0%
0   0   0
Where is a good place to buy acrylic? Do any of the big box stores carry anything worth using?
Regal Plastic Springfield
1956 East Phelps
Springfield, MO 65802
417-831-3110
They can cut and prob route it on a cnc machine if needed. You want cast acrylic and if making a sump or tank "Plexiglas G" if its avail.
 
OP
OP
Turbo's Aquatics

Turbo's Aquatics

Super Duper Member
View Badges
Joined
Jun 7, 2011
Messages
2,804
Reaction score
4,029
Location
West Des Moines, IA
Rating - 0%
0   0   0
The router bit I'm using is a Bosch 3/4-1/2 shank in craftsman variable speed router. I'm not to concerned with the chatter. What concerns me is the pitting/pin holes. I was planning on using WO4.
A lot to catch up on here, been busy! Regarding this pitting issue, you're using the same bit I use for edge prepping - Bosch 3/4" w/1/2" shank, it's my standby edge prep bit. As long as you don't use it for anything else, you're good. But your last 2 passes should be thin enough to produce almost dust instead of shavings, I'm talking 1/100". Large passes for rough prepping are OK, but they will leave pits like you are showing. IMO a spiral upcut is not the correct tool for edge prep, but what works for one might not work well for another, and vice versa. It comes down to technique. Whatever your technique, your "finishing pass" or passes should be super thin passes.

Regarding the polishing, I know I posted my process in several places in the past and meant to write it up and add it to the 1st post of this thread, but here are a few posts of mine in this thread. If you do a search for posts in this thread only, posted by me (enter my username) and use keywords "polish" or "meguair" you will get a bunch of hits, including these posts:


Wet/dry sanding in stages followed by polishing compounds...I'm sure it's been outlined in the thread somewhere but I only found random mentions of it (try searching the thread for a few keywords, you'll find more posts)

But basically for router-rounded edges or router-finished edges I start with something low grit like 600 or even 400, then you progress through each stage until you remove the previous pattern, rinsing a lot (water in spray bottle, cleaning off sandpaper and surface frequently). I go 800, 1000, 1200, 1500, 2000, etc and then I switch to an 3000 grit sponge sandpaper that I get from my local O'Reilly's and make a pass with that.

For the polish, if it's a big job, I go with a rotary auto polisher on low speed (most polishers go up to speed 6, I go to 2 maybe 3 max) with this pad
http://www.meguiars.com/en/professi...otary-foam-cutting-pad-7/#WHsrwfOYCbO4k2Uz.97
Pretty sure it's that one, it's purple that's all I remember
and this polish (Meguiar's Ultra Cut 105)
http://www.meguiars.com/en/professi...ultra-cut-compound-32-oz/#fGX4JxgXQ3KCIbRf.97
Then use a different pad (same type, just one that I did not use with the 105) and the swirl free polish (Meguiar's Mirror Glaze) on a bit higher speed on the polisher (maybe 2-3 to start then slowly work up to 4 and a very short time on 5 while keeping the head moving)
http://www.meguiars.com/en/professional/products/m8232-swirl-free-polish-32oz/#Vz2X2R3EkvSXKL66.97

Then rinse off with bleach to dissolve all the compound. Not vinegar - you need bleach.

BTW if you want your car to frickin shine, that Mirror Glaze is the bomb

^ this too, I forgot that. I use a 1g bucket with about 2" of water in it...

Also, for sanding just about anything flat or round, you need one of these badly...the Preppin Weapon is indispensible

http://secure.mm5server.com/merchant.mvc?Screen=PROD&Store_Code=TST&Product_Code=P10
https://www.amazon.com/Time-Shaver-Tools-Preppin-Weapon-Sanding/dp/B001399URG

So for a short summary: preppin weapon with wet/dry paper and progress through the stages to fine grit until you get to about 2000-2500. Then switch to 3000 grit sponge paper from auto part store. Then to the polisher - which is one of those big ones they use for polishing cars (google "variable speed auto polisher"). I got mine at either Northern Tool or Harbor Freight, I'm not poppin for a DeWalt considering how infrequently I use it. One pad for the 105, another pad (same type) for the mirror glaze. It takes some practice but I once polished a severely scratched up zero-edge tank to perfect in a couple hours. It's messy. But beats doing it all by hand.
 

Scrubber_steve

2500 Club Member
View Badges
Joined
Feb 19, 2018
Messages
3,224
Reaction score
4,828
Location
down under
Rating - 0%
0   0   0
A lot to catch up on here, been busy! Regarding this pitting issue, you're using the same bit I use for edge prepping - Bosch 3/4" w/1/2" shank, it's my standby edge prep bit. As long as you don't use it for anything else, you're good. But your last 2 passes should be thin enough to produce almost dust instead of shavings, I'm talking 1/100". Large passes for rough prepping are OK, but they will leave pits like you are showing. IMO a spiral upcut is not the correct tool for edge prep, but what works for one might not work well for another, and vice versa. It comes down to technique. Whatever your technique, your "finishing pass" or passes should be super thin passes.

Regarding the polishing, I know I posted my process in several places in the past and meant to write it up and add it to the 1st post of this thread, but here are a few posts of mine in this thread. If you do a search for posts in this thread only, posted by me (enter my username) and use keywords "polish" or "meguair" you will get a bunch of hits, including these posts:


So for a short summary: preppin weapon with wet/dry paper and progress through the stages to fine grit until you get to about 2000-2500. Then switch to 3000 grit sponge paper from auto part store. Then to the polisher - which is one of those big ones they use for polishing cars (google "variable speed auto polisher"). I got mine at either Northern Tool or Harbor Freight, I'm not poppin for a DeWalt considering how infrequently I use it. One pad for the 105, another pad (same type) for the mirror glaze. It takes some practice but I once polished a severely scratched up zero-edge tank to perfect in a couple hours. It's messy. But beats doing it all by hand.
What is the advantage of the 3000 sponge sanding to normal wet/dry paper?
 
OP
OP
Turbo's Aquatics

Turbo's Aquatics

Super Duper Member
View Badges
Joined
Jun 7, 2011
Messages
2,804
Reaction score
4,029
Location
West Des Moines, IA
Rating - 0%
0   0   0
Easier to find, cheap, can use just the palm of your hand, fold it up over itself, and it's more of a in-between stage or transition stage when you go from 2000 to 3000 to buffing. IMO you don't really need to go past 3000 on the sanding stage, so the 5000, 8000, 10000 grit stuff, including the 18000 that comes in the micro-mesh product, that's a waste of time. You can go the Novus 1-2-3 route (PS they also sell that at The Container Store) but you're doing hand-buffing with that as well. For the amount of time you really do have to spend using the auto-polisher, I would hate to find out how long it would take to resurface an entire 180g tank like that...

One of the first tanks I reconditioned was the worst. Someone got a rock under a magfloat and Zorroed the entire front inside panel. I should have removed the tank and taken it home, but I emptied it and did it in place. A few hours/day for 2+ weeks, last stage was with a cotton wheel on a drill and that took FOR EH VERR but it still looks really good, years later.
 

Victoria M

5000 Club Member
View Badges
Joined
Jan 6, 2017
Messages
5,615
Reaction score
22,735
Location
Sylvania, OH
Rating - 0%
0   0   0
Easier to find, cheap, can use just the palm of your hand, fold it up over itself, and it's more of a in-between stage or transition stage when you go from 2000 to 3000 to buffing. IMO you don't really need to go past 3000 on the sanding stage, so the 5000, 8000, 10000 grit stuff, including the 18000 that comes in the micro-mesh product, that's a waste of time. You can go the Novus 1-2-3 route (PS they also sell that at The Container Store) but you're doing hand-buffing with that as well. For the amount of time you really do have to spend using the auto-polisher, I would hate to find out how long it would take to resurface an entire 180g tank like that...

One of the first tanks I reconditioned was the worst. Someone got a rock under a magfloat and Zorroed the entire front inside panel. I should have removed the tank and taken it home, but I emptied it and did it in place. A few hours/day for 2+ weeks, last stage was with a cotton wheel on a drill and that took FOR EH VERR but it still looks really good, years later.

Thank you for the help. This 180 is built in. It does look so much better than it used to. But I really would like to get the viewing panel looking great.
 

lapin

10K Club member
View Badges
Joined
Dec 16, 2017
Messages
10,762
Reaction score
17,913
Location
Austin
Rating - 0%
0   0   0
Thank you for the help. This 180 is built in. It does look so much better than it used to. But I really would like to get the viewing panel looking great.
Try to finish the inside first. You can always work on the outside when you have water in it. Its work but its very worth it. Remember too that some very fine scratches will not show when under water.
 
OP
OP
Turbo's Aquatics

Turbo's Aquatics

Super Duper Member
View Badges
Joined
Jun 7, 2011
Messages
2,804
Reaction score
4,029
Location
West Des Moines, IA
Rating - 0%
0   0   0
No, never use soap at all. Maybe I don't understand the basis for the question...is there a particular application/process where you are supposed to use soap when wet sanding? Not necessarily related to acrylic. Just curious
 

Matthew Frost

Active Member
View Badges
Joined
Jul 13, 2017
Messages
396
Reaction score
471
Rating - 0%
0   0   0
No, never use soap at all. Maybe I don't understand the basis for the question...is there a particular application/process where you are supposed to use soap when wet sanding? Not necessarily related to acrylic. Just curious
I put a drop or two of Dawn in about a half gallon of spray bottle water. It helps the water stick to the acrylic when you're sanding. I don't understand why it works, it just works. I've done it both ways and the soap water just sands better, I couldn't explain to you why it just does.
 
OP
OP
Turbo's Aquatics

Turbo's Aquatics

Super Duper Member
View Badges
Joined
Jun 7, 2011
Messages
2,804
Reaction score
4,029
Location
West Des Moines, IA
Rating - 0%
0   0   0
I guess I never felt the need to get the water to stick better. The way I look at it, you want the water to sheet off because that takes the particles with it as it does. You don't need much water on the sandpaper, and you want to rinse the surface and the sandpaper quite frequently to clear off the particles. So in a way it forces you to keep adding more water if it doesn't stick
I put a drop or two of Dawn in about a half gallon of spray bottle water.
That's a pretty insignificant amount of soap, so I don't see that being a big problem. Besides, after you polish, you have to clean with bleach anyways so it's not like the soap is going to do any damage after you're all done...so I see no harm in that. I might try that myself next time. Check the box for "learned something today" off. And hey, it's after midnight so I get tomorrow off of learning. Bonus
 

Scrubber_steve

2500 Club Member
View Badges
Joined
Feb 19, 2018
Messages
3,224
Reaction score
4,828
Location
down under
Rating - 0%
0   0   0
No, never use soap at all. Maybe I don't understand the basis for the question...is there a particular application/process where you are supposed to use soap when wet sanding? Not necessarily related to acrylic. Just curious
Typically in the automotive industry
 

Being sticky and staying connected: Have you used any reef-safe glue?

  • I have used reef safe glue.

    Votes: 121 88.3%
  • I haven’t used reef safe glue, but plan to in the future.

    Votes: 8 5.8%
  • I have no interest in using reef safe glue.

    Votes: 5 3.6%
  • Other.

    Votes: 3 2.2%
Back
Top