Acrylic Fabrication Q & A

Justin_Reef

Active Member
View Badges
Joined
Apr 21, 2020
Messages
118
Reaction score
92
Rating - 0%
0   0   0
The best way I have found to level a large tank is to put a few inches of water in the tank and then measure each corner from the top of the tank to the waterline and adjust the stand to make all the measurements the same. Hopefully that makes sense lol
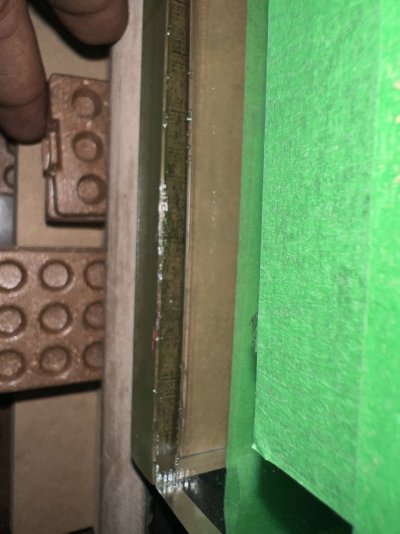
I did this to shim the tank as well as use a level. I measured every inch until it was filled about 6" . Then checked again with a level at the end and it was all good.

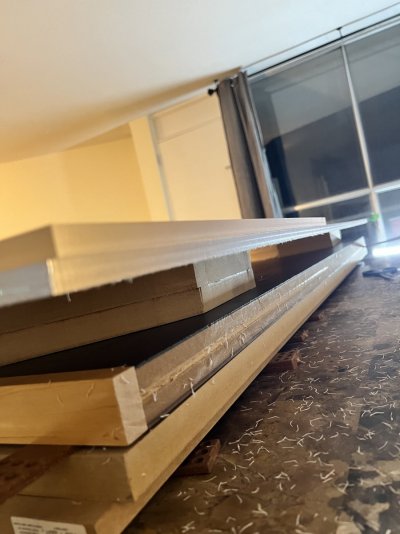
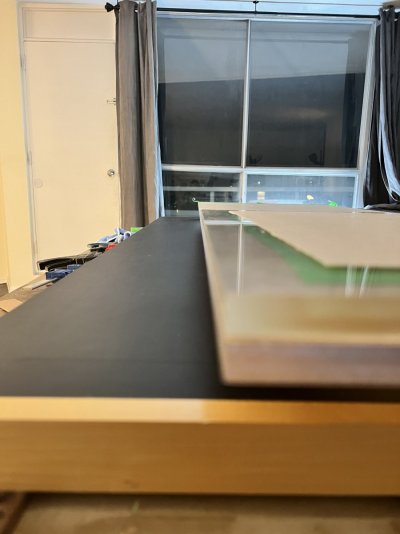
I don't have any concerns about the tank being level or not.
 

suresh2989

Community Member
View Badges
Joined
Jan 11, 2022
Messages
48
Reaction score
27
Location
Toronto
Rating - 0%
0   0   0
Hi @Turbo's Aquatics,

Thanks for the wonderful advice all over this thread and such a goldmine of a thread for DIYers,

I recently decided to take a plunge and ordered 1/2" thick acrylic to build my 60" X 24" X 20" tank, two weeks back i received my Shipment and and with the spare acrylic out of the original cut(4'X8') and buying two panels elsewhere i was able to come with 6 panels for 22' X 22' X 17' square tank.

all the panels are CNC cut.

I finished bonding as per your bonding order from the start of the thread, but things I did( some of them differently )

1. Used horizontal brace and ratcheting bar clamps for front/back to end, the seams were good although there was some small bubbles where I pulled the pin
2. Used ratcheting bar clamps( again when welding the three sided piece to back/front ), this seam was also good with little bubbles, during this process when i pulled the pin even with lots of overage I noticed the intverted U on the final side had slid almost to the edge of my back/front panel, so the extra bit of overage saved me.
3. Now the steps in #2 scared me so i doubled down on the clamps when i welded to EURO brace top panel, same kind of result( very few bubbles but not peerless seem either )
4. Now, when I welded the 5 sides box on to my base, and clamped it all around I see two sides came out good that is very few bubbles on the edge of the panel, but exactly two other sides have lots of minute bubbles, none of the bubbles are end to end but still it is kind of unsightly.

I got adhesive backed foam and i fashioned a brace out of MDF but i did not do it exactly as mentioned because i remember reading somewhere that vertical clamps will squeeze out bubbles after you pull the pins so i got more mdfs to elevate my boding platform so that i use the clamps.

My Question to you is, If me using Clamps/not using foam caused the the little bubbles within the seam, Should I do it
like how you instructed for my bigger display tank that is without vertical clamps maybe with a 12 pack as weight( I am sticking to 12 pack nothing you say will change my mind ), considering what happened in Step # 2 still scares me?

Without using vertical clamps, how would one go about preventing sliding?

Also after doing the final weld, how many days should I wait before I rout off the excess (up to 1/2" at some points due to sliding )?


Sorry if these points were addressed in the previous comments in the thread I did my best to read all 82pages so far( 2022), but couldn't find exact answers to my questions.

Last 6 pics are of the vertical seems which look far better than the bottom seem.

I've had lots of help from another member of this community, I would definitely create a build thread once I finish my bigger tank.

Thanks,
Suresh Kumar
5B91DADA-F590-49AF-A2FE-4C7EDDFDD8EA.jpeg
63E797E5-FBC3-46EB-A18B-38029E3D7C17.jpeg 348B7603-C642-4233-AF86-EE99A69E617C.jpeg 1256AA59-2FD3-45F7-80C5-C5AE33501F9D.jpeg DF444D0E-2206-4CF6-9F90-A630CA7A7DB7.jpeg IMG_4150.jpg IMG_4151.jpg IMG_4152.jpg IMG_4153.jpg IMG_4154.jpg IMG_4155.jpg
 
Last edited:

Cabinetman

Well-Known Member
View Badges
Joined
May 3, 2016
Messages
720
Reaction score
712
Location
Nova Scotia Canada
Rating - 0%
0   0   0
What solvent did you use and how long did you let it soak before pulling the pins? Also those ratchet bar clamps are a poor choice in my opinion. Regular bar clamps are what I use. The ratchet kind might be squeezing then releasing a bit causing the bubbles to form
 

suresh2989

Community Member
View Badges
Joined
Jan 11, 2022
Messages
48
Reaction score
27
Location
Toronto
Rating - 0%
0   0   0
What solvent did you use and how long did you let it soak before pulling the pins? Also those ratchet bar clamps are a poor choice in my opinion. Regular bar clamps are what I use. The ratchet kind might be squeezing then releasing a bit causing the bubbles to form
I used Weldon 4 for solvent, Accupunture needles as pins and I waited 60 seconds roughly before pulling pins.

I am already in this with 8 of these ratcheting clamps, is there anyway I can do this without new kind of clamps or without clamps at all?
 

Cabinetman

Well-Known Member
View Badges
Joined
May 3, 2016
Messages
720
Reaction score
712
Location
Nova Scotia Canada
Rating - 0%
0   0   0
3 mins isn’t pulling then very hard at that point ?
I’ve literally made dozens of tanks and every one of them turns out nearly perfect with almost 0 air pockets or bubbles and I always when I’m done filling the seam with solvent set my stopwatch and allowed two minutes 30 seconds too 3 minutes before I pull the pins and they always come out easy and when I squeeze them with the clamps there’s always a little bit of melted plastic oozes out of the seam. I’m actually the guy who taught the king of DIY how to do the pin method. He lives about 20 minutes from where I live
 

suresh2989

Community Member
View Badges
Joined
Jan 11, 2022
Messages
48
Reaction score
27
Location
Toronto
Rating - 0%
0   0   0
I’ve literally made dozens of tanks and every one of them turns out nearly perfect with almost 0 air pockets or bubbles and I always when I’m done filling the seam with solvent set my stopwatch and allowed two minutes 30 seconds too 3 minutes before I pull the pins and they always come out easy and when I squeeze them with the clamps there’s always a little bit of melted plastic oozes out of the seam. I’m actually the guy who taught the king of DIY how to do the pin method. He lives about 20 minutes from where I live
Thanks @Cabinetman, I didn't mean to question your methods, it's just different to almost most other hobbyists websites that I referred to,

Can you help me out with the kind of Clamps that you are using please ?may be a picture I am still confused about that part.

I definitely started this process after watching Joey's videos, amazing to know that you're the one that taught the guy. thanks again for all the advise.
 

Cabinetman

Well-Known Member
View Badges
Joined
May 3, 2016
Messages
720
Reaction score
712
Location
Nova Scotia Canada
Rating - 0%
0   0   0
Thanks @Cabinetman, I didn't mean to question your methods, it's just different to almost most other hobbyists websites that I referred to,

Can you help me out with the kind of Clamps that you are using please ?may be a picture I am still confused about that part.

I definitely started this process after watching Joey's videos, amazing to know that you're the one that taught the guy. thanks again for all the advise.
If you look on YouTube under Wayne’s reef tank you’ll find a few videos where I show A little bit of me building tanks. You’ll see the wooden brackets that I designed in a few of the videos. Here’s a picture of a similar clamp that I use
 

Attachments

  • AA9A5877-6298-49E2-9C29-FFF9FEB288F2.jpeg
    AA9A5877-6298-49E2-9C29-FFF9FEB288F2.jpeg
    61.9 KB · Views: 37

suresh2989

Community Member
View Badges
Joined
Jan 11, 2022
Messages
48
Reaction score
27
Location
Toronto
Rating - 0%
0   0   0
If you look on YouTube under Wayne’s reef tank you’ll find a few videos where I show A little bit of me building tanks. You’ll see the wooden brackets that I designed in a few of the videos. Here’s a picture of a similar clamp that I use
Thanks @Cabinetman, those are some crystal clear seams, I will try to follow as much as I grasped from your videos,

can I ask how many days one should wait before proceeding routing off excess trim of the tank?

Thanks,
Suresh Kumar
 

Cabinetman

Well-Known Member
View Badges
Joined
May 3, 2016
Messages
720
Reaction score
712
Location
Nova Scotia Canada
Rating - 0%
0   0   0
Thanks @Cabinetman, those are some crystal clear seams, I will try to follow as much as I grasped from your videos,

can I ask how many days one should wait before proceeding routing off excess trim of the tank?

Thanks,
Suresh Kumar
I usually leave the clamps on for an hour then remove them and router the edges.
 

suresh2989

Community Member
View Badges
Joined
Jan 11, 2022
Messages
48
Reaction score
27
Location
Toronto
Rating - 0%
0   0   0
I usually leave the clamps on for an hour then remove them and router the edges.
Hi Wayne,

I started my main display tank I followed your advise of 2.5 to 3 mins before pulling the pin the seems are better than before but still not as good as yours I used pipe clamps instead of Ratcheting clamps but after I leave it cute I can see very little air bubbles on the edges but no air bubbles were formed during the initial application or removing of the pins.

also please note I do not have a perfect level surface I used a million shims but I’m still not confident it is 100% level, will that cause these pesky tiny bubbles ?
But thanks for your advise the seem quality has certainly improved.
 

Attachments

  • image.jpg
    image.jpg
    174 KB · Views: 38
  • image.jpg
    image.jpg
    149.3 KB · Views: 44

Lowell Lemon

2500 Club Member
View Badges
Joined
May 23, 2015
Messages
3,962
Reaction score
16,786
Location
Washington State
Rating - 0%
0   0   0
Hi Wayne,

I started my main display tank I followed your advise of 2.5 to 3 mins before pulling the pin the seems are better than before but still not as good as yours I used pipe clamps instead of Ratcheting clamps but after I leave it cute I can see very little air bubbles on the edges but no air bubbles were formed during the initial application or removing of the pins.

also please note I do not have a perfect level surface I used a million shims but I’m still not confident it is 100% level, will that cause these pesky tiny bubbles ?
But thanks for your advise the seem quality has certainly improved.
Sometime the router bit used may not be machined for acrylic and can cause small pits to form on the surface leading to micro bubbles. The edges must be clean and smooth after coming off the router. Sometimes a second pass removing less material is necessary to get that perfect edge for solvent bonding.
 

suresh2989

Community Member
View Badges
Joined
Jan 11, 2022
Messages
48
Reaction score
27
Location
Toronto
Rating - 0%
0   0   0
Sometime the router bit used may not be machined for acrylic and can cause small pits to form on the surface leading to micro bubbles. The edges must be clean and smooth after coming off the router. Sometimes a second pass removing less material is necessary to get that perfect edge for solvent bonding.
So I don’t think that applies to me though but thanks. I say this because I got it CNCed from an acrylic supplier from Toronto.

although when I think about it I wouldn’t put it past them messing it up, they delivered my end panels with curved edges not square I had to visit them in person and demonstrate them how I need perfectly square edges for my application then they replaced it after 2 weeks with new end panels , and to add fuel to fire I noted the new end panels were about 1mm bigger than my front and back panels.

I took a deep breath took all of my blood pressure medications and hand routed(flush trimmed with my front panel underneath) them with my little Canadian tire router( upcut spiral bit) it came out well.

if anyone is wondering the supplier is “Canada-Plastics” sorry for going on a tangent but I am very satisfied with seems much better than my practise tank.
 

Attachments

  • B373EAAB-F2FD-42B2-8BB9-BF381839CB8D.jpeg
    B373EAAB-F2FD-42B2-8BB9-BF381839CB8D.jpeg
    136 KB · Views: 42
  • 1228DF0B-DD92-4FA0-9769-F256A0254829.jpeg
    1228DF0B-DD92-4FA0-9769-F256A0254829.jpeg
    107.3 KB · Views: 40
  • 0BE1ACEF-C701-4E05-AA4C-29C513C24E5A.jpeg
    0BE1ACEF-C701-4E05-AA4C-29C513C24E5A.jpeg
    159.6 KB · Views: 38
  • FAD4912D-ECF6-46B5-A867-BD2F30D84A95.jpeg
    FAD4912D-ECF6-46B5-A867-BD2F30D84A95.jpeg
    142.4 KB · Views: 41

Cabinetman

Well-Known Member
View Badges
Joined
May 3, 2016
Messages
720
Reaction score
712
Location
Nova Scotia Canada
Rating - 0%
0   0   0
Hi Wayne,

I started my main display tank I followed your advise of 2.5 to 3 mins before pulling the pin the seems are better than before but still not as good as yours I used pipe clamps instead of Ratcheting clamps but after I leave it cute I can see very little air bubbles on the edges but no air bubbles were formed during the initial application or removing of the pins.

also please note I do not have a perfect level surface I used a million shims but I’m still not confident it is 100% level, will that cause these pesky tiny bubbles ?
But thanks for your advise the seem quality has certainly improved.
It’s because the edges weren’t perfect. If the edges are perfectly flat and square what will happen is the solvent will dissolve after a little bit of time and leave little voids. How much plastic oozed out of the seam when you pulled the pins and squeezed?
 
Last edited:

suresh2989

Community Member
View Badges
Joined
Jan 11, 2022
Messages
48
Reaction score
27
Location
Toronto
Rating - 0%
0   0   0
It’s because the edges weren’t perfect. If the edges are perfectly flat and square what will happen is the solvent will dissolve after a little bit of time and leave little voids. How much plastic oozed out of the seam when you pulled the pins and squeezed?
Quite a bit oozed out, I think the edges are perfectly square they are CNCed after all.

I followed your instructions of 2 to 3 minute, thicker sewing pin instead of Accupunture pins and pipe clamps instead of ratcheting clamps the seem quality is leagues better.

although I failed trying to create that jig of yours twice, once with pine panels and once with MDF(what the heck was I thinking). Settled for another right angle jig design.

thanks again

image.jpg image.jpg
 
Last edited:

suresh2989

Community Member
View Badges
Joined
Jan 11, 2022
Messages
48
Reaction score
27
Location
Toronto
Rating - 0%
0   0   0
Hi @Turbo's Aquatics,@Cabinetman, @Lowell Lemon.

i think i fecked up ;case of extreme parallelogram after I flipped the 3 sides to the back/front panel.

my front/back is 1530mm(60.23”) x 486(19.13”) base/top is 1530(60.33”) x 616(24.64).

Now due to this parallelogram effect, the four sided cube is extending by about 1/4” outside of the top/base sheets( please check the attached video). So if I remove the clamps and place it on the sheet it will be about 1/4” outside of the base.

is there anyway I can salvage this build ? Is it worth salvaging considering there will be more load on one side than the other or it doesn’t work like that ?
Suresh kumar image.jpg image.jpg
 

Attachments

  • 66821968235__9F4197FB-A1A7-41D6-B4BA-E5DD9A33C9A9.MOV
    898.2 KB
Last edited:

suresh2989

Community Member
View Badges
Joined
Jan 11, 2022
Messages
48
Reaction score
27
Location
Toronto
Rating - 0%
0   0   0
Hi @Turbo's Aquatics,@Cabinetman, @Lowell Lemon.

i think i fecked up ;case of extreme parallelogram after I flipped the 3 sides to the back/front panel.

my front/back is 1530mm(60.23”) x 486(19.13”) base/top is 1530(60.33”) x 616(24.64).

Now due to this parallelogram effect, the four sided cube is extending by about 1/4” outside of the top/base sheets( please check the attached video). So if I remove the clamps and place it on the sheet it will be about 1/4” outside of the base.

is there anyway I can salvage this build ? Thanks all
Suresh kumar image.jpg image.jpg
Not too shabby, but the hard parts are still coming up...:)
Harder than this ?
 

Tenecor Aquariums

Valuable Member
View Badges
Joined
Oct 5, 2020
Messages
1,516
Reaction score
3,331
Location
Phoenix
Rating - 0%
0   0   0
All kidding aside, you are going down a bad path. Consider cutting your losses. One of the facts of acrylic builds is the errors are cumulative. Glass mistakes can be corrected by removing the last piece and trying again. Not so acrylic. Regrettably you are past the point of salvation.
 

High pressure shells: Do you look for signs of stress in the invertebrates in your reef tank?

  • I regularly look for signs of invertebrate stress in my reef tank.

    Votes: 36 31.3%
  • I occasionally look for signs of invertebrate stress in my reef tank.

    Votes: 28 24.3%
  • I rarely look for signs of invertebrate stress in my reef tank.

    Votes: 21 18.3%
  • I never look for signs of invertebrate stress in my reef tank.

    Votes: 30 26.1%
  • Other.

    Votes: 0 0.0%
Back
Top