Custom 190-My Dream Tank

Tomsimtim

Community Member
View Badges
Joined
Jun 10, 2022
Messages
71
Reaction score
130
Location
San Diego
Rating - 0%
0   0   0
Ultimately, the goal of this thread for me, is this will be my aquarium log. I will tell the story of the trials and tribulations of my tank in this public forum to get feedback from my fellow aquarists. I have 16 month story to tell so it will take me sometime to catch up to the current status of my tank. As with all aquariums I ask for your patience as I tell the story of my tank.

And what a tank it is, I can't wait to regale you with goings on of this tank, nothing like I have ever experienced before.


Well, after nearly a year and four months, my tank is finally coming into its own. Where do I begin??? I guess with the dimensions of the tank.

60" X 24" X 30". Wanted a nice big viewing window!

The stand is 36" inches tall with plenty of room underneath so with the canopy on top it is just a hair under 6' tall. I spend a lot of time on a Gorilla step ladder with a 3' grabber in hand. I have had some challenges getting to the bottom with the hood on, but once it is removed I have access to the depths of the aquarium with ease.​
I purchased a Sapphire 34 Sump.​
I have had to modify the sump to make it quieter. The distance from the outflow of the sock chamber to the water level of 2nd chamber is approximately 5-6" a lot of room for the outflow to build up sufficient head way to make a lot of noise.

I have placed a heat and mold piece of plastic to attach to the primary internal over flow above the filter socks to create a cascading slide at approximate 65 degree angle for the water to slide into the 2nd chamber. Now the water just slides out of the chamber above the socks into the 2nd chamber along the angled piece of plastic without a sound.

To attach the plastic slide I had to drill three holes in the wall that separates the filter socks from chamber #2 and put three plastic bolts and wing nuts to hold the slide in place.

Took out the sock mount which housed two 4" diameter filter socks. Only to measure the 4" X 3.5" diameter OVAL holes, which is why the 4" diameter ROUND filter socks are such a bear to get in and out. I replaced the filter socks with filter flax and two new 4" by 4.75" plexiglass plates with 12 qty 5/32" holes in each plate to simulate the back up and subsequent overflow caused by the filter socks. The sock chamber is 4" X 9 1/2". 1st attempt with 1/4" holes was not sufficient back up to create an overflow into the second chamber. The smaller holes did the trick.


Construction is sturdy But overall an average sump.

I am going to steal an idea from a video I saw that takes a piece of, don't know the proper term, but large squared needle point mesh, and attach it to the plastic waterfall l created and install a light and I will have an instant algae scrubber. A simple and easy modification.

Well that is all for now. I have some more modifications to describe but that is for another time. Wife & daughter are out of town, just me and my son!, Awesome!

July Photo.jpg
 
Last edited:

SPR1968

No, it wasn’t expensive dear....
View Badges
Joined
Feb 21, 2017
Messages
20,037
Reaction score
124,675
Location
Nottinghamshire England
Rating - 0%
0   0   0
Very nice, and keep the pictures coming!
 
OP
OP
Tomsimtim

Tomsimtim

Community Member
View Badges
Joined
Jun 10, 2022
Messages
71
Reaction score
130
Location
San Diego
Rating - 0%
0   0   0
The Build

It was actually cheaper for me to have my tank custom built than to buy one off the rack. No one was as surprised as I was when I found that out. Instead of a Euro brace around the edge, I went with the middle support. It is 20" wide in the center. It is two pieces of glass with a film in between them. I do not have a PAR meter to measure the difference in output underneath the center divide, but am, logically putting my SPS on the wings and my LPS in the middle.

There is 20" of available space on either side of the center support. Only an issue when I have to get something under the arch in the middle of the tank. I am looking for a bendable grabber, much like the Bendable Drill Bit. Not sure if it exists haven't really checked.

I had old dry liverock that hadn't seen NaH2O for 5 years or more. From two previous tanks that crashed due to a power outage in January in MD. A story for a different time, still painful, 15 years worth of work gone in 4 days UGH!!!

I seeded my tank with G.A.R.F. Grunge (Geothermal Aquaculture Research Foundation) , absolutely love the stuff! I put 15 lbs of it in my sump and waited about 4 months.

I put a Lawnmower Blenny in and within a month it perished, a Lawn Mower Blenny I know! Tested the water, none of the parameters were out of sorts. Waited another two months and did 4 water changes of 20%. So I Went with a pair of Yellow Tail Damsels. Eureka, they are both still alive and kicking to date.

There was a little die off smell in the Grunge that I added, nothing like the mud pots of Yellowstone or anything, but a slight odor. GARF used USPS and the box was only damp on the inside and it did not SOAK through the box. So I concluded it was safe to put in the sump. But there was something in there powerful enough to kill a Lawnmower Blenny.

Never found out what pathogen it was, but I have had no other deaths since, well not to husbandry problems, due to predation, well that is a completely different story. Those tales will come in due time.
 
Last edited:
OP
OP
Tomsimtim

Tomsimtim

Community Member
View Badges
Joined
Jun 10, 2022
Messages
71
Reaction score
130
Location
San Diego
Rating - 0%
0   0   0
Phytoplankton

One of the things I always wanted on my tank was a chilled supply of live phytoplankton to be in my tank. Well, problem is a contraption like that doesn't exist, so this is what I came up with. This is my second attempt and has served me well the past year and a half. The photos are not in order, but they are numbered referencing the associated # in the text.

This is the process I went through. Enjoy!

Tim

The photos will be referenced in order even though they are out of order. I numbered them in the upper left hand corner of each photo.

#1. Is the original set up, dare I use prototype, with the vinyl tubes attached to a cut in half pointer stick. I could not tighten the zip ties down too much or the flow would have been interrupted. So the zip ties slid up and down the pointer stick thus making extraction from the bottle difficult. Now I just pop off the stopper.

I have an Eheim adjustable flow, two outlet air pump. One to the sump and the other to the fridge. The plankton that bubbled up and out of the jar was due to the bubbler being set too high. I put it on its lowest setting thus correcting the overflow problem and still maintaining sufficient agitation to mix the OceanMagik

#2 & #3 The location of the hole was determined by the location of the cooling mechanism being located at the back of the unit. I wanted to be as far away from that so I drilled the hole close to the front and leaving enough room to ensure the fridge door would close.

I used a 1& 3/8 spade bit to drill the hole in photo # 3. However the plastic would get caught up in the rotation of the drill bit and stopped the drill from completing the hole. I tried sanding the plastic down to create a flush surface again attempting to complete the hole with the drill bit, as indicated by the scuff marks surrounding the hole. This binding of the plastic occurred each time I attempted to complete drilling the hole.

I was fortunate enough that the drill bit went deep enough to cut a groove into the plastic which enabled me to snap off the pieces and maintain the shape of the hole. The bits are in photo #2. Sometimes it is better to be lucky than good.

I used a spade bit and am not sure if a hole saw would have worked better. But the wings on the spade bit dug out the groove that enabled me to snap off the plastic while maintaining the form of the hole.

The insulation is just styrofoam. The second layer of plastic was not penetrated by the drill bit. So I had to use a much smaller diameter drill bit to drill several holes into the second layer of plastic.. I in order to make the second hole one hole instead of 3-4 little holes I swirled the rotating drill bit around in a circle to shave off the protrusions thus making it one hole. I had to use a metal file to finish off the hole of the second layer of plastic so the stopper would fit in.

Mind you the goal was not necessarily have the stopper go all the way through both layers of plastic, but just enough to have the hard tube go through both layers into the bottle of OceanMagik. The thickness of the fridge roof is approximately 1 & 1/4”.

#4 & #5. Are just photos of the airstone connection. The male tip of the stone was too small for the hard tubing so I just cut a 2cm section of vinyl tubing to connect the two up. I also had to consider the diameter of the opening of the bottle of OceanMagik when purchasing the air stone to make sure it would enter the hole of the OceanMagik. My LFS had one, no problems finding that.

#6. Choosing the stopper diameter was not so simple. The stoppers dimensions were different at the top and bottom as they are tapered. After some time searching I was able to find a list of the different size stoppers and their specifications. The size stoppers are numbered 000-12, well the diameters that were for sale for my needs used this nomenclature.

The dimensions were in mm and I found a feature on my new phone calculator that has conversions for length and volume from standard to metric and back, AWESOME! I chose stopper size # 8 which is 42mm (1.65 in.) across the top & 32mm (1.25) across the bottom. Since the decimal equivalent of 1 & 3/8 of an inch is 1.375 I knew that I needed to buy a 1 & 3/8” drill bit so the stopper would enter the hole and stop as well.

Amazon has spoiled us with 2-day shipping, but they would not be able to get it to me on my day off, and this just would not do. So my Varuca Salt came out and I ordered it from Grainger, paid retail as I went to pick it up, no shipping. However, the price for having it delivered today was that they only had stoppers with one hole and not two and I had to buy a bag of 10. Which worked out well as I was able to practice drilling the hole into the rubber stopper. I found one that had its hole drilled off center, and I chose that one for my finished product and used two others to practice alignments.

I was easily able to drill a hole in the hard rubber stopper matching the diameter of the existing hole. Another bit of luck was that I bought the hard tubing before I bought the stoppers not knowing the diameter of the hole before I purchased them. The hard tubing fit just fine it the manufactured hole, again better to be lucky than good. The second hole did take some effort to bore out as the rubber is soft enough that it does not leave a clean hole like drilling wood. Several strokes of the drill back and forth for 2-3 minutes bored out a nice clean hole. The debris switched from spindles to powder as I progressed.

I think that is just about everything I encountered during my 2nd conversion. Total time for the project was less than an hour. If ya’ll have any questions feel free to PM me.


Begin forwarded message:
From: Thomas Shepard <[email protected]>
Subject: Fwd: Fridge Photos
Date:
November 1, 2021 at 5:34:42 PM PDT


20211101_160001.jpeg
20211101_155902.jpeg
1658424080575.png
20211101_155304.jpeg
20211101_170250.jpeg
20211101_155324.jpeg
20211101_155304.jpeg
 
Last edited:
OP
OP
Tomsimtim

Tomsimtim

Community Member
View Badges
Joined
Jun 10, 2022
Messages
71
Reaction score
130
Location
San Diego
Rating - 0%
0   0   0
Aquascaping

Well that is something that I have always wanted to get right. I think I did with what I had. The rock you see is all from an old 46 Bowfront and a 60 Cube tall. They were out of the water for 5+ years before I was able to use them again. One good thing about rock that has been out of the water for 5+ years is that it is D.E.D. dead. In the 5+ years that I was out of the hobby quite a few developments took place. Especially in the arena of live bacteria. I did not find out about it until after I had seeded the tank with the GARF Grunge. I did finally add a sufficient amount of Turbo Start for my 190 + 35 for the sump so for 225 gallons worth of volume.

The rock on the left is one piece of rock that I was able to score in Annandale VA, back when I lived in DC. All my rock came from that store except for the arch. The Arch is an 18" arch that I purchased from Carib Sea. The rock on the right end of the arch is 3 pieces combined together via epoxy putty to make the shape that it is. The last rock on the right is two pieces.

In order to get them to stay together I took my trusty spade bit again and drilled two 2" diameter holes in each piece to align to make the best looking tower that I thought was possible. One hole in the top of the bottom rock, then one hole in the bottom of the top rock. I then cut the appropriate length piece of PVC pipe, put some putty where the pieces would touch and voila ! One pretty cool tower, IMO.

Before I installed the arch this is what she looked like. I always knew that my vision of my tank was not complete until I was to have installed an arch connecting the island on the left with the island on the right. I wanted the contrast of fish swimming in and out of the shadows to give the tank, primarily the fish, a real flash, each time they would swim in an out of the shadows. Well my arch provides that flash that I so desired. The arch is 18" long, not linearly straight from left to right, but along the entire length of the curve of the arch from left to right. It averages 10" front to back. It weighs a good 35-40 lbs.

I wanted to avoid like the Plague, maybe that should be updated to the Covid, that "mound of rock look." I believe I achieved that. I grew up in Ft. Lauderdale and was fortunate enough to be able to travel to the Bahamas to snorkel. I fell in love with a Royal Gramma when I was a boy seeing one hanging upside down defying gravity in the ocean. I have one, but he doesn't hang upside down under my arch as much as I would like, but I get a glimpse every now and then.

There is plenty of room for the corals to grow up, sufficient room for the fish to swim. There is sufficient space in front of and behind the rock work, approximately 4" in front & behind the arch and closer to 6" in front & behind the original islands. In between the overflow and the original Island on the left there is approximately 3", the tightest space in the tank.

20210622_182201.jpg


May Aquarium Photo.jpg
 
OP
OP
Tomsimtim

Tomsimtim

Community Member
View Badges
Joined
Jun 10, 2022
Messages
71
Reaction score
130
Location
San Diego
Rating - 0%
0   0   0
Lighting - ReefBreeders 50-V2

I knew from the very beginning that I wanted an LED fixture. I have been using ReefBreeders LED lights ever since they released their first model. I still have that fixture and it is still working on my 20g hospital tank. It has two dials on it. One controls the blue actinic and the other controls the white & the red & green. A simple 1st generation LED Fixture that I bought, can't remember what year.
1st ReefBreeder Light.jpg
Hospital Tank.jpg


I have stuck with ReefBreeders and so I bought their ReefBreeders Photon 50-V2, they gave me a loyalty discount as well, NICE!!!

When I originally mounted the light I used plastic coated wire with crimps. But over time the tension was lost and the light began to sag closer to the surface of the tank. Here are a couple of photos of the original mounting. The thing I had to consider when mounting the light was that I had to be able to remove it from the hood to clean it for maintenance. I also needed a fixture with a pig tail so that I can remove the light without having to worry about the cord when I removed the light. The Photon 50-V2 had all the features I wanted.

I screwed 6 U-bolts and strung up 3 different strings connected to the U-bolts with carabiners, thus enabling me to remove the fixture from the hood. The second photo shows how it began to droop over time.
Wire Mount.jpg
Wired Mount2.jpg


The hood of the tank is only 7" tall and 2" of the hood rests below the edge of the tank. So the highest the light can be over the surface of the water is 5". Not a lot of clearance for light to spread out over the tank. But a necessary evil as the wifey did not want the light hanged from the ceiling as it is an eyesore. Can't say I disagree with her on that aesthetic point.

But with the light being so close to the water level, coverage of the tank is a concern as you will see in the next photo. There is a distinct area of the tank that is not lit by the light. As you see, the Blue Headed Wrasse is at the top of the tank and is in a "Shadow" or area where the light does not shine simply because of it sitting close to the surface of the water. The Powder Blue Tang is further down the tank and you can see that he is not illuminated either. You can also see a distinct line where the light is shining and where it is not looking down the length of the tank. With the light in the middle of the tank, there is one area of no light in the front and back of the tank.

Fish in Shadow.jpg


As I mentioned previously in the Aquascaping post. I wanted a flash when the fish enter and exit the arch. Well I have that same effect with the fish swimming in an out of the beam of light up high in the tank. The fixture itself is 8.33" wide and I have considered buying another fixture to illuminate the entire water column. The opening of the hood is 20" wide so I have sufficient room to do just that.

I have been in contact with ReefBreeders and their current lights run on a 2.4Ghz network. My new router is a 5.0 Ghz and does not offer a 2.4 Ghz operating frequency. They are working on releasing their next version of the Photon 50-V2 with a 5.0 Ghz connection to the Internet. I may wait to buy that version and their modification kit to update the one I already have. We'll see how long my patience lasts for this new development and release of their new version.

The fixture has 6 different color lights that you can control the intensity of each color over a 24 hour period. You set the intensity in percentages of full power. The light will ramp up and reach the percentage of full power that you set per hour. Each hour is sub-divided into 10 quantity, 6 minutes increments that achieve the hourly set percentage.

It is a bit tedious to set all 144 settings for all six colors for a 24 hour period. But once you have played with it, it becomes second nature and happens lickity split.

Since the wire apparatus I installed sagged nearly 2 &1/2" I was not happy with the coverage the fixture was generating.

I still had to be able to remove the fixture from the hood for service and maintenance. That being said I needed a more rigid means to support the fixture over the tank that would not sag and maximize the height of the light above the water. This is what I came up with.

I purchased 3 quantity, 6m thread, 316 SS threaded rods and cut them each to a length of 44 cm / 17". I then purchased 6m eye bolts and 6 quantity SS "S" carabiners.

I screwed on the 6m eyebolts on each end of the 6m -316 SS threads and put one end of the "S" carabiner on each eye bolt. I then attached the other "gate" of the "S" carabiner to the already in place U-bolts that I installed for the wire installation of the fixture. The "S" carabiner is 1" long. But since the support for the fixture is threaded I am able to screw the eyebolts as far as I can to shorten the support to maximize height over the surface of the water to minimize sag as much as possible. Here are photos of the finished product.

S-biner & I Bolt.jpg


SS Finished Product.jpg


Each "S" carabiner is rated to hold 5 Lbs, and the fixture is only 12 Lbs, so with six points of contact, each one is only carrying 2 Lbs. Even if I add the second fixture each "S" carabiner will only be charged with 4 Lbs. of weight.

I installed rubber washers upon the threaded SS rods to push up against the eyebolts to hold the fixture in place. I did not have that feature on the wire suspension, the light slid as I removed the fixture from the tank, No More!!! If you squint at the picture you can see the black washers.

Well that's the lighting for this tank. Next installment will be water flow and a major oversight by Maxspect Gyre X350 engineers.
 
Last edited:
OP
OP
Tomsimtim

Tomsimtim

Community Member
View Badges
Joined
Jun 10, 2022
Messages
71
Reaction score
130
Location
San Diego
Rating - 0%
0   0   0
Wrasse Caught in Overflow!

Any ideas on how to get a fish out of an overflow without draining it and removing the plumbing. Too narrow for a slurp gun.

Brainstorm please.
Wrasse In Overflow.jpeg
 
OP
OP
Tomsimtim

Tomsimtim

Community Member
View Badges
Joined
Jun 10, 2022
Messages
71
Reaction score
130
Location
San Diego
Rating - 0%
0   0   0
Water Movement

My idea regarding water movement was to have as few powerheads visible as possible and to achieve simulation of the tides. I originally had just one Maxspect Gyre XF350 on the left side of the tank in front of the black overflow box to keep it visually hidden. This met my needs to have the gyre be camouflaged, but it pushed the surface water to the right side of the tank where the dust and surface film collected. Regrettably I had to move the gyre to the right side so that the surface scum would be pushed into the overflow to ensure the surface layer of the water was being filtered.

I knew of the Maxspect XF350 programmable nature which is why I invested in a second Maxspect XF350 gyre pump. I was very pleased with the programmable features of the XF 350. It will even let me program a neap tide, or the 15-20 minutes in-between tidal cycles of neutral water movement.

I was thrilled that I could achieve a neap tide that I was finally getting ready to program the time that I wanted each XF350 to run. Much to my horror, the options for programming the on time only doubled in length from 1 hour to 2 to 4 and then to 8. The engineers were too much of an engineer and not an aquarist! There is no 6 hour option to have 4 tides a day. AAAARRRRGGGGHHHH!!!!! I cannot believe it! What a horrible oversight the engineers made by not offering a 6 hour option.


So I swallowed my disappointment and set it up for 6 four hour tides instead of three, eight hour tidal cycles. Raga Fracking! Raga Backing! Crazy Long Eared Varmutt!

I love the water movement I have in my tank every 4 hours the direction changes and stirs up all the detritus that settles during each cycle. Then the time period where both pumps are going, that really stirs things up and everything enters the water column and is filtered out. Love Love Love my Maxspect XF350 Gyres.

With the XF350s set at 50% power, I will have sufficient power in reserve to increase the flow as my tank matures. At a year and four months I only have 2"-4" colonies at this point in time. Some 2"-3" colonies as well.

Next installment is where the fun begins. I get to share the shenanigans that have been taking place in my Dream 190.
 
OP
OP
Tomsimtim

Tomsimtim

Community Member
View Badges
Joined
Jun 10, 2022
Messages
71
Reaction score
130
Location
San Diego
Rating - 0%
0   0   0
Algae Scrubber

Well my most recent modification to my sump is the addition of an algae scrubber. I went to Michael's, a US national arts and crafts store. I purchased what is called a "Needle Point Canvas" or Mesh from now on as it is shorter to type and more efficiently conveys my point.

Do you think the inventor of the "Needle Point Canvas" ever envisioned his or her product to be used in a marine aquarium?

In my post of July 14, 2022 I referenced the addition of a "Slide" to minimize the sound of the water flowing from Chamber # 1 to Chamber #2. Here is a photo of the slide. You can see the action of the water entering the second chamber indicated by the bubbles where the slide meets the water. But I digress....


This is the platform / slide that I attached the mesh to create an algae scrubber.
Slide.jpg


The next photo is of the holes that I drilled into the slide. I had to sacrifice a drill bit to a rusty fate as I could not turn off the main pump as the water from the main tank would have filled up the sump to where I could not have drilled the holes to attach the mesh. I again used plastic bolts and wing nuts to attach the mesh so that I can remove it to clean it. Here is a photo of the holes in the slide.

Holes in Slide.jpg


Then here is the finished product with the mesh installed and the bolts inserted to hold the mesh into place.

Installed Mesh.jpg


Instant Algae Scrubber!!! An easy and very inexpensive addition to my tank.

This next photo is of the light that I installed. The reason that I chose this light is that it has a posable neck that gives me the freedom to move the light into any position I want. In addition to the neck moving where I want it, the light also rotates 180 degrees where it connects to the neck, which permits me to angle the light to the position of my desire.

Scrubber With Light.jpg


And here is the scrubber after a month in action.

Scrubber.jpg


A good mix of brown, red cyano, and green hair algae. Not sure if that is a badge of honor I want to wear, but it seems to be doing its job. The exposed surface above the water line of the mesh measures 9" X 5" or 45 Sq Inches of surface area that is the scrubber. A small addition, but a lot less expensive than the installation of a function specific scrubber device for less than $40.00 Light $25, Mesh $3.50 Plastic bolts and wing nuts $8.75 at Ace Hardware. More expensive than Home Depot, but you always get what you need when you have a very specific need at Ace.

Upon installation of the scrubber, also installed a timer to set the light of the scrubber and the sump light, not pictured, to the opposite time of the lights of the main tank. The sump lights were on 24/7.

Well that's all for this posting.
 
Last edited:

AlgaeBarn

Marine Aquariums Made Easy!
View Badges
Joined
Oct 14, 2013
Messages
2,416
Reaction score
3,510
Location
Denver, Colorado
Rating - 100%
1   0   0
Wrasse Caught in Overflow!

Any ideas on how to get a fish out of an overflow without draining it and removing the plumbing. Too narrow for a slurp gun.

Brainstorm please.
Wrasse In Overflow.jpeg
I would get a medium-large fish net and just bend it so that it can go around the pvc. It will probably take a lot of patience and maybe some food for coaxing the wrasse into the right spot :)
 

AlgaeBarn

Marine Aquariums Made Easy!
View Badges
Joined
Oct 14, 2013
Messages
2,416
Reaction score
3,510
Location
Denver, Colorado
Rating - 100%
1   0   0
Phytoplankton

One of the things I always wanted on my tank was a chilled supply of live phytoplankton to be in my tank. Well, problem is a contraption like that doesn't exist, so this is what I came up with. This is my second attempt and has served me well the past year and a half. The photos are not in order, but they are numbered referencing the associated # in the text.

This is the process I went through. Enjoy!

Tim


20211101_160001.jpeg
20211101_155902.jpeg
1658424080575.png
20211101_155304.jpeg
20211101_170250.jpeg
20211101_155324.jpeg
20211101_155304.jpeg
We love this DIY and shared it on our socials! Any update on how its working out? :)
 
OP
OP
Tomsimtim

Tomsimtim

Community Member
View Badges
Joined
Jun 10, 2022
Messages
71
Reaction score
130
Location
San Diego
Rating - 0%
0   0   0
We love this DIY and shared it on our socials! Any update on how its working out? :)
It is working out great! Keep in mind it is designed to cool only 25º-30º F below ambient air temperature. I don't have A/C in my home so this past heat wave in San Diego it has been 100º F in my home so my phytoplankton has only been kept at approximately 75º F these past two weeks. Everyday I smell test it for die off, so far my olfactory senses have not detected any foul Yellowstone mud pot sulphur smells. With the passage of tropical storm Kay today, the heat wave has temporarily been broken! So far I'd say outstanding!
 
OP
OP
Tomsimtim

Tomsimtim

Community Member
View Badges
Joined
Jun 10, 2022
Messages
71
Reaction score
130
Location
San Diego
Rating - 0%
0   0   0
It is working out great! Keep in mind it is designed to cool only 25º-30º F below ambient air temperature. I don't have A/C in my home so this past heat wave in San Diego it has been 100º F in my home so my phytoplankton has only been kept at approximately 75º F these past two weeks. Everyday I smell test it for die off, so far my olfactory senses have not detected any foul Yellowstone mud pot sulphur smells. With the passage of tropical storm Kay today, the heat wave has temporarily been broken! So far I'd say outstanding!
Glad to know ya'll are passing along my DIY to other aquarists :beaming-face-with-smiling-eyes::cool::face-with-open-mouth:
 
OP
OP
Tomsimtim

Tomsimtim

Community Member
View Badges
Joined
Jun 10, 2022
Messages
71
Reaction score
130
Location
San Diego
Rating - 0%
0   0   0
San Diego Heat Wave Effects

Well I have been battling 100º F temperatures these past two weeks in my home as I do not have A/C in my home as even in the dog days of summer it only gets to be 80º F here in America's Finest City. But alas even sitting less than two miles from the largest geographic feature on the planet is not enough to defeat an offshore flow from a High Pressure system parked over Utah for the past two weeks.

I have been rotating frozen cold packs into the last chamber of my sump with the return in attempts to bring down the temperature of 85º F. The large volume of 235 US gallons was a great help as it was not until the last 3 days that the temperature reached its maximum of 85º F.

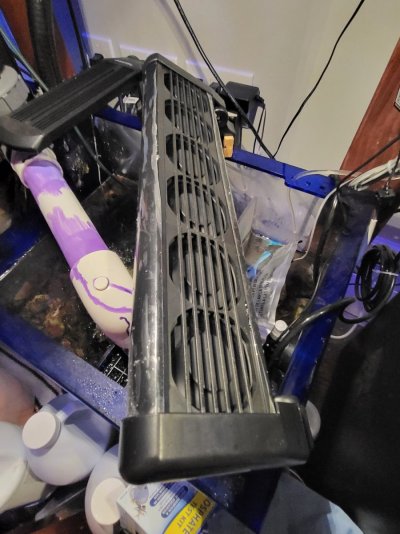
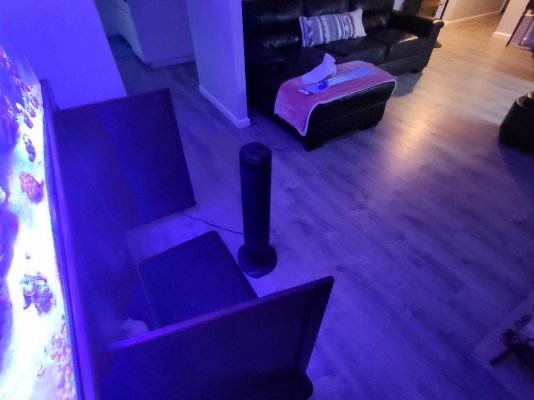
I installed an aquarium fan on the edges of the sump, but it was wider than the width of the sump. So I had to install it diagonally over the 3rd of 4 chambers of the sump. In addition to the aquarium fan I have opened the doors up and place an oscillating tower fan in front of the aquarium.

I am fortunate that I work from home and can rotate the 4 different cold packs through out the day every two hours. The freezer takes about 6 hours to refreeze each cold pack so with 4 in rotation I am not doing too bad.

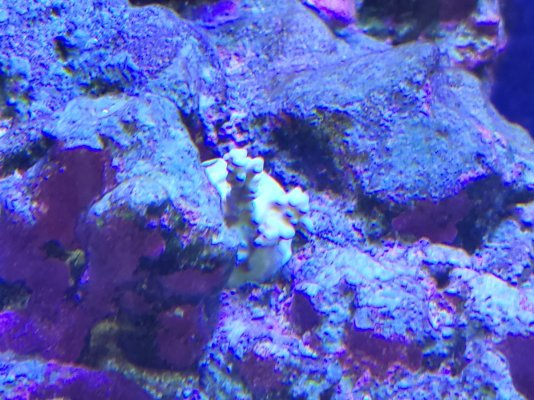
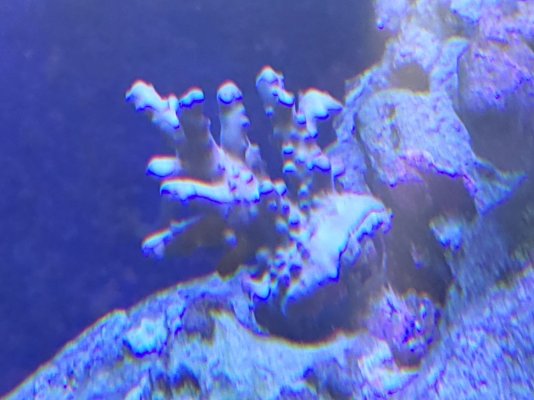
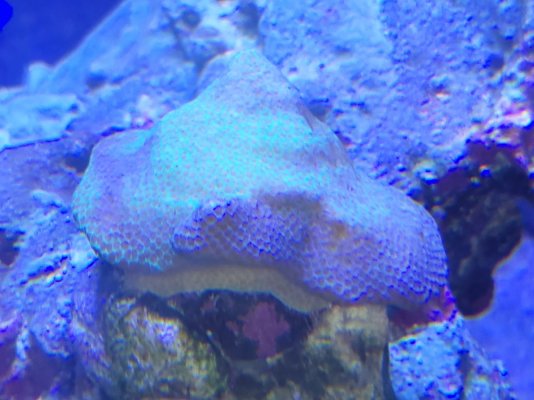
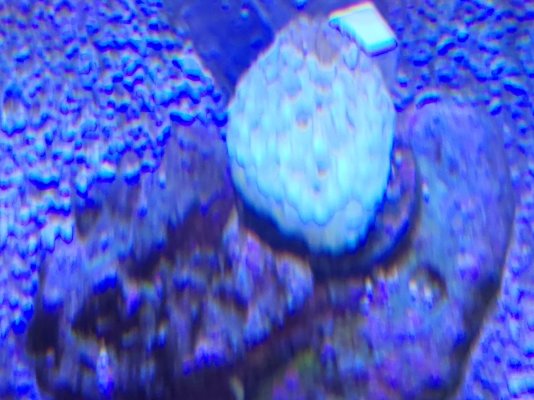
I have had some die off of 4 of my frags, two acros, one alveopora and one species I haven't been able to ID yet. They have not perished completely so I have hope they will rebound.

Speaking of which it is time to switch out the cold pack.


Acro No. 1.jpg Acro No.2.jpg Unknown Species.jpg White Alveopora.jpg


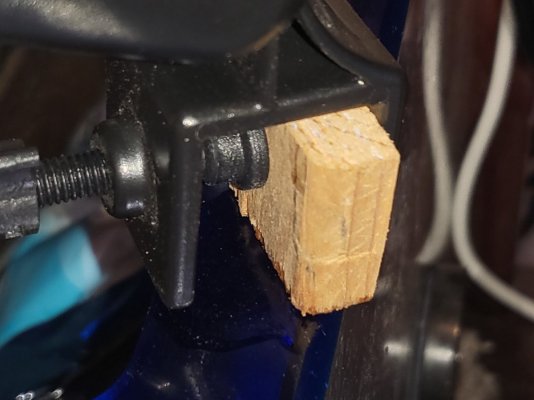
The mounting of the aquarium fan was not so simple. It is longer than the width of my sump and it is only designed to be mounted on a maximum of 1/2" glass, mine is 3/4" thick.

My sump has a Eurobrace design so I had to cut two pieces of a 2 X 4 that measured 1/2" X 1" X 1 & 1/2" no easy feat with a hand wood saw.

I cut one long piece of the desired dimensions and put it in my vice. Cramped down the vice on the wood, and cut my final dimension twice out of the length in the vice.

I place the saw right up against the vice to get a straight edge. Sanded it with No. 60 grit paper and I was good to go.

I cleaned off the rim of the sump, applied some super glue and Viola! Two mounts for my fan.

It is only temporary, and I can leave the mounts there for another heat wave, or if this one returns, God I hope not! My entire household has been one short tempered mess these past two weeks UGH!

Her are some photos, ugly, but a necessary evil when you are in a pinch. Wood Mount.jpg Complete Fan Install.jpg

My daughter helped me plumb the tank and went nuts on the primer. I left the plastic film on the fan just to give it that little extra protection, because salt water is so kind to electronics, just ask any boat owner!
Tower Fan.jpg


Anyway, that is my most recent installment, speaking of which it is time to switch out the cold packs. Looks like I commandeered another few items forever lost to the human world only to be adopted by the marine aquarium only world. I know I am the ONLY one who has ever had that fight with their wife!
 
Last edited:
OP
OP
Tomsimtim

Tomsimtim

Community Member
View Badges
Joined
Jun 10, 2022
Messages
71
Reaction score
130
Location
San Diego
Rating - 0%
0   0   0
RECENT HEAT WAVE IN SAN DIEGO WITHOUT A/C!!!

Temperature.jpg


Well everyone, these were the temperatures in my home during the most recent, and worst, heat wave in San Diego WITHOUT air conditioning. Oh boy....

Needless to say, even a total volume of 235 gallons is going to heat up in sustained temps of this nature for an extended period of time. For the first 5 days the tank stayed at 80ºF but his went on for nearly 3 weeks...

Good news is I work from home, bad new is I work from home!

During the heat wave I was able to maintain an internal temperature of the tank to around 85º-87º F by every two hours rotating 4 different reusable 4 lb blocks of ice. By the time the first one was thawed, I would obtain another one and place it in the return pump chamber of my sump. Keeping the tank 10º-12º F below the ambient air temperature was more than I could have hoped for.

In six hours time, the first one I put in and removed would have frozen and just continue the rotation. At night I would put two in.

I installed a fan underneath, a six fan array, opened the doors up and put an oscillating tower fan in front of the sump as well.

I have lost two acropora colonies thus far in the aftermath of the heat wave. A bubble coral is fighting for its life at this time...


Both Nitrate & Phosphates are at ZERO!

One thing I didn't expect to occur that may be taking place now is, I believe , that the bacteria culture / balance that takes so long to establish in the first year of any set up is all wonky.

Could the death of bacterial biomass in an aquarium cause this? An aside question, Does anybody know if any scientists are looking into this theory regarding the heating up of the oceans and the death of bacteria and its effects?

I believe I have an outbreak of Gambierdiscus toxicus (Pg. 69 Julian Sprung's Algae: A Problem Solver Guide) See photo below.

It is a nasty thing, grows on the rocks, substrate, walls everywhere. It grows in mats and and long stringy strands.

Daily I am
physically removing this crap, brushing my corals free of this ****.

Changed back to filter socks from filter floss, and clean them after each daily wall scrubbing and coral cleaning, what pain in the butt this crap is...


Seems to disappear at night and comeback with a vengeance during the day. I added 36 additional blue legged crabs, not sure if the reappearance during the day is due to the crabs being nocturnal and taking a break during the day. Or maybe they don't eat during the day so they know they have a guaranteed meal at night...probably not that smart!

Haven't yet
shortened my photo period, but that would seem to be a prudent course of action as well.

I have turned my Maxspect XF395 gyres up to 100% to make the climate as inhospitable for this stuff to grow. That is throwing so much junk into the water column you'd think I was looking at brown tannin stained salt water.

Nuckin Futs!


I have added an additional Activated Carbon reactor.

One bottle of Dr. Tim's Bacteria.

And am waiting on some Turbo Start 900 bacteria culture to add as well.

I have also added two more
air stones pumps as I do not know if this algae is consuming oxygen. If my theory is correct that he bacteria is dying off, there may be anaerobic pockets in the tank.

Maybe variety of bacteria is the spice of life!

If there is a silver lining to this ordeal, My Flame Angel, Coral Beauty, and Powder Blue Tang are feasting like I have never seen, they are all nice and plump!

Then with this lovely inflation, we have had to cut budgets to make ends meet, humans before fish and coral, just didn't have the funds for an emergency purchase of a chiller. I bought my son a Whopper the other day, JUST the Whopper, no meal deal, and it was $9.50! $7.20 for a gallon of chocolate milk.

The Algae problem solver guide says just to wait it out and it could last for months....

I may be dealing with this for some time to come.

Any other diagnosis would be appreciated. Thoughts & Suggestions Please


Gambierdiscus.jpeg
 
Last edited:
OP
OP
Tomsimtim

Tomsimtim

Community Member
View Badges
Joined
Jun 10, 2022
Messages
71
Reaction score
130
Location
San Diego
Rating - 0%
0   0   0
RECENT HEAT WAVE IN SAN DIEGO WITHOUT A/C!!!

Temperature.jpg


Well everyone, these were the temperatures in my home during the most recent, and worst, heat wave in San Diego WITHOUT air conditioning. Oh boy....

Needless to say, even a total volume of 235 gallons is going to heat up in sustained temps of this nature for an extended period of time. For the first 5 days the tank stayed at 80ºF but his went on for nearly 3 weeks...

Good news is I work from home, bad new is I work from home!

During the heat wave I was able to maintain an internal temperature of the tank to around 85º-87º F by every two hours rotating 4 different reusable 4 lb blocks of ice. By the time the first one was thawed, I would obtain another one and place it in the return pump chamber of my sump. Keeping the tank 10º-12º F below the ambient air temperature was more than I could have hoped for.

In six hours time, the first one I put in and removed would have frozen and just continue the rotation. At night I would put two in.

I installed a fan underneath, a six fan array, opened the doors up and put an oscillating tower fan in front of the sump as well.

I have lost two acropora colonies thus far in the aftermath of the heat wave. A bubble coral is fighting for its life at this time...


Both Nitrate & Phosphates are at ZERO!

One thing I didn't expect to occur that may be taking place now is, I believe , that the bacteria culture / balance that takes so long to establish in the first year of any set up is all wonky.

Could the death of bacterial biomass in an aquarium cause this? An aside question, Does anybody know if any scientists are looking into this theory regarding the heating up of the oceans and the death of bacteria and its effects?

I believe I have an outbreak of Gambierdiscus toxicus (Pg. 69 Julian Sprung's Algae: A Problem Solver Guide) See photo below.

It is a nasty thing, grows on the rocks, substrate, walls everywhere. It grows in mats and and long stringy strands.

Daily I am
physically removing this crap, brushing my corals free of this ****.

Changed back to filter socks from filter floss, and clean them after each daily wall scrubbing and coral cleaning, what pain in the butt this crap is...


Seems to disappear at night and comeback with a vengeance during the day. I added 36 additional blue legged crabs, not sure if the reappearance during the day is due to the crabs being nocturnal and taking a break during the day. Or maybe they don't eat during the day so they know they have a guaranteed meal at night...probably not that smart!

Haven't yet
shortened my photo period, but that would seem to be a prudent course of action as well.

I have turned my Maxspect XF395 gyres up to 100% to make the climate as inhospitable for this stuff to grow. That is throwing so much junk into the water column you'd think I was looking at brown tannin stained salt water.

Nuckin Futs!


I have added an additional Activated Carbon reactor.

One bottle of Dr. Tim's Bacteria.

And am waiting on some Turbo Start 900 bacteria culture to add as well.

I have also added two more
air stones pumps as I do not know if this algae is consuming oxygen. If my theory is correct that he bacteria is dying off, there may be anaerobic pockets in the tank.

Maybe variety of bacteria is the spice of life!

If there is a silver lining to this ordeal, My Flame Angel, Coral Beauty, and Powder Blue Tang are feasting like I have never seen, they are all nice and plump!

Then with this lovely inflation, we have had to cut budgets to make ends meet, humans before fish and coral, just didn't have the funds for an emergency purchase of a chiller. I bought my son a Whopper the other day, JUST the Whopper, no meal deal, and it was $9.50! $7.20 for a gallon of chocolate milk.

The Algae problem solver guide says just to wait it out and it could last for months....

I may be dealing with this for some time to come.

Any other diagnosis would be appreciated. Thoughts & Suggestions Please


Gambierdiscus.jpeg
10 Weeks Later, The Pestilence is Gone

Well it has taken 10 weeks after the heat wave for me to rid my aquarium of this pestilence! I usually change out a handful of filter floss every week in the 2nd chamber of my sump . But alas this was not sufficient to remove the algae.

So I reinstalled the filter socks that came with the sump and I bought two more. I had a rotation of 4 filter socks going. I would clean the glass every two days. Wait an hour for the water to clear. Change out the filter socks. Clean out the ones I just removed with the "JET" setting on my hose nozzle. Let the removed and clean filter socks dry out for 48 hours to make sure I was not putting any of this crap back into the circulation of my tank.

Wash, Rinse, Repeat every two days.

As the bloom began to lessen in severity, the time between washings increased.

None of this would have been possible if it were not for my children. I was away for two weeks and they kept up the cleaning routine in my absence. My algae problem would not have subsided if it were not for the hard work put in my my children. I am so grateful that they were willing to take on the responsibility of this God awful task of cleaning filter socks every two days.

I also put two different Live Bacteria solutions, Dr. Tims and Turbo Start. The thought / goal behind that was that my good bacteria were out of whack with the sustained increased temperatures of the tank for nearly 3 weeks due to the heat wave.

With all the work getting rid of the algae and removing it from the system balance seems to have been restored.

I lost 2 across and one white bubble frag that is still hanging on for its life. I only see the globes at night lit up by the blue actinic lights. They are barely above the skeleton. Hope it recovers, only time will tell.

Not sure where this is headed, but we just installed Solar Panels on the roof and the local electric company is paying me for my energy production about $50 a month. Love that, not sure what it would be for the time I were to run an A/C system

My wife and kids have now started pestering me like this "Dad, we NEED a/c FOR THE FISH!" My retort to this is" for 10% of the cost of an A/C installation, I can install a chiller! Which hasn't gone over too well. Still struggling with the moral dilemma of "Fish & Corals before Humans or Humans before Fish & Corals". LOL! o_O:face-with-spiral-eyes::face-with-hand-over-mouth:
 

More than just hot air: Is there a Pufferfish in your aquarium?

  • There is currently a pufferfish in my aquarium.

    Votes: 30 17.0%
  • There is not currently a pufferfish in my aquarium, but I have kept one in the past.

    Votes: 30 17.0%
  • There has never been a pufferfish in my aquarium, but I plan to keep one in the future.

    Votes: 32 18.2%
  • I have no plans to keep a pufferfish in my aquarium.

    Votes: 76 43.2%
  • Other.

    Votes: 8 4.5%
Back
Top