Clittrell

Community Member
View Badges
Joined
Jan 16, 2010
Messages
30
Reaction score
19
Location
Shelton
Rating - 0%
0   0   0
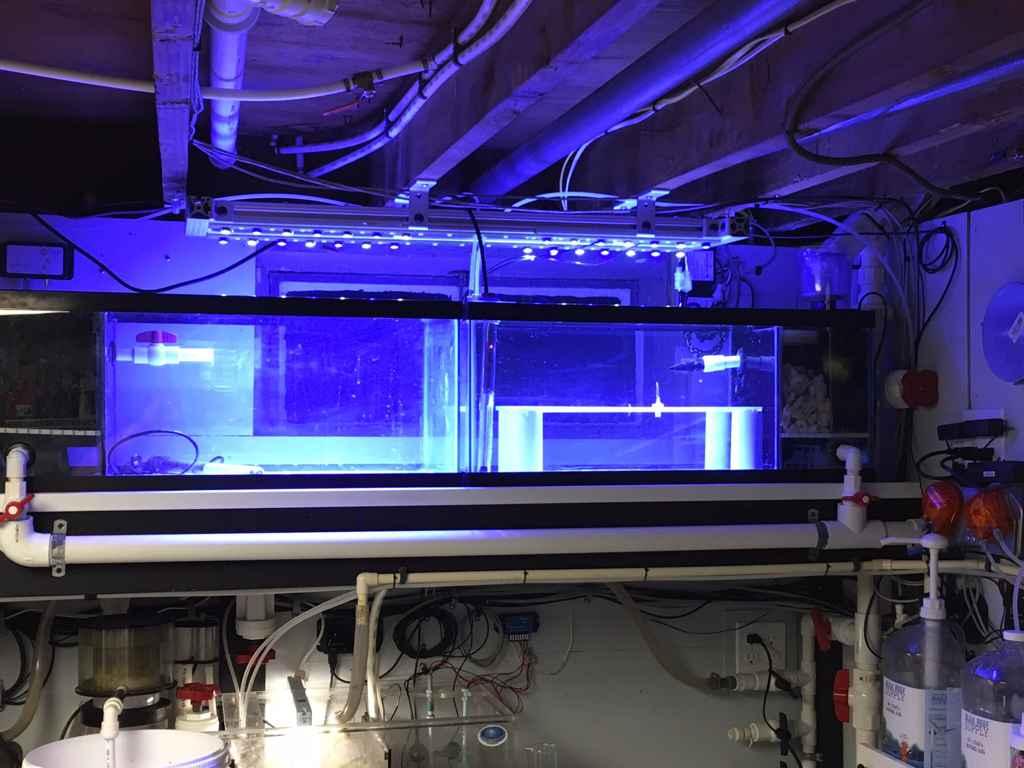
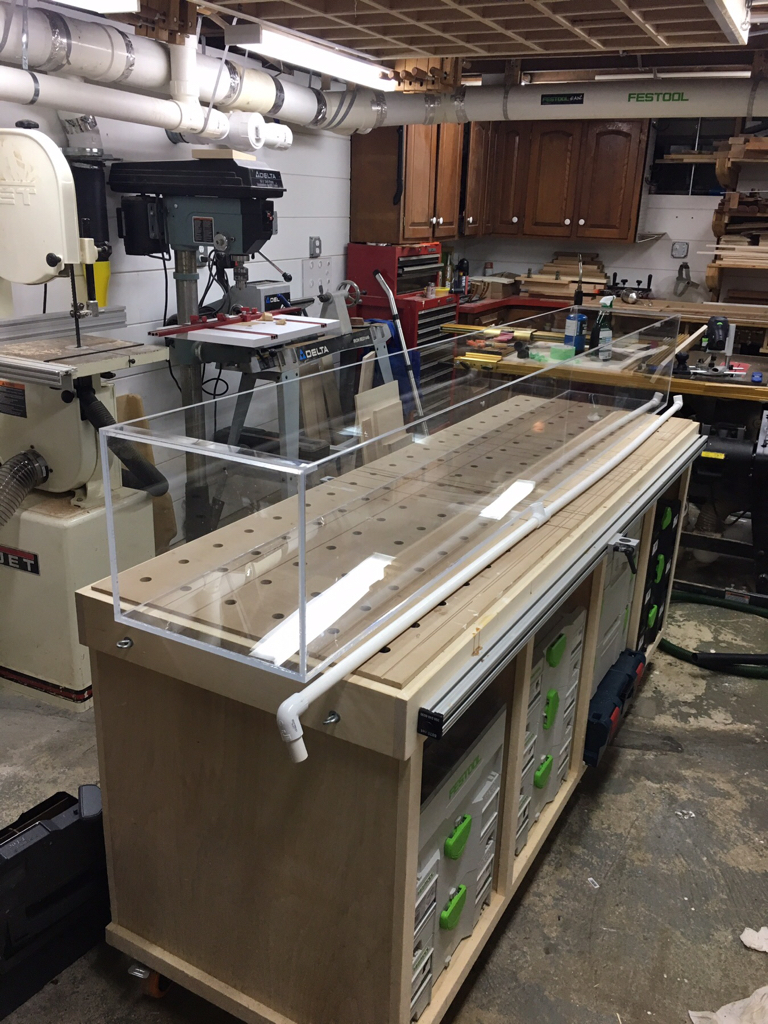
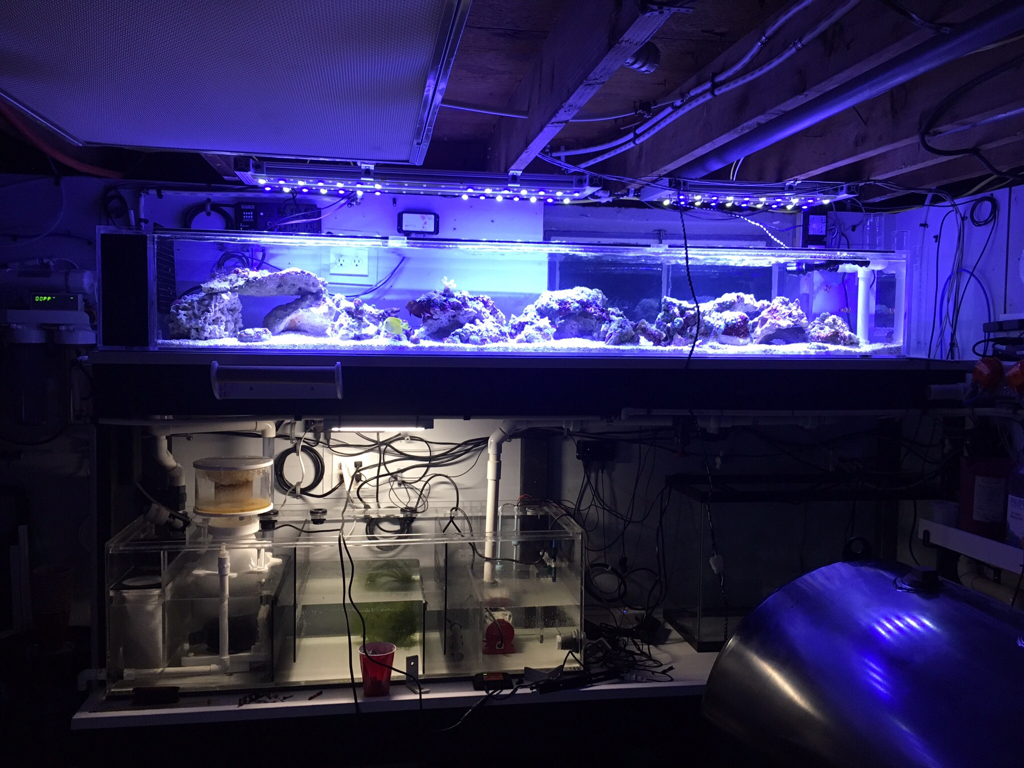
Long story short my 58 gallon Oceanic tank with basement sump had to come down for space. I built a new tank in the basement. All was going fine until I cooked the tank. 106 degrees and nothing lives. This thread will document the rebuild and upgrade to that system.
 
OP
OP
C

Clittrell

Community Member
View Badges
Joined
Jan 16, 2010
Messages
30
Reaction score
19
Location
Shelton
Rating - 0%
0   0   0
The oceanic was fairly straight forward setup tank in living room and the sump in the basement. The system survived a move in 2011 and until the summer of 2017 was running without any real issues. The sump in the basement also had a simple water station and 2 twenty long qt tanks.

ae48f0344eda4d9ecee41fad893da4f0.jpg
 
OP
OP
C

Clittrell

Community Member
View Badges
Joined
Jan 16, 2010
Messages
30
Reaction score
19
Location
Shelton
Rating - 0%
0   0   0
This is basically how the system ran until summer of 2017. I knew I needed more space upstairs and that the 58 would need to come done. After much pondering I decided t build a tank that had the same foot print of 3 twenty longs. I had build several sumps before so building a tank seem like a logical plan and I happened to have a sheet of 4x8’ cellcast acrylic in the shop. Time to get started.

Early before overflow and bracing.

b9d1a370372ff2458de81b58b5d48ca4.jpg
 
OP
OP
C

Clittrell

Community Member
View Badges
Joined
Jan 16, 2010
Messages
30
Reaction score
19
Location
Shelton
Rating - 0%
0   0   0
Here is a photo with tank in place and stuff moved from the tank upstairs. This was literally days before the disaster. I still look at this photo and use it to remind me that we need to do everything we can to provide the best we can for our tanks.

2041a552b8bf1d305605bb1756021c6c.jpg


Then on the morning of October 8th I was updating the controller removing modules left from the tank upstairs and somehow deleted the PM1 that controlled the 1000w heater. It was only in there because the tank upstairs was using the more appropriately sized heater. Then I left for the day. I did not realize the controller turned on the heater thinking the new tank was 20 degrees.

I returned home later in the day and did not think much of a slight strange smell in the house. Late that night I went down stairs and disaster. The skimmer was covered in thick foam and after sticking my hand in the water realized the tank was 106.

It was a total loss. It was bad. I had some stuff in the tank for 10+ years. I had worked so hard to move the tank in 2011 and then move to the basement. In 10 hours I had killed it all.

I had shortcut some of the safeties I had in the past on the controller. The email was not working right and the alarms were all set for the 58 not the new one.

Time for a break...
 

AKReef

Active Member
View Badges
Joined
Nov 3, 2017
Messages
245
Reaction score
335
Rating - 0%
0   0   0
This is basically how the system ran until summer of 2017. I knew I needed more space upstairs and that the 58 would need to come done. After much pondering I decided t build a tank that had the same foot print of 3 twenty longs. I had build several sumps before so building a tank seem like a logical plan and I happened to have a sheet of 4x8’ cellcast acrylic in the shop. Time to get started.

Early before overflow and bracing.

b9d1a370372ff2458de81b58b5d48ca4.jpg

Sorry for you lose.

I love your MFT/syscart there. I need to build something similar and have been looking for ideas. What are the eye bolts for on the end?
 

Chris Littrell

New Member
View Badges
Joined
Nov 7, 2017
Messages
24
Reaction score
21
Location
Shelton CT
Rating - 0%
0   0   0
After emptying the tank of rock and substrate. I took one piece of rock with some corals on it to a tank I have at the school where I work. It was running and maybe something would survive, but it was a lost cause.

So the next step was bleach and let it sit.

After a week in bleach I put the rock out in the sun and let it dry. Changed the water in the tank a few times. Filled it with fresh RODI and just left it running.

I started on working on a list of fixes I wanted...

Controller redundancies
Better cable management
New water mixing station
Random equipment upgrades
Better quarantine setup
Take advantage of some of the new 24v offerings from Neptune Systems
Better refugium lighting

I upgraded some equipment when I moved the tank from upstairs to the new tank in the basement over the summer. This list included...

New homemade sump. (The time it was running showed me a few fixes I wanted to make)
New skimmer (thought it would have fit in the old sump)
New return pump

At this point this is the closest picture to what it all looked like minus stuff in the tank.


4CBA284E-3616-4C3E-9414-D27E1184C02A.jpeg
 

Chris Littrell

New Member
View Badges
Joined
Nov 7, 2017
Messages
24
Reaction score
21
Location
Shelton CT
Rating - 0%
0   0   0
I love your MFT/syscart there. I need to build something similar and have been looking for ideas. What are the eye bolts for on the end?

If you look in the top of that photo you can just make out a grid that is the bottom of a 4x8’ top that drops from the ceiling. I use some turnbuckles to hook it on to the cart. It has the same hole pattern. I had a CNC shop cut a tamplate that I can use to put the holes in the MDF.
 

AKReef

Active Member
View Badges
Joined
Nov 3, 2017
Messages
245
Reaction score
335
Rating - 0%
0   0   0
If you look in the top of that photo you can just make out a grid that is the bottom of a 4x8’ top that drops from the ceiling. I use some turnbuckles to hook it on to the cart. It has the same hole pattern. I had a CNC shop cut a tamplate that I can use to put the holes in the MDF.

I can see the torsion box above. That is a great idea! Wonderful shop setup!
 

AKReef

Active Member
View Badges
Joined
Nov 3, 2017
Messages
245
Reaction score
335
Rating - 0%
0   0   0
Here is a photo with tank in place and stuff moved from the tank upstairs. This was literally days before the disaster. I still look at this photo and use it to remind me that we need to do everything we can to provide the best we can for our tanks.

2041a552b8bf1d305605bb1756021c6c.jpg


Then on the morning of October 8th I was updating the controller removing modules left from the tank upstairs and somehow deleted the PM1 that controlled the 1000w heater. It was only in there because the tank upstairs was using the more appropriately sized heater. Then I left for the day. I did not realize the controller turned on the heater thinking the new tank was 20 degrees.

I returned home later in the day and did not think much of a slight strange smell in the house. Late that night I went down stairs and disaster. The skimmer was covered in thick foam and after sticking my hand in the water realized the tank was 106.

It was a total loss. It was bad. I had some stuff in the tank for 10+ years. I had worked so hard to move the tank in 2011 and then move to the basement. In 10 hours I had killed it all.

I had shortcut some of the safeties I had in the past on the controller. The email was not working right and the alarms were all set for the 58 not the new one.

Time for a break...

I think, like any disastrous event, it’s not one, but a series of missteps that lead up to the event. Not that it makes it any easier, but at least you’ve identified those missteps so you can learn to avoid them in the future. And thank you for sharing so hopefully others can learn from your misfortune and avoid a similar fate.

Again, sorry for your loss and I’ll be watching the progress of your recovery...in the hopes that I might see some more Festools ;)
 

Chris Littrell

New Member
View Badges
Joined
Nov 7, 2017
Messages
24
Reaction score
21
Location
Shelton CT
Rating - 0%
0   0   0
The Sump: New skimmer and return pump too.

I had built several sumps in the past for tanks that I have at the school I work at but it was time to replace the sump at home. I did that when I took down the tank upstairs. This helped in two ways. One I could have both the new and the old system up and running at the same time and it let me build a bigger sump.

The skimmer is a SKIMZ MONZTER SM203 DC INTERNAL PROTEIN SKIMMER. I had bought it awhile ago thinking I could make it fit in the old sump, nope.

I also was no longer running the tank upstairs so I elected the stop using the blue line external pump and switch to a new VARIOS-4 CONTROLLABLE DC PUMP (1050 GPH). I know some may question the reliability of DC but sure is a smooth and slick pump.

The sump is 48" x 18" x 15" tall. It was built with some ability to add more tanks in the future.

  • Main drain, Socks, Skimmer section with Emergency drain, Refugium section, High flow area, pump section.
  • It has a drain for skimate but for now I am not using. Will when the tank has been running longer and I have a better idea how much is coming out. This skimmer does not seem to randomly overflow like my last one did.
  • Both the skimmer section and the refugium section have an over / under baffle so they could be switched if science tells me that is better.
  • I added the egg crate in the refugium as part of the upgrades. I like the way the macro is not always trying to go over the baffle.
  • The high flow area was just a way to create a space that the water speeds up in for dosing.
  • I like the built in prob holders unfortunately I made them a little close to the bracing so the tall probes can be hard to get in and out.
  • There is a drain on the sump that runs to the outside. All of my setup uses this drain including the RODI sink. More on this in another post. It is tied into the downspout system so I am not adding extra water to the septic system. RODI goes here too.
The SM203 so far has been great. I know that Skims had some issues with pumps so I am always nervous about that failing. If it does I think I will get a Reef Octopus skimmer pump. With a little work I think the Various-4 would fit fine. I tested the return pump in the housing before I put all this together. Not that I think you are going to change pump speed much I do like Apex conductivity that the current Skims pump does not have.

The Varios-4 is a great pump. Like others have said you can't tell if its running other than water moves. Like the skimmer is seems strange to need to vary the speed of the return pump. We all spend time trying to tune the return valves for just the right amount of water. We I must say I have been supprized at how much easier it is to change the program rather than the valve to tune. Also with the emergency drain I have feed d on the apex turn on the return pump to full. This increased flow is nice to stir up both the sump and the tank. Programmatically I turn off some float valves for top off since the water level does drop in the sump. Runs for 10 min and then everything returns to normal.

Time will tell on the DC pumps and they longevity but the savings in power (48watts for both) and the control is really nice. The extra of no noise just puts them over the top.

Some photos.

1 - 1.jpg
Sump setup the first time. No egg crate in the refugium. Wires were a mess.


Version 2.jpg
Sump setup for second time. Egg crate in the Refugium. Wires are better. More on that in another post. Also better light. More on that in another post.

1 - 1.jpg
close up

1 - 2.jpg
Not a great photo but you can see the heater and the float switches. All flow through the sump is directed around the pump in a clockwise manor. The red and black tubes dose ALK and CA.

1 - 3.jpg
Temp and pH probe in the skimmer section. Also have temp and pH probe in the higher flow area. After the last disaster I want as much redundancy as I can have.
 
Last edited:

Chris Littrell

New Member
View Badges
Joined
Nov 7, 2017
Messages
24
Reaction score
21
Location
Shelton CT
Rating - 0%
0   0   0
New Apex and Cable management...

Thanks to some good Black Friday deals I was able to upgrade from the original to the new Apex. I have been looking at this for a while but was always happy with the old one. I had two base units so I felt good having a spare. It was really some of the 24v relays valves and pumps that were causing me to want to upgrade. So I took the plunge. Also the old stuff holds it's value so I sold some on the other site. The new system is defiantly slick. Packaging is very good. The eb832 has a lot to offer. With the new DC motors it is great to see the power on each outlet. The other goal of the upgrade was to clean up some of the wiring. In the old setup I used gray plastic conduit holders to run the wires it worked well but was hard to make changes. I did some looking around on other build threads and found a much better solution from StarTech it comes in different sized depending on how many cables you are running. I have all three sizes, 3x3, 1x2, and 1x1.

1 - 1.jpg
To keep with the Apex theme I painted the covers orange.


1 - 1.jpg

Not totally done in this photo but you can see the new brain, eb832 and much of the StarTech conduit.

It is a vast improvement over the old solution and is relatively cost effective. I cut the 5' sections into shorter sections so I don't often need to remove 5' to make a change.
 

Chris Littrell

New Member
View Badges
Joined
Nov 7, 2017
Messages
24
Reaction score
21
Location
Shelton CT
Rating - 0%
0   0   0
A few posts back I said I would have more on the refugium lighting. Sorry it has been so long. If you look through the photos I have had two lights on the fuge. The first is the Kessil H80. The controls are great and with the Apex you can easily make it do what you want it to do. However I found it was just not bright enough. Luckily I found a H150 Purple online used. It is a fantastic light and grows the refugium like mad. Here is the problem, Kessil stopped making it. It is still listed on their website but I have emailed with Kessil several times to discuss this h150p. It is not controllable like the h80 but I have found on my setup it is just the right amount light. You can still find them new online but the price keeps going up. I also find that the H380 is too big. I just don't need to run 90watt led light. Could have used 2 H80 but that would have been a more money and harder to due.

1 - 1 (8).jpg
 

Chris Littrell

New Member
View Badges
Joined
Nov 7, 2017
Messages
24
Reaction score
21
Location
Shelton CT
Rating - 0%
0   0   0
Just wanted to post a few picks. 3 bangi cardinals were added to the tank the other night. So we are back to having fish. They spent a few months in QT to make sure they were healthy and give the MT time to be fallow. They really seem to like there new home.

IMG_1154.jpg


IMG_1124.jpg
 

A worm with high fashion and practical utility: Have you ever kept feather dusters in your reef aquarium?

  • I currently have feather dusters in my tank.

    Votes: 78 38.2%
  • Not currently, but I have had feather dusters in my tank in the past.

    Votes: 69 33.8%
  • I have not had feather dusters, but I hope to in the future.

    Votes: 26 12.7%
  • I have no plans to have feather dusters in my tank.

    Votes: 29 14.2%
  • Other.

    Votes: 2 1.0%
Back
Top