DIY - Aquatic Life DX18 Canopy/Shade

tmnails

Community Member
View Badges
Joined
Nov 20, 2019
Messages
67
Reaction score
70
Rating - 0%
0   0   0
Hey everyone!

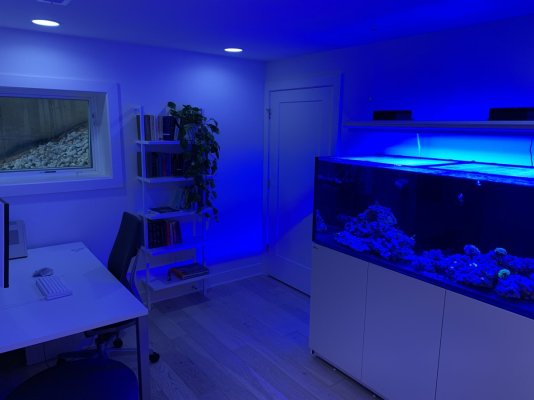
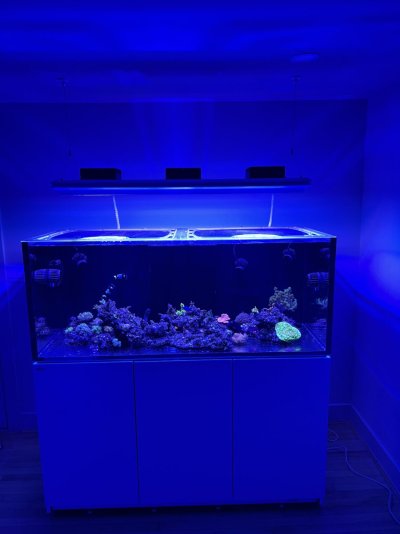
My name is Trevor, and I am finally wrapping up a 180 gallon system that is going in my living room. Since this room is the main living space, I have a couple requirements of this tank for my own sanity that may not pertain to tanks in other areas of the house.

1) It has to be quiet
2) It can't bleed light everywhere
3) It has to look clean - both inside and out

PXL_20201024_004102086.jpg


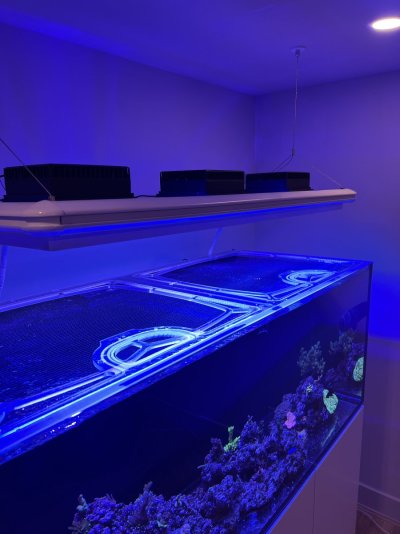
The lighting for this system is a 60" Aquatic Life DX18 with (4) T5 lamps, as well as (3) Kessil A360x's mounted along the center. After hanging this fixture and turning it on, it immediately became apparent that something needed to be done with the light spill into the room, as well as the harsh glare coming from both the T5's and the Kessils. Fortunately the Kessils was an easy fix with the narrow beam reflectors. I bought those, slapped them on and simply raised the fixture from 8" above water to about 13" above water and the light distribution evened out.

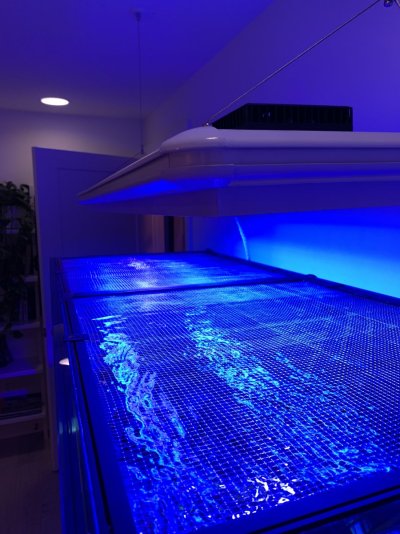
The T5's however.... Not as simple of a fix. But on a setup without an enclosed canopy, I should have known that this would be an issue. So I built a shade that absolutely mitigates both the light spill into the room as well as the harsh glare from the T5's that strained my eyes even from a peripheral angle. While I am not a lighting engineer, I am a commercial/industrial master electrician by trade and have spent a great deal of time constructing, retrofitting, and installing expensive lighting fixtures throughout the years. And this project is not too difficult! Hopefully it can help someone with a similar lighting requirement in their home.

As you can see in the first picture, the reflectors of the Aquatic Life itself are very visible from straight on and below the fixture and they bounce light into the room. All that is needed here (at least in my application) is a 1" lip surrounding the reflector that extends down toward the water. If you aren't sure if 1" will be enough for you, grab some painters tape and some cardboard and tape up some pieces to see what length you need.

PXL_20201025_173711786.jpg

This is the underside of the fixture, where we will be building the shade in place.

PXL_20201025_173808947.jpg

This is extruded aluminum angle stock, which just became available at my local Home Depot. It's sold in 8' sections, so I needed four of them. About $15 each.

PXL_20201025_204932187.jpg

Here are the other tools I used. Aluminum Primer and matte black paint, good off for the stupid stickers on the aluminum, a heavy pair of Wiss snips to cut the aluminum, a sheet metal seamer to tweak your cuts back to straight, and a file to clean edges or shave off a little more after cutting. Alternatively you could use a miter saw with a metal blade , or band saw, but these work fine. You'll need two hands to snip the metal though, lol. It would also be a good idea to take the stickers off now, instead of after it's built (like I did).

PXL_20201025_202029162.jpg

Here is the goal. Cut your pieces on the outside first, EXACTLY to the length of the rubber corners of the fixture. The rubber corners are raised, so the aluminum can snap into it, as shown above. Cut as closely as you can, erring on long and shaving it down. Get it as snug as practical for the cleanest look. I built the outside box first and did the two inside pieces last since there isn't much to support them.

As far as bonding the aluminum together, I used the super glue shown above. This is NOT an indestructible bond. I would certainly not build an entire fixture this way, but super glue bonds well to aluminum, and the Aquatic Life fixture is a sturdy base so there will be no flexing of the shade once installed. Just don't be rough will it at any point.

For my joints, I cut every piece exactly to length, then cut (8) pieces of angle to just shy of an inch, then glued my corners as you can see in the picture. Pinch and hold for (15) seconds or so. After the perimeter box is done, do the remaining inside long pieces.

PXL_20201025_202040864.jpg

Here is a close up of what I did for corners. You can see my short angle pieces I used to join my corners, and also how the sections butt right into the rubber corners of the fixture.

PXL_20201025_202145870.jpg

Super glue holds the entire shade together well. Again just treat it delicately, since it isn't held together by a mechanical means such as screws.

PXL_20201025_203911979.jpg

Two coats of primer about 15 minutes apart (not more than an hour apart). Then let it cure for 48 hours.

PXL_20201027_231732534.jpg

Same with the paint, 2 coats in 15 minutes.

PXL_20201027_231742313.jpg

Here's a close-up of the corners after paint. Not perfect, but it's clean and presentable and won't detract from the DX18, which I think is one of the better looking fixtures available today.

PXL_20201030_223719474.jpg

Lastly, we get some black silicone and run a thin bead along the perimeter of the DX18, then place the shade on top of the fixture. This will serve as both the fastening means for the shade to the fixture, as well as a gasket to prevent light shining between the shade and fixture. (Sorry for not getting any pictures of this part, but its pretty simple). After 24 hours, I flipped the fixture and ran a bead of silicone from the underside to the two inner sections of the shade. And above is the final picture.

PXL_20201030_223923513.jpg

The paint is a pretty close match, and it doesn't drastically change the aesthetic of the fixture. And it MASSIVELY cuts down on glare and room spill.

Thanks for reading! Let me know if you have any questions :)
 

Jseimo

Active Member
View Badges
Joined
Oct 26, 2018
Messages
453
Reaction score
1,542
Location
West Fargo
Rating - 0%
0   0   0
Clever. It looks like it’s designed that way from the factory. I just had to build a canopy for mine. But I have a rimmed tank
 

jmichaelh7

2500 Club Member
View Badges
Joined
May 29, 2020
Messages
3,862
Reaction score
1,962
Location
Hanford ca
Rating - 0%
0   1   0
Hey everyone!

My name is Trevor, and I am finally wrapping up a 180 gallon system that is going in my living room. Since this room is the main living space, I have a couple requirements of this tank for my own sanity that may not pertain to tanks in other areas of the house.

1) It has to be quiet
2) It can't bleed light everywhere
3) It has to look clean - both inside and out

PXL_20201024_004102086.jpg


The lighting for this system is a 60" Aquatic Life DX18 with (4) T5 lamps, as well as (3) Kessil A360x's mounted along the center. After hanging this fixture and turning it on, it immediately became apparent that something needed to be done with the light spill into the room, as well as the harsh glare coming from both the T5's and the Kessils. Fortunately the Kessils was an easy fix with the narrow beam reflectors. I bought those, slapped them on and simply raised the fixture from 8" above water to about 13" above water and the light distribution evened out.

The T5's however.... Not as simple of a fix. But on a setup without an enclosed canopy, I should have known that this would be an issue. So I built a shade that absolutely mitigates both the light spill into the room as well as the harsh glare from the T5's that strained my eyes even from a peripheral angle. While I am not a lighting engineer, I am a commercial/industrial master electrician by trade and have spent a great deal of time constructing, retrofitting, and installing expensive lighting fixtures throughout the years. And this project is not too difficult! Hopefully it can help someone with a similar lighting requirement in their home.

As you can see in the first picture, the reflectors of the Aquatic Life itself are very visible from straight on and below the fixture and they bounce light into the room. All that is needed here (at least in my application) is a 1" lip surrounding the reflector that extends down toward the water. If you aren't sure if 1" will be enough for you, grab some painters tape and some cardboard and tape up some pieces to see what length you need.

PXL_20201025_173711786.jpg

This is the underside of the fixture, where we will be building the shade in place.

PXL_20201025_173808947.jpg

This is extruded aluminum angle stock, which just became available at my local Home Depot. It's sold in 8' sections, so I needed four of them. About $15 each.

PXL_20201025_204932187.jpg

Here are the other tools I used. Aluminum Primer and matte black paint, good off for the stupid stickers on the aluminum, a heavy pair of Wiss snips to cut the aluminum, a sheet metal seamer to tweak your cuts back to straight, and a file to clean edges or shave off a little more after cutting. Alternatively you could use a miter saw with a metal blade , or band saw, but these work fine. You'll need two hands to snip the metal though, lol. It would also be a good idea to take the stickers off now, instead of after it's built (like I did).

PXL_20201025_202029162.jpg

Here is the goal. Cut your pieces on the outside first, EXACTLY to the length of the rubber corners of the fixture. The rubber corners are raised, so the aluminum can snap into it, as shown above. Cut as closely as you can, erring on long and shaving it down. Get it as snug as practical for the cleanest look. I built the outside box first and did the two inside pieces last since there isn't much to support them.

As far as bonding the aluminum together, I used the super glue shown above. This is NOT an indestructible bond. I would certainly not build an entire fixture this way, but super glue bonds well to aluminum, and the Aquatic Life fixture is a sturdy base so there will be no flexing of the shade once installed. Just don't be rough will it at any point.

For my joints, I cut every piece exactly to length, then cut (8) pieces of angle to just shy of an inch, then glued my corners as you can see in the picture. Pinch and hold for (15) seconds or so. After the perimeter box is done, do the remaining inside long pieces.

PXL_20201025_202040864.jpg

Here is a close up of what I did for corners. You can see my short angle pieces I used to join my corners, and also how the sections butt right into the rubber corners of the fixture.

PXL_20201025_202145870.jpg

Super glue holds the entire shade together well. Again just treat it delicately, since it isn't held together by a mechanical means such as screws.

PXL_20201025_203911979.jpg

Two coats of primer about 15 minutes apart (not more than an hour apart). Then let it cure for 48 hours.

PXL_20201027_231732534.jpg

Same with the paint, 2 coats in 15 minutes.

PXL_20201027_231742313.jpg

Here's a close-up of the corners after paint. Not perfect, but it's clean and presentable and won't detract from the DX18, which I think is one of the better looking fixtures available today.

PXL_20201030_223719474.jpg

Lastly, we get some black silicone and run a thin bead along the perimeter of the DX18, then place the shade on top of the fixture. This will serve as both the fastening means for the shade to the fixture, as well as a gasket to prevent light shining between the shade and fixture. (Sorry for not getting any pictures of this part, but its pretty simple). After 24 hours, I flipped the fixture and ran a bead of silicone from the underside to the two inner sections of the shade. And above is the final picture.

PXL_20201030_223923513.jpg

The paint is a pretty close match, and it doesn't drastically change the aesthetic of the fixture. And it MASSIVELY cuts down on glare and room spill.

Thanks for reading! Let me know if you have any questions :)
I'm currently looking into a canopy or something to reduce the glare from 3 radions and aquatic life fixture. Would you say this was worth it or did you end up moving to a canopy?
 
OP
OP
tmnails

tmnails

Community Member
View Badges
Joined
Nov 20, 2019
Messages
67
Reaction score
70
Rating - 0%
0   0   0
I'm currently looking into a canopy or something to reduce the glare from 3 radions and aquatic life fixture. Would you say this was worth it or did you end up moving to a canopy?
The short answer is both lol. This worked well when I was mostly using the LEDs for lighting. I did end up moving to a canopy recently because I wanted to get more T5's going. I currently have 8x T5's and my Kessils, and the only plausible way to tolerate that much light in a living space is with a canopy in my opinion.

But when I was only using Kessils, the shields from this thread worked well :)
 

Gumbies R Us

Another Fish in the Sea
View Badges
Joined
Nov 10, 2022
Messages
9,865
Reaction score
18,970
Location
North Georgia
Rating - 0%
0   0   0
Hey everyone!

My name is Trevor, and I am finally wrapping up a 180 gallon system that is going in my living room. Since this room is the main living space, I have a couple requirements of this tank for my own sanity that may not pertain to tanks in other areas of the house.

1) It has to be quiet
2) It can't bleed light everywhere
3) It has to look clean - both inside and out

PXL_20201024_004102086.jpg


The lighting for this system is a 60" Aquatic Life DX18 with (4) T5 lamps, as well as (3) Kessil A360x's mounted along the center. After hanging this fixture and turning it on, it immediately became apparent that something needed to be done with the light spill into the room, as well as the harsh glare coming from both the T5's and the Kessils. Fortunately the Kessils was an easy fix with the narrow beam reflectors. I bought those, slapped them on and simply raised the fixture from 8" above water to about 13" above water and the light distribution evened out.

The T5's however.... Not as simple of a fix. But on a setup without an enclosed canopy, I should have known that this would be an issue. So I built a shade that absolutely mitigates both the light spill into the room as well as the harsh glare from the T5's that strained my eyes even from a peripheral angle. While I am not a lighting engineer, I am a commercial/industrial master electrician by trade and have spent a great deal of time constructing, retrofitting, and installing expensive lighting fixtures throughout the years. And this project is not too difficult! Hopefully it can help someone with a similar lighting requirement in their home.

As you can see in the first picture, the reflectors of the Aquatic Life itself are very visible from straight on and below the fixture and they bounce light into the room. All that is needed here (at least in my application) is a 1" lip surrounding the reflector that extends down toward the water. If you aren't sure if 1" will be enough for you, grab some painters tape and some cardboard and tape up some pieces to see what length you need.

PXL_20201025_173711786.jpg

This is the underside of the fixture, where we will be building the shade in place.

PXL_20201025_173808947.jpg

This is extruded aluminum angle stock, which just became available at my local Home Depot. It's sold in 8' sections, so I needed four of them. About $15 each.

PXL_20201025_204932187.jpg

Here are the other tools I used. Aluminum Primer and matte black paint, good off for the stupid stickers on the aluminum, a heavy pair of Wiss snips to cut the aluminum, a sheet metal seamer to tweak your cuts back to straight, and a file to clean edges or shave off a little more after cutting. Alternatively you could use a miter saw with a metal blade , or band saw, but these work fine. You'll need two hands to snip the metal though, lol. It would also be a good idea to take the stickers off now, instead of after it's built (like I did).

PXL_20201025_202029162.jpg

Here is the goal. Cut your pieces on the outside first, EXACTLY to the length of the rubber corners of the fixture. The rubber corners are raised, so the aluminum can snap into it, as shown above. Cut as closely as you can, erring on long and shaving it down. Get it as snug as practical for the cleanest look. I built the outside box first and did the two inside pieces last since there isn't much to support them.

As far as bonding the aluminum together, I used the super glue shown above. This is NOT an indestructible bond. I would certainly not build an entire fixture this way, but super glue bonds well to aluminum, and the Aquatic Life fixture is a sturdy base so there will be no flexing of the shade once installed. Just don't be rough will it at any point.

For my joints, I cut every piece exactly to length, then cut (8) pieces of angle to just shy of an inch, then glued my corners as you can see in the picture. Pinch and hold for (15) seconds or so. After the perimeter box is done, do the remaining inside long pieces.

PXL_20201025_202040864.jpg

Here is a close up of what I did for corners. You can see my short angle pieces I used to join my corners, and also how the sections butt right into the rubber corners of the fixture.

PXL_20201025_202145870.jpg

Super glue holds the entire shade together well. Again just treat it delicately, since it isn't held together by a mechanical means such as screws.

PXL_20201025_203911979.jpg

Two coats of primer about 15 minutes apart (not more than an hour apart). Then let it cure for 48 hours.

PXL_20201027_231732534.jpg

Same with the paint, 2 coats in 15 minutes.

PXL_20201027_231742313.jpg

Here's a close-up of the corners after paint. Not perfect, but it's clean and presentable and won't detract from the DX18, which I think is one of the better looking fixtures available today.

PXL_20201030_223719474.jpg

Lastly, we get some black silicone and run a thin bead along the perimeter of the DX18, then place the shade on top of the fixture. This will serve as both the fastening means for the shade to the fixture, as well as a gasket to prevent light shining between the shade and fixture. (Sorry for not getting any pictures of this part, but its pretty simple). After 24 hours, I flipped the fixture and ran a bead of silicone from the underside to the two inner sections of the shade. And above is the final picture.

PXL_20201030_223923513.jpg

The paint is a pretty close match, and it doesn't drastically change the aesthetic of the fixture. And it MASSIVELY cuts down on glare and room spill.

Thanks for reading! Let me know if you have any questions :)
Wow it looks really good too!!
 

jmichaelh7

2500 Club Member
View Badges
Joined
May 29, 2020
Messages
3,862
Reaction score
1,962
Location
Hanford ca
Rating - 0%
0   1   0
The short answer is both lol. This worked well when I was mostly using the LEDs for lighting. I did end up moving to a canopy recently because I wanted to get more T5's going. I currently have 8x T5's and my Kessils, and the only plausible way to tolerate that much light in a living space is with a canopy in my opinion.

But when I was only using Kessils, the shields from this thread worked well :)
Bummer.

I have the same setup on this diy kit but with 3 radions in the middle. Do you think it will work?

I might need to do a canopy but this was a way easier solution
 
OP
OP
tmnails

tmnails

Community Member
View Badges
Joined
Nov 20, 2019
Messages
67
Reaction score
70
Rating - 0%
0   0   0
It would still work I believe. What I would suggest is getting couple long rips of cardboard and tape it on your fixture to see how deep you need to make your shield. The biggest issue for me was the glare hitting my eyes at my sitting area in the living room. I found I only needed that 1 1/2" shade to prevent that from happening.

For what it's worth, You've also inspired me to finally post the walkthru on my sit stand canopy lol. Here's the link for that if you're interested: https://www.reef2reef.com/threads/diy-sit-stand-canopy.956122/
 

Ky_acc

Active Member
View Badges
Joined
Jun 16, 2019
Messages
272
Reaction score
116
Rating - 0%
0   0   0
Hey @tmnails - thank you so much for this.

I have been wanting to pull the trigger on the t5 hybrid fixture but just could not get past the glare issue. Also the aesthetics are a big component so I really appreciate your detailed guide and how well the finished product came together

thanks again!
 
OP
OP
tmnails

tmnails

Community Member
View Badges
Joined
Nov 20, 2019
Messages
67
Reaction score
70
Rating - 0%
0   0   0
Hey @tmnails - thank you so much for this.

I have been wanting to pull the trigger on the t5 hybrid fixture but just could not get past the glare issue. Also the aesthetics are a big component so I really appreciate your detailed guide and how well the finished product came together

thanks again!
Of course! I'm glad it helped.
 

Ky_acc

Active Member
View Badges
Joined
Jun 16, 2019
Messages
272
Reaction score
116
Rating - 0%
0   0   0
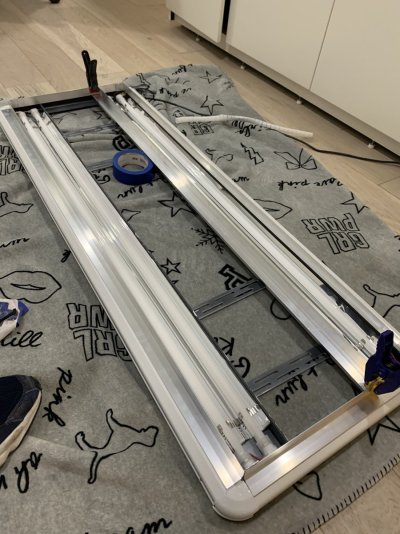
@tmnails — just circling back on this as I decided to order the DX18 fixture and do the same light shade using your guide

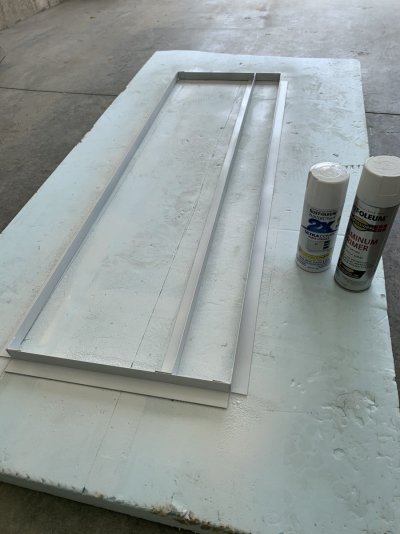
I also ended up painining the entire fixture white to better match my office.

Overall I would say that my effort turned out pretty good — would have been better if I’d had all the proper equipment / taken more time. But all in all id say it was a success

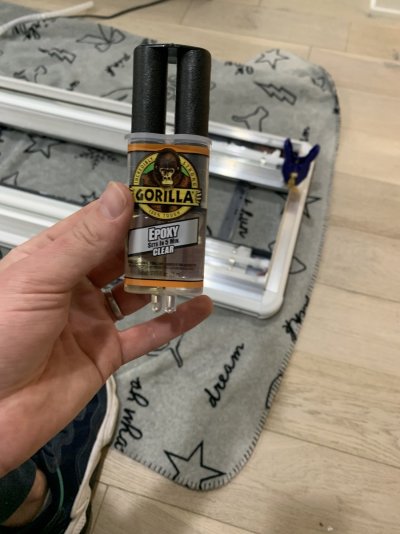
The below pics basically show my process. Only really changes I made were using gorilla epoxy instead of superglue to assemble the canopy, and then I used Flex Seal glue (white) to attach the light shade to the fixture.

I will say the most challenging part was painting the actual fixture itself white which took a number of redcoats and waiting to get it looking decent. The finish is not perfect as I did not have access to a dust free area to paint in (had to use my garage) and the temps in the low 50’s with on and off rain most of last week did not do me any favors either

The assembly / painting of the light shade itself was very easy following your guide


Thanks again!

7478ADE9-26C2-44F7-8322-D18CE749923E.jpeg

85367922-598C-492B-8A64-CE9E5850A541.jpeg 96753DAE-A200-4A72-A5D2-69795B653297.jpeg 27D394EE-004E-4ED8-8F40-CFB214DD7CB2.jpeg E5F4812C-8E3E-4DEE-AC6A-210CBC53D810.jpeg FE7AAB61-CDB9-430F-962B-F022CD0DCE3E.jpeg
 

Lbrdsoxfan

5000 Club Member
View Badges
Joined
Jun 13, 2021
Messages
5,064
Reaction score
8,025
Location
Long Beach, CA
Rating - 0%
0   0   0
I had to do something similar when I hung mine a few weeks ago, the light bleed at 8" off the water is stupid bad. I used 3" neoprene rubber tape on 3 sides. Made a heck of a difference.

Before
20230318_214623_HDR.jpg


After
20230330_135647_HDR.jpg
 
OP
OP
tmnails

tmnails

Community Member
View Badges
Joined
Nov 20, 2019
Messages
67
Reaction score
70
Rating - 0%
0   0   0
@tmnails — just circling back on this as I decided to order the DX18 fixture and do the same light shade using your guide

I also ended up painining the entire fixture white to better match my office.

Overall I would say that my effort turned out pretty good — would have been better if I’d had all the proper equipment / taken more time. But all in all id say it was a success

The below pics basically show my process. Only really changes I made were using gorilla epoxy instead of superglue to assemble the canopy, and then I used Flex Seal glue (white) to attach the light shade to the fixture.

I will say the most challenging part was painting the actual fixture itself white which took a number of redcoats and waiting to get it looking decent. The finish is not perfect as I did not have access to a dust free area to paint in (had to use my garage) and the temps in the low 50’s with on and off rain most of last week did not do me any favors either

The assembly / painting of the light shade itself was very easy following your guide


Thanks again!

7478ADE9-26C2-44F7-8322-D18CE749923E.jpeg

85367922-598C-492B-8A64-CE9E5850A541.jpeg 96753DAE-A200-4A72-A5D2-69795B653297.jpeg 27D394EE-004E-4ED8-8F40-CFB214DD7CB2.jpeg E5F4812C-8E3E-4DEE-AC6A-210CBC53D810.jpeg FE7AAB61-CDB9-430F-962B-F022CD0DCE3E.jpeg
Very nice look! Clean and white. I'm glad this worked for you!
 

Ky_acc

Active Member
View Badges
Joined
Jun 16, 2019
Messages
272
Reaction score
116
Rating - 0%
0   0   0
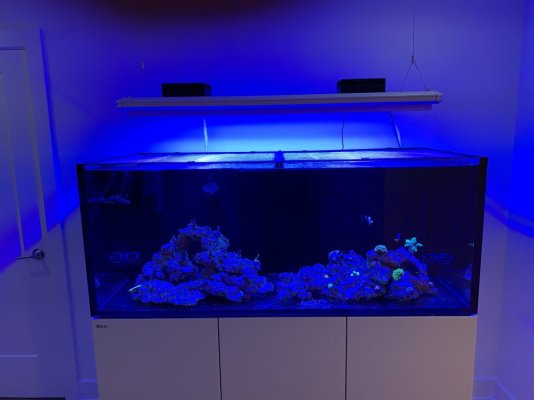
@tmnails - over a year later and still going strong!

I’m basically stuck with the light for the foreseeable future because it’s the only one you can add something like this to block light spill and still look good aesthetically.

I think manufacturers should consider light spill in their design and at least have an shade attachment of some kind

My work desk is 5 feet away from the aquarium and I sit far lower than the light - without this mod not sure what I would do. Thanks again!
 

Attachments

  • IMG_0713.jpeg
    IMG_0713.jpeg
    141 KB · Views: 12
  • IMG_0712.jpeg
    IMG_0712.jpeg
    86.1 KB · Views: 14
OP
OP
tmnails

tmnails

Community Member
View Badges
Joined
Nov 20, 2019
Messages
67
Reaction score
70
Rating - 0%
0   0   0
@tmnails - over a year later and still going strong!

I’m basically stuck with the light for the foreseeable future because it’s the only one you can add something like this to block light spill and still look good aesthetically.

I think manufacturers should consider light spill in their design and at least have an shade attachment of some kind

My work desk is 5 feet away from the aquarium and I sit far lower than the light - without this mod not sure what I would do. Thanks again!
Looks really nice, glad it's working!
 
Back
Top