ReefChef19

Active Member
View Badges
Joined
Feb 27, 2019
Messages
285
Reaction score
194
Rating - 0%
0   0   0
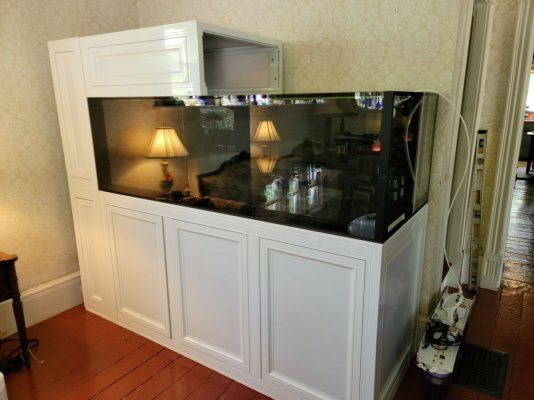
So guess what... Once I had the small 20 gallon APS stands I realized that they just happened to be the perfect size to make my hood.

I promise that this was a happy accidental discovery. I had intended to build my hood out of 80/20 aluminum and cover it with PVC board. I even purchased the materials to build it.

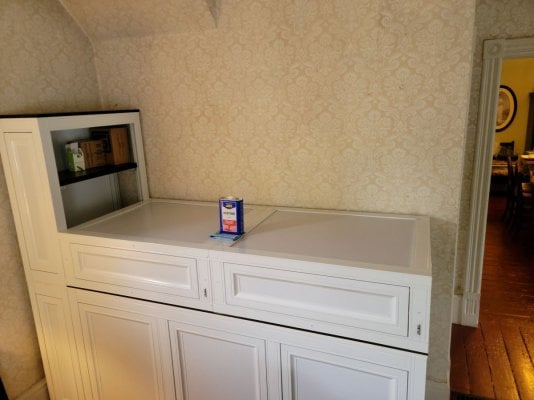
Once I saw how the stands looked on the side of the tank, I couldn't let the hood look different or of lesser quality. So... I acquired two more APS 20 Peninsula tank stands. I laid them on their sides and removed one of the braces on each. Put them end to end and boom. Instant hood.

So once again it was as simple as buying more cabinets. Ready made, off of the shelf, and nothing is custom.

I had to cut down the PVC board to allow the two side cabinets to sit directly on top of each other. This lowered the total height by 1/2 of an inch and once the tank was added, aligned perfectly.

All together there is a really nice ratio between the stand tank and hood of 3 to 2 to 1. I think that it has nice balance.

I used acetone to remove the APSnuvo branding tags. Sorry IM... Not sorry.
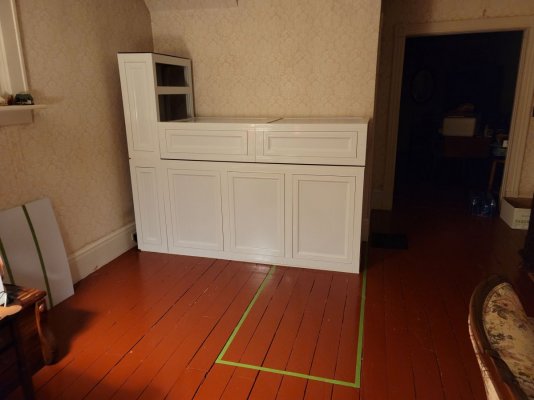
20210516_234339.jpg 20210529_145314.jpg 20210515_173029.jpg
Man those must be some great beers, or just a quite a few of them!!! But the idea with the sides and the canopy looks great. I actually like the IM 200 EXT, great looking tanks. I love your build so far and look forward to following along.
 
OP
OP
Sean Clark

Sean Clark

7500 Club Member
View Badges
Joined
May 16, 2019
Messages
8,055
Reaction score
31,577
Location
Michigan
Rating - 0%
0   0   0
The tank is 21" high but where's the water level at? I have a rock structure that's about 15" high and I am getting worried it's too high. My other structures are about 8-10" high.

The tank is 21" high but where's the water level at? I have a rock structure that's about 15" high and I am getting worried it's too high. My other structures are about 8-10" high.
Measuring from the bottom of the glass to the top of the glass is 21.75". My water is around 19.75". The water height can be raised or lowered by adjusting the secondary drain pipe height if needed. I used the pipe lengths that shipped with the tank. I would like it to be a little higher but my sump can not absorb the additional capacity. When the system is off, I have about .75 inches of room left at the top of the sump once all of the water had drained down. My quick math tells me that that only gives me about 2.3 gallons worth of room to spare.

20210822_111203.jpg
 
Last edited:
OP
OP
Sean Clark

Sean Clark

7500 Club Member
View Badges
Joined
May 16, 2019
Messages
8,055
Reaction score
31,577
Location
Michigan
Rating - 0%
0   0   0
Man those must be some great beers, or just a quite a few of them!!! But the idea with the sides and the canopy looks great. I actually like the IM 200 EXT, great looking tanks. I love your build so far and look forward to following along.
"Man those must be some great beers, or just a quite a few of them!!!"

Let's assume that it is a little bit of both.
 
Last edited:

ninjamyst

2500 Club Member
View Badges
Joined
Nov 1, 2014
Messages
2,596
Reaction score
3,944
Location
Orlando
Rating - 0%
0   0   0
Measuring from the bottom of the glass to the top of the glass is 21.75". My water is around 19.75". The water height can be raised or lowered by adjusting the secondary drain pipe height if needed. I used to pipe lengths that shipped with the tank. I would like it to be a little higher but my sump can not absorb the additional capacity. When the system is off, I have about .75 inches of room left at the top of the sump once all of the water had drained down. My quick math tells me that that only gives me about 2.3 gallons worth of room to spare.

20210822_111203.jpg
thanks for measuring it!! I will probably break down my rock structure and start over and make it shorter. I also forgot I loose a couple of inches of real estate because I have the INT.
 
OP
OP
Sean Clark

Sean Clark

7500 Club Member
View Badges
Joined
May 16, 2019
Messages
8,055
Reaction score
31,577
Location
Michigan
Rating - 0%
0   0   0
Looks really clean!

Though I've got to ask, how do you get into the tank? Looks like the canopy just sits on the top of the tank, isn't that a pain to move for maintenance access?
This is a case where form does not match function. It is a pain if you need to do any real work in the tank through the canopy. The doors are only eight inches. Obviously trying to reach the back of a 30 inch tank through an eight inch hole is not going to work out very well (and that is just at the surface). I don't even use the doors. If I need to get in the tank I usually just take the right side off entirely. If needed, both the left and right sides can easily be removed to allow full access. The cabinets do not weigh much and I have my lighting set up so that the wiring is simple and easy to disconnect when I need to remove the hood for tank access. All of the power for the lights is in the top of the upper left cabinet. The hood is not ideal for maintenance, but that is the price that I was willing to pay to get the look. I feel that the juice is worth the squeeze as someone likes to say.
 
OP
OP
Sean Clark

Sean Clark

7500 Club Member
View Badges
Joined
May 16, 2019
Messages
8,055
Reaction score
31,577
Location
Michigan
Rating - 0%
0   0   0
I ordered an INT 200 and has to wait till Nov to get it. Now I am regretting not getting the Ext so I dont have to wait =P. But I didn't want the Ext overflow to stick out from back of the tank. Looks like you solved that elegantly =).
I really like the return line placement on the regular EXT200 and the "coast to coat" overflow of the INT200. If they could somehow bring the two ideas together I would be in love.
 

Griev

Well-Known Member
View Badges
Joined
Jan 12, 2017
Messages
617
Reaction score
1,374
Rating - 0%
0   0   0
I really like the return line placement on the regular EXT200 and the "coast to coat" overflow of the INT200. If they could somehow bring the two ideas together I would be in love.

I remember thinking the same when I was trying to decide on which 200 to get. I went with the 200 INT and I will say it's super quiet thanks to the coast to coast overflows.
 
OP
OP
Sean Clark

Sean Clark

7500 Club Member
View Badges
Joined
May 16, 2019
Messages
8,055
Reaction score
31,577
Location
Michigan
Rating - 0%
0   0   0
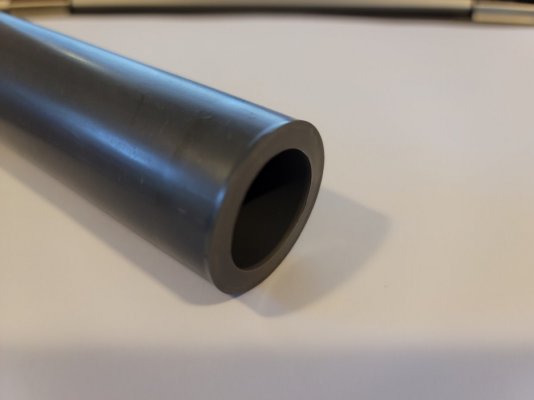
Am I the only one that is this OCD? After cutting my piping, I chamfered the inside and outside to ensure that everything was buttery smooth; even though nobody would ever see it. Here are some before and after pics.

20210822_144401.jpg 20210822_144428.jpg
 
OP
OP
Sean Clark

Sean Clark

7500 Club Member
View Badges
Joined
May 16, 2019
Messages
8,055
Reaction score
31,577
Location
Michigan
Rating - 0%
0   0   0
Here are some more hood photos. I added black foam insulation tape to the bottom where the hood sets on the glass. This is so that it acts like a gasket to protect the glass and also to prevent any light spilling out of the hood. When I need to get in the tank I just unplug the light and remove it. I was going to put an auto feeder up here too but that complicated taking the hood off so I relocated the feeder to the return section of the sump.
20210823_203909.jpg


20210823_203948.jpg

20210823_201913.jpg

20210823_202007.jpg
 
OP
OP
Sean Clark

Sean Clark

7500 Club Member
View Badges
Joined
May 16, 2019
Messages
8,055
Reaction score
31,577
Location
Michigan
Rating - 0%
0   0   0
I love the look but I wonder if making it a floating canopy so you don’t have to constantly remove lights and the hood would still look just as nice or not?
Possibly. I was originally not even going to do a hood at all. I was just going to use A500x lights mounted recessed into the ceiling. I may still do that.

I did considered installing linear actuators on the hood to raise it up when needed but decided that manually removing them is easy enough (for now at least). They only weigh about 25 pounds each.

Plus there is the added benefit of only lighting the tank and not having light spill all over the wall and into the room. Not having the room glowing blue is a nice side effect.

Another downside that I did not anticipate was the added humidity that the hood traps in. I expected some heat and have fans to help pull that out. I was going to have them only run when the temp got too high. Now I control them based on the humidity and they need to run a lot more often.
 

ninjamyst

2500 Club Member
View Badges
Joined
Nov 1, 2014
Messages
2,596
Reaction score
3,944
Location
Orlando
Rating - 0%
0   0   0
Would love to see photos of the sump.abd plumbing. I am coming from a plug and play red sea reefer where the sump and plumbing were provided. The IM will be my first custom sump tank so I am super nervous about the plumbing. Did you pick your sump so the overflow pipes line up perfectly with the sump bulkheads?
 
OP
OP
Sean Clark

Sean Clark

7500 Club Member
View Badges
Joined
May 16, 2019
Messages
8,055
Reaction score
31,577
Location
Michigan
Rating - 0%
0   0   0
Would love to see photos of the sump.abd plumbing. I am coming from a plug and play red sea reefer where the sump and plumbing were provided. The IM will be my first custom sump tank so I am super nervous about the plumbing. Did you pick your sump so the overflow pipes line up perfectly with the sump bulkheads?
Yes, I did pick this particular sump based on how the plumbing would line up among other things. I have it all the way to the drain side and centered front to back in the stand. This allows me to tuck my UV in the back while still having access to replace the bulb. This also gives me a nice area in front of the sump to collect junk. With this sump and stand area I still get the entire right cabinet area to store and collect more junk or add gear.
20210824_143947.jpg


The drains are all one inch and come straight down into a sweep elbow to go under the stand, into a second sweep elbow to turn back down and straight into the sump. They are supported with clamps mounted to the stand; thought not really necessary in this particular install, why not right?
20210824_144556.jpg


Sorry this is not the best photo but I thought it may help with some perspective. I should have taken a photo before I covered it up.
20210824_144647.jpg


The return lines come up a single line from the return pump, into a three way valve that doubles as tee, into long sweep elbows that turn the pipe to the left and out of the stand.

I used the pipe that is between the return pump and the valve to set the height of lines. I used the pipe between the elbows and the valve to match the width of the return line bulkheads.

The returns reduce down where they meets the left side of the stand from 1-1/4 inch down to one inch, are clamped, turn up with sweep elbows, into check valves, into sweep elbows again to turn into the return bulkheads, and finally bushings reduce them down to 3/4 inch right at the bulkheads.

Here you can see that the far right drain is not like the others. This is temporary and will be where the UV ties in. I am waiting on a fitting that has been backordered.

I added some short pipes to the inside of the sump bulkheads. Keeping them under the water level eliminates any splashing noises, while still making removing filter socks easy. I usually only run one filter sock on the main drain.
20210824_143718.jpg


Here you can see the three way valve and how I kept all of the lines clean, simple, and straight. I do not have any "extra" fittings, like couplings to connect pipes.

Yes, I really need to work on some better wire management. Right now I have a lot of "stuff" everywhere. I installed a sheet of PVC board that covers the entire back of the tank, That is why you can not see the doors that are against the back wall. I did this so that I can mount stuff basically anywhere on the ceiling or the back wall. I just need to get around to cleaning it up.

The green tape on the sump is my "The sump will overflow in a power outage" reference mark.
20210824_144038.jpg


Let me know your thoughts or if you want different pictures/details that I may have left out. Thanks.
 
Last edited:
OP
OP
Sean Clark

Sean Clark

7500 Club Member
View Badges
Joined
May 16, 2019
Messages
8,055
Reaction score
31,577
Location
Michigan
Rating - 0%
0   0   0
Nice work with that plumbing. Those sweep elbows are nice. Definitely going to pick some up next time i plumb a tank!
Thanks. I used them purely for looks.
 

Algae invading algae: Have you had unwanted algae in your good macroalgae?

  • I regularly have unwanted algae in my macroalgae.

    Votes: 43 35.0%
  • I occasionally have unwanted algae in my macroalgae.

    Votes: 27 22.0%
  • I rarely have unwanted algae in my macroalgae.

    Votes: 9 7.3%
  • I never have unwanted algae in my macroalgae.

    Votes: 9 7.3%
  • I don’t have macroalgae.

    Votes: 31 25.2%
  • Other.

    Votes: 4 3.3%
Back
Top