Not too far but have been mostly caught up in work stuff. Enough to not notice a faulty TDS meter and RODI unit which meant I was topping up nutrients on a weekly basis and fuelling a GHA issue which I thought was caused by my rock. Anyway, I'm slowly getting on top of it and I reckon I'll be clear in around three weeks or so.
I've never had so many issues to be honest.
Got some lights into the sump area today and am awaiting the arrival of some Chaeto. Pics in a day or so I hope.
I had all the electrics on the right side of the cabinet. You've probably seen a bit of it in post #26 in this thread. That all changed after an earthquake in the middle of the night caused a not so mini tsunami in the tank, and water slopped all over the place. I now have another cupboard on the right side with electrics, my top-off reservoir etc.
The sump itself is all glass. 10mm outside the the baffles are 5mm. Nothing special about the actual build. Glass, silicone, masking tape, clamps, square and so on. I just started gluing baffles from the left hand side and worked through it.
Right, while I'm a bit nervous saying it, I appear to have beaten my GHA issue. The solution in short was a combo of sorting out my RODI, weekly 25% water changes, adding Seachem Purigen & PhosGuard and adding a Tunze 9001 skimmer.
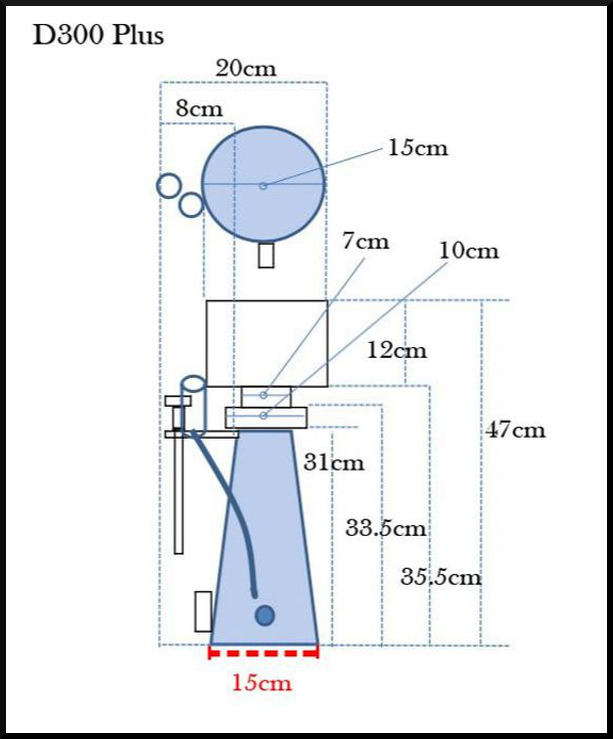
With all that it was a bit difficult to pinpoint what had the greatest impact but the addition of the skimmer seemed to be the deciding factor. Why a 9001 you ask. Only because the design of the existing sump within the cabinet limited access and I only had a 100mm (3.9") space to squeeze a skimmer through into the sump. Another design limitation was the sump water level of 250mm (9.8") was too high for any skimmer small enough to fit through the 100mm gap because of a cabinet head restriction of 500mm. Hope all of that makes sense, but the long and short of it is that the existing cabinet and sump design limited my choice of skimmer, and thus the 9001.
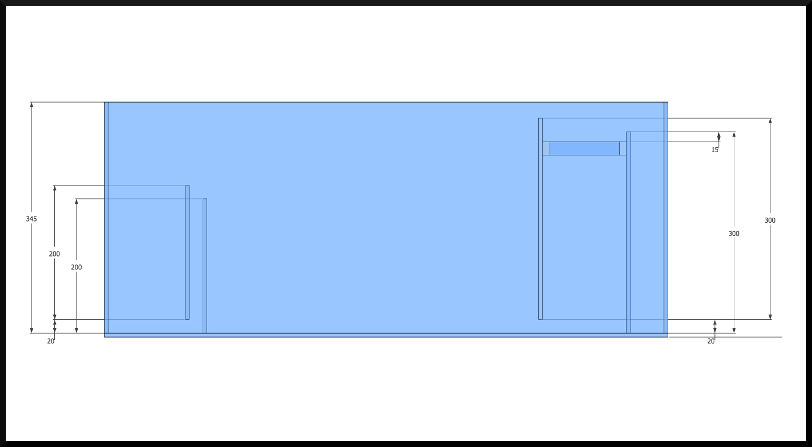
So, that meant designing a new sump around a skimmer that would fit within the cabin head height restrictions. I settled on a Coral Box D300 Plus. The height and footprint worked well for me, and I was keen on a DC pump to allow more skimmer adjustment flexibility. Overall sump height was reduced to 350mm (13.8”) and water level in-sump reduced to 200mm (7.9"].