- Joined
- May 25, 2020
- Messages
- 630
- Reaction score
- 497
Hello R2R,
I see a lot of folks writing about their builds now, so I will share some details below. I've been in the hobby for over 15 years now. My interest all started with an investor of mine that had an impressive 120g on display at his office. At the time, I started with a 55g without overflow in my office window overlooking the freeway; however, the lighting was not what it is today, nor did I realize the natural light would be problematic. Life moved on, and eventually, nano-sized maintenance and spending were more in line with my other priorities. I went through various downsizing through trial and error, all the Fluval EVO series, all the BioCube models, and eventually settled on a Red Sea MAX Nano.
This nano was a great tank, but my family and I recently moved, and I had to have my own office with all the remote calls and conferences. This time, I was wiser, and with all the experience with nano tanks, I thought I would upscale my tank with my new home office. My LFS is a Red Sea dealer, and using the AR features with my phone; I found the Reefer 250 would be the most efficient with my existing room layout.
My build list:

My automation list (will be shown later):
--------------------------------------------------------------------------------------------------------------------------------------
I know some of you are probably wondering, "If you have the Neptune Systems Apex controller and a Reefer, why not go with total customization for more components?"
Nowadays, everyone has an app for everything, and everything seems to be an IoT device wanting access to something outside your network and control. While I cannot avoid this risk entirely, it is something I chose to minimize by using only the Apex Controller and the Red Sea ReefBeat app (it could be better, I know).
The benefit to this approach is that I only have two apps to address, and I can free up some of the control of these Red Sea devices to the APC UPS connected to them for the moment. Additionally, all of these work together with the programming provided and make for a more "whole" experience. I was disappointed that the ReefMat 500 is not a "plug-in-play" as described without modification of the sump and down flow pipes. However, I chose to keep it, knowing that changing socks goes against my "minimalist maintenance" religious beliefs in reef keeping. With this in mind, I opted for all Red Sea lighting since AI lights no longer have IOTA control, and I reserved my dosing pumps for the water change features I know will be ahead and opted for the ReefDose4.
-------------------------------------------------------------------------------------------------------------------------------------
Aquascaping and design:
After watching several BRS videos and another from Tidal Gardens, I decided that I wanted something to put on display with this tank and that a negative space aquascape would be best. There is a variant of this known as HNSA, which focuses on the habitat, but getting the right balance of this was a challenge. I started with at least 50 lbs of Marco Dry Rock and bought another 20 out of abundance in caution. While Ryan recommends plenty of rock per pound due to intentional breakage, I was able to get some decent shapes of all sizes. This made breaking it up somewhat easier. The foundation rock is a must-have; without this, one would have some challenges getting the initial aquascape balanced. Another critical item to note is that it was 90-110F this past summer, and doing this is not a few hours on the weekend endeavor.
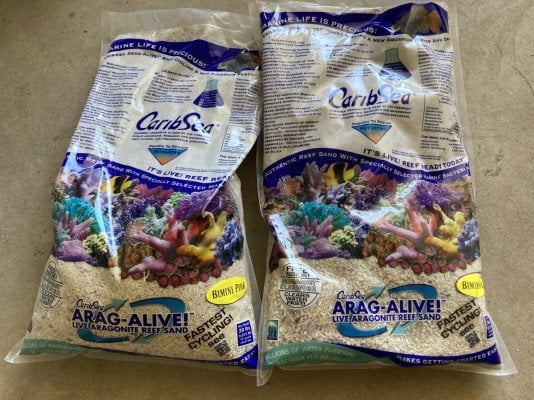
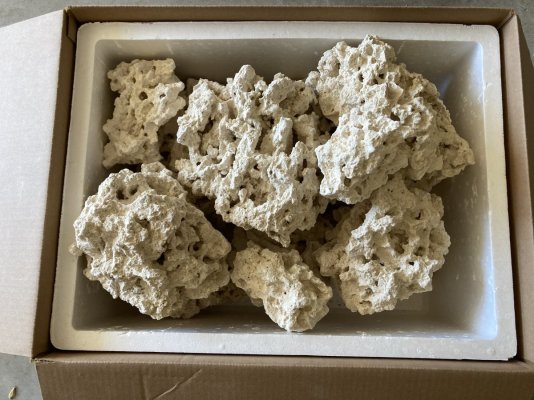
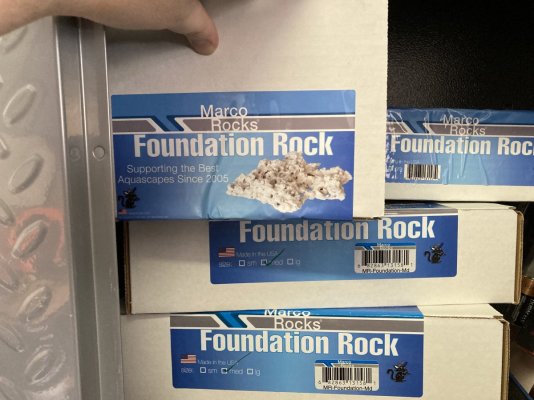
Here's an image before I got started and another afterwards. Most of the rock was broken up over two weekends. I didn't begin assembly of the rock until I returned home from vacation in June.
----------------------------------------------------------------------------------------------------------------------------------------------------------------


----------------------------------------------------------------------------------------------------------------------------------------------------------------
The next part of this was not very fun and honestly, was both hot and challenging. I recommend not attempting this in summer if you can and plan this in spring or fall for best results. I also recommend putting on some music, something tropical or whatever inspires you to think creatively. While BRS recommends lots of glue and insta-set, plus mortar in the first video; the second one has Ryan using epoxy and left over marco rock dust. This is ideal and is the same method used by Than Thein of Tidal Gardens. In fact, Than has a video where the epoxy step was skipped over entirely if you are using the dust as a filler and permitting your glue to be viscous enough to set in.
Here's his video on the subject below:
Over the past four weeks, I started with a foundation and some smaller pieces, gluing them together using a mix of the BRS and Tidal methods. I used epoxy on the base pieces or those where I would have a difficult time getting the foundation to hold or where it would risk full collapse. In others, I used the Tidal Gardens method, since one has to cover the epoxy after that step and really saves time and gloves too! Be prepared to get at least five (5) or more sets of general nitrile gloves and some thicker ones for handing the rocks overall. I found that the glue recommended will eventually run all over as you handle your aquascape and you'll eventually get glued to the rock, the bottle or the fingers of the gloves themselves. This part of the build by far, was one of the most challenging and difficult parts but I now have many places for coral placement, plenty of flow and several areas for fish and corals!
While this has been a lot of fun and expense, it's time to move on with getting the groundwork ready for easy maintenance. Next up, water automation and tank cycling.
Please subscribe to my thread for updates in the weeks and ahead!
Thank you,
OfficeReefer
I see a lot of folks writing about their builds now, so I will share some details below. I've been in the hobby for over 15 years now. My interest all started with an investor of mine that had an impressive 120g on display at his office. At the time, I started with a 55g without overflow in my office window overlooking the freeway; however, the lighting was not what it is today, nor did I realize the natural light would be problematic. Life moved on, and eventually, nano-sized maintenance and spending were more in line with my other priorities. I went through various downsizing through trial and error, all the Fluval EVO series, all the BioCube models, and eventually settled on a Red Sea MAX Nano.
This nano was a great tank, but my family and I recently moved, and I had to have my own office with all the remote calls and conferences. This time, I was wiser, and with all the experience with nano tanks, I thought I would upscale my tank with my new home office. My LFS is a Red Sea dealer, and using the AR features with my phone; I found the Reefer 250 would be the most efficient with my existing room layout.
Without ado, here's my Reefer 250 Office Study build below! Thank you @blaxsun for the motivation to create this. 
--------------------------------------------------------------------------------------------------------------------------------------------------------------------

--------------------------------------------------------------------------------------------------------------------------------------------------------------------
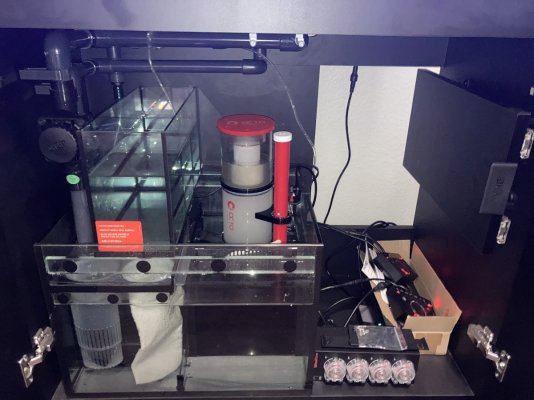
My build list:
- 1x Cobalt Aquatics Neo-Therm 200W Heater (might need chiller)
- 50 lbs Marco Dry Reef Rock
- 1x Red Sea KH Coraline Grow (may switch to All-For-Reef as with Nano)
- 1x ARCReef Purple Coraline Algae (removed)
- 1x ARCReef Pink Coraline Algae (removed)
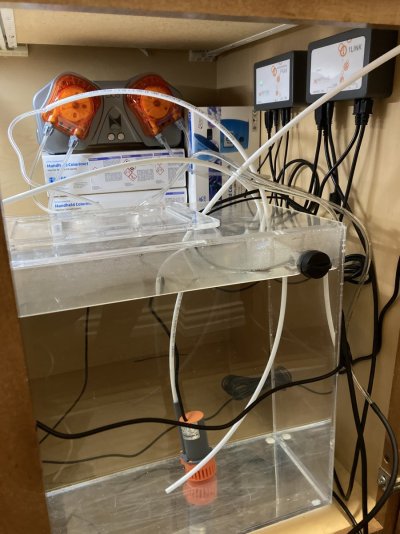
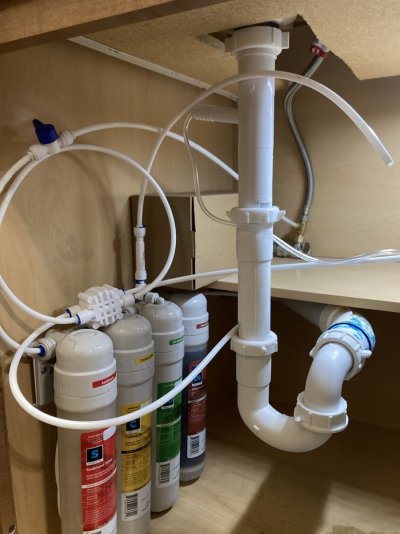
My automation list (will be shown later):
- 1x AquaticLife 75gal Twist-in RODI filter
- 1x 10gal Trigger Systems ATO reservoir
- 1x Neptune Systems ApexEL controller with EB832
- 1x Apex ATKv2 module (currently in use on MAX Nano)
- 2x Apex FMM module (on Max Nano, came with LDK)
- 2x Apex DŌS units (used for auto water changes)
- 1x Apex 1Link module
- 1x Apex Trident
- 1x Apex AFS
- 1x Apex 24vdc PMUP
- 1x Apex 24vdc Solenoid
- 1x Apex ¼ Flow Sensor (RODI supply, larger for return)
- 3x Apex Leak Sensors
- 2x Apex Optical Sensors
--------------------------------------------------------------------------------------------------------------------------------------
I know some of you are probably wondering, "If you have the Neptune Systems Apex controller and a Reefer, why not go with total customization for more components?"
Nowadays, everyone has an app for everything, and everything seems to be an IoT device wanting access to something outside your network and control. While I cannot avoid this risk entirely, it is something I chose to minimize by using only the Apex Controller and the Red Sea ReefBeat app (it could be better, I know).
The benefit to this approach is that I only have two apps to address, and I can free up some of the control of these Red Sea devices to the APC UPS connected to them for the moment. Additionally, all of these work together with the programming provided and make for a more "whole" experience. I was disappointed that the ReefMat 500 is not a "plug-in-play" as described without modification of the sump and down flow pipes. However, I chose to keep it, knowing that changing socks goes against my "minimalist maintenance" religious beliefs in reef keeping. With this in mind, I opted for all Red Sea lighting since AI lights no longer have IOTA control, and I reserved my dosing pumps for the water change features I know will be ahead and opted for the ReefDose4.
-------------------------------------------------------------------------------------------------------------------------------------
Aquascaping and design:
After watching several BRS videos and another from Tidal Gardens, I decided that I wanted something to put on display with this tank and that a negative space aquascape would be best. There is a variant of this known as HNSA, which focuses on the habitat, but getting the right balance of this was a challenge. I started with at least 50 lbs of Marco Dry Rock and bought another 20 out of abundance in caution. While Ryan recommends plenty of rock per pound due to intentional breakage, I was able to get some decent shapes of all sizes. This made breaking it up somewhat easier. The foundation rock is a must-have; without this, one would have some challenges getting the initial aquascape balanced. Another critical item to note is that it was 90-110F this past summer, and doing this is not a few hours on the weekend endeavor.


Here's an image before I got started and another afterwards. Most of the rock was broken up over two weekends. I didn't begin assembly of the rock until I returned home from vacation in June.
----------------------------------------------------------------------------------------------------------------------------------------------------------------
----------------------------------------------------------------------------------------------------------------------------------------------------------------
The next part of this was not very fun and honestly, was both hot and challenging. I recommend not attempting this in summer if you can and plan this in spring or fall for best results. I also recommend putting on some music, something tropical or whatever inspires you to think creatively. While BRS recommends lots of glue and insta-set, plus mortar in the first video; the second one has Ryan using epoxy and left over marco rock dust. This is ideal and is the same method used by Than Thein of Tidal Gardens. In fact, Than has a video where the epoxy step was skipped over entirely if you are using the dust as a filler and permitting your glue to be viscous enough to set in.
Here's his video on the subject below:
Over the past four weeks, I started with a foundation and some smaller pieces, gluing them together using a mix of the BRS and Tidal methods. I used epoxy on the base pieces or those where I would have a difficult time getting the foundation to hold or where it would risk full collapse. In others, I used the Tidal Gardens method, since one has to cover the epoxy after that step and really saves time and gloves too! Be prepared to get at least five (5) or more sets of general nitrile gloves and some thicker ones for handing the rocks overall. I found that the glue recommended will eventually run all over as you handle your aquascape and you'll eventually get glued to the rock, the bottle or the fingers of the gloves themselves. This part of the build by far, was one of the most challenging and difficult parts but I now have many places for coral placement, plenty of flow and several areas for fish and corals!
While this has been a lot of fun and expense, it's time to move on with getting the groundwork ready for easy maintenance. Next up, water automation and tank cycling.
Please subscribe to my thread for updates in the weeks and ahead!
Thank you,
OfficeReefer
Last edited:


