OP
OP
Ranjib
7500 Club Member
View Badges
Ultimate Member
Reef Squad
Excellence Award
R2R App User
Expert Contributor
Reef Squad Emeritus
SF Bay Reefer
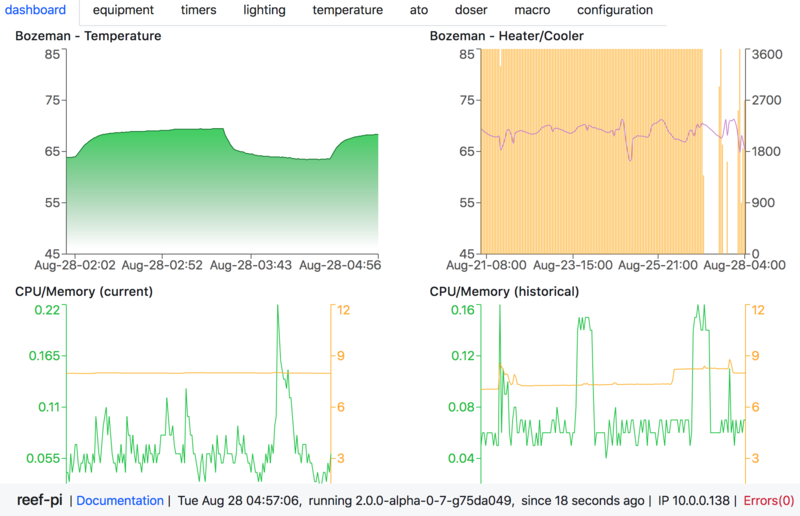
reef-pi uses ds18b20 probes which are different than the inkbird, as a result tWas wondering if anyone used the new aquarium safe temp probe from inkbird?