RFBF's Five Footer

OP
OP
redfishbluefish

redfishbluefish

Stay Positive, Stay Productive
View Badges
Joined
Mar 22, 2012
Messages
11,704
Reaction score
25,720
Location
Sayreville, NJ
Rating - 0%
0   0   0
I think I'm finished summarized what's occurred with my build since 2008. If I can think of anything I've missed, I'll be sure to add it. I want to be able to revisit this thread in the future and see the changes that have occurred.

So from here on, this will be current....as the changes/improvements continue with my build. There is always something that needs to be done.

Here is my current "To Do" list:

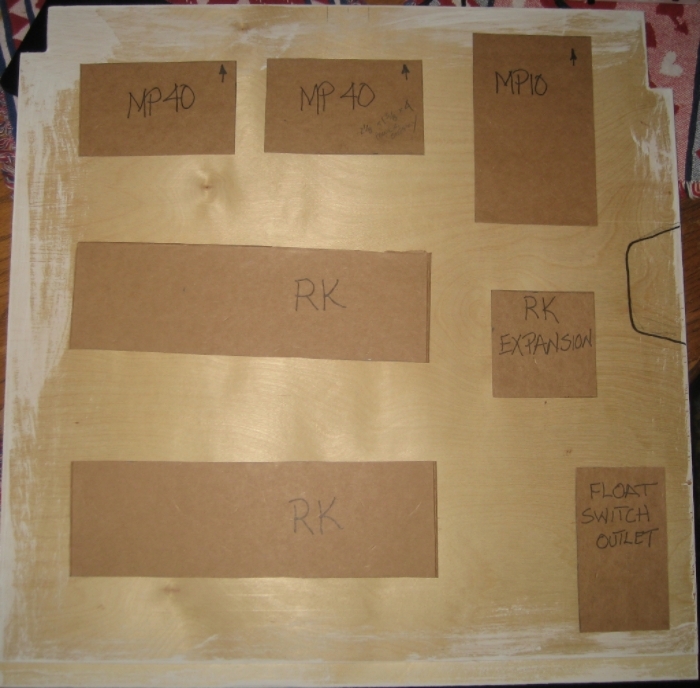
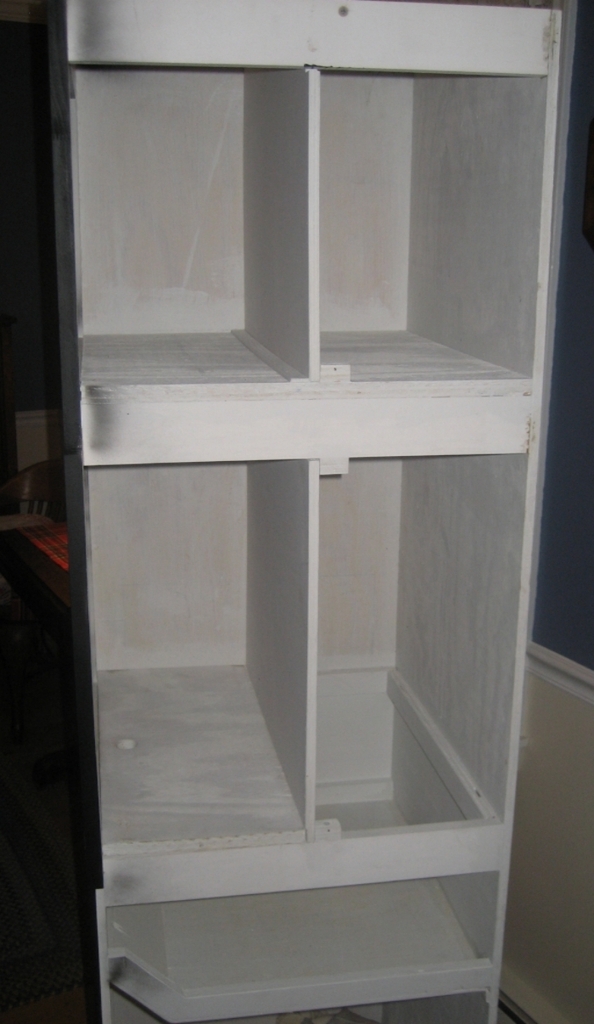
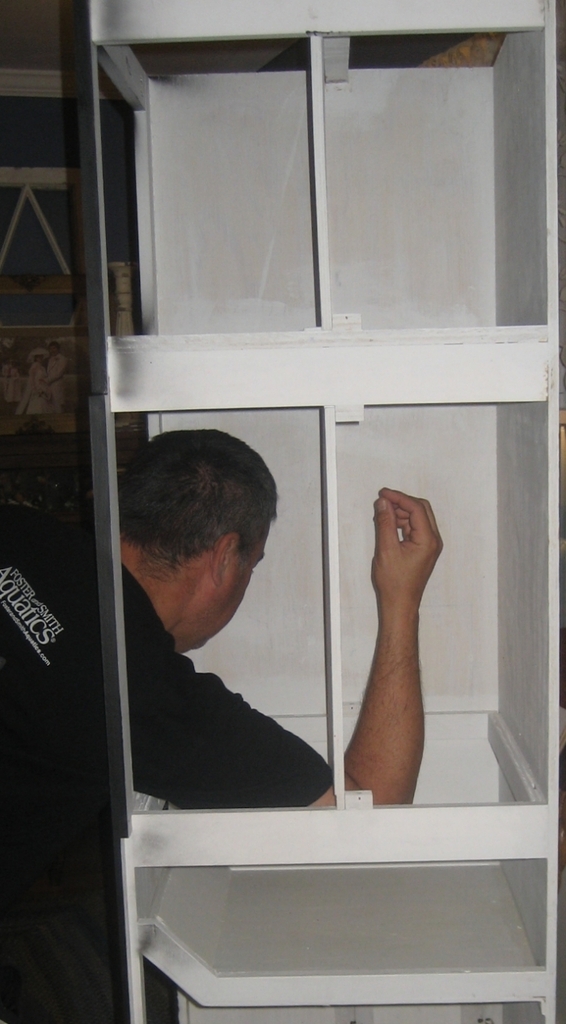
1. Build Equipment Cabinet (for the last 7 years!!!)
2. Repaint the stand and canopy flat black.
3. Purchase and install a DC return pump.
4. Continue to kick around the idea of a manifold (for the carbon reactor and biopellet reactor)
5. Mull over adding an Algae Scrubber....design and location considerations

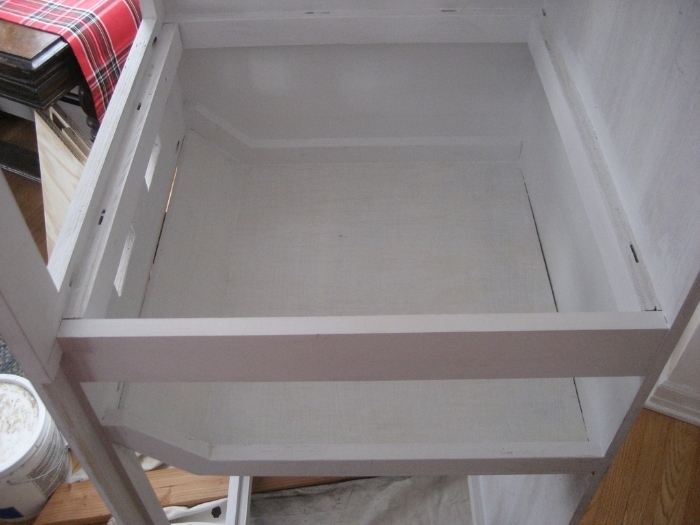
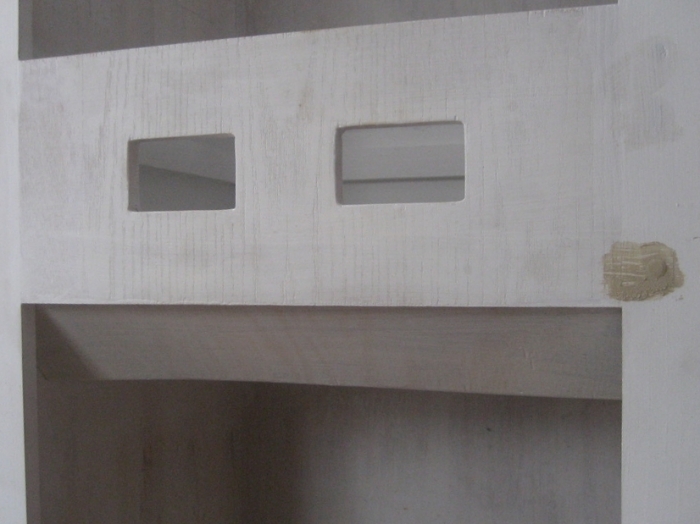
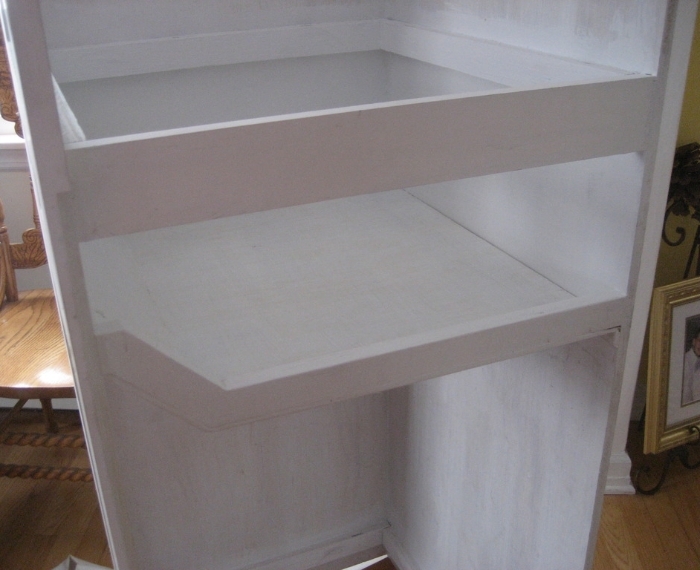
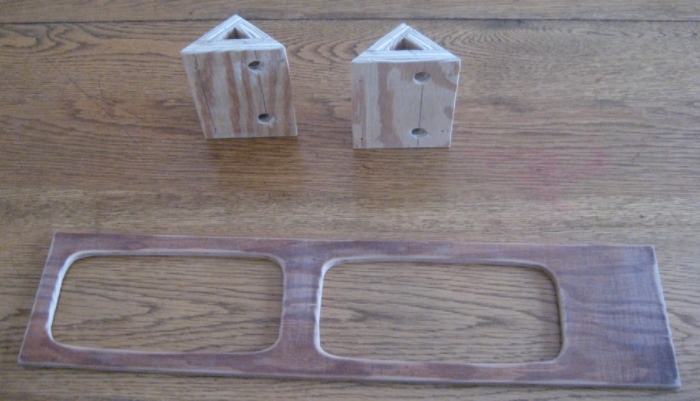
So tomorrow is a fresh day to tackle my list....beginning with the equipment cabinet....long overdue. I've pulled out the side boards I cut years ago, and they have a warp to them. I also started a DIY thread on this that I'll move over to this thread.
 

Salty1962

Wrasse and SPS Lover
View Badges
Joined
Jan 28, 2015
Messages
8,484
Reaction score
7,741
Location
Charlotte, NC
Rating - 0%
0   0   0
Great build Man. My BP reactor, Skimz BR83, took a couple of months to make any difference. It does help, I just top off every couple of months and let it go. Thx for the great inof, I got many ideas from it!
 
OP
OP
redfishbluefish

redfishbluefish

Stay Positive, Stay Productive
View Badges
Joined
Mar 22, 2012
Messages
11,704
Reaction score
25,720
Location
Sayreville, NJ
Rating - 0%
0   0   0
Thanks for the kind words @Salty1962 . Here's more!


XIII. Equipment Cabinet

I actually started this cabinet build as a DIY HERE, but will be continuing this build here in this thread. I'll breifly summarize what's over in the DIY build.

What has been on my list of "To Do's" has been the building of an equipment cabinet.....for years. I originally started this tank with a bird's nest of wires along the left side of the tank....on the floor. What a mess! This eventually graduated into a temporary board that was built with leftover lumber from some project. Here is that temporary panel right after it was installed.

IMG_4788.jpg


It has since been "updated" with dosing pumps.....and ended up being not so temporary.

THE PLANNING

This cabinet will be going to the left of my tank/stand


I had struggled with the design of this side cabinet until I thought about it differently....starting with the face-frame. I was originally thinking of building the box first and then attaching the face frame....and that's where I struggled. Once I thought "face-frame", my design became clear in my head. Here is the face-frame laid out on the floor.


And here is the face-frame screwed together and just resting in place to the left of the stand. The two ReefKeeper head pieces will be view-able from the front of the cabinet.


Now I had cut what was going to be the two sides of the cabinet a couple years ago....yes, I procrastinate! These have been in a closet leaning up against the wall. Now I don't know if it was the leaning, or if the boards just warped on their own, but here they are, where you can see the bow. These will now be the left side and the back, so I'm holding the two at right angels, where you can see the bow.


Don't know if this will work, but I have them between two sawhorses with weights on the boards to see if I can get them to straighten out.
 
Last edited:
OP
OP
redfishbluefish

redfishbluefish

Stay Positive, Stay Productive
View Badges
Joined
Mar 22, 2012
Messages
11,704
Reaction score
25,720
Location
Sayreville, NJ
Rating - 0%
0   0   0
Didn't accomplish much yesterday and today. Got dragged up to Northern NJ to look at wedding venues....and put down a deposit.....not fun. And today two of the kids are coming over with their significant others for dinner....again, not fun.

The plywood sides are still cupped after a couple days under weights. I've had this in the front foyer blocking the front door. With the kids coming over, my wife wanted it out. So I've moved it outdoors, and I'm giving it one more day under weights. It's supposed to rain tomorrow night, so tomorrow this thing gets put together, warp or not!

In the mean time, with the face frame done, I measured and cut the wood for the doors. They will be simple flat paneled doors, matching the stand. Also drilled pocket holes to assemble when ready. Just love that Kreg! The biggest issue with this wood was those labels they put on the wood......what a PIA to take those off. First a knife, with careful scrapping, and then isopropyl alcohol to remove the last bit of adhesive. You can actually see where the alcohol took the primer off the wood, in the picture below.

Here are the door pieces simply laid out on the floor.


Tomorrow hopefully the beginning of the cabinet. Still thinking about how to organize all the stuff inside and hide the wires.
 
OP
OP
redfishbluefish

redfishbluefish

Stay Positive, Stay Productive
View Badges
Joined
Mar 22, 2012
Messages
11,704
Reaction score
25,720
Location
Sayreville, NJ
Rating - 0%
0   0   0
So I've had these two warped boards set up between two sawhorses for 2-3 days with 45 pounds of weight on them (a 27 lb piece of railroad rail, and an 18 lb solid steel brick). I don't think this did anything. They still appear to be the same as they were before the weight. Can't wait any longer....it's going together today.


Well it was a pain putting this thing together. I started with the plywood corner, were I had to use clamps to force out the warp, while it was glued and nailed. With the face frame, I cut a dado (grove) to accept the plywood, and help straighten it out at that joint. Also cut shelves out of 3/4 plywood....actually 23/32. Didn't notice when I purchase this piece of plywood....just this week....but it too was slightly cupped. Are they just not making quality wood any more? Although I shouldn't complain....it is construction grade, and not furniture grade,where I'd have to mortgage my house to buy a full sheet of that.

So finally, here is the carcass of the equipment cabinet!


This open side will be up against the open portion of the side of the stand and the side of the tank....so no need for a solid side of the cabinet.
 
OP
OP
redfishbluefish

redfishbluefish

Stay Positive, Stay Productive
View Badges
Joined
Mar 22, 2012
Messages
11,704
Reaction score
25,720
Location
Sayreville, NJ
Rating - 0%
0   0   0
Thanks Kevin....it's getting there, but evolving on the way. I'm thinking about the next piece. Although I don't like the way the shelves are fitting. I might have a problem with it being square. I'm beat from working on this today.....need to let the paint dry......more tomorrow.
 
OP
OP
redfishbluefish

redfishbluefish

Stay Positive, Stay Productive
View Badges
Joined
Mar 22, 2012
Messages
11,704
Reaction score
25,720
Location
Sayreville, NJ
Rating - 0%
0   0   0
Well this wasn't expected. The cabinet isn't square. I'm guess that the warped boards had something to do with this. I actually noticed this when I put the shelves in....they were very tight on one side, with an obvious gap on the other side edge.

Once the paint dried, I put a square on the cabinet and verified it wasn't square. And the odd thing was that the top was different than the middle, which was different than the lower part of the cabinet. So using a bar clamp, I straightened out and squared the upper cabinet and screwed the upper shelf in place.....hoping they would hold the cabinet square.


Now I moved down to the lower shelf and found that it too was out of square, but in the opposite direction??? So now I played with the upper and lower shelves to find a happy medium, and screwed the shelves down. Bottom line is that this little problem ticked me off. I'm taking a break. So as I think about the next steps, I'm off to looking to see if I have any 1/4 plywood for the doors.....and if not, a trip to HD to help clear my mind.


THINKING AHEAD: I've also started to scratch my head on how this transfer is going to happen. I'm just not seeing a quick and clean transfer going down. All the wires need to be out of the way (pulled inside the stand), for this cabinet to slide into place. In addition, the wire mess attached to the side of the canopy (all light outlets with nine plugs)..........


..........needs to be out of the way as well. Then I'll have to unscrew everything from the temporary board and mount in this cabinet. Got to continue scratching my head on this one. Want the transfer to be as quick as it can be.

First thought was throwing a power strip in front of the tank and plugging essential stuff in....return pump, powerheads, whatever.
 
Last edited:
OP
OP
redfishbluefish

redfishbluefish

Stay Positive, Stay Productive
View Badges
Joined
Mar 22, 2012
Messages
11,704
Reaction score
25,720
Location
Sayreville, NJ
Rating - 0%
0   0   0
THE BELLY OF THE BEAST

Today was a fun day. This thing evolves as I go forward with the various parts of this cabinet. I originally planned on simply putting a piece of plywood across the bottom of that wide center style to hold and hide all the wires coming in from the stand. But as I gave this thought, the 2x6 side of the stand is the same width and I would therefore have to cut a hole in the bottom of this "floor" to pass wires in and out. I though it would be a bit too difficult pulling wires in and out to do equipment cleaning and replacing.

So I came up with what I call the belly of the beast. I will drop the "floor" down a couple inches, now leaving the stand side slightly open to allow easy feeding of wires in and out of the cabinet. I think this will become a bit clearer with pictures.

I first made the two side supports:


The one on the stand side (that's free standing) was cut from one piece of wood, but the other side (screwed to the side plywood), was made of three parts glued together.

I have to wait overnight before I can install this glued up one, but here is the one solid side one simply friction fitted in place. I will screw this side in ready for tomorrow to add the other side and continue.

 
OP
OP
redfishbluefish

redfishbluefish

Stay Positive, Stay Productive
View Badges
Joined
Mar 22, 2012
Messages
11,704
Reaction score
25,720
Location
Sayreville, NJ
Rating - 0%
0   0   0
WHAT IS IT?

I'm taking a little aside from "The Belly of the Beast," because my wife went out tonight with my daughter to look at wedding crap....oops, I mean stuff. My wife thinks I spend way too much time on the tank, but fortunate for me is that she still works, and I'm retired. So when she is at work, I can play, but I still have to do enough stuff around the house to make it look like I didn't spend the entire time on the tank. With her going out tonight....down to the shop I went. If she asks, I watched "Down Town Abby" tonight. For some reason, she likes that show, and gets mad at me when I refer to it as "down town."

I think I'll make this a "guess what it is" post. I'm not sure if many, or any people are looking at this build, but maybe this will bring some out of the woodwork. This will be the second time I build something for my tank that looks like the Nickolson Bridge. Now you're scratching your head. My wife grew up in north east Pennsylvania where there is this train bridge in Nickolson....rather famous. In the day my wife climbed about this bridge....it is now fenced off, with loads of signage, so no one can climb on it.

NicholsonBridge.jpg


Now when I built my sump, it had a bulkhead on the side of the tank. I had to build a support for the skimmer shelf that worked around this bulkhead, and I just happen to make it look like the Nickolson bridge. When I had cut this piece out, I walked upstairs and asked my wife, "What does this look like?" Without hesitation, she said, "The Nickolson bridge."

IMG_1623.jpg


And here it is installed, supporting the skimmer shelf:

IMG_1624.jpg


Well I've repeated a great design tonight for a part of my equipment cabinet.


Now the picture above is actually upside down to when it will be used. I only took the above picture this way for the sake of the Nickolson bridge. I also have to drill a couple holes and "slot" these holes as well. When in the position of use, it will be positioned like this:


Each or the four compartments are 1 3/8 by 2 1/8 by 4 inches high. Again, I still need to do a little more work on this, but this will be used to help organize the electronics in the cabinet.....WHAT IS IT? I'm back to the Belly tomorrow, but will wait a couple days before I show this finished and the actual use.
 
Last edited:
OP
OP
redfishbluefish

redfishbluefish

Stay Positive, Stay Productive
View Badges
Joined
Mar 22, 2012
Messages
11,704
Reaction score
25,720
Location
Sayreville, NJ
Rating - 0%
0   0   0
Bump this up.

So over 50 folks have looked at this post since I posted, but nobody has guessed what it is. Now I figure you're either too shy, or have no idea what it is, or it is blatantly obvious what it is. So which one is it? Here it is finshed and ready to mount in the stand. WHAT IS IT?


This little side project took longer than expected. Now back to working on the Belly.
 
OP
OP
redfishbluefish

redfishbluefish

Stay Positive, Stay Productive
View Badges
Joined
Mar 22, 2012
Messages
11,704
Reaction score
25,720
Location
Sayreville, NJ
Rating - 0%
0   0   0
The Belly of The Beast (continued)

Continuing with The Belly of the Beast, the support pieces were glued and screwed in place. A 1/4 inch plywood "floor" was applied using glue and nails....and all coated with Kilz.

IMG_1590_zpsz1hcgsby.jpg


IMG_1589_zpsefcp3du8.jpg


IMG_1588_zpsxrjfve0j.jpg


That drop-down allows for wires to go in and out of the cabinet with ease....hopefully. And this belly keeps the birdnest of wires hidden.

I like how this came out.....just hope it works out.
 
OP
OP
redfishbluefish

redfishbluefish

Stay Positive, Stay Productive
View Badges
Joined
Mar 22, 2012
Messages
11,704
Reaction score
25,720
Location
Sayreville, NJ
Rating - 0%
0   0   0
Dosing Pump Stand-Offs and Container Holder

Well, my wife had a "snow day" today, being a teacher and now having the day off. That meant that I couldn't do my daily routine of playing with the tank and doodling in my shop. So I had to sneak down there to get a couple thinks done......like building these stand-offs.

In retrospect, not sure why I built these little stand-offs with three little boards each. I could have easily taken a piece of 3 by, and angle cut at 45 degrees and be done. I will admit that is was fun calculating all the sizes of the pieces. My wife actually thought I was doing something very important, with all the math. The stand-offs will hold the BRS dosing pumps at 45 degrees, while the piece of plywood with the holes will hold the alkalinity and calcium containers in their place:

IMG_1607_zpsv8dulwv8.jpg


Here are the two stand-offs installed, with one pump install.....hopefully this gives you a better idea of what I'm talking about. The 1/4 plywood base simply holds the Alk and Calc containers in place.

IMG_1656_zps4qvtrx19.jpg


She's off to a baby shower tomorrow, so it should be a good day.
 
OP
OP
redfishbluefish

redfishbluefish

Stay Positive, Stay Productive
View Badges
Joined
Mar 22, 2012
Messages
11,704
Reaction score
25,720
Location
Sayreville, NJ
Rating - 0%
0   0   0
While I was searching for 1/4 plywood for the doors, I found a nice piece of 5/8 furniture grade plywood that I decided to use for the equipment boards. These were rough cut out and I also made cutouts of the equipment to play with placement.

IMG_1659_zpst6aoivrt.jpg


IMG_1660_zpsxss8ohzn.jpg


I'm pretty sure I'll mount the power strip in the lower part of the cabinet. Of the two above, I liked the second one better. So I mounted these partition boards in the cabinet. Now the double Doh! I was sitting back admiring my work (every once in a while I pat myself on the back), and it hit me! The dry side of the MP40 will stick into the stand....right where this equipment is located.......Doh! Here is the approximate location of the dry side up against that board:

IMG_1667_zpsckli8cuc.jpg


Now, while looking at this protrusion, I look up at the canopy, and now double Doh! The fan is sticking out into the partition board of the upper part of the cabinet. Totally forgot about that as well:

IMG_1669_zpsj8en3y1j.jpg


WIth the fan, I'll simply take that out. It died awhile ago and I don't use it anymore having LEDs....so no biggie. With the dry side of the MP40, I'll just rework the layout of the equipment. Here is the equipment board again, with the dry side shown with a Sharpie.

IMG_1670_zpsecve2e58.jpg


With the false walls installed using small cleats, here's what the cabinet looks like.

IMG_1676_zpsjnokyjhx.jpg


The middle section shelf is not screwed in and can be removed by simply lifting it out....just friction fit. Either one of these false walls are held in place with a single screw, so if they do need to be removed, it's quick and easy. However, I don't believe I'll need to remove the middle false wall because I can easily get my arm/hand to the back side to feed wires in and out.

IMG_1678_zpsinzw4jjj.jpg


Between the Belly of the Beast and the space behind these false walls, I'll be able to hide a crap-load of wires. From the front side it should look clean and organized.

Now, for some reason, as I approach the completion of this cabinet, I've become very tentative in doing the actual drilling and placement of equipment on this board. I don't know why I feel this way. If it doesn't work out I could always simply cut another board....but still I've got this nervousness going forward. I actually haven't drilled any holes in this cabinet yet....and it will need quite a few. I wonder what that's all about.
 
OP
OP
redfishbluefish

redfishbluefish

Stay Positive, Stay Productive
View Badges
Joined
Mar 22, 2012
Messages
11,704
Reaction score
25,720
Location
Sayreville, NJ
Rating - 0%
0   0   0
Some of my photos are no longer loading???? I haven't changed anything, but now they are no longer loading. I'm getting this:

IMG_1132_zpswupepjod.jpg


I'm a Photobucket user and the photos are still over there, but not here. Here are the ones that I'm no longer seeing....and I'm going to try to reload them and see what happens....(and in some cases, guess what photo was originally there):

Post 31 (Page 2): MAG pump with modifications


Post 43 (Page 3) pictures 2, 3, 4

Pic 2 (left side of tank/stand)


Pic 3 (Faceframe on floor)


Pic 4 (Faceframe in place)


Post 48 (Page3) pictures 2
Pic 2: (Light wire mess)


EDIT TO ADD: OK, all the photos appear to be here.....I'm now going to see if I can edit them back in where they belong.


Success! Hopefully no more will "disappear."
 
Last edited:
OP
OP
redfishbluefish

redfishbluefish

Stay Positive, Stay Productive
View Badges
Joined
Mar 22, 2012
Messages
11,704
Reaction score
25,720
Location
Sayreville, NJ
Rating - 0%
0   0   0
Well, change of heart on the upper cabinet portion, which was going to have all the light outlets. What I originally planned in my head was to install three, 4 gang outlets on that false wall and have holes were the plugs could come through to plug into the respective outlets. I'm talking about three of these:

Electrical_Receptacle_0322_DJFcs.jpg


There would be one outlet for "whites", one outlet for "blues", and one outlet for "moon lights" WIth each of these I have three wires to plug in...for a total of nine wires.

So here's my issue.....the one wire coming from the furthest fixture just makes it into the top of the cabinet. If I were to do this outlet thing, I'd have to get one of those 1 foot extension cords to reach...no big deal, but I didn't like it. One or two of the other wires would have been close as well, and might also needed an extension. I felt it would still look messy.

So here's what I did instead .........I ordered up three power strip outlets from Amazon.

618J4xQm0aL._SY550_.jpg


With Prime, these should be here toot-sweet.

I will install these either on the back wall, or put up a piece of plywood to the right.....but behind the false wall. These power strips should be close enough so no extension cords will be needed. I still plan on using this false wall to hide it all. Again, a single screw exposes the back side.
 
OP
OP
redfishbluefish

redfishbluefish

Stay Positive, Stay Productive
View Badges
Joined
Mar 22, 2012
Messages
11,704
Reaction score
25,720
Location
Sayreville, NJ
Rating - 0%
0   0   0
Atman - The Death of Me

Got up today, excited that this cabinet is close to being finished. Power strips have been shipped, and should be here tomorrow. Started measuring and laying out all the holes I need to drill, when I go into the fish room to see the lights aren't ON. What the hoot! And, the one ReefKeeper controller is not lit up. I did notice an electrical smell as well.

I'm figuring I blew the fuse in the PC8 and no big problem, I have a backup PC8. I pull all the plugs on the old one and start to plug the new one in. As soon as I plugged in plug #6, boom, the fuse blows in this PC8, and lights out on the controller (as well as the tank's lights, which were on plugs 2 - 4). So I actually unscrew the old PC8 from the board and bring it out to the dining room table, thinking I could easily replace the fuse. When I go to take the fuse out, there is this black liquid around the fuse screw.


When I go to wipe off this apparent black goo, it actually is a dark purple on the tissue. What the heck is this stuff? When I open the fuse, none of this inky stuff is in there. So I then open up the whole PC8, like I know what I'm looking at. (I don't know electronics, period). I find that this is as far as I could go:


Nothing obvious, and only a very slight amount of this ink close to the plug location #6.....close to the fuse. No time to see if this PC8 is still good....back to finding out what was going on.

So I replace the fuse in the "newer," non-inky PC8 and go back to the tank and plug in everything except plug #6. Now what is Plug #6? It is the power to the float switch cut-out, that has both the skimmer and Biopellet reactor plugged into it. This cut-out is for the float switch in the skimmate container. If this container is too full with skimmate, it cuts the skimmer (and biopellet reactor), and saves me from a flood.

I quickly found that of the two, it was the marvously designed Atman pump on my SWC 160 skimmer. Now I'm a back up freak. I have backups of pretty much everything. When I purchased this skimmer, I was aware that Atmans were below crap when it came to pumps, and accordingly, I had three additional pumps....for a total of four pumps. FOUR!!! Well I went through one......two.....three (which was brand new and never worked from day 1, !!!), and now four. Pump four just went in a couple months ago, and I figured I had a little time to order up additional replacements. Well, see where that got me.

When I pulled the skimmer apart to pull the pump out, that smell was so strong, I had to put the pump out the back door. I also needed to clean the skimmer body with a little soap and water to get rid of the smell. Actually a lot of soap....had to soak the parts to get rid of the smell. I'm running carbon in the tank as well, not knowing if whatever this is, is it in the tank. It's now a good number of hours after I discovered this, and that smell still lingers in the fish room. Good news is that polyps are out and fish appear to be fine.

Immediately ordered another Piece-O-Crap Atman 2500 from Amazon Prime. Should be here on Thursday. Hoping I'm OK without a skimmer until then. I do really like this skimmer and wished there was another pump option other then the Atman. SWC won't do anything because they are virtually out of business. Maybe I should be looking to pick up some other brand of skimmer.

Lets see what tomorrow brings!
 
OP
OP
redfishbluefish

redfishbluefish

Stay Positive, Stay Productive
View Badges
Joined
Mar 22, 2012
Messages
11,704
Reaction score
25,720
Location
Sayreville, NJ
Rating - 0%
0   0   0
This morning I still had a lingering odor of whatever came out of that blown Atman pump. I actually could smell the smell in the skimmate container and pulled that out and cleaned it. From this info, I would speculate the pump ran for some amount of time while it was dying, putting it's stink into the skimmate. Well everything is clean, awaiting the arrival of Atman pump #5. I'm also casually looking for another brand of skimmer to replace this SWC 160. Apparantly there is no replacement pump for this Atman that will fit in an SWC.

Anyway, today is about:

Holes!


So today was about making holes and filling holes.

I actual began with blocking the hole in the canopy that held the fan. The fan would be in the way of the cabinet, and the partition wall in that part of the cabinet. I pointed this out in post #54, above. Simple fix....I cut a piece of 1/4 plywood that would cover the hole...keeping fish from making the jump through that hole. But not so fast. I did cut the plywood and had it drilled to screw it in place. However, when I pulled out the fan (that was no longer working), I noticed the front screen easily pops off. ;) So instead of having a blocked off hole, I now have a passive ventilation hole covered by the screen of the fan (and the screen will keep fish from surfing.) A serendipitous fix, if I say so myself. I think I had a little smile on my face for the next half hour or so, really liking this fix.

Inside the Canopy:


Outside the Canopy:


Now to making holes!

I have a wall outlet behind where this cabinet is going. Using the largest hole saw I have (3 1/2 inches), I drilled a hole where this outlet should be once the cabinet is installed. I did measure twice. :D


Now with the equipment board, I was nervous about starting to drill this. I'm not sure why, but after a couple holes, I seemed to calm down. I started with the two ReefKeeper Power Controllers. I did tighten these up from the original plan (got them closer). Once these holes were done, I made yet another change to the layout. I remembered that the one MP40 on the far side of the tank, the wire just gets to this side. So I moved the controllers closer to the right wall of the cabinet, were that wire would be coming into the cabinet. Here's the new layout.


So next I cut the holes for the two MP40 controllers. This is were I hit my third Doh! of this build. (Luckily an easily fixed Doh!) The cleat that holds this board in place is right where the controller will be located. DOH!!!


Simply moved the cleat over about 1 1/2 inches.....done!


And finally, here is the equipment panel all drilled out and in the cabinet, along with the MP10 mounting bracket I made. (If interested in the mounting bracket, I did a DIY thread on making one HERE.)


I'm going to slap a second coat of paint on this and call this part of the cabinet DONE!

Darn, I'm getting close!
 
OP
OP
redfishbluefish

redfishbluefish

Stay Positive, Stay Productive
View Badges
Joined
Mar 22, 2012
Messages
11,704
Reaction score
25,720
Location
Sayreville, NJ
Rating - 0%
0   0   0
Lights, Holes and the Final Paint

The power strips for the nine light plugs arrived last night, and so they were installed today. One strip for the "White" channel, one for the "Blue" channel, and one for the moon lights. The holder for the Vortech voltage supplies also installed in this upper part of the cabinet.


Also drilled maybe 6 or 7 more holes. I didn't count, put this cabinet now has a load of holes for the wires to go everywhere.


And finally, gave the inerts a second and final coat of paint. You'll also note the white outlet in the middle section.....since the skimmer was crapped out, I installed the outlet and relay for the float switch that is in the skimmate container.........kills the skimmer pump if the container is too full.


Tomorrow is D Day....this thing is getting installed! :D In addition, the new skimmer pump should be here. Big day.
 

kschweer

Moderator
View Badges
Joined
Mar 25, 2011
Messages
12,225
Reaction score
31,520
Location
New Jersey
Rating - 0%
0   0   0
Very well thought out! Have fun running the wires!! When I built my cabinet it think running the wires took just as long as building the cabinet and I'm still not happy with them. Still need to take a little time and clean them up a bit.
 

Being sticky and staying connected: Have you used any reef-safe glue?

  • I have used reef safe glue.

    Votes: 68 86.1%
  • I haven’t used reef safe glue, but plan to in the future.

    Votes: 5 6.3%
  • I have no interest in using reef safe glue.

    Votes: 3 3.8%
  • Other.

    Votes: 3 3.8%
Back
Top