Room Divider Peninsula Tank Build

SEWIreefer

New Member
View Badges
Joined
Sep 25, 2021
Messages
19
Reaction score
61
Location
Waterford, WI
Rating - 0%
0   0   0
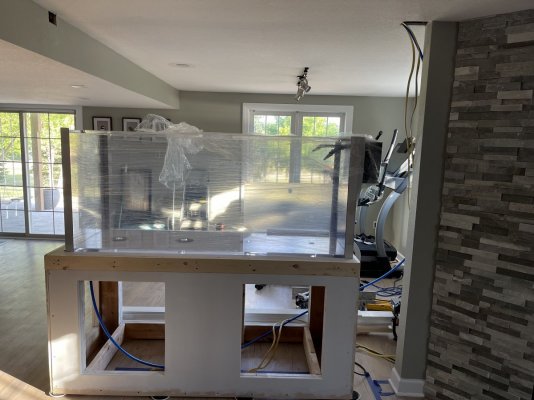
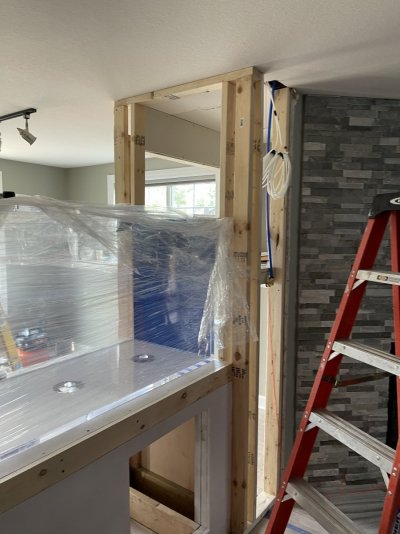
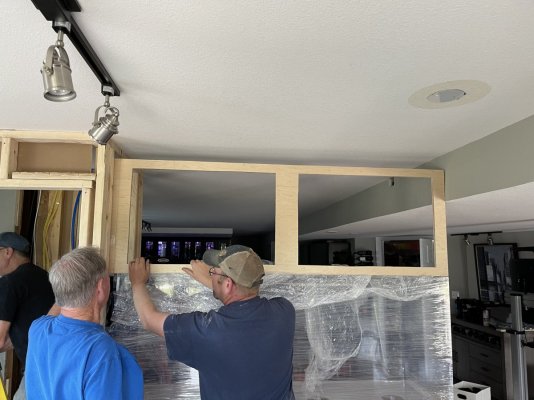
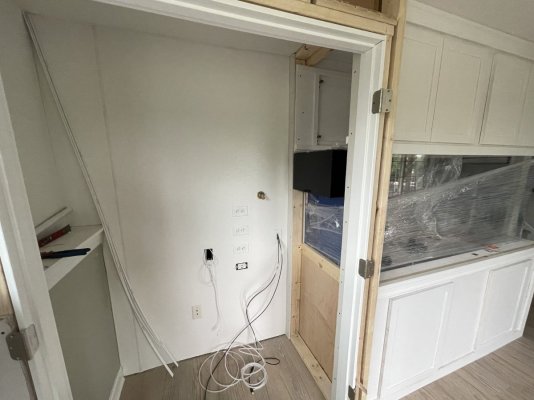
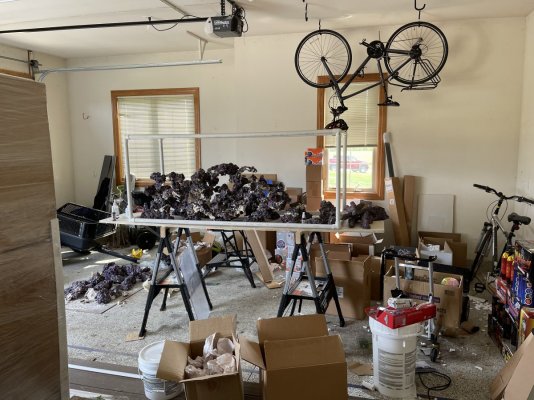
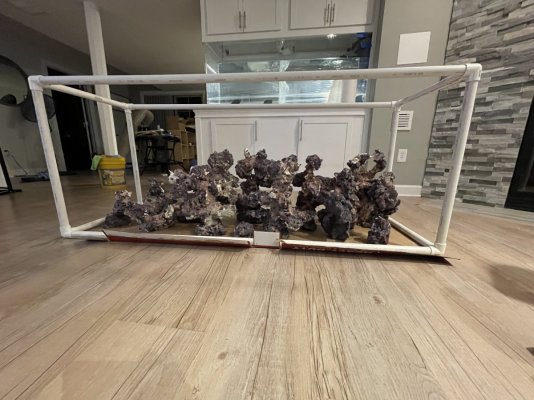
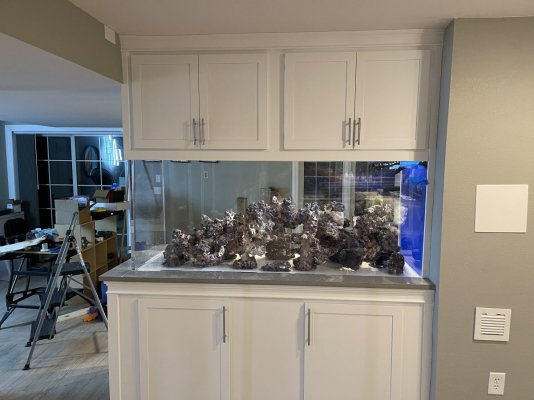
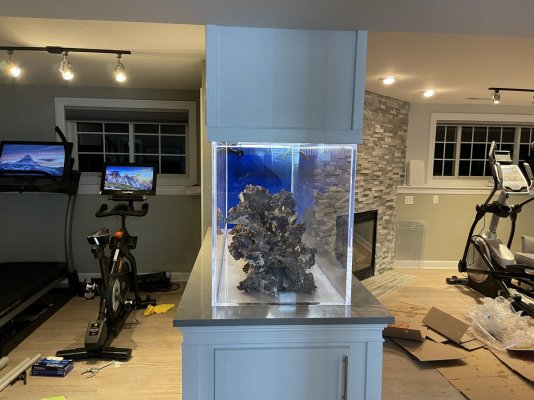
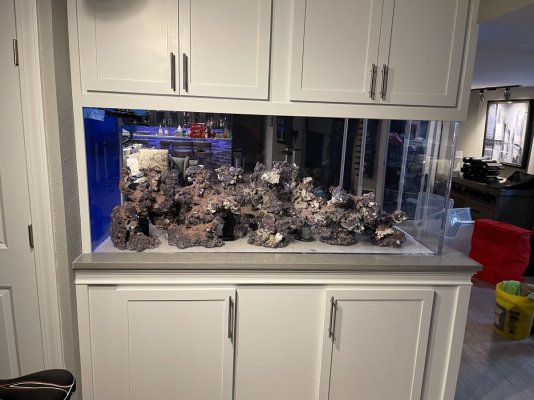
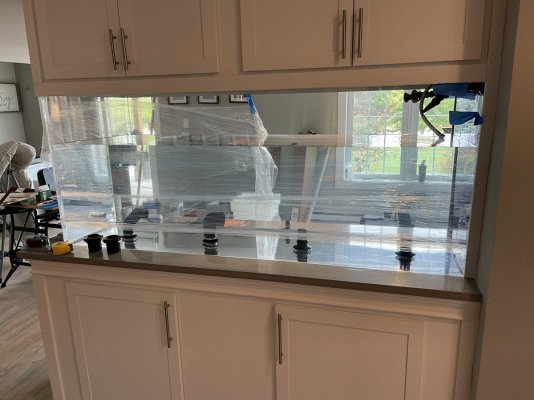
We bought our house with the basement mostly finished but have remodeled almost everything in the last few years. The basement is long and the different areas never seemed cohesive so I was lucky enough to get my wife on-board for a room divider aquarium! The tank itself is 72x24x30 custom acrylic with ghost overflow and 2 closed loops planned to help with flow.

C41C73F1-F2F3-4A3D-A3A0-CE3353AB3F48.jpeg 09745D41-A15C-4AFF-A508-3FCDFA93EAFB.jpeg
 

Attachments

  • Bean Overflow Aquarium Client-Layout1.pdf
    513.7 KB · Views: 51
OP
OP
S

SEWIreefer

New Member
View Badges
Joined
Sep 25, 2021
Messages
19
Reaction score
61
Location
Waterford, WI
Rating - 0%
0   0   0
After ordering the tank and having my contractor look at where we wanted to put it, we came up with room behind the tank to create a sump closet and keep things out from under the tank. We also were able to create a water change station in the unfinished part of the basement and ran hose line through the ceiling so I can fill the tank directly from the station with no buckets. I also ran lines for a Neptune Dos so water changes can happen automatically.
 

Attachments

  • 635C137F-BE09-4DF9-A346-63A07EBB36E7.jpeg
    635C137F-BE09-4DF9-A346-63A07EBB36E7.jpeg
    171.1 KB · Views: 96
  • 41ED632A-A766-4A6A-9C30-7F54307F23FB.jpeg
    41ED632A-A766-4A6A-9C30-7F54307F23FB.jpeg
    166.7 KB · Views: 107
  • 5EFDCBC0-7210-4F2D-8349-F004D141197C.jpeg
    5EFDCBC0-7210-4F2D-8349-F004D141197C.jpeg
    187.3 KB · Views: 87
  • 940CAB40-BF9B-435A-84E9-7C91228D3A28.jpeg
    940CAB40-BF9B-435A-84E9-7C91228D3A28.jpeg
    152.5 KB · Views: 111
OP
OP
S

SEWIreefer

New Member
View Badges
Joined
Sep 25, 2021
Messages
19
Reaction score
61
Location
Waterford, WI
Rating - 0%
0   0   0
I opted for a NSA style aquascape built in about 9 separate pieces that allowed a channel through the center for the closed loop pumps to move water. I used caribsea liferock and Marco pink mortar. I followed the video on BRS, used their superglue and insta-set but skipped putting sand into the mortar. I think the pink Marco mortar looks great with the life rock!
 

Attachments

  • 8AB89602-3020-418F-B9A7-D6E424784E72.jpeg
    8AB89602-3020-418F-B9A7-D6E424784E72.jpeg
    241.7 KB · Views: 102
  • 580FD799-DFC0-48B0-8696-6BCDB6709705.jpeg
    580FD799-DFC0-48B0-8696-6BCDB6709705.jpeg
    316.6 KB · Views: 89
  • E36180A1-03EC-4AB4-8CCB-BBDC84426D4B.jpeg
    E36180A1-03EC-4AB4-8CCB-BBDC84426D4B.jpeg
    199.7 KB · Views: 113
  • E086B1C1-DCAB-42F7-9EE3-72A84ADC76C0.jpeg
    E086B1C1-DCAB-42F7-9EE3-72A84ADC76C0.jpeg
    161.9 KB · Views: 123
  • 965F8339-F59B-4098-A2A2-F71A6889851D.jpeg
    965F8339-F59B-4098-A2A2-F71A6889851D.jpeg
    186.5 KB · Views: 110
  • C8BA4813-3FA5-449D-A640-D2B731AF7841.jpeg
    C8BA4813-3FA5-449D-A640-D2B731AF7841.jpeg
    190.4 KB · Views: 108
OP
OP
S

SEWIreefer

New Member
View Badges
Joined
Sep 25, 2021
Messages
19
Reaction score
61
Location
Waterford, WI
Rating - 0%
0   0   0
Plumbing the closed loops was more challenging than I anticipated. I have a lifeguard pro max 90 watt high output UV plumbed into the loop that draws water in from the hole nearest the overflows and returns water at the far end of the peninsula. The second closed loop draws in water from the next closest hole to the return. Both returns direct water back towards the overflow.
 

Attachments

  • 19D7A978-1750-4701-8DE3-85FF3B7677D4.jpeg
    19D7A978-1750-4701-8DE3-85FF3B7677D4.jpeg
    185.2 KB · Views: 111
  • D6221C9D-4CD6-42EC-98C6-6E45FC5A4D9B.jpeg
    D6221C9D-4CD6-42EC-98C6-6E45FC5A4D9B.jpeg
    164.7 KB · Views: 93
  • 1933436E-440D-42A4-B852-7A85622053D0.jpeg
    1933436E-440D-42A4-B852-7A85622053D0.jpeg
    159.8 KB · Views: 76
  • 07EE86B8-57CF-415C-AB38-FE3578EC890B.jpeg
    07EE86B8-57CF-415C-AB38-FE3578EC890B.jpeg
    159.7 KB · Views: 86
  • 83D6AAAE-8CB7-4646-AE64-CBA3E3CCF7DD.jpeg
    83D6AAAE-8CB7-4646-AE64-CBA3E3CCF7DD.jpeg
    166.6 KB · Views: 88
  • D3974BD5-9FBE-4679-A2B9-B7A9F8E7D7BE.jpeg
    D3974BD5-9FBE-4679-A2B9-B7A9F8E7D7BE.jpeg
    158.6 KB · Views: 87
  • 0C9F137A-4335-4B42-8375-C939AC744182.jpeg
    0C9F137A-4335-4B42-8375-C939AC744182.jpeg
    185.1 KB · Views: 94
  • 9F4AF695-A233-4378-AB40-A3CD6AB8C420.jpeg
    9F4AF695-A233-4378-AB40-A3CD6AB8C420.jpeg
    192.7 KB · Views: 67
OP
OP
S

SEWIreefer

New Member
View Badges
Joined
Sep 25, 2021
Messages
19
Reaction score
61
Location
Waterford, WI
Rating - 0%
0   0   0
I got a Pro-Clear Aquatics RedFlex 400 Sump for this system. After some research I decided to retrofit the filter sock areas with the Klir roller-mat filters for two of the slots and then I plan to plug the third hole (it comes with three, 4" filter socks. The only modification I had to do was to Dremel the area above the filter socks to accomidate the rectangular shape of the Klir filters. I also had to plug the wave shaped slots that allow water to exit the top of the filter sock chamber. This was necessary because the Klir need to the ability for 1.5" of water above the holes for the filter socks in order for the optical sensors to work properly. I used flextape for starters. I may eventually glue pvcboard over these slots if I want a more permanent solution. I also increased the built-in intakes from above. The Redflex came with 1" bulkheads, I went up to 1 1/2" to match my main overflow.

IMG_7216.jpeg
 
OP
OP
S

SEWIreefer

New Member
View Badges
Joined
Sep 25, 2021
Messages
19
Reaction score
61
Location
Waterford, WI
Rating - 0%
0   0   0
after initially placing the sump in position I decided I wanted the sump closet to have a more finished look and also wanted servicing the sump to be very easy. I made a base of cinderblocks evenly spaced and then did a plywood platform above that and then used expanded PVC board to encase that entire base structure and caulk it to the floor and walls.
IMG_6850.jpeg
IMG_7297.jpeg
IMG_7298.jpeg
 
OP
OP
S

SEWIreefer

New Member
View Badges
Joined
Sep 25, 2021
Messages
19
Reaction score
61
Location
Waterford, WI
Rating - 0%
0   0   0
I also purchased the matching 10 gallon ATO reservoir and it fit perfectly next to the sump in the space I had. I had a 6" space behind the sump so I built an elevated area and then cut a PVC board to fit
IMG_7350.jpeg
IMG_7347.jpeg
and be even with the top of the sump. The piece can come out if I need to route cords or anything else behind the sump but it also creates a nice shelf and further makes the whole thing look clean and intentional.
 
OP
OP
S

SEWIreefer

New Member
View Badges
Joined
Sep 25, 2021
Messages
19
Reaction score
61
Location
Waterford, WI
Rating - 0%
0   0   0
Plumbing took forever and I was busy so I did it a little bit at a time. Due to a communication error with Proclear, the overflow that came with the tank only had room for 3/4" bulkheads. I was able to use hole saws and increase these so that two of the holes were able to fit 1 1/2" bulkheads and one would be 1". I set it up bean-animal style with the primary and emergency drains being the large pipe and the secondary being the 1".
IMG_7289.jpeg
IMG_7290.jpeg
I opted for a dual return and was able to integrate an additional Lifeguard 90 watt UV sterilizer into one of the returns while the other one went right to the tank. I plumbed Neptune flow meters into both returns so I know the actual flow rate back into the tank. I also make the rookie mistake with the dry fitting of the UV return and the last piece was about an inch short of where I needed it to be. I was able to cut it apart and install a coupler so it worked out in the end.
IMG_7291.jpeg
IMG_7293.jpeg
IMG_7368.jpeg
IMG_7369.jpeg
IMG_7387.jpeg
IMG_7389.jpeg
IMG_7400.jpeg
IMG_7401.jpeg
 
OP
OP
S

SEWIreefer

New Member
View Badges
Joined
Sep 25, 2021
Messages
19
Reaction score
61
Location
Waterford, WI
Rating - 0%
0   0   0
I had four circuits run to the sump closet so deciding how the electrical load would be divided and allocated took some thought. The goal is that no single circuit has too much load and if any breakers trip the tank will not be taken completely offline. The sump closet will have 2 EB 832s, an EB4 for the lights, and a regular power strip for all the things that don't need a smart plug. I got two of the adaptive reef controller boards that I am mounting side by side and high up on the wall and then I am making my own board to mount 3 of the 4 energy bars onto. I had everything spread out on my dining room table for far longer than my wife would have preferred.
IMG_7418.jpeg
IMG_7419.jpeg
IMG_7420.jpeg
IMG_7427.jpeg
IMG_7436.jpeg
IMG_7437.jpeg
I installed all the modules on the board but don't think they will all be placed into service right away.
 
OP
OP
S

SEWIreefer

New Member
View Badges
Joined
Sep 25, 2021
Messages
19
Reaction score
61
Location
Waterford, WI
Rating - 0%
0   0   0
Installing the aquascape was quite a project. This tank is just tall enough that placing the pieces properly was quite an acrobatic event. I'm happy I went with a 6" lip all around the tank as it is substantial enough to stand on while leaning into the tank to make adjustments. I used cardboard to prevent scratching the acrylic as I moved each element of the rockscape into the tank. Once I got all the rocks in I used a combination of Oceandirect sand and special grade dry sand. I used less than 100 pounds of sand overall and it looks deeper than I expected
IMG_7431.jpeg
IMG_7432.jpeg
IMG_7433.jpeg
IMG_7530.jpeg
.
 

Paul Kachirsky

Active Member
View Badges
Joined
Dec 7, 2018
Messages
230
Reaction score
51
Rating - 0%
0   0   0
How do you like the Klir 4 rollers? I have the Red Flex 300 sump and am curious if they would fit and how you like them?
 

Paul Kachirsky

Active Member
View Badges
Joined
Dec 7, 2018
Messages
230
Reaction score
51
Rating - 0%
0   0   0
I got a Pro-Clear Aquatics RedFlex 400 Sump for this system. After some research I decided to retrofit the filter sock areas with the Klir roller-mat filters for two of the slots and then I plan to plug the third hole (it comes with three, 4" filter socks. The only modification I had to do was to Dremel the area above the filter socks to accomidate the rectangular shape of the Klir filters. I also had to plug the wave shaped slots that allow water to exit the top of the filter sock chamber. This was necessary because the Klir need to the ability for 1.5" of water above the holes for the filter socks in order for the optical sensors to work properly. I used flextape for starters. I may eventually glue pvcboard over these slots if I want a more permanent solution. I also increased the built-in intakes from above. The Redflex came with 1" bulkheads, I went up to 1 1/2" to match my main overflow.

IMG_7216.jpeg
How do you like the Klir 4 rollers? I have the Red Flex 300 sump and am curious if they would fit and how you like them?
 

Mastering the art of locking and unlocking water pathways: What type of valves do you have on your aquarium plumbing?

  • Ball valves.

    Votes: 67 51.9%
  • Gate valves.

    Votes: 67 51.9%
  • Check valves.

    Votes: 33 25.6%
  • None.

    Votes: 29 22.5%
  • Other.

    Votes: 9 7.0%
Back
Top