Shallow Lagoon Build

robs.mark

Active Member
View Badges
Joined
Jul 12, 2020
Messages
121
Reaction score
192
Location
Perth, Western Australia
Rating - 0%
0   0   0
G’day from Australia! As an British man it still sounds a little weird saying that, but feel like after 13 years’ it’s become part of my regular vocabulary!

Background

Like most “fish people”, I started by keeping freshwater as a kid. Something has always fascinated me about creating and observing an entire ecosystem, it’s quiet incredible!

Shortly after arriving in Australia, I started scuba diving. I was blown away by diversity of life that dwelled below the surface. Naturally, after spending time googling various diving forums, I found reference to the reef hobby. I joined Reefcentral in 2008, and began reading (and reading and reading!), a trip the the LFS, and I was hooked! I needed to set up a reef tank. At the time, my partner and I were saving for our first house together. I ordered a tank, and began to accumulate equipment. The tank was a custom 50g tall without an overflow box, instead having two riser pipes (don’t ask!). Eventually we purchased a house, and I was able to set up the tank. It was a great learning curve, but after about 12 months, I wanted more. As the years passed I upgraded again and ended up with a 187g reef, complete with a fish room. It was awesome! The tank ran for about a year, during which time my now wife fell pregnant with twins, and we realised that we needed a larger house. I transferred a couple of fish and corals into a smaller tank and shut down this system.

Fast forward a number of years and a substantial renovation, and I am now a position to start a larger system again. I kept the smaller system running, and still have the three fish I kept (a pair of Occi clowns (the first sw fish I ever bought), and a hybrid scopes tang who I couldn’t bare to part with).

New Beginnings

The new system will be a shallow SPS lagoon. I am a keen DIYer, and spent the first 18 years of my (working life) as a mechanical fitter - as such, I love to modify and build things. This will no doubt be apparent during this tank build. I have purchased most of the required equipment and have almost finished the stand, but for the sake of documentation, I will start this thread from the beginning. Here is what I have so far:

Tank: 40” x 28” x 16” (73g) custom rimless with external overflow
Sump: Custom DIY
Skimmer: Bubble Magus Curve 7
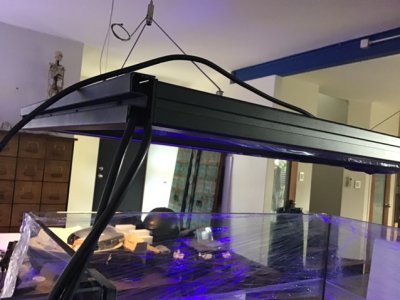
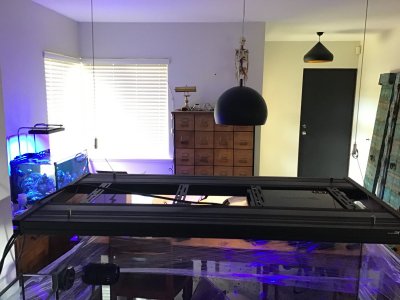
Lighting: Modified Aquatic Life Hybrid, 2 x G3 Ecotech Radion XR30s. Tunze refugium LED
Flow: 1 x MP40 QD, 1 x MP40w
Return: EcoTech Vectra M1
Temp Control: Inkbird WIFI controller with Eheim heater, and eBay cooling fans
Elements: Bubble Magus Dosing Pump
Other: Bubble Magus Automatic Filter Roller, Smart Automatic Water Change System

Some of this equipment is new, some used, and some from my existing system.

Its 12:30 am over here, but I promise to start adding some pics tomorrow. Hopefully this thread is of use to someone, even if it’s just how not to do something x-)

Cheers, Mark
 

fishguy242

Cronies..... INSERT BUILD THREAD BADGE HERE !!
View Badges
Joined
Jan 21, 2020
Messages
43,061
Reaction score
247,996
Location
Illinois
Rating - 100%
1   0   0
following this one ;)
 
OP
OP
robs.mark
robs.mark
Active Member
View Badges
Joined
Jul 12, 2020
Messages
121
Reaction score
192
Location
Perth, Western Australia
Rating - 0%
0   0   0
Well that was a terrible sleep! Okay, back to it!
The Stand

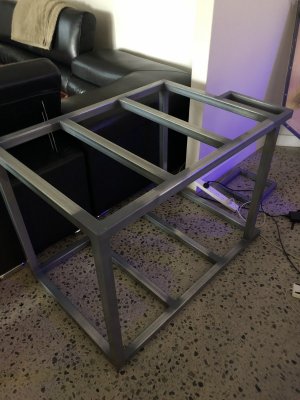
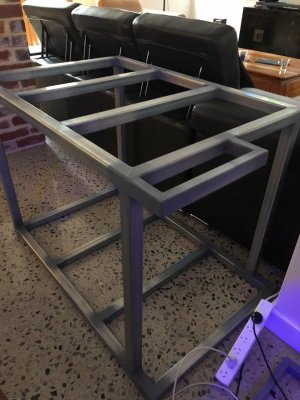
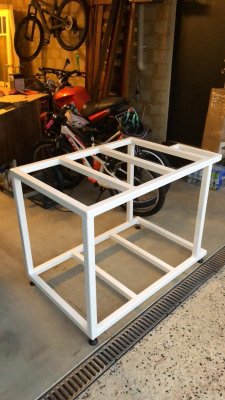
I decided to build a metal stand with removable plywood panels. This is in part to match my kitchen (which is also ply) and part because I wanted as few access restrictions as possible to the sump area.

I decided to use 4mm X 40mm box section.

Note: I’ve been working from home for six months at this point - hence my resemblance to a Neanderthal!

8F2F89A8-21B2-4A73-B5F1-F87B1F29B9BA.jpeg 15864584-F4C3-4592-8577-8565475691F7.jpeg 92249211-8496-432D-9755-EEC5D3F14827.jpeg
 
Last edited:
OP
OP
robs.mark

robs.mark

Active Member
View Badges
Joined
Jul 12, 2020
Messages
121
Reaction score
192
Location
Perth, Western Australia
Rating - 0%
0   0   0
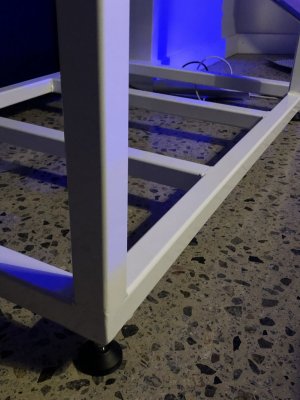
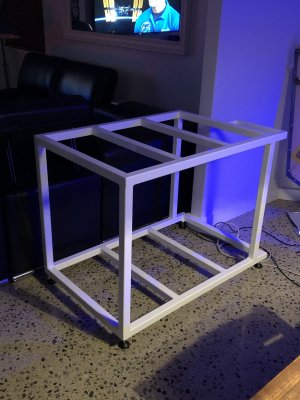
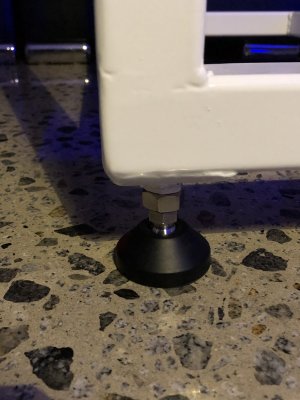
Just before sending to the powdercoaters I decided to give it a test fit (shown in the above pic), I was horrified to find that the floor was 10mm out where the tank will sit! As part of the house renovation we had the concrete slab ground and polished and I believe the floor polisher went a little too heavy in this spot. At this point I decided to reinforce the bottom of the stand and add adjustable stainless steel/rubber feet. They are rated for 500kg a corner so should easily take the weight. In retrospect, this should have formed part of my original planning as I like the look it has provided (even though it has raised the tank by 50mm) - my first oversight!

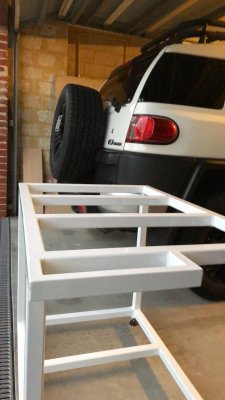
Back from Powdercoaters

68AF1937-4DD1-44B3-A7EF-ADCD698474F1.jpeg A218AE3A-836B-4106-B1C7-BE6DFD2E6562.jpeg E9C10A2B-6519-4F03-B166-C42FCA0B0AC9.jpeg FD9303C1-55C0-473B-AA08-FE4A61FF4B82.jpeg E9F622E9-8994-4195-A80A-B034E0F9339C.jpeg
 
OP
OP
robs.mark

robs.mark

Active Member
View Badges
Joined
Jul 12, 2020
Messages
121
Reaction score
192
Location
Perth, Western Australia
Rating - 0%
0   0   0
Timber Work

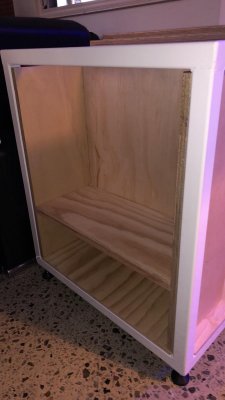
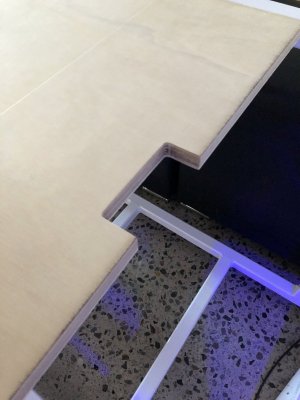
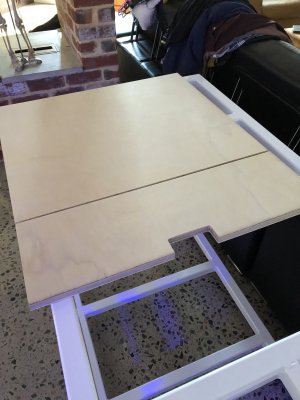
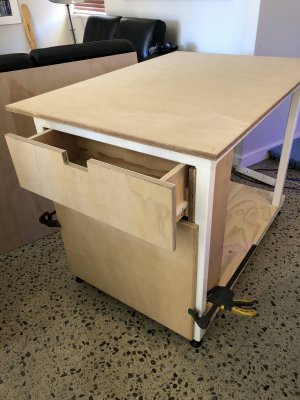
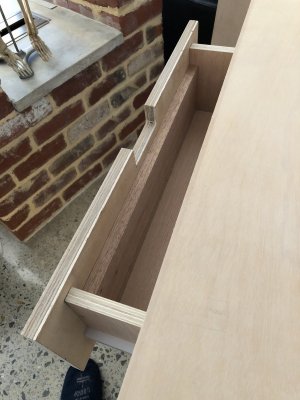
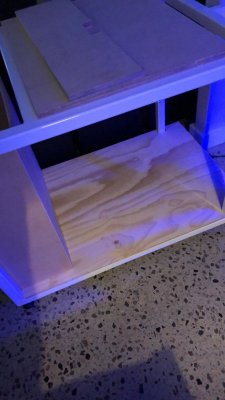
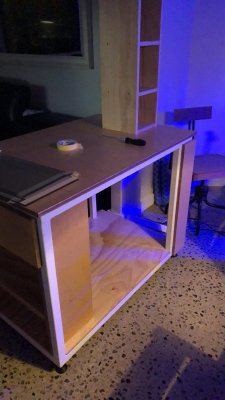
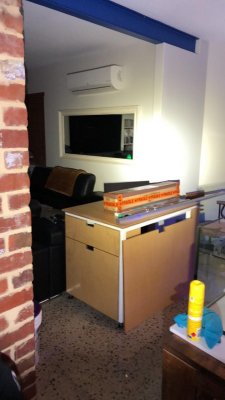
The sump area had a floor fitted, and I decided to add an electrical cabinet/storage compartment to one end with a draw above it. I should have probably mentioned in my first post that this tank will be peninsula style, visible from 3 1/2 sides (this will make sense later!).

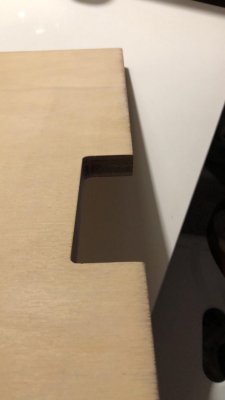
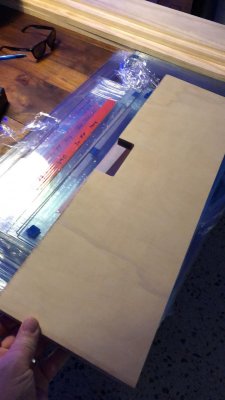
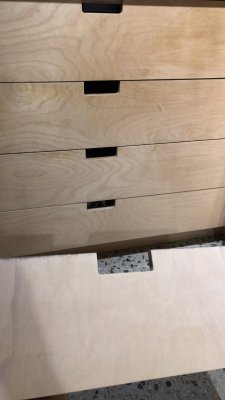
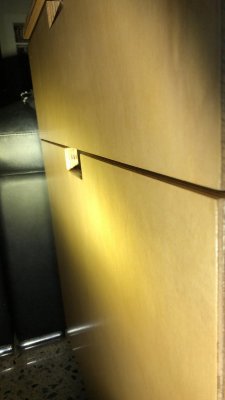
As per my last post re. the kitchen design - the kitchen was made using 18mm AA/A Hoop ply, which was too expensive to use for this stand. Given that the tank was situated in the living area which is a fair way back from the kitchen, I decided that 18mm AA/A mixed hardwood marine ply for the cladding Would be close enough! The kitchen “cut-out” handles were replicated using a router. The bank of four draws in the photos below shows my kitchen for comparison.

1A7DC154-1FF0-41AE-A906-D7B033A052AF.jpeg 58854AAE-D42B-4F81-A0B0-5A818E3C7936.jpeg 42B21F09-B14C-44DE-8EB5-F3515DD231D8.jpeg 8C0139F6-E525-4914-BB15-D17D5244FF18.jpeg 96B1253F-A990-412F-80C7-7C52C4CD3385.jpeg 89203FD8-7262-4C6E-AA2D-C9FC3B61D282.jpeg A236232B-3657-4E9D-AEB5-5F73095AAA5B.jpeg B00CAE79-7E09-49B6-8922-FA6C4EF27574.jpeg 34D0BAAA-7076-4B3B-958A-B88C714BE69D.jpeg
 
Last edited:
OP
OP
robs.mark

robs.mark

Active Member
View Badges
Joined
Jul 12, 2020
Messages
121
Reaction score
192
Location
Perth, Western Australia
Rating - 0%
0   0   0
The rest of the panels were cut over a period of a week. Each one received five coats of water based polyurethane, prior to fitting. At no point has the stand been drilled, all fixtures/panels have been secured using silicone in an effort to reduce the risk of corrosion.

Leaving the edges of the steel exposed was part of my original design, in hoping to achieve an “architectural” look once complete - we will see!

B493F2FC-6E62-4E8B-874E-5DDA123AB96F.jpeg 0FFABB9B-10A4-401B-A36D-B1383AE6975A.jpeg D48CA52C-F798-4EDA-B333-A14D028DD388.jpeg
 
Last edited:

fishguy242

Cronies..... INSERT BUILD THREAD BADGE HERE !!
View Badges
Joined
Jan 21, 2020
Messages
43,061
Reaction score
247,996
Location
Illinois
Rating - 100%
1   0   0
Oooo ..this is going to be good!!nice work,i want to ask..but don't ruin the suspense..is it going to hug the beam?? DON'T ANSWER..;)i can wait:cool::cool:
 
OP
OP
robs.mark

robs.mark

Active Member
View Badges
Joined
Jul 12, 2020
Messages
121
Reaction score
192
Location
Perth, Western Australia
Rating - 0%
0   0   0
Stands are a little boring, so lets put a pin in that and look at something more interesting..

Lighting

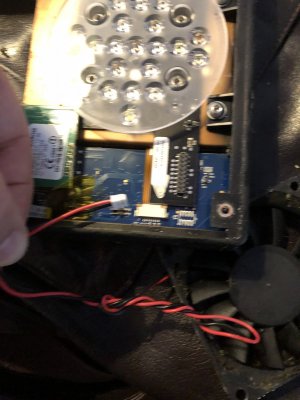
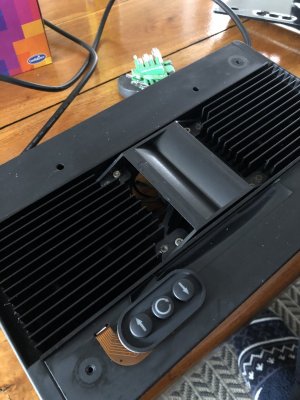
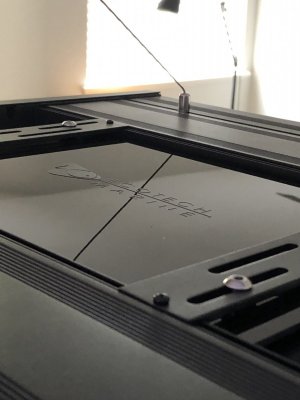
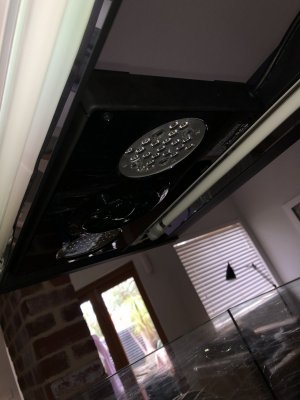
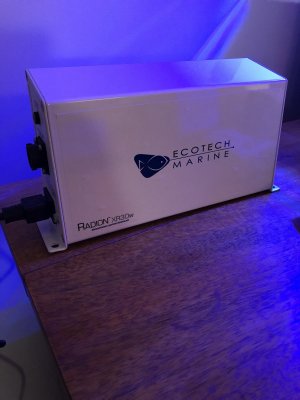
So I have a G3 XR30 going strong on my temp tank and recently managed to find another. It actually arrived in the mail today, and I immediately got to work pulling it apart to have a look at the condition. I really need to get better at this photo thing as I was almost finished when I realised that I hadn’t taken any! Anyway, the light was pretty gross, I don’t think it has been cleaned since new, which according to the label was in 2016. I pulled the covers, lenses and fan off and thoroughly cleaned it inside, following with a soapy bath for the bits I pulled off. After a test, I’m pleased to say it is feeling much better!

I plan on using these two radions with a Aquatic Life 39w T5. I figure this combination on a 16” tank should allow me to grow most things.

F9CB816C-2D69-4F55-8B8E-62212DF40213.jpeg B9C3B721-5DDB-4DBA-94A5-D1D86FA8BE4E.jpeg 40A8A589-CAA1-4ECD-B562-D5DEAC2E5FA7.jpeg 96542D1E-9DC5-4BCF-BDF2-DA39C8CEDF56.jpeg image.jpg
 
Last edited:
OP
OP
robs.mark

robs.mark

Active Member
View Badges
Joined
Jul 12, 2020
Messages
121
Reaction score
192
Location
Perth, Western Australia
Rating - 0%
0   0   0
Anyone familiar with the Aquatic Life T5 hybrid knows three things:

1. They are a great idea;
2. They are relatively cheap; and
3. They come out of the box with some serious limitations/issues.

I figured for the price, I’d have a crack at overcoming these issues, and here’s how that went!

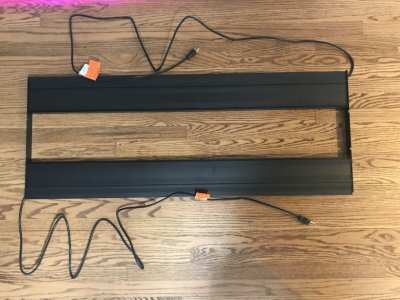
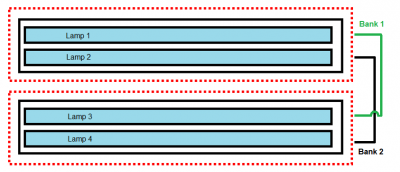
The first issue is that the lights have two banks, one powers the two lights on the left side, and the other powers the right. This is terrible for light distribution and effectively means the only option is to run all lamps at once, especially on a 28” wide tank.

The second issue, is that the two banks of T5s are identical, only mounted opposite. This means that a power cored comes from each side of the tank. The image below from R2R user “Behnken” demonstrates my issue..

9D025EFE-6B43-4509-899B-FB3711D19FEE.png
 
OP
OP
robs.mark

robs.mark

Active Member
View Badges
Joined
Jul 12, 2020
Messages
121
Reaction score
192
Location
Perth, Western Australia
Rating - 0%
0   0   0
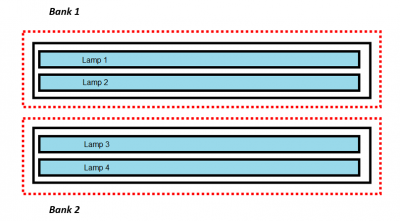
Here is a diagram to show how I wanted the lights to operate.

Whilst rewiring the lamp, I wanted to try to swap the ballast in one of the banks to allow both cables to exit one side of the lamp.

Unfortunately, I tackled this before starting this thread and failed to photograph it.

This YouTube video by "What the Frag" basically describes what is did (my wiring was slightly different when finished because I wanted one side of the fixture to be completely free of cables.

I will say that you shouldn't do this, it voids warranty and is 220/40V power. If you don't know what you're doing you could kill yourself.

The entire task took four hours and was a complete pain in the ar$e!
Config1.png A5F61BE0-636E-448E-96AE-C1A8EB67D109.jpeg C75236FF-097E-4BE8-A72E-D472C202EC27.jpeg
 
OP
OP
robs.mark

robs.mark

Active Member
View Badges
Joined
Jul 12, 2020
Messages
121
Reaction score
192
Location
Perth, Western Australia
Rating - 0%
0   0   0
Display

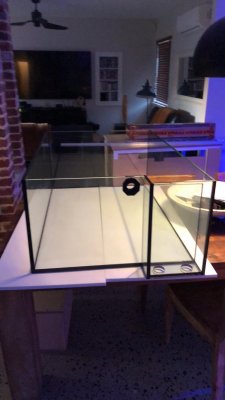
So the display was built by a local guy (Franks Tanks). This is the 4th tank which he has built for me, and I’m always happy with his work.

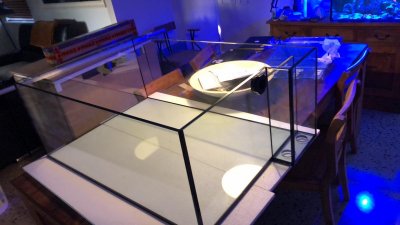
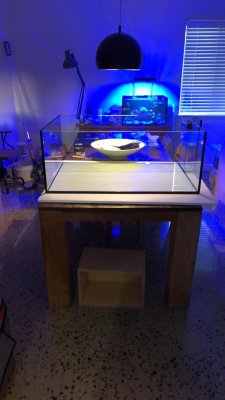
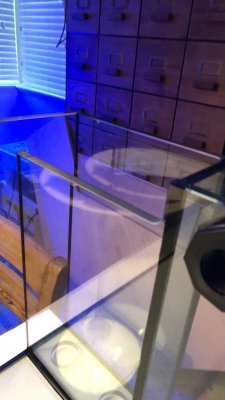
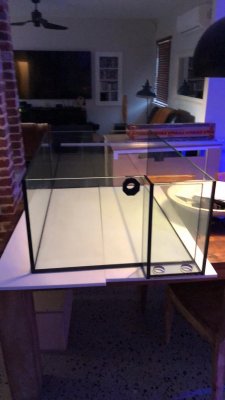
40” long x 28” wide x 16” tall, external overflow with a return hole drilled next to the overflow. The tank is constructed from 12mm glass, with every edge flat polished. This tank is rimless and was constructed using black silicone. One cool feature of this tank is that Frank cut the silicone seams away leaving a bond between the glass edge only.

I plan on painting the underside of the tank and attaching black acrylic/comb to the overflow. What colour should I paint the base, black or white? going against the grain of a traditional lagoon, I think I’ll be running this system BB.

0F3E9A61-687B-4DE4-9261-FD7EF508A679.jpeg D946C00D-98F3-4A6D-B8F8-AEDC44DBA761.jpeg 880C9D58-5FFC-431B-B745-290CAE649A4E.jpeg 12DDA1E2-2791-49B4-B6D2-7B0BC02B35EF.jpeg BDD37163-C5C4-4744-865D-A1D36B82FF4E.jpeg
 

More than just hot air: Is there a Pufferfish in your aquarium?

  • There is currently a pufferfish in my aquarium.

    Votes: 30 18.0%
  • There is not currently a pufferfish in my aquarium, but I have kept one in the past.

    Votes: 27 16.2%
  • There has never been a pufferfish in my aquarium, but I plan to keep one in the future.

    Votes: 32 19.2%
  • I have no plans to keep a pufferfish in my aquarium.

    Votes: 70 41.9%
  • Other.

    Votes: 8 4.8%
Back
Top