Steve K's 120 gallon build

Steve K

Community Member
View Badges
Joined
May 24, 2016
Messages
80
Reaction score
33
Rating - 0%
0   0   0
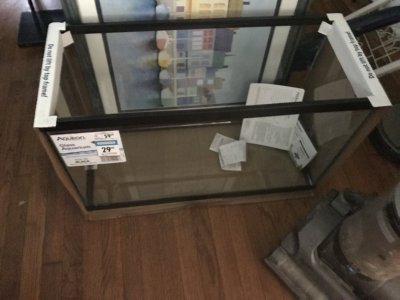
I picked up a used 120 gallon 5' tank from a local aquarium service company a couple weekends ago.

IMG_0112-2.jpg


It's going to eventually replace my 60 gallon algae farm

IMG_0145.jpg


The new tank was pretty much stripped out, there was no sump, plumbing, or even bulkheads.

I'm on a budget, so I'll be acquiring stuff bit by bit and posting it as replies here. I'm currently planning on doing a 3d foam and rock background, using black box LEDs, a DIY sump and a gyre wavemaker. Other stuff TBD.
 
OP
OP
Steve K

Steve K

Community Member
View Badges
Joined
May 24, 2016
Messages
80
Reaction score
33
Rating - 0%
0   0   0
I ordered some bulkheads and got them installed. I had to guess at the size, but I managed to get it right. 1" in case you were wondering.

IMG_0138.jpg
 
OP
OP
Steve K

Steve K

Community Member
View Badges
Joined
May 24, 2016
Messages
80
Reaction score
33
Rating - 0%
0   0   0
Woah, I didn't keep this up while I'm going so I'm way behind. The tank is up and running now. Here's a whole bunch of updates incoming as I try to remember what I did based on the pics on my phone.
 
OP
OP
Steve K

Steve K

Community Member
View Badges
Joined
May 24, 2016
Messages
80
Reaction score
33
Rating - 0%
0   0   0
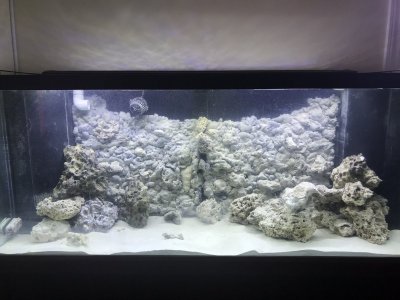
Let's start with the 3-D rock background. I was inspired by some posts here, which of course I don't remember now, so props to the original pioneers that inspired me.

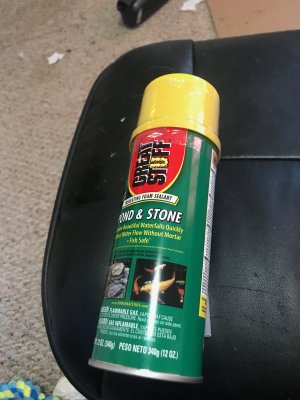
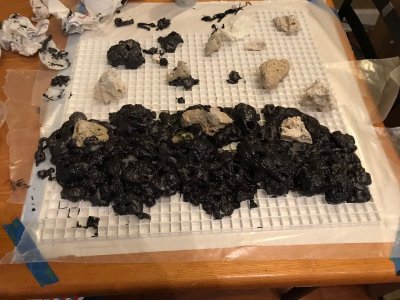
I used egg crate cut to size, some small dry rocks and black pond foam to cobble this monstrosity together.

IMG_0150.jpg

IMG_0154.jpg

That's the first run through, I put wax paper under the egg crate to keep the foam from sticking to the table. Word of warning this stuff sticks everywhere and the color will stick to your hands for weeks. Use gloves.

Originally I made molds to get rock shapes by taking some meltable plastic and covering pieces of dry rock. In the end I found that particular bit to not work so great. I ended up doing most of the fake rocks by hand, using various things to poke holes in the foam once it began to set up. Protip: coat the items with cooking spray or oil to keep them from getting stuck in the foam.

IMG_0161.jpg

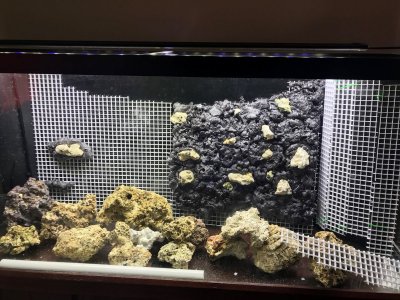
I built the background in two pieces since my tank has a crossbar. I also left an area up top without background as I didn't know what I'd be doing for wavemakers at the time. Originally I attempted to do a wrap around the corner overflows, but eventually decided against it.

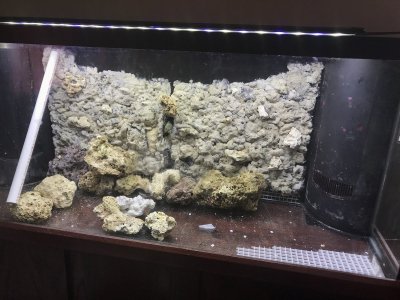
Finally, once the foaming was done, I took the two backgrounds and used a spray version of one of the epoxies that some have claimed to be safe, Envirotek. I apparently didn't take pictures of the sand covering phase. It took a couple of coats and I wasted about 10lbs of argonite sand to get the end results. The sand didn't fully cover everything, leaving some of the black exposed, but it came out pretty good.

IMG_0166.jpg

I originally planned on using magnets to keep this thing from floating away, but couldn't find strong enough magnets to keep the thing down through the glass. I ended up just siliconing it directly to the back glass.

Now that the tank has been in use for a while, I found that the motion of the waves has rubbed off a lot of the sand, especially on top. Eventually coraline will cover that up.
 
OP
OP
Steve K

Steve K

Community Member
View Badges
Joined
May 24, 2016
Messages
80
Reaction score
33
Rating - 0%
0   0   0
Da sump

Petco happened to throw a $1/gallon sale at the right time. I selected a 29 gallon. I wanted bigger, but the design of the stand prevented anything larger from fitting.

IMG_0141.jpg

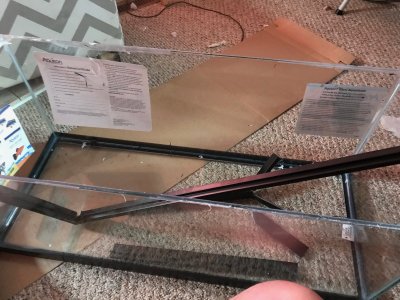
My previous attempts to build DIY sumps have been... mixed to say the least. The biggest problem is I could never find a source of decent glass. To counter this I had a brilliant idea. I also bought a 20 long during the sale to part out for glass for the baffles. It may have been a bit more expensive than buying it from a shop and of course I had to cut it myself, but you work with what you got.

IMG_0146.jpg

It turns out pulling the rim off of and getting the glass un siliconed is friggin hard. Way harder than they make it look on the YouTube video. I only cracked one pain, but I had enough glass for my project.

...and here's where I realized I also don't have pictures of this part.

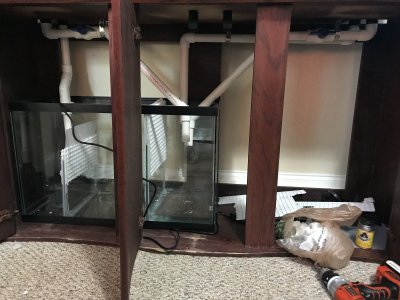
Here's a shot of the finished sump with plumbing in place. I also didn't take pictures of the plumbing, I was too excited to get the tank wet I guess.

IMG_0171.jpg

I have 3 chambers, the right is the drain area/refugeum, middle is skimmer and heat, left is the return. I decided on a weird design. Instead of glass baffles, I used egg crate silioned on either side attached to and above the chamber glass. In between that I cut a piece of craft plastic and stuck it in between the egg crate. This keeps all but the smallest bits from spilling into the next chamber. It works great for the fuge, but kinda sucks for the return, I have a microbubble issue I'll need to figure out at some point.
 
OP
OP
Steve K

Steve K

Community Member
View Badges
Joined
May 24, 2016
Messages
80
Reaction score
33
Rating - 0%
0   0   0
Plumbing.

I also didn't take any pictures while I was doing the plumbing :)

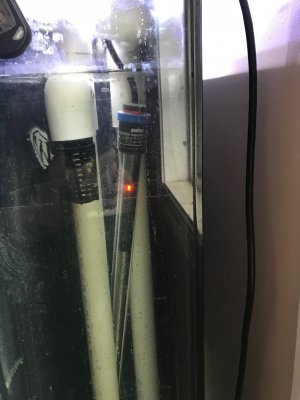
The tank is setup with 2 corner overflows and 2 bulkheads in each. I decided to do a sort of bean animal overflow that was split between the two weirs.

The weir on the left has my return along with the siphon.

IMG_0208.jpg

The right return has the open drain (with emergency siphon) and the emergency drain (along with what I like to call the preheater)

IMG_0206.jpg

The setup works, and the emergency drain system also works. I did discover after the tank filled it settled a bit more on the left side than the right, so it's been a bit tricky getting the flow perfect on the siphon.

Now for more pictures...

I made one HUGE mistake. I glued the pipe coming out from the bulkhead in the bottom into the bulkhead. That makes sense. BUT, I didn't leave any exposed pipe before the elbows. If anything happens where I need to change a bulkhead it's going to be a real PITA to get the bulkhead out and the pipes reattached.

Everything else is straight forward, I used a combination of 90's and 45's to get the pipes where they needed to go. There are valves on each of the drains except the emergency drain. The emergency drain is also above the waterline so it will be noisy if it engages. I used plumber's metal tape to keep the pipes from drooping.

I was smart enough to put a union valve on my return pump. That came in handy as I found I had to re-plumb the return after I had the system running.
 
OP
OP
Steve K

Steve K

Community Member
View Badges
Joined
May 24, 2016
Messages
80
Reaction score
33
Rating - 0%
0   0   0
Cycling

IMG_0186.jpg

Very boring.

I did move some live sand from my old sump, live rubble and a couple live rocks from the old system to speed things up. I used frozen shrimp rotting in the sump to get the ammonia flowing.
 
OP
OP
Steve K

Steve K

Community Member
View Badges
Joined
May 24, 2016
Messages
80
Reaction score
33
Rating - 0%
0   0   0
Lighting and flow

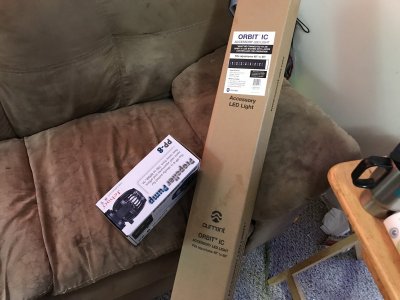
I'm on a pretty tight budget so really good lights just weren't in the cards. I was debating two different directions. I had a current Orbit IC fixture on the old tank, so I could get a second one and integrate it, or I could ditch those and get a couple black box 165w LEDs.

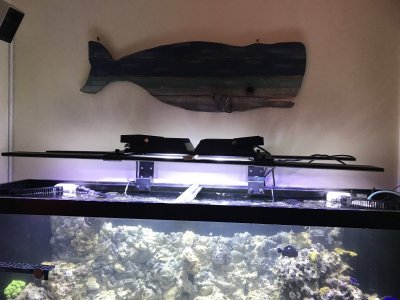
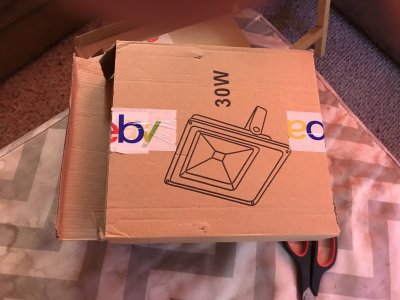
In the end, I settled on going with the Orbits since I could integrate wavemakers into the same system down the road. Once I got them I found the lighting was ok, but lacking a little (not a big shock). I ended up buying a couple of 30 watt 20,000k LED spotlights from a shop on eBay I've bought LEDs from before. I haven't PAR tested anything, as I expect it still to be a bit low, but it looks pretty sweet. I'm using the Current light brackets, they're a bit taxed, I may need to think of something else.

IMG_0209.jpg
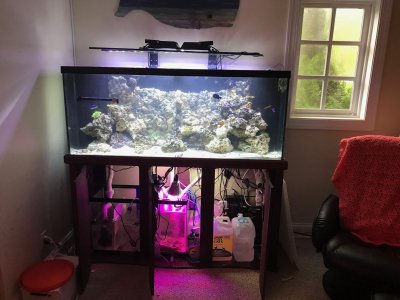
Say hello to Slappy the Mayonnaise Whale who we bought specifically to hang over the tank.

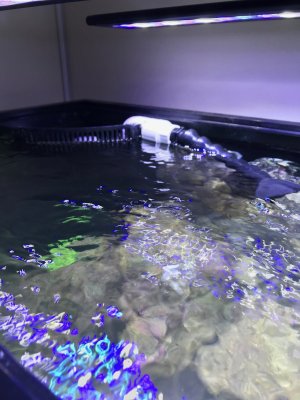
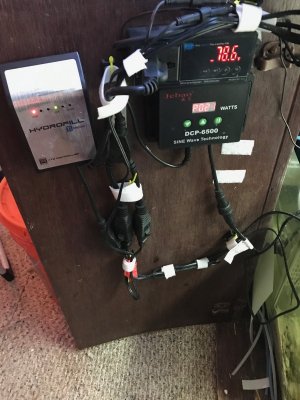
As for flow, pretty basic there. I already had a Jebao DC PP8 in the old tank, so I bought a second one (they can run as master/slave). For an inexpensive pump, they put out a crazy amount of power. I have them turned way down now as they were blowing sand all over the place on anything higher than half power.

I took pictures when the lights and wavemakers came in for some reason

IMG_0192.jpg IMG_0210.jpg
 
OP
OP
Steve K

Steve K

Community Member
View Badges
Joined
May 24, 2016
Messages
80
Reaction score
33
Rating - 0%
0   0   0
Aquascaping

I call this one the happy accident as the aquascape came out great, but nothing like I had originally planned.

The biggest challenge was scraping all the @#$%^ algae off of the rocks that were coming in from my old tank.

I created a couple of rock arches I was going to use on one side with some rock that jutted out and then a heavier collection of rocks on the left that extended out and covered most of the overflow. Yes, I have no pictures.

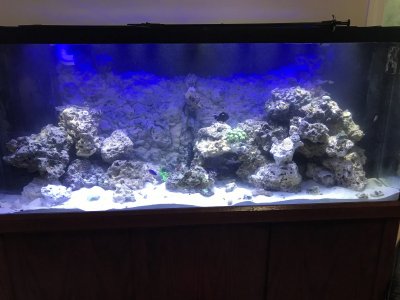
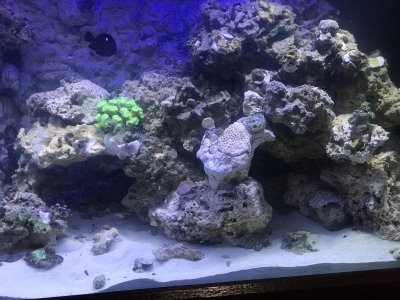
Once I did that, it looked... terrible. There were way too many rocks on the left, it looked like a big rock pile. So, I moved some of the larger rocks over to re-work it. I just sort of stuck them on top of the rockwork on the right. And, it ended up making a nice cave system. The left still looks a little rock pile-y to me, but I figured I'd leave it as is.

IMG_0190.jpg IMG_0191.jpg

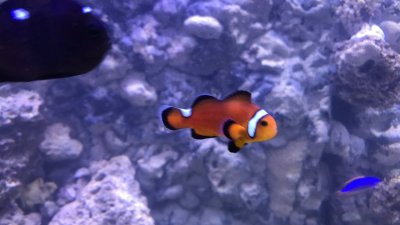
After the rockwork went in, so did the rest of the inhabitants, and that's the end of the build tale.
 
OP
OP
Steve K

Steve K

Community Member
View Badges
Joined
May 24, 2016
Messages
80
Reaction score
33
Rating - 0%
0   0   0
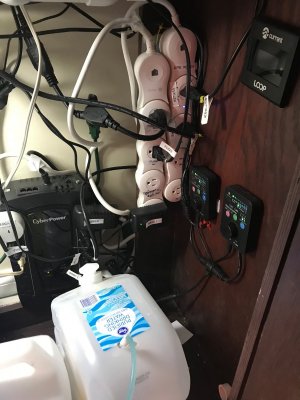
Awesome tank! and Slappy too lol. Is the purified drinking water for ATO?
I put RODI in the purified water containers, they're the perfect shape to fit under there.

The kitty litter bottle is for skim. It somehow seems appropriate.
 

TOP 10 Trending Threads

WHICH OF THESE CREEPY REEF CRITTERS IS MOST LIKELY TO GIVE YOU NIGHTMARES? (PICTURED IN THE THREAD)

  • The Bobbit Worm

    Votes: 50 66.7%
  • The Goblin Shark

    Votes: 4 5.3%
  • The Sea Wolf

    Votes: 0 0.0%
  • Giant Spider Crabs

    Votes: 1 1.3%
  • The Stargazer Fish

    Votes: 5 6.7%
  • The Giant Isopod

    Votes: 9 12.0%
  • The Giant Squid

    Votes: 1 1.3%
  • Other (Please explain!)

    Votes: 5 6.7%
Back
Top