The Tenecor® Pico DIY Drops March 2nd, 2024

Jim Gomoll

Active Member
View Badges
Joined
May 11, 2022
Messages
388
Reaction score
604
Location
Colorado Springs
Rating - 0%
0   0   0
Anyone know the overall roll dimensions for Innovative Marine NUVO AIO replacement fleece rolls?

BRS site says the fleece is 1 5/8 wide. I want to confirm width as well as need to know the overall roll dimeter and tube diameter.

Any other roll replacement suggestions with sizes is also welcome.

There are allot of Mini Fleece rollers out there out of Acrylic and/or printed. Playing around with an all acrylic DIY version to fit the Drop tank and other DIY tanks.
1712238266223.png
 

Jim Gomoll

Active Member
View Badges
Joined
May 11, 2022
Messages
388
Reaction score
604
Location
Colorado Springs
Rating - 0%
0   0   0
Anyone know the overall roll dimensions for Innovative Marine NUVO AIO replacement fleece rolls?

BRS site says the fleece is 1 5/8 wide. I want to confirm width as well as need to know the overall roll dimeter and tube diameter.

Any other roll replacement suggestions with sizes is also welcome.

There are allot of Mini Fleece rollers out there out of Acrylic and/or printed. Playing around with an all acrylic DIY version to fit the Drop tank and other DIY tanks.
1712238266223.png
Went straight to the supplier.

Innovative Marine Tech. Support
The filter roll for the desktop Nuvo fleece roller has a width approximately 1 ¾”, outside diameter of the fleece is about 2 3/8” and the tube diameter is about ¾”.
 

Jim Gomoll

Active Member
View Badges
Joined
May 11, 2022
Messages
388
Reaction score
604
Location
Colorado Springs
Rating - 0%
0   0   0
From questions I take it this might be your first DIY build. Many Youtube videos out there so watch a few for tips, tricks and how to's. See my post #799 on Electrical tape when gluing.

Many options of assemble order depending on your ability, and how much DIY you might do with kit.
Personally I assembled AIO first. Glued on media baffle and used silicone for the optional pump baffle in case I want to move or remove it later on.
My build order. 1) AIO 2) Main tank - Back to side1, side 2. Recommend and wish i did this... Use AIO assembly as a width guide for side 2 so there isn't a gap like I had on one end of my AIO. Then front (use AIO as guide), bottom, and finally the AIO assemble. I did all this planning for Euro brace last to have room for a hand in AIO chambers for tape/silicone. Will be doing Euro brace last by flipping tank over and tacking on the brace. Then will glue around inside edges to seal it up.

Highly recommend Weldon-4. Cleaner looking seams. 16 is thicker and messy. Did whole tank in 4 with the exception of one end of AIO back wall where I tried 16 to fill a wider gap. Mistake! Seam was an ugly mess with 16 which you can see the difference in pictures below comparing 4 & 16 seams. Ended up taping off edges of tank/AIO end and running a bead of silicone to clean it up best I could. (2nd 16 picture) Going to paint AIO area any way so hopefully that hides the ugly 16 seam more.

As for the adhering the bottom around the AIO you really only have to seal off the 3 edges of the display area to make it water tight. Inside AIO area the media baffle only needs to be glued to the back wall since it has feet. No need to glue to the bottom unless you want to. Depending on how you place the optional pump baffle, there is enough room to get a hand in there to glue it to the bottom from the middle chamber if you want. This seals off that chamber from middle. I silicone the optional baffle in place in case I decide to remove it or move it down the road. Did this by taping off the edges from middle chamber side only and ran small bead to seal it off.

Good Luck!!! PS: Practice on the spare pieces and scrap.

1712157403244.png
Been scrolling though this tread. See Tenecor's post #140 for assembly order.
 

Jim Gomoll

Active Member
View Badges
Joined
May 11, 2022
Messages
388
Reaction score
604
Location
Colorado Springs
Rating - 0%
0   0   0
On page 13 Post #248 of the Desktop tread I shared a video on different silicone types and holding strength.
DO NOT use GORILLA brand 100% silicone. NOT REEF SAFE
I used it on my AIO baffle seams for the Pico DIY build. Totally missed the statement on tube that it is mold & mildew resistant and not for underwater applications, aquariums. Figured being 100% silicon like GE1 and others this would be reef safe. Well it is not.
Cutting off this silicone and resealing with reef safe brand. Back to the beginning to restart cycle after it cures :(

Reached out to manufacturer.
Thank you for contacting The Gorilla Glue Company. We appreciate your interest in our company and products.
We would not recommend Gorilla Glue Caulk and Seal for your aquarium that as it is not recommended for constant submersion. It IS mildew and mold resistant by design. We would recommend reaching out to the manufacturer of the aquarium for their recommendation.
 

~MD~Reefs~

Active Member
View Badges
Joined
Apr 5, 2023
Messages
165
Reaction score
135
Location
San Jose
Rating - 0%
0   0   0
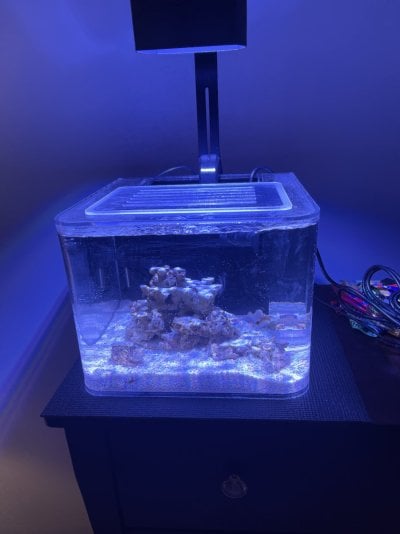
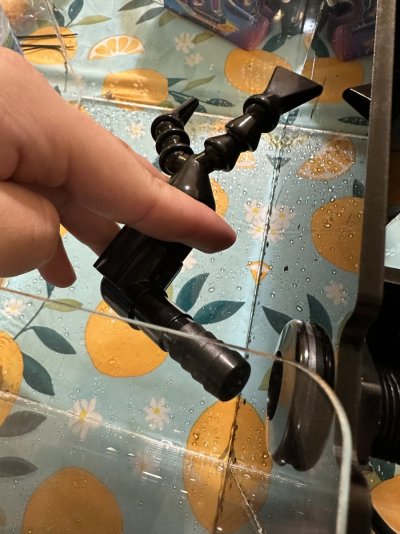
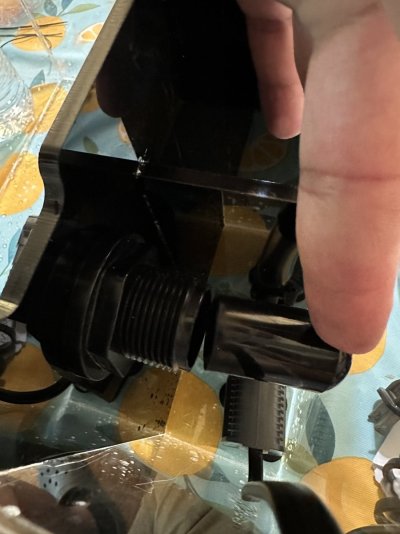
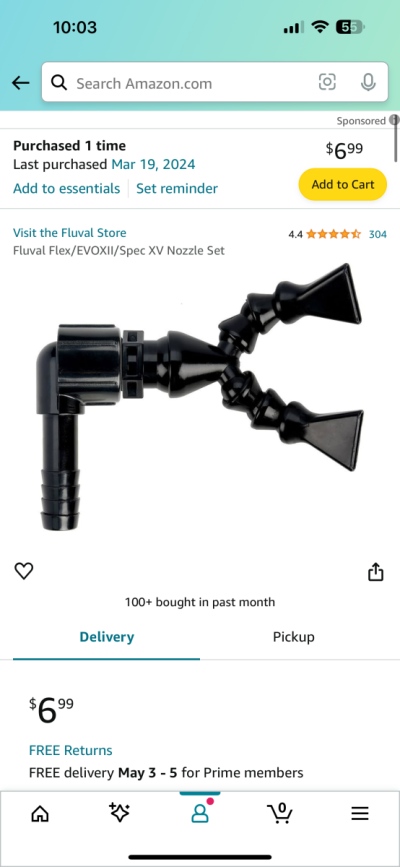
This is super later but I’m barely getting around to setting this up and I can’t for the life of me figure out the plumbing… I ordered the Fluval Flex nozzle which someone said would fit but I can’t get the tube to stay together?
 

Attachments

  • IMG_7784.jpeg
    IMG_7784.jpeg
    190.4 KB · Views: 12
  • IMG_7783.jpeg
    IMG_7783.jpeg
    132.4 KB · Views: 10

Reefing threads: Do you wear gear from reef brands?

  • I wear reef gear everywhere.

    Votes: 20 12.9%
  • I wear reef gear primarily at fish events and my LFS.

    Votes: 11 7.1%
  • I wear reef gear primarily for water changes and tank maintenance.

    Votes: 1 0.6%
  • I wear reef gear primarily to relax where I live.

    Votes: 23 14.8%
  • I don’t wear gear from reef brands.

    Votes: 89 57.4%
  • Other.

    Votes: 11 7.1%
Back
Top