The Tenecor® Pico DIY Drops March 2nd, 2024

Jim Gomoll

Active Member
View Badges
Joined
May 11, 2022
Messages
395
Reaction score
617
Location
Colorado Springs
Rating - 0%
0   0   0
Anyone know the overall roll dimensions for Innovative Marine NUVO AIO replacement fleece rolls?

BRS site says the fleece is 1 5/8 wide. I want to confirm width as well as need to know the overall roll dimeter and tube diameter.

Any other roll replacement suggestions with sizes is also welcome.

There are allot of Mini Fleece rollers out there out of Acrylic and/or printed. Playing around with an all acrylic DIY version to fit the Drop tank and other DIY tanks.
1712238266223.png
 

Jim Gomoll

Active Member
View Badges
Joined
May 11, 2022
Messages
395
Reaction score
617
Location
Colorado Springs
Rating - 0%
0   0   0
Anyone know the overall roll dimensions for Innovative Marine NUVO AIO replacement fleece rolls?

BRS site says the fleece is 1 5/8 wide. I want to confirm width as well as need to know the overall roll dimeter and tube diameter.

Any other roll replacement suggestions with sizes is also welcome.

There are allot of Mini Fleece rollers out there out of Acrylic and/or printed. Playing around with an all acrylic DIY version to fit the Drop tank and other DIY tanks.
1712238266223.png
Went straight to the supplier.

Innovative Marine Tech. Support
The filter roll for the desktop Nuvo fleece roller has a width approximately 1 ¾”, outside diameter of the fleece is about 2 3/8” and the tube diameter is about ¾”.
 

Jim Gomoll

Active Member
View Badges
Joined
May 11, 2022
Messages
395
Reaction score
617
Location
Colorado Springs
Rating - 0%
0   0   0
From questions I take it this might be your first DIY build. Many Youtube videos out there so watch a few for tips, tricks and how to's. See my post #799 on Electrical tape when gluing.

Many options of assemble order depending on your ability, and how much DIY you might do with kit.
Personally I assembled AIO first. Glued on media baffle and used silicone for the optional pump baffle in case I want to move or remove it later on.
My build order. 1) AIO 2) Main tank - Back to side1, side 2. Recommend and wish i did this... Use AIO assembly as a width guide for side 2 so there isn't a gap like I had on one end of my AIO. Then front (use AIO as guide), bottom, and finally the AIO assemble. I did all this planning for Euro brace last to have room for a hand in AIO chambers for tape/silicone. Will be doing Euro brace last by flipping tank over and tacking on the brace. Then will glue around inside edges to seal it up.

Highly recommend Weldon-4. Cleaner looking seams. 16 is thicker and messy. Did whole tank in 4 with the exception of one end of AIO back wall where I tried 16 to fill a wider gap. Mistake! Seam was an ugly mess with 16 which you can see the difference in pictures below comparing 4 & 16 seams. Ended up taping off edges of tank/AIO end and running a bead of silicone to clean it up best I could. (2nd 16 picture) Going to paint AIO area any way so hopefully that hides the ugly 16 seam more.

As for the adhering the bottom around the AIO you really only have to seal off the 3 edges of the display area to make it water tight. Inside AIO area the media baffle only needs to be glued to the back wall since it has feet. No need to glue to the bottom unless you want to. Depending on how you place the optional pump baffle, there is enough room to get a hand in there to glue it to the bottom from the middle chamber if you want. This seals off that chamber from middle. I silicone the optional baffle in place in case I decide to remove it or move it down the road. Did this by taping off the edges from middle chamber side only and ran small bead to seal it off.

Good Luck!!! PS: Practice on the spare pieces and scrap.

1712157403244.png
Been scrolling though this tread. See Tenecor's post #140 for assembly order.
 

Jim Gomoll

Active Member
View Badges
Joined
May 11, 2022
Messages
395
Reaction score
617
Location
Colorado Springs
Rating - 0%
0   0   0
On page 13 Post #248 of the Desktop tread I shared a video on different silicone types and holding strength.
DO NOT use GORILLA brand 100% silicone. NOT REEF SAFE
I used it on my AIO baffle seams for the Pico DIY build. Totally missed the statement on tube that it is mold & mildew resistant and not for underwater applications, aquariums. Figured being 100% silicon like GE1 and others this would be reef safe. Well it is not.
Cutting off this silicone and resealing with reef safe brand. Back to the beginning to restart cycle after it cures :(

Reached out to manufacturer.
Thank you for contacting The Gorilla Glue Company. We appreciate your interest in our company and products.
We would not recommend Gorilla Glue Caulk and Seal for your aquarium that as it is not recommended for constant submersion. It IS mildew and mold resistant by design. We would recommend reaching out to the manufacturer of the aquarium for their recommendation.
 

~MD~Reefs~

Active Member
View Badges
Joined
Apr 5, 2023
Messages
221
Reaction score
163
Location
San Jose
Rating - 0%
0   0   0
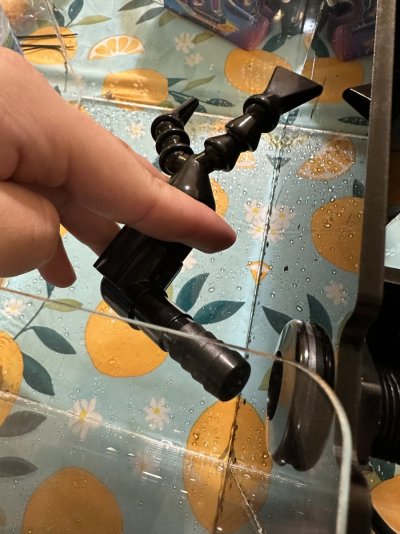
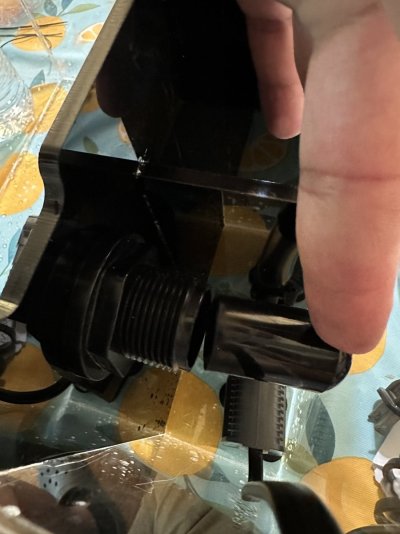
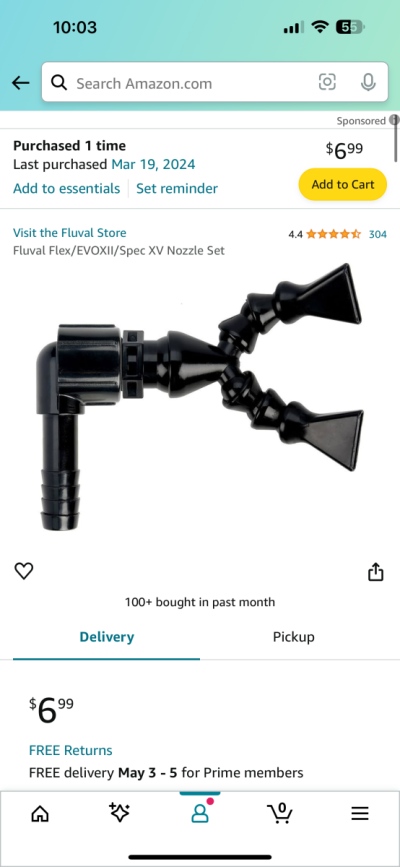
This is super later but I’m barely getting around to setting this up and I can’t for the life of me figure out the plumbing… I ordered the Fluval Flex nozzle which someone said would fit but I can’t get the tube to stay together?
 

Attachments

  • IMG_7784.jpeg
    IMG_7784.jpeg
    190.4 KB · Views: 38
  • IMG_7783.jpeg
    IMG_7783.jpeg
    132.4 KB · Views: 32

tbrown

Nominated Cronie Intern - Might be failing?
View Badges
Joined
Nov 22, 2019
Messages
54,317
Reaction score
126,762
Location
Peoria, AZ
Rating - 100%
2   0   0

accidental_reefer

Active Member
View Badges
Joined
Sep 11, 2023
Messages
242
Reaction score
201
Location
Northeast
Rating - 0%
0   0   0
Life happened so a bit behind in putting together the drop down AIO until today’. The decal is super sexy. As is the surprise Tenecor coffee mug. Really like this tank.

Thanks @Tenecor Aquariums!

P.S. The other DIY AIO is up and holding all my favorite frags quarantined at the
moment. Also using to experiment with bare bottom tanks — so much easier to maintain; kinda don’t want to move my frags back to the display.
 

Attachments

  • IMG_4992.jpeg
    IMG_4992.jpeg
    237.2 KB · Views: 27
  • IMG_4989.jpeg
    IMG_4989.jpeg
    246.2 KB · Views: 33

Aaron75

Well-Known Member
View Badges
Joined
Nov 13, 2019
Messages
903
Reaction score
710
Rating - 0%
0   0   0
Life happened so a bit behind in putting together the drop down AIO until today’. The decal is super sexy. As is the surprise Tenecor coffee mug. Really like this tank.

Thanks @Tenecor Aquariums!

P.S. The other DIY AIO is up and holding all my favorite frags quarantined at the
moment. Also using to experiment with bare bottom tanks — so much easier to maintain; kinda don’t want to move my frags back to the display.
20240518_205047.jpg

Are your media rack sides offset like this?
 

accidental_reefer

Active Member
View Badges
Joined
Sep 11, 2023
Messages
242
Reaction score
201
Location
Northeast
Rating - 0%
0   0   0
20240518_205047.jpg

Are your media rack sides offset like this?
Ahhhh I was wondering why I couldn’t get one side flush with the back panel. I couldn’t figure out what I was doing wrong. D’oh. Thanks for solving the mystery!

I’m guessing this affected the entire production. A little silicon can fill in the gap though.

IMG_4998.jpeg IMG_5001.jpeg
 

dansyr

Active Member
View Badges
Joined
Nov 28, 2022
Messages
299
Reaction score
351
Location
Los Angeles
Rating - 100%
1   0   0
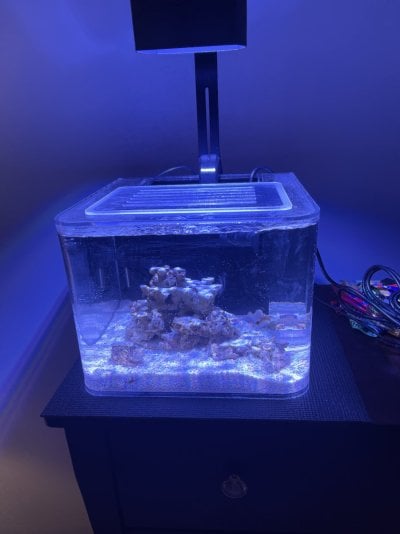
How are everyone's picos doing? Mine's been wet but uninhabited for awhile, just dropped first tester frags in recently and so far so good!
IMG_7315.jpg
 

Jim Gomoll

Active Member
View Badges
Joined
May 11, 2022
Messages
395
Reaction score
617
Location
Colorado Springs
Rating - 0%
0   0   0
Same here. Up and cycled just waiting for new light before dropping in some frags.

Did notice water level has to be more than half of the weirs height to not run low in pump section. Even after cutting 3/8" off top of the baffle and pump set on lowest setting water height must be maintained higher. Might cut out some of the weir teeth or widen them.
 

HOW DO YOU DEAL WITH BULLIES IN YOUR TANK?

  • I place the offender in an acclimation box for a period of time (jail).

    Votes: 10 16.4%
  • I remove the offender entirely and reintroduce them at a later time (rehab).

    Votes: 2 3.3%
  • I use the mirror method (a little reverse psychology).

    Votes: 6 9.8%
  • I rearrange rock work (throw them off).

    Votes: 4 6.6%
  • I don't tolerate bullies. Bye bye fishy!

    Votes: 14 23.0%
  • I've never dealt with a tank bully.

    Votes: 17 27.9%
  • Other (please explain!)

    Votes: 8 13.1%

New Posts

Back
Top