Such a cool tank I also love the apex cabinet
Navigation
Install the app
How to install the app on iOS
Follow along with the video below to see how to install our site as a web app on your home screen.
Note: This feature may not be available in some browsers.
More options
You are using an out of date browser. It may not display this or other websites correctly.
You should upgrade or use an alternative browser.
You should upgrade or use an alternative browser.
Waterbox 7226 Build
- Build Thread
- Thread starter jblasi
- Start date
- Tagged users None


OP
OP
- Joined
- Dec 21, 2017
- Messages
- 537
- Reaction score
- 1,335
Thank you, I really appreciate it! The cabinet was definitely a pain.Such a cool tank I also love the apex cabinet
OP
OP
- Joined
- Dec 21, 2017
- Messages
- 537
- Reaction score
- 1,335
It’s been awhile since I have posted on this thread. One of the Neptune DDR sensors corroded and made my Phosphates skyrocket. But all the colors are finally coming back and so has the growth.

WWC Pink Passion

JF Solar Flare

Bubblegum Digi

TSA Bill Murray w/ frag I just cut

UC Dippin Dots

RMF Acid Trip

Vivids Confetti

JF Jolt

TSA Princess Peach

RR Vihn

ARC Fireworks

CC Hayfever
I have several more that are still working on getting their color back. Hopefully I can add more pictures soon.
WWC Pink Passion
JF Solar Flare
Bubblegum Digi
TSA Bill Murray w/ frag I just cut
UC Dippin Dots
RMF Acid Trip
Vivids Confetti
JF Jolt
TSA Princess Peach
RR Vihn
ARC Fireworks
CC Hayfever
I have several more that are still working on getting their color back. Hopefully I can add more pictures soon.

Solid build! Love every facet of the setup!! I recently saw in the 3D printing form there was someone selling side shades that were pretty stylish if you find your bleed out is rough.
the electrical cabinet is phenomenal!!
the electrical cabinet is phenomenal!!
OP
OP
- Joined
- Dec 21, 2017
- Messages
- 537
- Reaction score
- 1,335
Thank you for the tip! I’ll have to take a look.Solid build! Love every facet of the setup!! I recently saw in the 3D printing form there was someone selling side shades that were pretty stylish if you find your bleed out is rough.
the electrical cabinet is phenomenal!!
Saw this tank in person today and it's amazing.

- Joined
- Jun 5, 2020
- Messages
- 30
- Reaction score
- 19
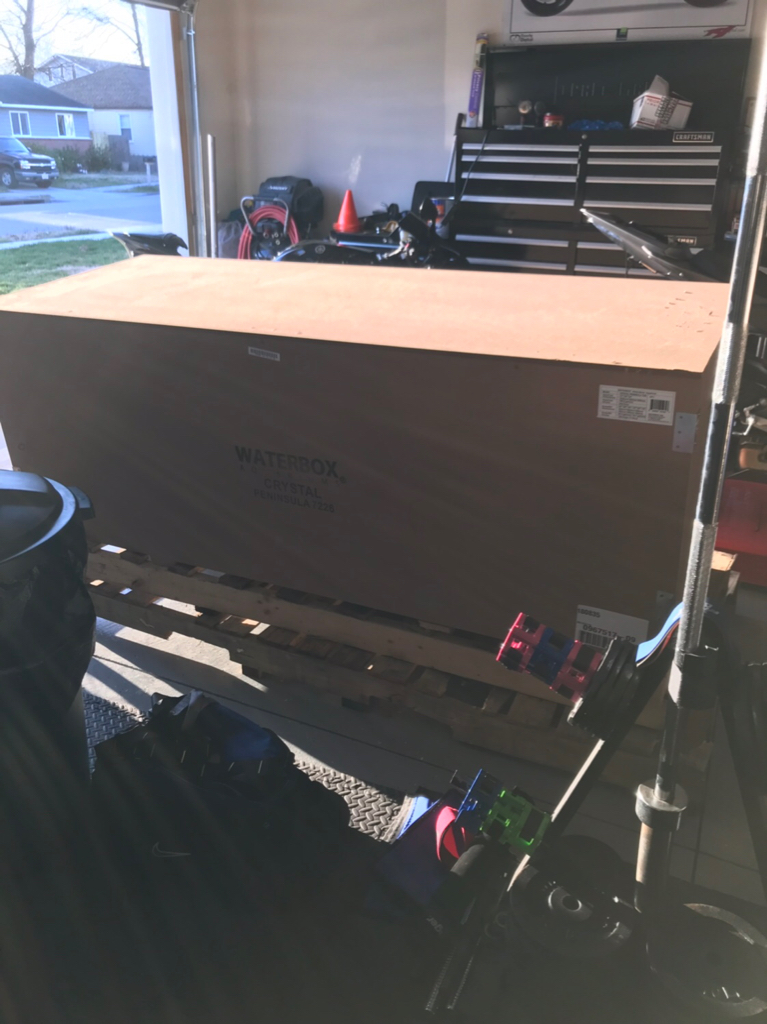
I put my peninsula 7725 together this weekend. Putting it together was quite smooth. The only that I found a little unusual was that the pre-drilled holes in theUPS strikes again. Tank was scheduled for delivery on Monday took time off work so I would be home and of course they didn’t come or call. After the purposed delivery time had passed I called and they confirmed that the tank was still sitting on the docks and would be deliver next day. We received the tank last night and like a little kid a Christmas I started going to work.
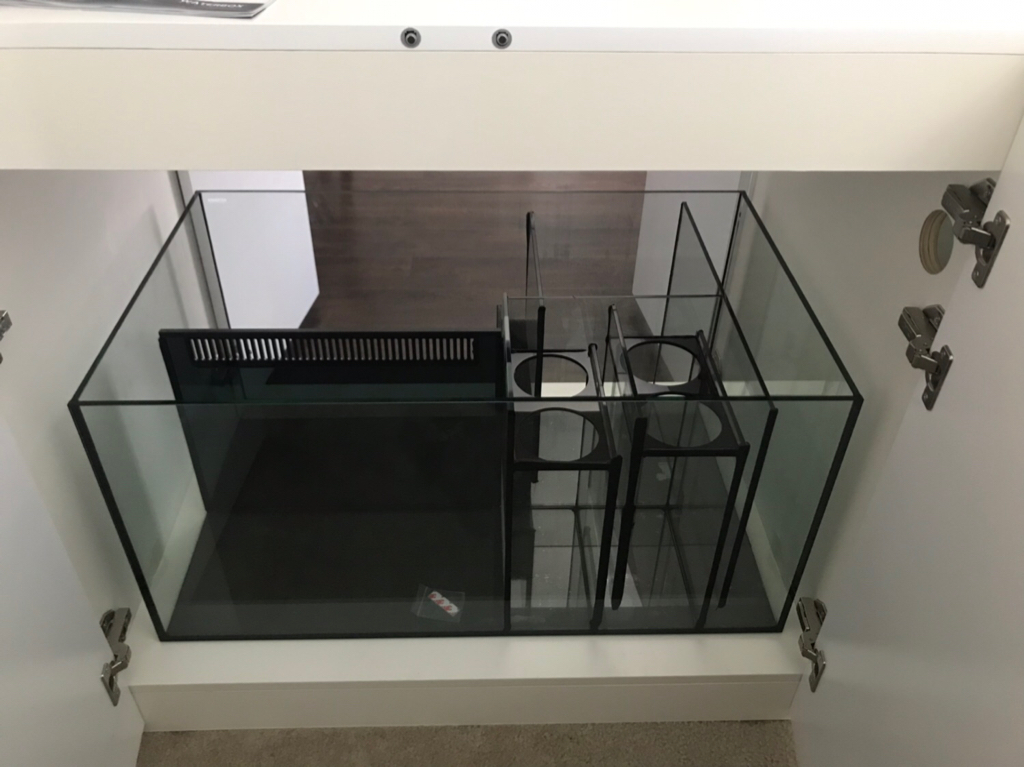
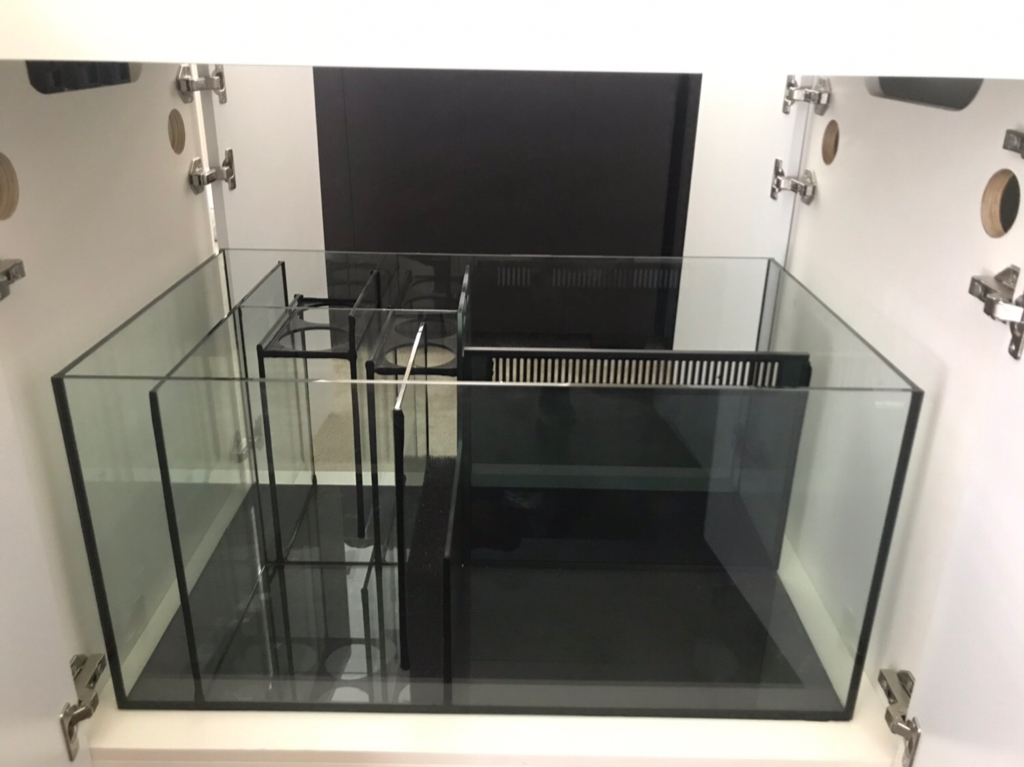
I have only seen a few people on here with this style tank and I have talked to several people who have questions on what the cabinet looks like on the inside as well as sump design and so forth. I figured I would take as many detailed pictures as possible for others looking into this style of tank or interested.
I noticed that Waterbox does not include detailed instructions like other cabinets I have seen. But if you have assembled cabinets like this before it’s all the same.
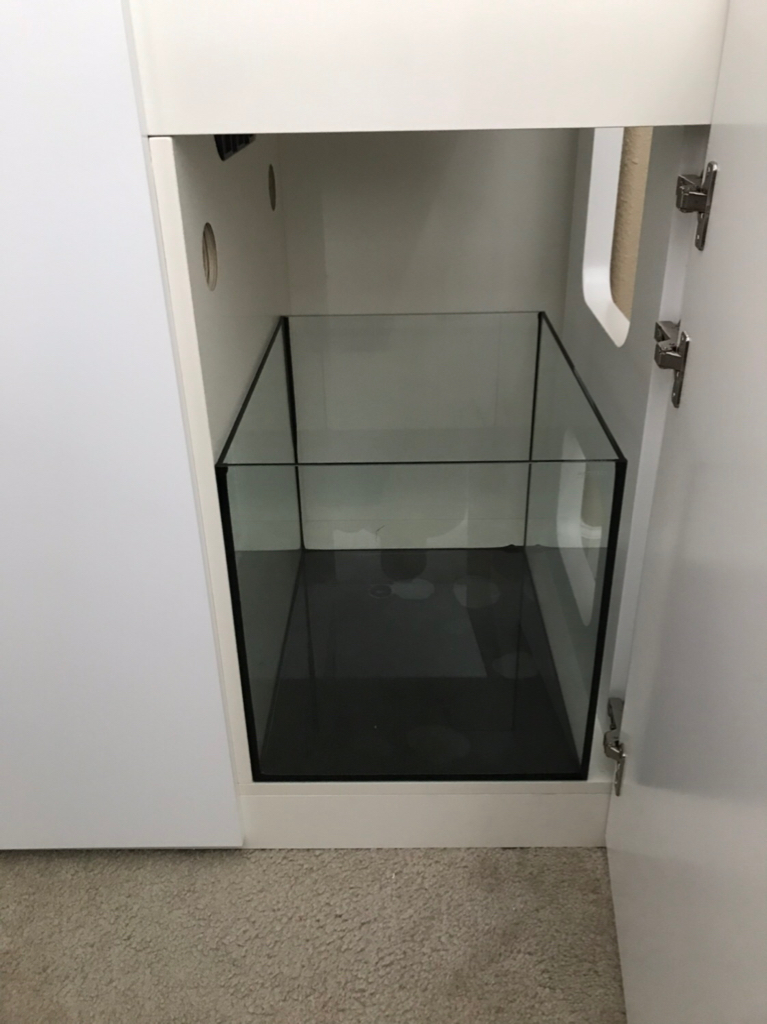
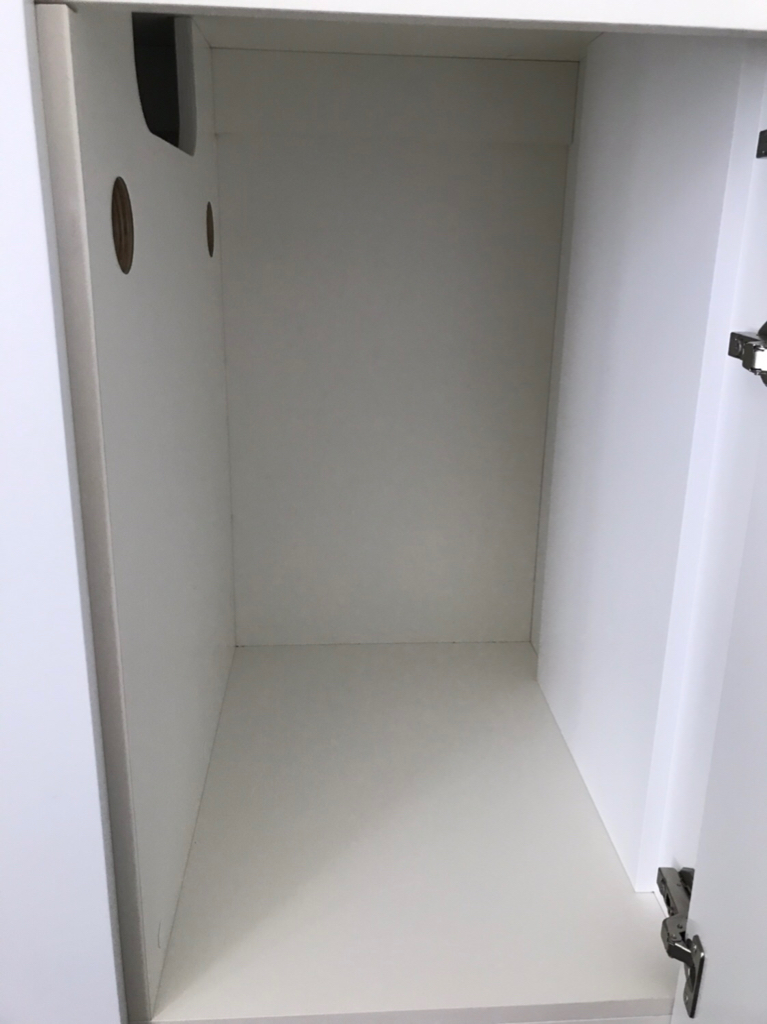
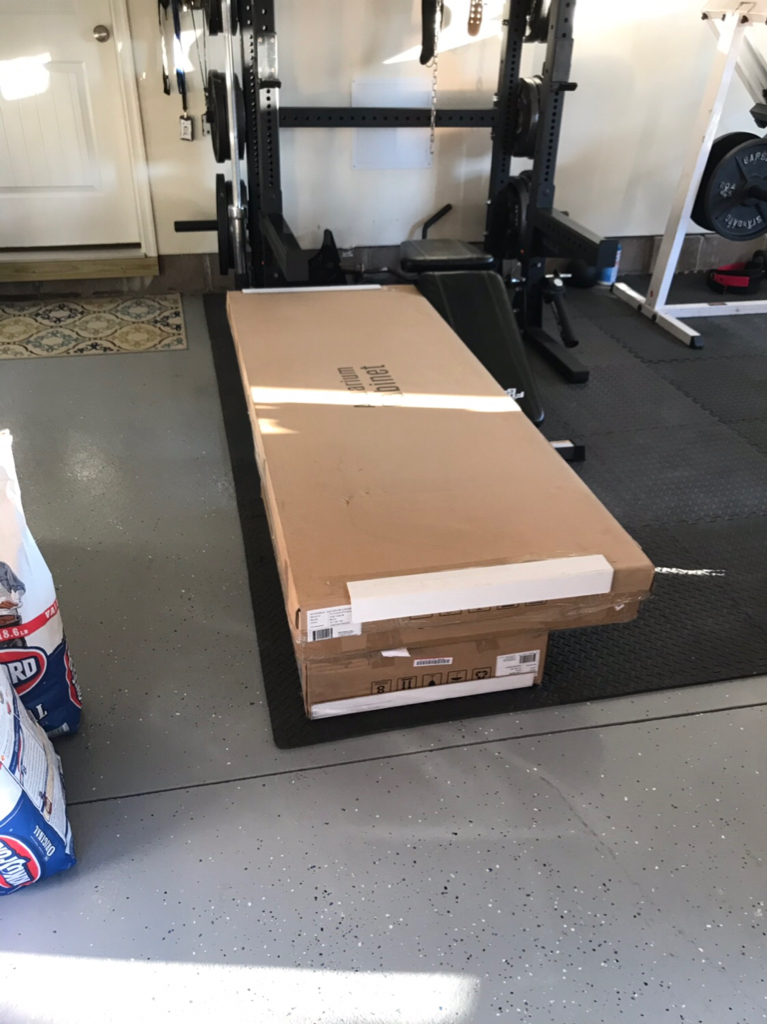
As I stated at the start of this thread, the plan was to bring the tank out from the wall and make flush with the small room divider wall and place a equipment cabinet between the tank and wall for all my apex and drivers. I wasn’t sure if the cabinet space under the tank would be sufficient for a controller and the calcium reactor. I decided to wait and purchase the equipment cabinet until the tank was assembled and had a better look. Ordering that equipment cabinet today, it will have the same design as the one I build for my Red Sea.
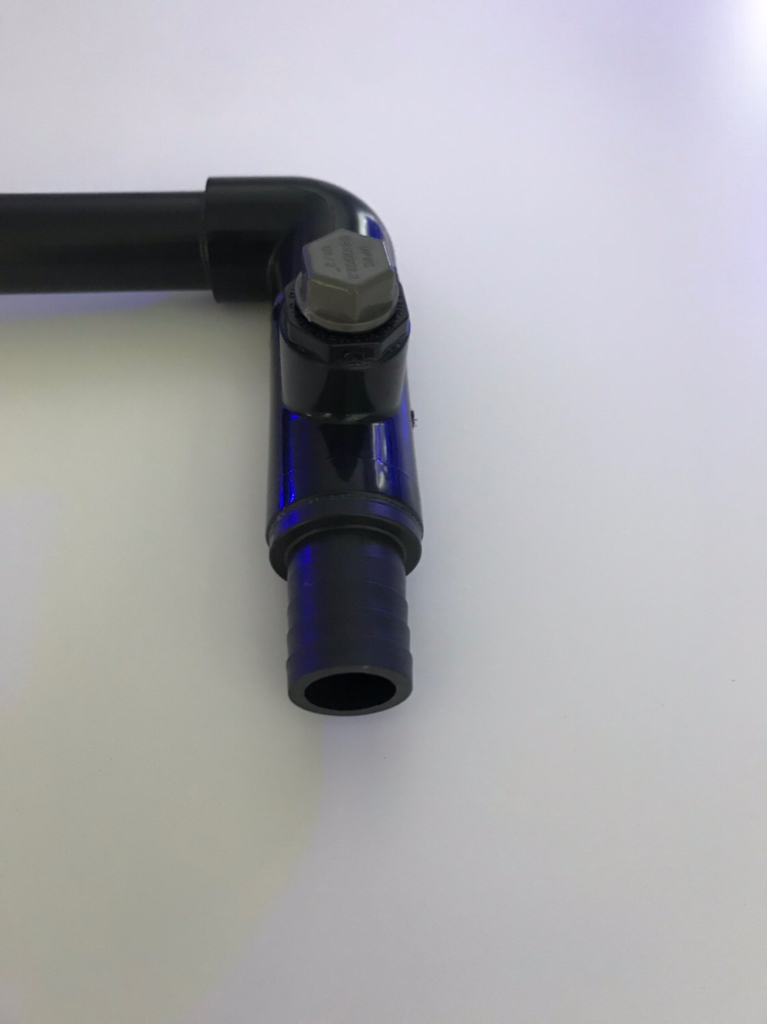
Another question that arose was the look of the return plumbing. I am looking to hard plumb the return pump. However Waterbox has all their plumbing preassembled with a hose barb and the tanks come with the flex hose. I contacted Waterbox and they stated that they receive all their plumbing pre-glued so there is no way for them to send me a new piece that does not have a barb. So now to the drawing board to see how I can remove the barb and glue without compromising the “T” fitting.
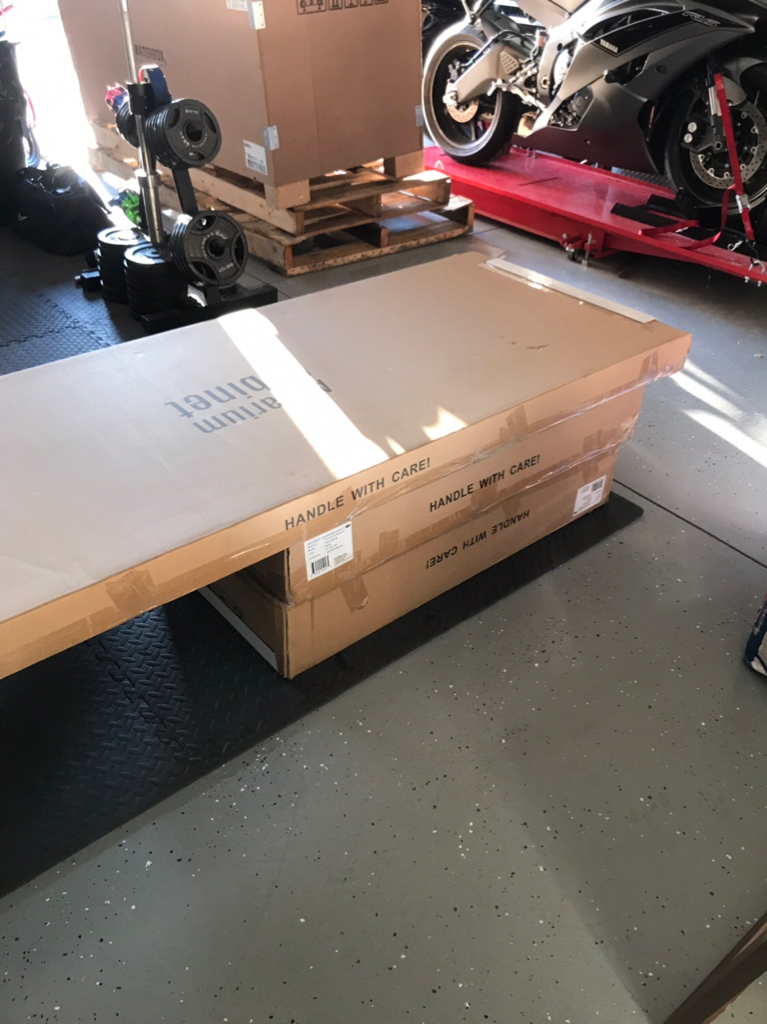
All that is left is to get the man power over to get the tank from the garage into the next room and then I can start the plumbing.
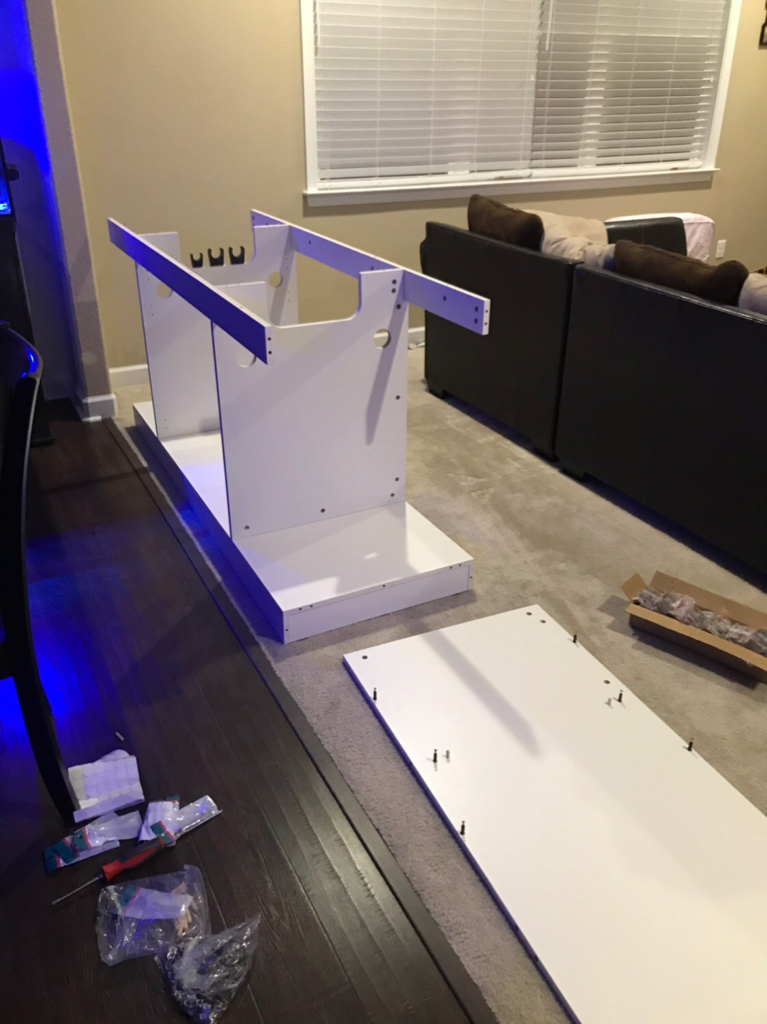
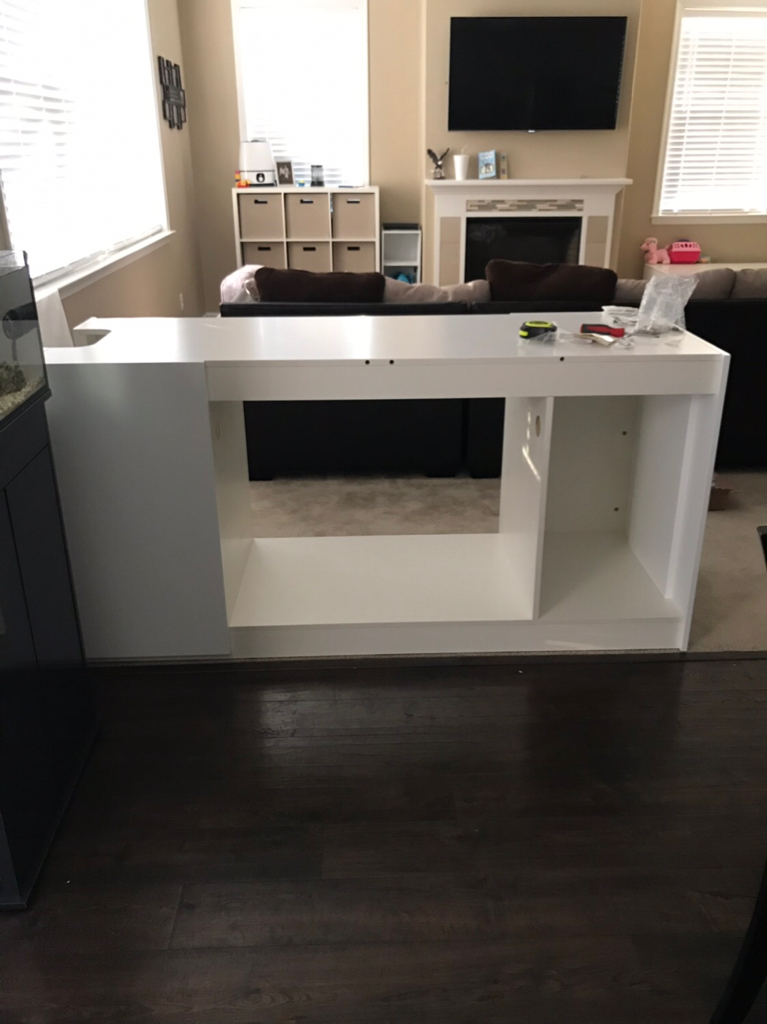
UPS strikes again. Tank was scheduled for delivery on Monday took time off work so I would be home and of course they didn’t come or call. After the purposed delivery time had passed I called and they confirmed that the tank was still sitting on the docks and would be deliver next day. We received the tank last night and like a little kid a Christmas I started going to work.
I have only seen a few people on here with this style tank and I have talked to several people who have questions on what the cabinet looks like on the inside as well as sump design and so forth. I figured I would take as many detailed pictures as possible for others looking into this style of tank or interested.
I noticed that Waterbox does not include detailed instructions like other cabinets I have seen. But if you have assembled cabinets like this before it’s all the same.
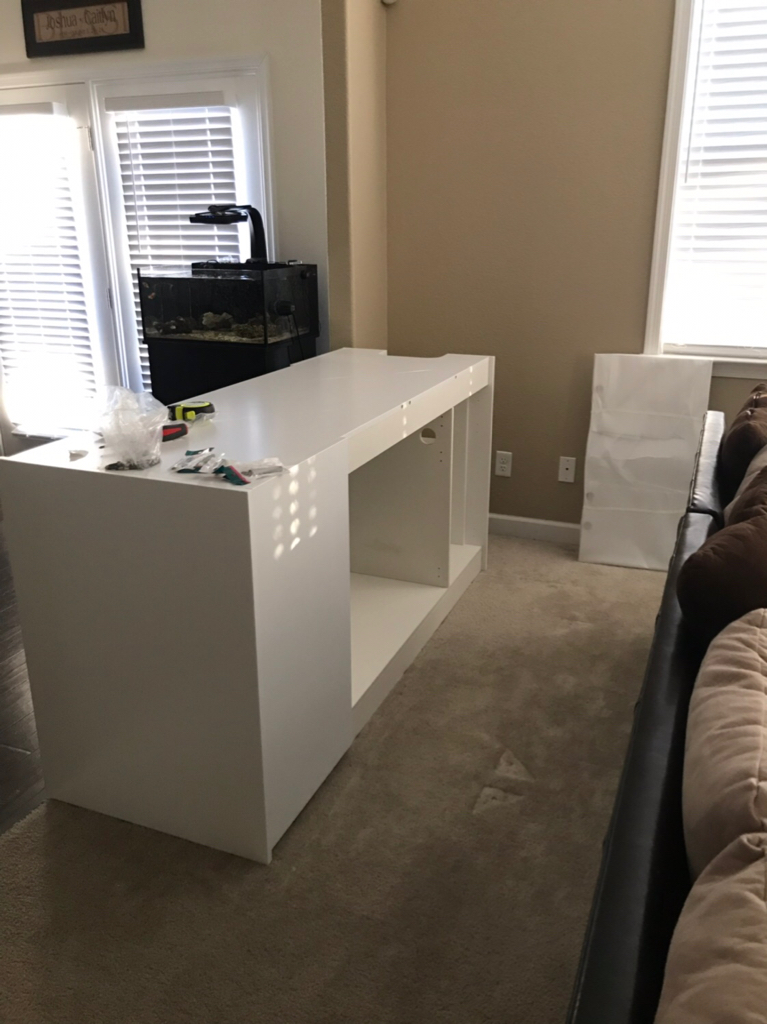
As I stated at the start of this thread, the plan was to bring the tank out from the wall and make flush with the small room divider wall and place a equipment cabinet between the tank and wall for all my apex and drivers. I wasn’t sure if the cabinet space under the tank would be sufficient for a controller and the calcium reactor. I decided to wait and purchase the equipment cabinet until the tank was assembled and had a better look. Ordering that equipment cabinet today, it will have the same design as the one I build for my Red Sea.
Another question that arose was the look of the return plumbing. I am looking to hard plumb the return pump. However Waterbox has all their plumbing preassembled with a hose barb and the tanks come with the flex hose. I contacted Waterbox and they stated that they receive all their plumbing pre-glued so there is no way for them to send me a new piece that does not have a barb. So now to the drawing board to see how I can remove the barb and glue without compromising the “T” fitting.
All that is left is to get the man power over to get the tank from the garage into the next room and then I can start the plumbing.
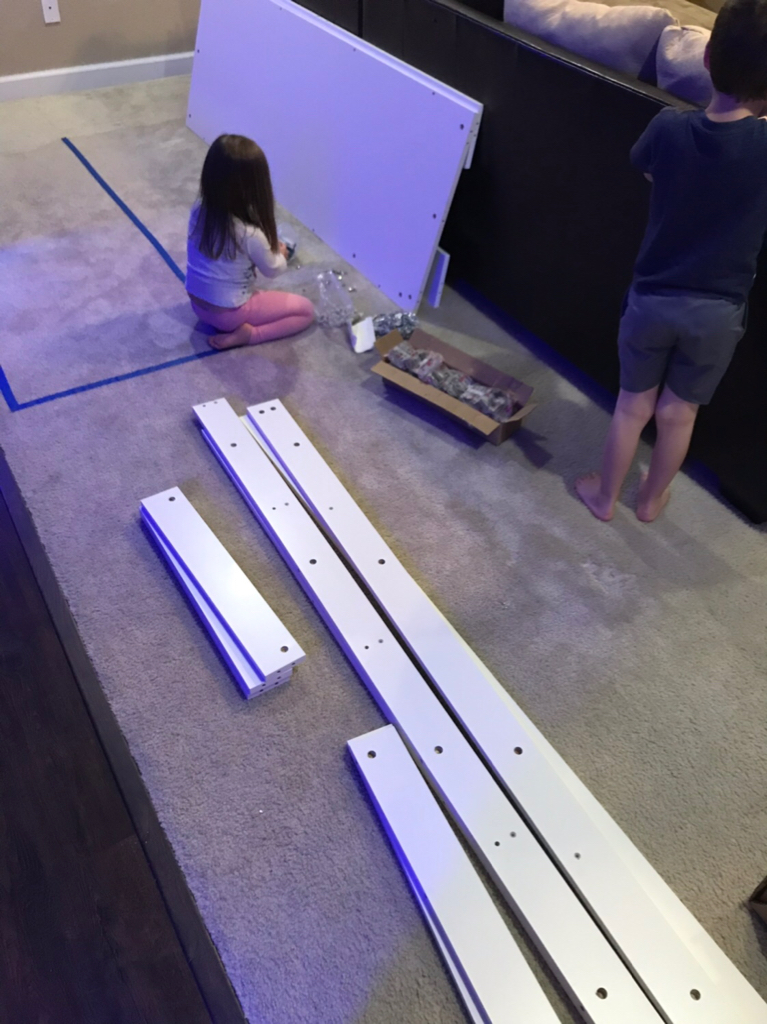
I finally received my 7725 last weekend and I put together the stand. Pretty straightforward, but there was one thing that puzzled me. Some of the pre-made holes in the panel on the viewing side didn't all match up with the holes of the surrounding panels it should be bolted in which these cam nuts. For example, in the attached photo, I couldn't use the cam nuts indicated in red because there was no hole for the corresponding screw. Does that sound familiar? I took it up with WB.UPS strikes again. Tank was scheduled for delivery on Monday took time off work so I would be home and of course they didn’t come or call. After the purposed delivery time had passed I called and they confirmed that the tank was still sitting on the docks and would be deliver next day. We received the tank last night and like a little kid a Christmas I started going to work.
I have only seen a few people on here with this style tank and I have talked to several people who have questions on what the cabinet looks like on the inside as well as sump design and so forth. I figured I would take as many detailed pictures as possible for others looking into this style of tank or interested.
I noticed that Waterbox does not include detailed instructions like other cabinets I have seen. But if you have assembled cabinets like this before it’s all the same.
As I stated at the start of this thread, the plan was to bring the tank out from the wall and make flush with the small room divider wall and place a equipment cabinet between the tank and wall for all my apex and drivers. I wasn’t sure if the cabinet space under the tank would be sufficient for a controller and the calcium reactor. I decided to wait and purchase the equipment cabinet until the tank was assembled and had a better look. Ordering that equipment cabinet today, it will have the same design as the one I build for my Red Sea.
Another question that arose was the look of the return plumbing. I am looking to hard plumb the return pump. However Waterbox has all their plumbing preassembled with a hose barb and the tanks come with the flex hose. I contacted Waterbox and they stated that they receive all their plumbing pre-glued so there is no way for them to send me a new piece that does not have a barb. So now to the drawing board to see how I can remove the barb and glue without compromising the “T” fitting.
All that is left is to get the man power over to get the tank from the garage into the next room and then I can start the plumbing.

OP
OP
- Joined
- Dec 21, 2017
- Messages
- 537
- Reaction score
- 1,335
Sorry I didn’t see your message till just now. Unfortunately that doesn’t sound right. Unless the new tanks are built differently, it sounds like QA slipped on the cabinet.I put my peninsula 7725 together this weekend. Putting it together was quite smooth. The only that I found a little unusual was that the pre-drilled holes in the
I finally received my 7725 last weekend and I put together the stand. Pretty straightforward, but there was one thing that puzzled me. Some of the pre-made holes in the panel on the viewing side didn't all match up with the holes of the surrounding panels it should be bolted in which these cam nuts. For example, in the attached photo, I couldn't use the cam nuts indicated in red because there was no hole for the corresponding screw. Does that sound familiar? I took it up with WB.

- Joined
- Jun 5, 2020
- Messages
- 30
- Reaction score
- 19
Yeh, WB will sent me a new panel. I thought first that some panels were used for multiple tank models, and hence that not all holes get used for a particular model. But that appears not to be correct. It's a wonderful tank though. Thanks for all your posts/pictures, it really helped me in making decisions on my system!Sorry I didn’t see your message till just now. Unfortunately that doesn’t sound right. Unless the new tanks are built differently, it sounds like QA slipped on the cabinet.
OP
OP
- Joined
- Dec 21, 2017
- Messages
- 537
- Reaction score
- 1,335
Your very welcome! I am happy that you love that tank. It will just keep getting better as you get it up and running. I couldn’t be happier with mine.... just wish it was bigger.Yeh, WB will sent me a new panel. I thought first that some panels were used for multiple tank models, and hence that not all holes get used for a particular model. But that appears not to be correct. It's a wonderful tank though. Thanks for all your posts/pictures, it really helped me in making decisions on my system!
OP
OP
- Joined
- Dec 21, 2017
- Messages
- 537
- Reaction score
- 1,335
After going through THREE Neptune DDR’s, dealing with corroding sensors on each one dumping phosphates into my tank... I decided to just go basic for now. Tried to make it look as clean as I could.

OP
OP
- Joined
- Dec 21, 2017
- Messages
- 537
- Reaction score
- 1,335
For me it has been worth every penny. As far as the whole system goes, I have had very few problems. A few of the accessories I can say otherwise, specifically the DDR’s and a few trident issues.That's no good!
How has your experience with the new gen Apex been over all?
Daniel@R2R
Living the Reef Life
View Badges
Staff member
Super Moderator
Reef Squad
Partner Member 2024
Excellence Award
Photo of the Month
Article Contributor
Hospitality Award
Article Administrator
Reef Pumpkin Carver
R2R Secret Santa 2023
My Tank Thread
Looking great!! Can we see a new FTS?

OP
OP
- Joined
- Dec 21, 2017
- Messages
- 537
- Reaction score
- 1,335
@Daniel@R2R, thank you however things are not looking so great at the moment. I am going to have to issue a rain check on that FTS. A week ago I started developing a very random green algae problem and I have been trying to combat it.Looking great!! Can we see a new FTS?
OP
OP
- Joined
- Dec 21, 2017
- Messages
- 537
- Reaction score
- 1,335
OP
OP
- Joined
- Dec 21, 2017
- Messages
- 537
- Reaction score
- 1,335
The tank is growing amazing, but as always I sit here and think what could be better? I currently have the Klir-DI4’s and yes they have done their job. However, I am changing out roller mat too frequently and the paper is constantly getting torn by a stray snail. The Klirs as just a royal pain in the butt and a very tight fit to get in and out.
I have been inquiring for about a year now with GEO about designing a sump for the 7226 that would incorporate a ClariSea and some other features. After producing one for @reefdudes, and seeing exactly how it would turn out my wife and I decided to pull the trigger.
I am also going to add a second Vectra pump into the sump to have a separate circuit for a UV sterilizer.

OP
OP
- Joined
- Dec 21, 2017
- Messages
- 537
- Reaction score
- 1,335
Anyone, please speak up if you have previous experience with this setup or had an issue. As I am waiting for my new sump to be completed I have planned to have a dedicated circuit for a UV sterilizer. Ever since the random bloom we had, my wife has been giving me a hard time about lot listening to her when we first started the build. I want to a second vectra in the skimmer chamber to feed the UV then have it dump into the return chamber. That way I am not re-treating water. The reason for the vectra is because the sterilizer will be located out of the cabinet and there will be a small amount of extra plumbing involved.
Similar threads

- Replies
- 10
- Views
- 324


