With Headaches and Lessons Learned a New Tank Build

OP
OP
Ditto

Ditto

Valuable Member
View Badges
Joined
Apr 25, 2017
Messages
2,229
Reaction score
2,973
Location
Albany, NY
Rating - 0%
0   0   0
With any new tank it needs to have it own RODI Station for Saltwater and for ATO. I really did not want to have to carry any buckets anymore, which is one of my low maintenance wish list items, so this water station is going to allow me to achieve this.

RODI Water is stored in the top Rubbermaid container up to 22 Gallons, and is dumped into the Brute Trash Can where it can be re-circulated with Salt. The pump PanWorld 200 Pump will then proceed to pump it upstairs to the sump to fill the tank. (This will have GHL dual Optical sensor as a backup for safety details when building the tank)

I will have a ATO Reservoir which is also 5 gallons under the tank upstairs, with a GHL Maxi tied to the P4 with a Min/Max Float switch within. (Details when I am building the tank). This will draw water also from the RODI Rubbermaid container.

I dialed in the Booster pump to 80PSI and it now filling the Rubbermaid Container.

Nothing to Fancy, on the bottom of my Basement Steps
Station1.JPG

Plumbing within the Brute Mixing Station, this should provide more then enough circulation.
Station2.JPG

RODI Station up and Running, with Booster pump, with UV. (TDS Tester on both the SpectraPure and within the Container are at 0)
Station3.JPG

Return Pump and Circulation of the Saltwater within the Brute Mixing Station. (Pan World 200 Pump)
One valve on the pump is on the inlet of the pump is just for easier maintenance, the upper Shut off switch is towards the tank upstairs, and will be my redundant one as one will be up by the tank also.
Station4.JPG

Plumbing between the Rubbermaid RODI Water and the Brute Mixing Station.
Two shut off valves, with one used to allow RODI water into the Brute Mixing Station. The Second is if I wish to have RODI water empty into a bucket.
Station5.JPG
 
Last edited:

WWIII

2500 Club Member
View Badges
Joined
Jan 13, 2016
Messages
3,739
Reaction score
7,701
Location
Louisville, KY
Rating - 0%
0   0   0
That panworld 200 will get that water upstairs in a hurry!!! I had one on my 200 gallon, but bought a smaller iwaki and kept the 200 for backup. Nice pumps!

Like the plumbing inside the mixing can!
 
OP
OP
Ditto

Ditto

Valuable Member
View Badges
Joined
Apr 25, 2017
Messages
2,229
Reaction score
2,973
Location
Albany, NY
Rating - 0%
0   0   0
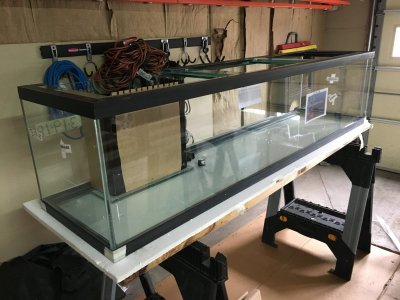
Friends came over today and help me break down the tank so I could begin to stain and expoxy the inside.

Now with it fully apart And fully inspected I for sure would buy again from them. The overall quality (except) for two of the eurobrace seams which could be cleaner(will scrape the excess), and some overcuts on the doors which are covered the overall tank quality is very good.

A1EF7D57-17FF-4430-BEC2-241662755ABC.jpeg


You can see the over run on this door in the upper left corner but it is hidden by the door. Laid out the shelves for the equipment and to make sure no issues placed a dosing container in to make sure height was ok.

1F81731F-638B-45FD-8714-21362A1C6C0A.jpeg


A1EF7D57-17FF-4430-BEC2-241662755ABC.jpeg


Tank off the stand awaiting to go back home I may rock scape the overflow.
8A08285E-A2AF-4A82-B54C-C1435111F32B.jpeg

I went for now with Glasscage sumps also. From left to right will be input from the tank to the first chamber which a algae reactor and two avast spyglass reactors will be off my manifold, the next chamber will be the royal exclusive skimmer and the last chamber the red dragon return pump.
147038FE-6E31-46CF-95DE-CF343428D77F.jpeg


The bulkheads will be two schedule 80 1 inch and 1/2 drain from the overflow and one schedule 80 1 inch return line.

The inside of the cabinet will be painted with pond armor expoxy to make sure inner cabinet is water resistant. Outside will be stained and then an expoxy clear coat for also water resistance.

If the weather holds and does not get to cold in the garage should have it painted and sealed and in the house within 2 weeks.
 
OP
OP
Ditto

Ditto

Valuable Member
View Badges
Joined
Apr 25, 2017
Messages
2,229
Reaction score
2,973
Location
Albany, NY
Rating - 0%
0   0   0
Busy weekend :)

Two coats of expoxy now done, one to go within the stand.
C4F17844-F594-4191-9A83-502ADD408D5F.jpeg

00FD5E0D-C498-4175-B875-09B2A0DB665B.jpeg

Staining is all done except for one door, and now I can move onto clear expoxy coating tomorrow. Maybe I will get lucky and be done this week so I can get my freinds to come back next weekend to carry it into the house and begin to plumb it up.

0E926F82-A859-4E4B-8E56-FEE0D5A27709.jpeg

Still need to expoxy paint the inside of the canopy will do that this week also.
 
OP
OP
Ditto

Ditto

Valuable Member
View Badges
Joined
Apr 25, 2017
Messages
2,229
Reaction score
2,973
Location
Albany, NY
Rating - 0%
0   0   0
Whooohoo I am done staining, epoxy and sealing the tank. it is now on the final drying stage and next Sunday friends are coming over to help me move it into the dining room, where I will post a video if the tank. The staining and epoxy done I like the results overall it came out very well. I did get some blue on the tank where I did not and did my best to stand it, but the doors will hide those mistakes :)

With 4 coats of Epoxy in the sump area with 60 grit sandpaper between application, and 3 coats of Epoxy for the tank hood and Equipment area, my hope this will keep the stand from receiving any damage from saltwater or salt creep, or chemicals used in dosing the tank.

Tabk_1.JPG
Sump_Tank2.JPG
Tank_Equipment1.JPG
Hood1.JPG


Feel sorry for the UPS and Fedex delivery people it seemed last week was delivery of boxes with equipment coming in every day, overall I have 90% of the equipment. I see this from Avast, from reading few posts here on the forms people seem to like them, and the idea is actually a good one so I said lets put one on the this tank: (https://www.avastmarine.com/products/barrel-tender).
Tank Barrel.JPG

Still on the way:
The Royal Exclusive Mini Bubble King 180 VS Skimmer has shipped and should be here this week (http://royalexclusiv.com/Skimmer/Skimmer/Mini-Bubble-King-160-200/Mini-Bubble-King-180-VS12::51.html)
The GHL PLM-ADM module has shipped (https://www.aquariumcomputer.com/usa/product/plm-adin/) (This is going to be used to control the Avast Barrel Tender 2 & a light switch within the sump area)
The Pacific Sun Alea Reactor has shipped and on it way from overseas (http://pacific-sun.eu/shop/filtration/algae-reactor/)
Fittings for the GHL 9000 l/h adapter and GHL 5000 l/h adapters
LED waterproof lighting for inside the Sump

4 Weeks and I am at 0 Phosphate from the Rock, I just did another water change today (5 total) on both bins I am expecting this rock will be ready for the tank in about 2-3 weeks. This is good timing as that is when I anticipate the tank will be ready for water. Then we begin the process of seeding the tank.
Rock_Cure1.JPG
Rock_Cure2.JPG
 
OP
OP
Ditto

Ditto

Valuable Member
View Badges
Joined
Apr 25, 2017
Messages
2,229
Reaction score
2,973
Location
Albany, NY
Rating - 0%
0   0   0
Busy weekend coming up as we plan to move the tank into position on Sunday.

I wanted to come up with a solution when I have certain coral food that once open needs to be refrigerated, and use my doser to dosing them.

Now my first thought, drilling holes into my refrigerator, is not an option hehe. I want something big enough to hold 3-4 bottles but not so big that it can not fit under the tank somewhere.

So first need to find something that can do the job:

https://www.amazon.com/gp/aw/d/B0769P9NRY?psc=1&ref=yo_pop_mb_pd_title

I placed 4 cans of soda in it and measured the internal tempaature all of them were betten 43-49 degrees.

Now I need to place some dosing tube connections in it and wala for less then 50 dollars a solution to my coral food dilemma.

EDF30A22-A954-47BF-A410-018722A98B9B.jpeg

Dosing ports on the outside
A2D5C87C-FAF6-4179-B2C7-78952B20598C.jpeg


From the inside
D011F2AB-E82A-4678-8F66-8C4B4E64DFB6.jpeg

I will be using a GHL doser as the feeding mechanism. One advantage with the GHL doser doing this it can run in reverse when done feeding.
 

WWIII

2500 Club Member
View Badges
Joined
Jan 13, 2016
Messages
3,739
Reaction score
7,701
Location
Louisville, KY
Rating - 0%
0   0   0
Busy weekend coming up as we plan to move the tank into position on Sunday.

I wanted to come up with a solution when I have certain coral food that once open needs to be refrigerated, and use my doser to dosing them.

Now my first thought, drilling holes into my refrigerator, is not an option hehe. I want something big enough to hold 3-4 bottles but not so big that it can not fit under the tank somewhere.

So first need to find something that can do the job:

https://www.amazon.com/gp/aw/d/B0769P9NRY?psc=1&ref=yo_pop_mb_pd_title

I placed 4 cans of soda in it and measured the internal tempaature all of them were betten 43-49 degrees.

Now I need to place some dosing tube connections in it and wala for less then 50 dollars a solution to my coral food dilemma.

EDF30A22-A954-47BF-A410-018722A98B9B.jpeg

Dosing ports on the outside
A2D5C87C-FAF6-4179-B2C7-78952B20598C.jpeg


From the inside
D011F2AB-E82A-4678-8F66-8C4B4E64DFB6.jpeg

I will be using a GHL doser as the feeding mechanism. One advantage with the GHL doser doing this it can run in reverse when done feeding.


Very cool! Interested to see what you feed
 
OP
OP
Ditto

Ditto

Valuable Member
View Badges
Joined
Apr 25, 2017
Messages
2,229
Reaction score
2,973
Location
Albany, NY
Rating - 0%
0   0   0
Sunday Update:

Whooohoo back is hurting a little but the tank is now inside. I know glass is heavy but hehe.

The Location of the Tank in the Dining Room: (The Blue Pipe Your Seeing is from the Salt Mixing Stations down in the Cellar).
Location of Tanl.JPG


Stand installed and leveled
tank_stand.JPG


Tank on the Move! (All that was running through my head is please do not drop it)
tank_on_themove.JPG


Tank and sump installed in place.
Tank Leveled and now in place.JPG


Plumbing in the 1 1/2 Lines from the overflow. (In Red) the Blue Pipe is from the Mixing Station in the Basement, and Humidity fans are installed to help dissipate heat, and humidity out from within the Cabinet. The wire you see is in cabinet lighting.
begining the plumbing 2.jpg
plumbing.JPG


My Royal Exclusive skimmer also arrived this week. Very well made, heavy Acrylic should have no issues skimming this tank.
skimmer-Arrived.JPG
 

WWIII

2500 Club Member
View Badges
Joined
Jan 13, 2016
Messages
3,739
Reaction score
7,701
Location
Louisville, KY
Rating - 0%
0   0   0
Sunday Update:

Whooohoo back is hurting a little but the tank is now inside. I know glass is heavy but hehe.

The Location of the Tank in the Dining Room: (The Blue Pipe Your Seeing is from the Salt Mixing Stations down in the Cellar).
Location of Tanl.JPG


Stand installed and leveled
tank_stand.JPG


Tank on the Move! (All that was running through my head is please do not drop it)
tank_on_themove.JPG


Tank and sump installed in place.
Tank Leveled and now in place.JPG


Plumbing in the 1 1/2 Lines from the overflow. (In Red) the Blue Pipe is from the Mixing Station in the Basement, and Humidity fans are installed to help dissipate heat, and humidity out from within the Cabinet. The wire you see is in cabinet lighting.
begining the plumbing 2.jpg
plumbing.JPG


My Royal Exclusive skimmer also arrived this week. Very well made, heavy Acrylic should have no issues skimming this tank.
skimmer-Arrived.JPG


Congrats man! Big step forward!!!
 
OP
OP
Ditto

Ditto

Valuable Member
View Badges
Joined
Apr 25, 2017
Messages
2,229
Reaction score
2,973
Location
Albany, NY
Rating - 0%
0   0   0
Wish I knew the size of the skimmer hole within then royal exclusive skimmer cup is?I have tried a few different size fittings and none seem to fit. Want to empty this into a skimate and not having luck determining the size.

Also I am thinking about rock scaping the overflow but not sure what would be best to to it. I am thinking silicone, or super glue and use Marco 400 to scape it together.
 
Last edited:

Support@GHLUSA

Team GHL
View Badges
Joined
Jul 27, 2016
Messages
614
Reaction score
418
Rating - 0%
0   0   0
Wish I knew the size of the skimmer hole within then royal exclusive skimmer cup is?I have tried a few different size fittings and none seem to fit. Want to empty this into a skimate and not having luck determining the size.

Also I am thinking about rock scaping the overflow but not sure what would be best to to it. I am thinking silicone, or super glue and use Marco 400 to scape it together.

402_0.jpg


You can use this, will be a tight fit, many of the MBK users use this solution.
http://royalexclusiv.com/Spare-Part...-King-DeLuxe-Double-Cone-Supermarin::293.html
 
OP
OP
Ditto

Ditto

Valuable Member
View Badges
Joined
Apr 25, 2017
Messages
2,229
Reaction score
2,973
Location
Albany, NY
Rating - 0%
0   0   0
Busy Saturday:

Return Plumbing completed from pump, with a 9000 l/h GHL Flow Sensor, along with the manifold (https://www.aquariumcomputer.com/usa/product-category/profilux-accessories/ghl-sensors/)
manifold.jpeg


Pacific-Sun Algae Reactor Unboxed and tested: (This will be installed inside the Sump) (http://pacific-sun.eu/shop/filtration/algae-reactor/)
Pacific-Sun Algea Reactor2.JPG
Pacific-Sun Algea Reactor1.JPG


Avast Media Spy-Glass Reactor Unboxed for installation: (https://www.avastmarine.com/products/spyglass)
Avast_Reactor.JPG


Time to Squeeze it all in and plumb it in:
Avast_installed.JPG
Avast_Installed2.JPG


GHL Sensor 5000 l/h off the Algae Reactor so can tune in the correct flow: (https://www.aquariumcomputer.com/usa/product-category/profilux-accessories/ghl-sensors/)
GHL_Sensor_2.JPG


AquaDriver Helix Installed along with the Royal Exclusive Mini-Bubble King 180 Skimmer.
Aqauhelix_Installed.JPG
All_done_whooohoo.JPG


Everything is now Plumb beneath the tank, tomorrow will begin to plumb the overflow, rockscape the overflow.
 
OP
OP
Ditto

Ditto

Valuable Member
View Badges
Joined
Apr 25, 2017
Messages
2,229
Reaction score
2,973
Location
Albany, NY
Rating - 0%
0   0   0
Friday Update,

Let filling begin!
F61D7D59-DB80-450A-8D6B-CF8EBFBF6159.jpeg


33831773-51A8-4AB9-AEB0-DB7EAE9F1C85.jpeg


64A3A549-5700-4EA0-A4B4-1678235529EB.jpeg


I may increase one rock formations height I noticed it a bit to
Symmetrica.

This is my first tank where all the equipment is under the tank and what I noticed was it was dead silent, both the skimmer and the return pump.

With any luck by Sunday it will be filled so I can begin installing the Rest of the GHL equipment and begin the cycle on the tank.
 
OP
OP
Ditto

Ditto

Valuable Member
View Badges
Joined
Apr 25, 2017
Messages
2,229
Reaction score
2,973
Location
Albany, NY
Rating - 0%
0   0   0
I just could not wait, it was annoying me the symmetric look of the rock-formation bugged me all night, so with some Marco 400 and a few more pieces have been added. Another 30 gallons of saltwater added.
EAA211A1-FE9A-42D3-A04F-8950D000B491.jpeg

CF564786-A95A-4A06-85E8-5EE50D657151.jpeg
D69554B2-D0A3-47BA-BE17-FB6801304852.jpeg
5067A35B-7150-41C3-897C-AD844412B696.jpeg


Still a bit cloudy but expected with the stir up of the sand. What I am amazed by is the pattern of the 2 Vicid aquatic random flow generators, I will post a video one the tank is fully filled to show but the pattern out two cover what looks like the entire tank with flow which was something I did not expect.

One leak discovered so need to pull off GHL sensor and re-apply the sealant to it.

7BCBA85D-6CBC-48D9-B822-01F0AC0AD9AC.jpeg


F9C87793-2DCF-452B-9A0A-73DA15D579DE.jpeg
 
OP
OP
Ditto

Ditto

Valuable Member
View Badges
Joined
Apr 25, 2017
Messages
2,229
Reaction score
2,973
Location
Albany, NY
Rating - 0%
0   0   0
@chefjpaul - Thanks!!

Busy Saturday Night and Sunday (Did not get as much as I wanted to get done, but Mom's do come first)

Tank is full of water: Whoohoo we can begin the cycle this week. (GHL Cooling fan will be providing cooling on the tank, hopefully so that a chiller is not needed (Not set up yet))

tank_Filled_1.JPG

tank_Filled_2.JPG


Started to Install the P4, but first I had to take the lid off and slide in two cards, a Air Humidity Card which will be used to cool the inside of the cabinet, and a O2 card for measure Oxygen in the tank. It great to be able to install modules within the unit, saving space within the cabinet.

4 Hex Screws removed from the bottom of the unit opens the top lid.

P4_Open1a.jpg


Cards Installed
P4_Cards_Installeda.jpg


With the Lid back on, inspected the back of the unit to make sure no issues (We have some ports here!!)
P4_Back.JPG


I was quite surprised after placing the IP on the unit how I was able to configure all the base probe configurations from both the GHL App or P4 web interface not needing the GCC Desktop at all. The Calibration steps for the probes still needed to be done from the P4 Display interface on the unit. It actually took me longer to run the cables for the probes then it did to enable the probes, calibrate them and base config them, it was very very simple.

(Cliff Note Version) I logged into the P4 Web page, activated each sensor, and went about calibrating them one at a time using the Calibrate option on each sensor in the P4 Display menu options (ORP, Salinity and PH). After the Calibration was completed I went back to the P4 Web Interface set up the alarms, and some additional functions. Pretty much all the base functions were available that were needed to set the probes up to being charting results, and alarm if tank parameters were out of tolerance)

The Temperature Probe was First was first (Alarm set up through the web interface and, nocturnal changes so I do not receive an alarm at night when the tank will run cooler) (Will Alarm when Tank Temp is above 78.46, or below 77.74)
Temp-1.png


PH Probe was Second
(Alarm set up through the web interface and, nocturnal change in PH for night drops do not trigger an alarm) (Will Alarm if above 8.20 or below 7.8)
PH-1.png


Redox probe was Third
(I set up the Alarm through the web interface, I will enable for water changes once I have the ATO, and AWC online) (Will Alarm when ORP is Below 300 or above 400)
redox-1.png

Salinity probe was Forth (I set up the Alarm through the web interface, I will enable for water changes once I have the ATO, and AWC online) (Will Alarm when Above 47.5 or below 42.5)
Salinity-1.png

O2 Was the Fifth Probe to Setup (I had to install a Card into the P4 shown above)(I have not set any alarms yet(Still playing with this), but I did have set the compensation sensors for the O2 probe which where the)
O2-1a.png


Air and Humidity Sensor was the last to setup which will be used for Fans within the Cabinet to lower the Temperature. (Still playing with)
Air-Probe-1.png

Humidity-1.png

All the above settings will be adjusted as I tweek the tank for final, but wanted to show how easy it was to configure. It was either a List of Values in a Drop down Menu with a radio button to select like below:
easy2.png

or
Typing in the Field and providing a value you wish or by clicking the up down arrows to change the number on the settings you wish to change shown below:
easy1.png

I also made sure probe names were seen easily inside the Sump. (The Brackets used were the ones from GHL, the magnets are encased in the acrylic, I am not expecting any Corrosion issues with them)
GHL_Probe2.JPG


Below is a view examples of what it looked like in the GHL I-Phone App.

Redox_App2.PNG
Redox_App1.PNG

PH_App1.PNG
PH_App2.PNG


chefjpaul

2500 Club Member
View Badges
Joined
May 21, 2014
Messages
3,278
Reaction score
4,667
Location
South Florida
Rating - 0%
0   0   0
Very nice.

Let me know how those air / humidity probes work out.
I am building a bearded dragon enclosure in my elos stand under my AIO tank and will be running it as well off my P4.
 
OP
OP
Ditto

Ditto

Valuable Member
View Badges
Joined
Apr 25, 2017
Messages
2,229
Reaction score
2,973
Location
Albany, NY
Rating - 0%
0   0   0
Let the cycle begin,

I am doing Dr Tim’s fishless cycle.

Day 1:
Yesterday I added first defense, one and only and the ammonia drops.

Day 2:
I am going with:
Ammonia: 1.0ppm
Nitrite: between 2-5 but not 100% sure
Nitrate: 80ppm

0BCB8113-9647-45DF-BC98-D5710831E286.jpeg


PH is At fluxates between 7.9 and 8.0 (monitored by the ghl)

You agree?
 
Last edited:

When to mix up fish meal: When was the last time you tried a different brand of food for your reef?

  • I regularly change the food that I feed to the tank.

    Votes: 36 23.5%
  • I occasionally change the food that I feed to the tank.

    Votes: 52 34.0%
  • I rarely change the food that I feed to the tank.

    Votes: 46 30.1%
  • I never change the food that I feed to the tank.

    Votes: 15 9.8%
  • Other.

    Votes: 4 2.6%
Back
Top